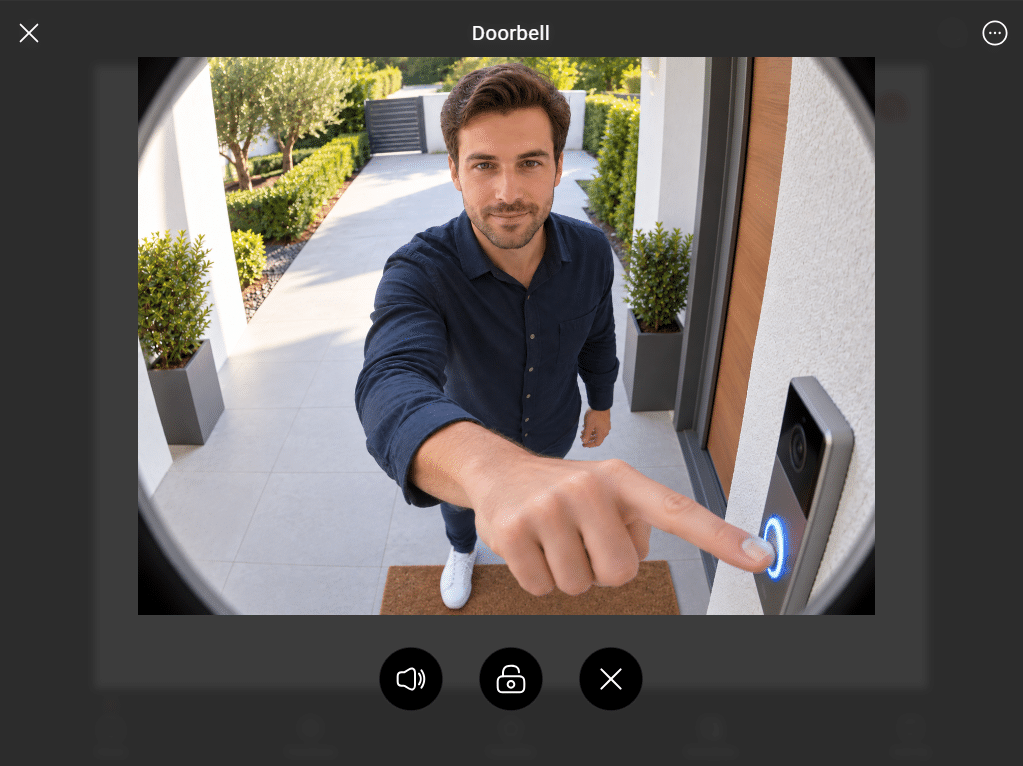
DOORBELL COMPONENT CONFIGURATION IN ILEVIA MANAGER
INTRODUCTION
This guide explains how to configure the Doorbell component using the Ilevia configuration software and how the component works within the Ilevia Control app.
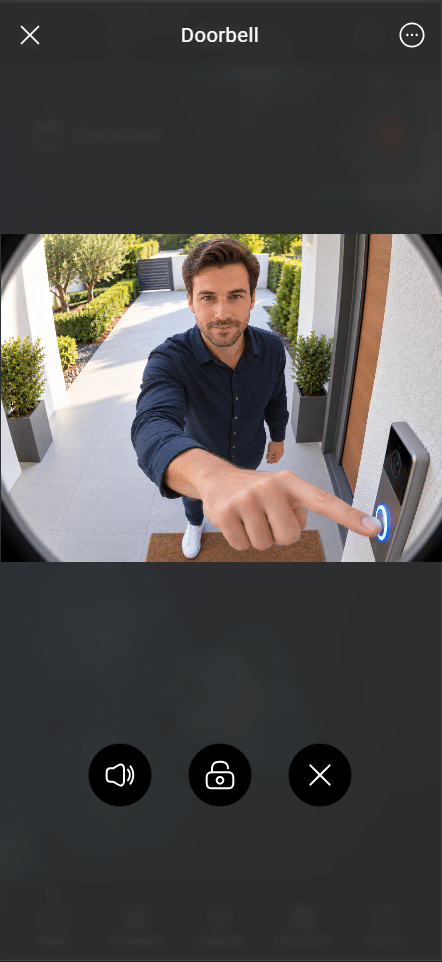
You will learn how to set up the required component properties, link the Doorbell to devices such as an IP camera, notification trigger, scenario, and actuator, and select the users who will receive the notification. The guide also shows how the Doorbell interface appears in Ilevia Control and how users can interact with available actions, such as viewing the camera stream, unlocking the door, or activating a predefined scenario.
Component Configuration
Step 1:
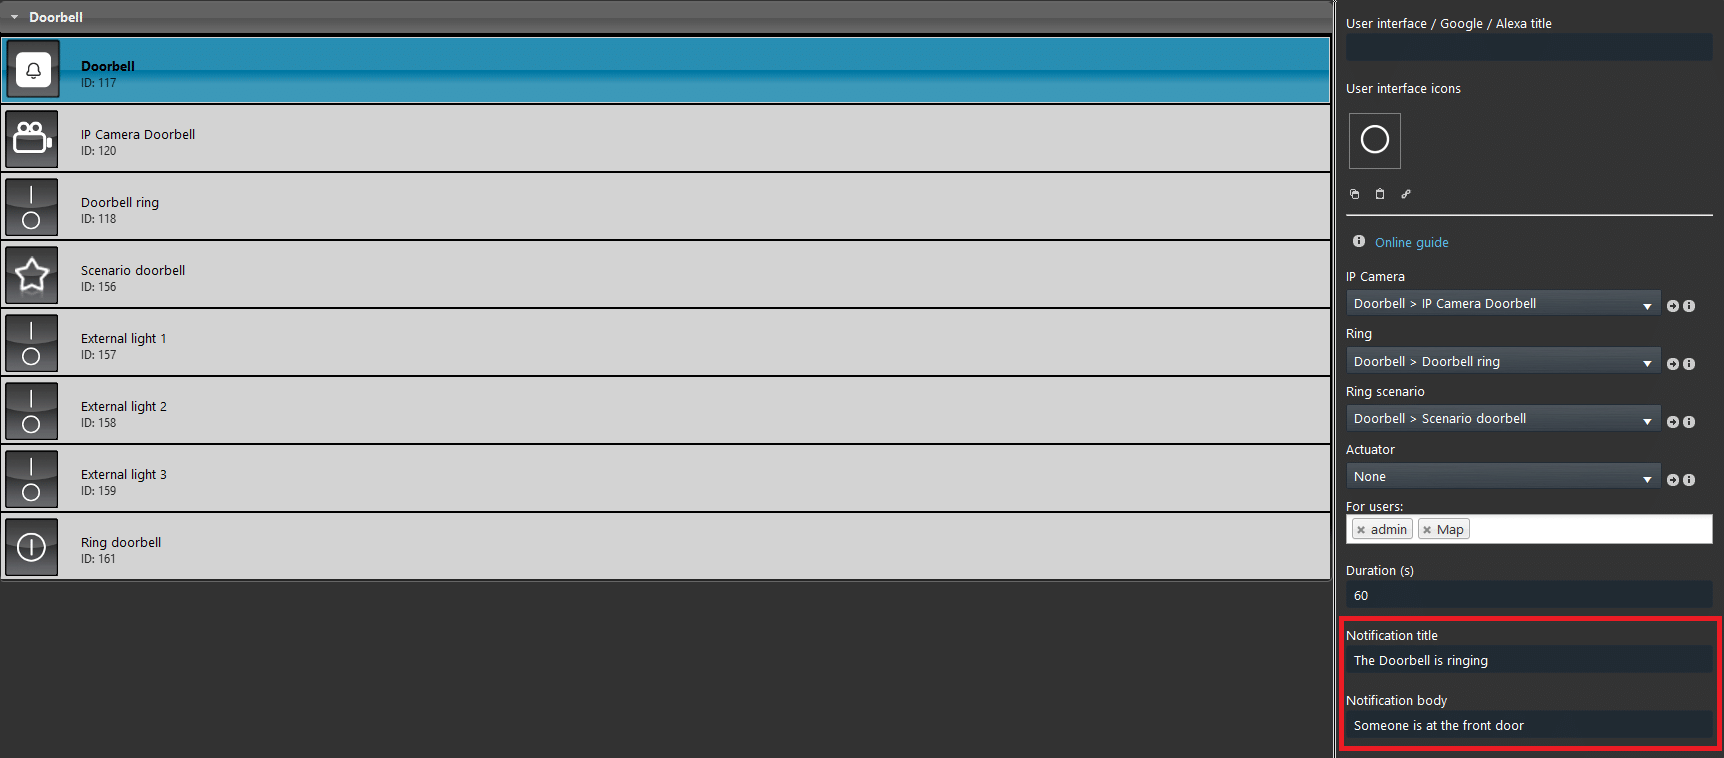
Open the Ilevia Manager and head to the Components tab. Open the Access Control and and add the Doorbell component within the “My component“.
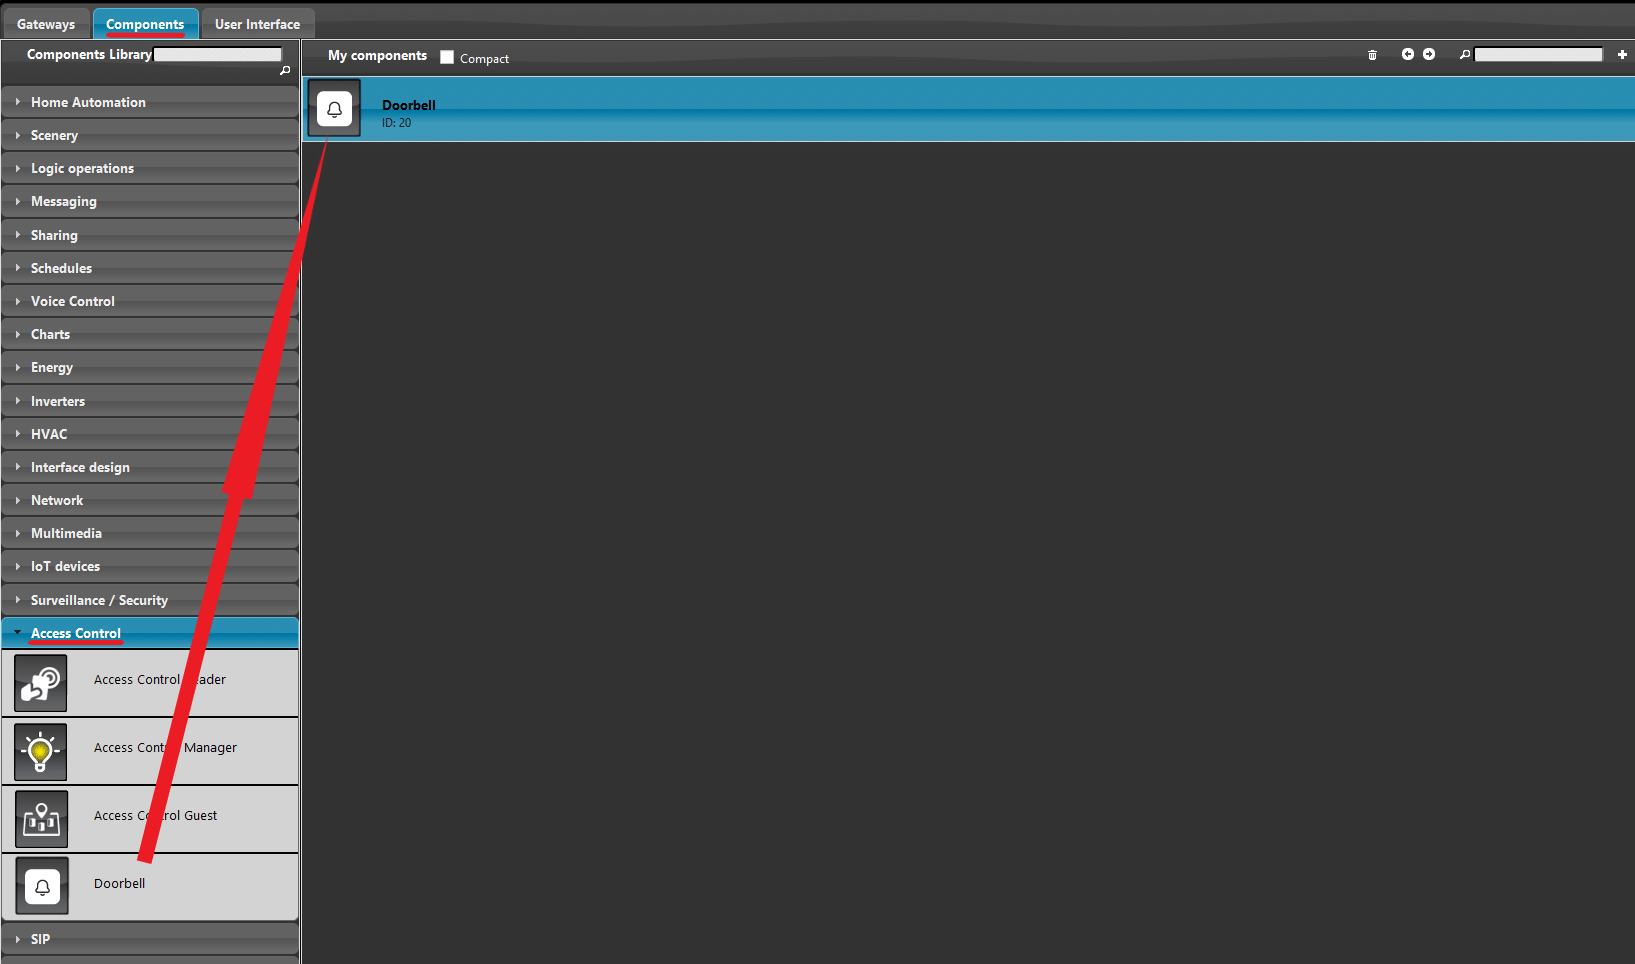
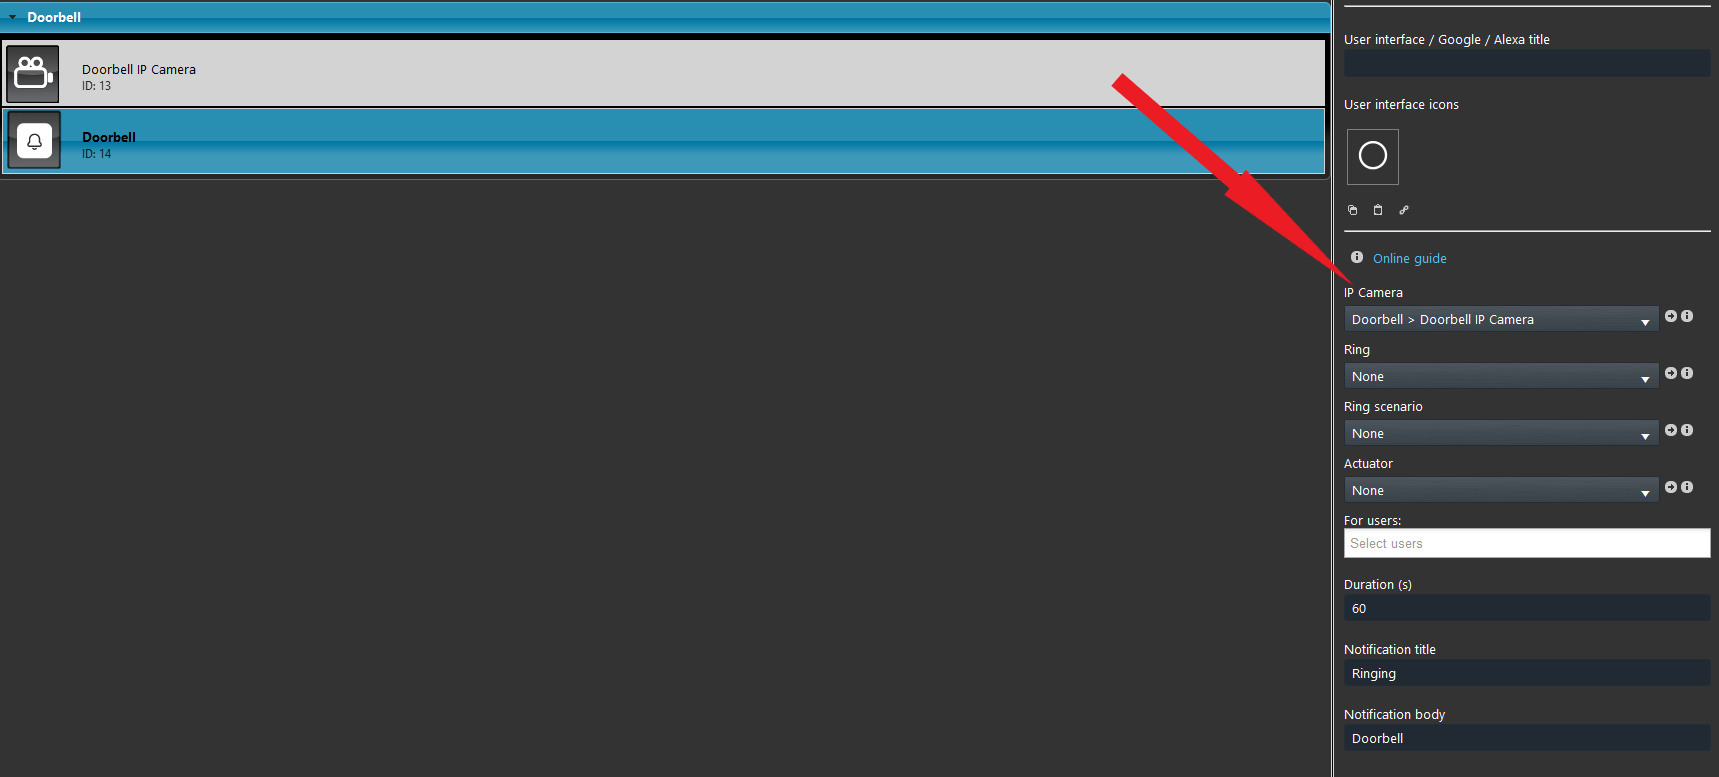
Add the IP camera to the Doorbell component. The IP camera component, in this case, should have the RTSP URL of the Camera of the Doorbell, if it has it.
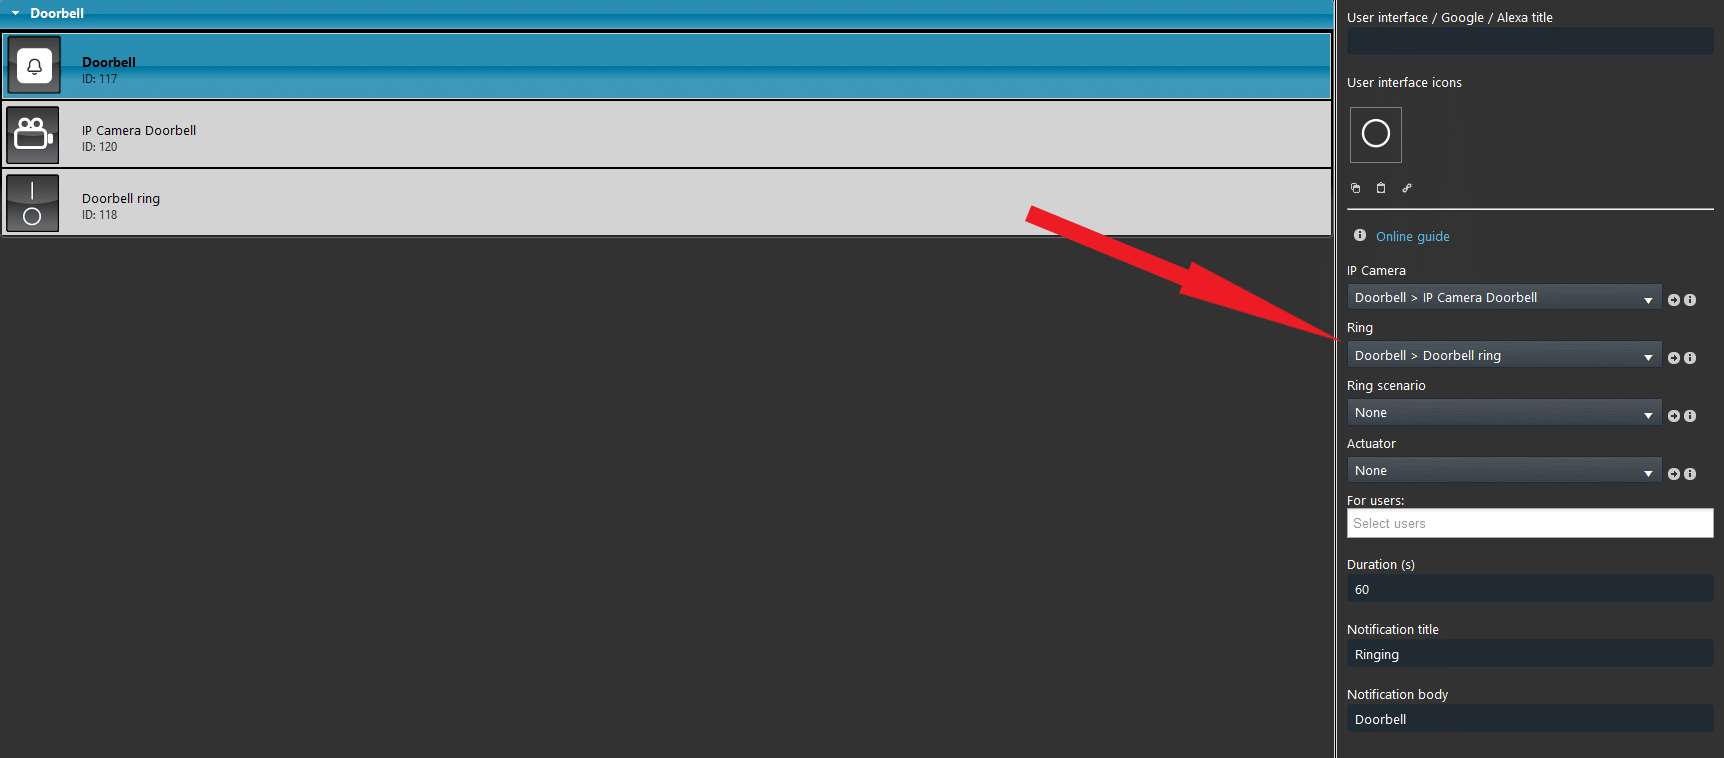
Add a new Switch component in the project. Then add it to the Ring parameter of the Doorbell component. This component represent the real Doorbell button that triggers the ilevia’s doorbell call.
Add a Scenario component that can be triggered once the call Doorbell is triggered.
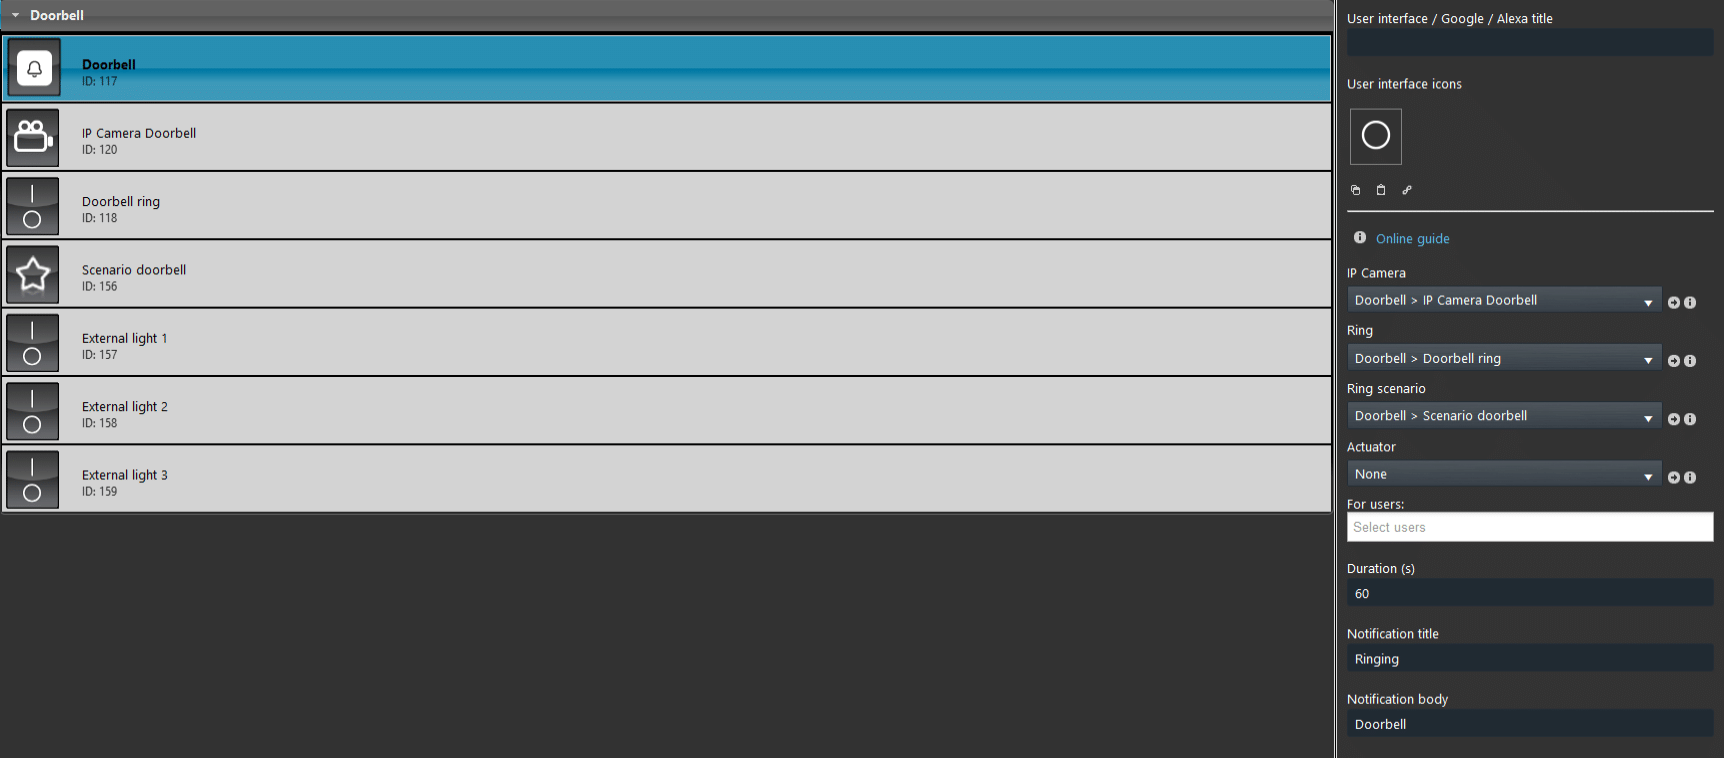
Add a new Pulse component that represents the pulse that will open the door. Finally link it to the Actuator parameter of the Doorbell component.
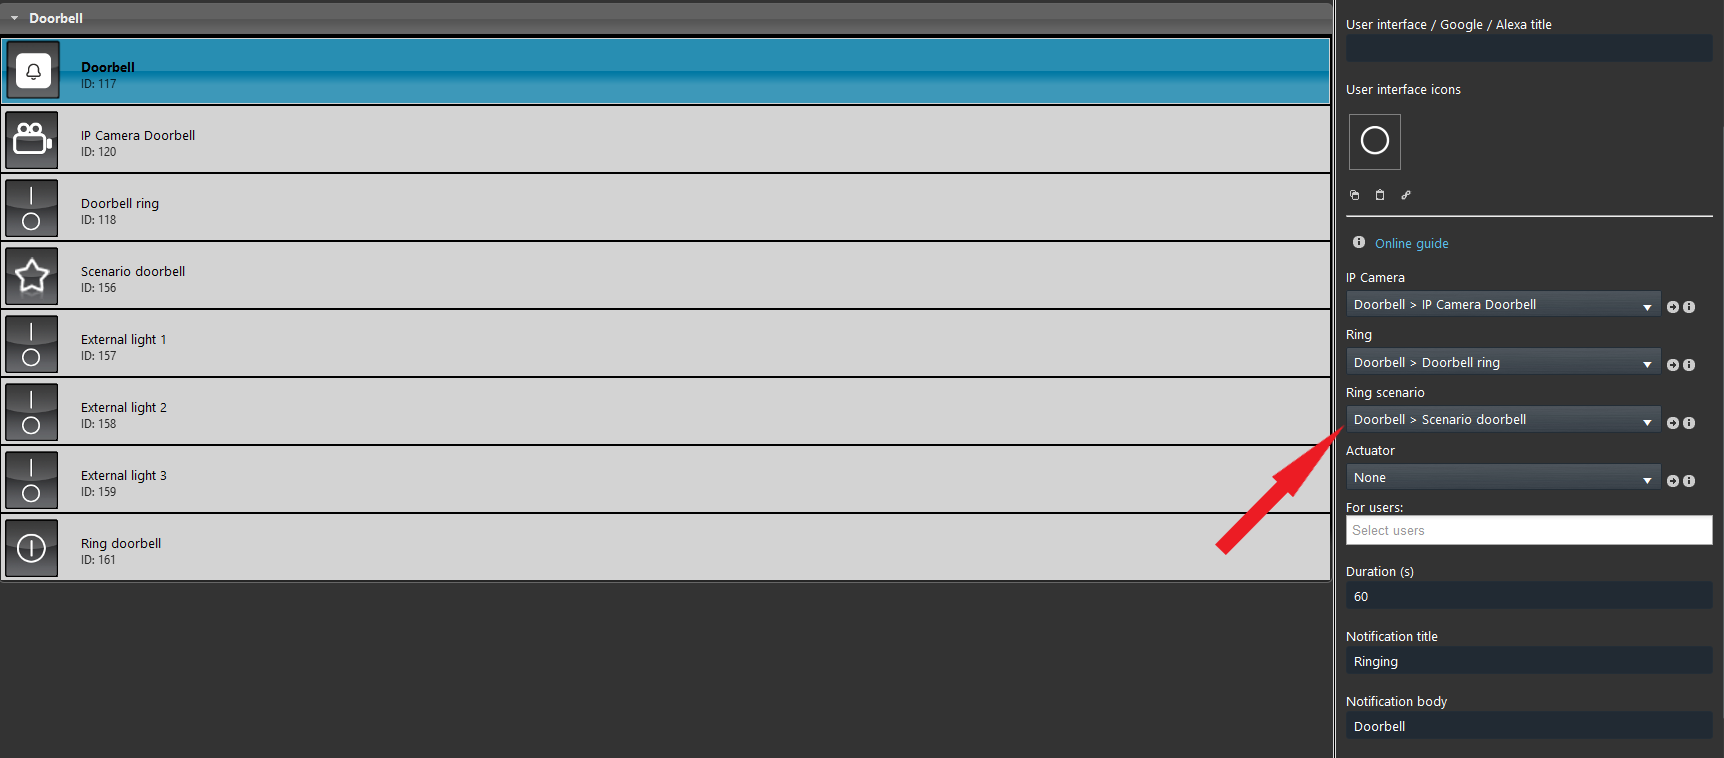
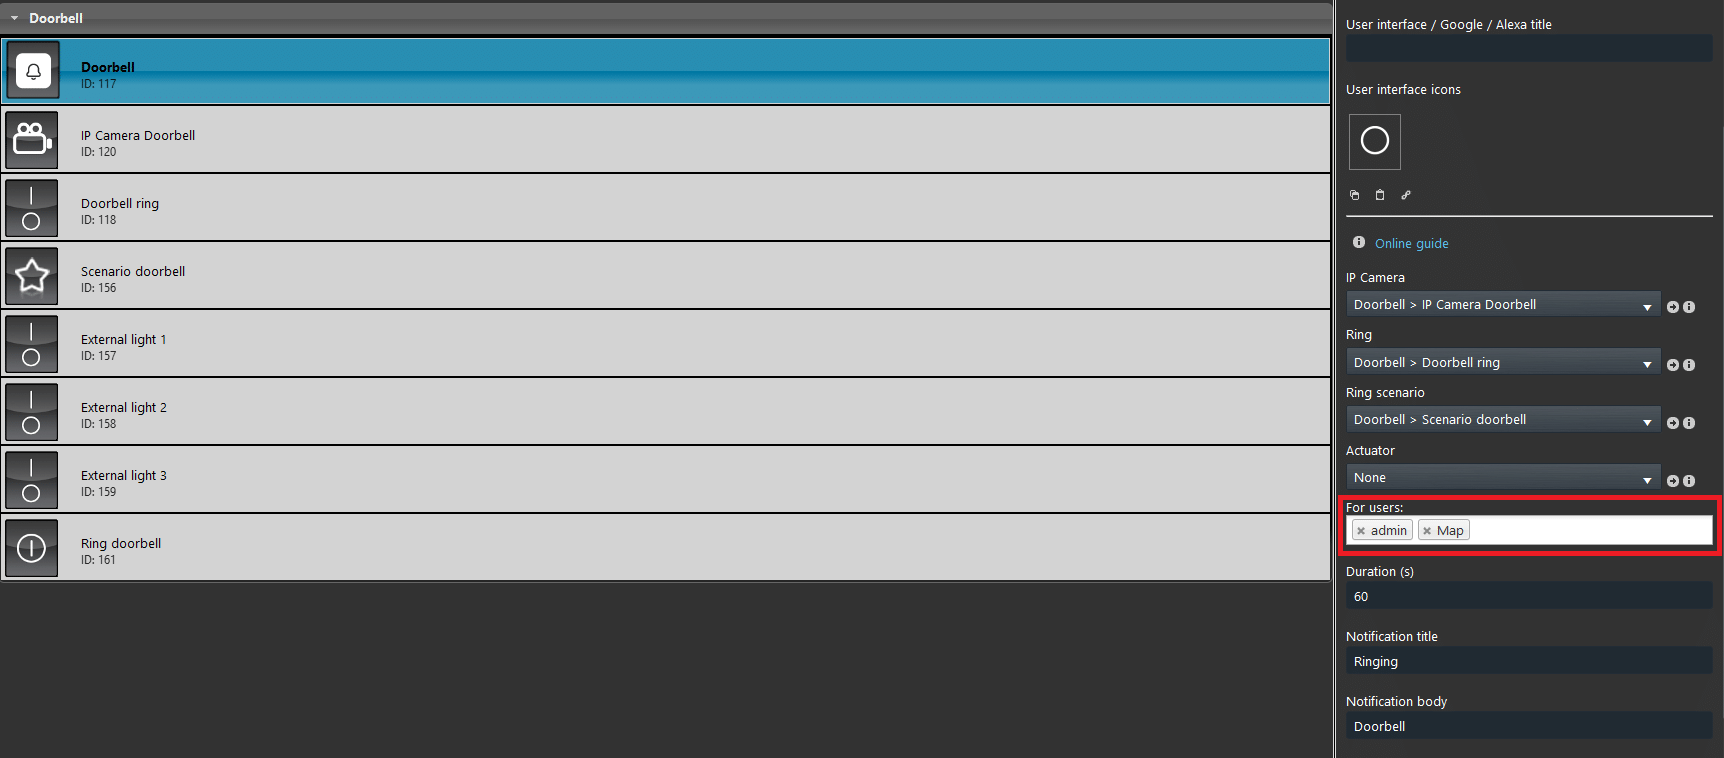
Within the For users parameter, select the users who will receive the Doorbell notification. When the component is triggered, the Doorbell interface will also appear in the Ilevia Control app for the selected users.
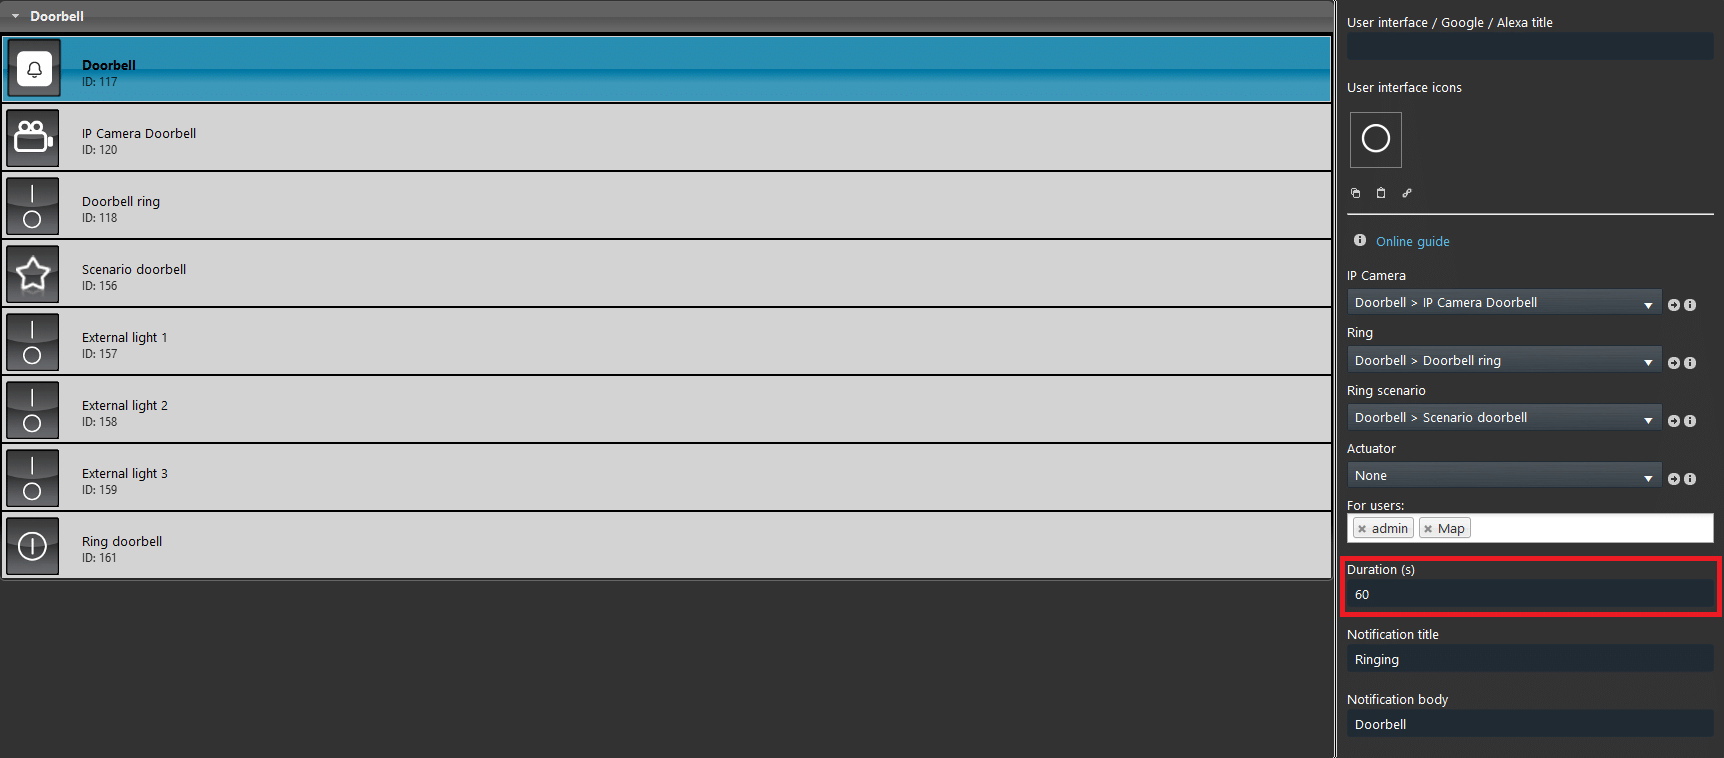
Within the Duration (s) parameter, set the amount of time the Doorbell interface will remain visible on the screen after the component is triggered.
Within the Notification title parameter, enter the title that will be displayed in the notification sent through the Ilevia Control app when the Doorbell component is triggered.
Within the Notification body parameter, enter the message text that will be displayed in the body of the notification when the Doorbell component is triggered.
Final result within the Ilevia’s user interface
The Doorbell component allows users to receive and manage doorbell events directly from the Ilevia Control app. When triggered, it can provide quick access to actions such as unlocking the door or activating a predefined scenario.
In this guide, the Doorbell component is shown in both the Classic and Map interface styles, demonstrating how the available actions can be accessed and used from each interface.
Classic user interface
Map user interface