 Log
Log
INTRODUCTION
This component allows you to record what happens in the system. The plugin has an operation similar to the plugin for sending emails but instead of sending a message, it is logged to a file that can be viewed later.
USE CASES
- This kind of component allow you to control a specific behaviour of a specific component.
- This component comes useful if a user need to take track of specific information that needs to be exported such as energy consumption and power production or just keeping track of the temperature coming from a probe or sensor.
COMPONENT’S PROPERTIES
GUI
This component’s sample is made by using Graphic UI gateway.
Please refer to “Gateways / Protocols” chapter in order to get further info.
Enable: select the switch to enable or disable status logging;
Trigger component: select the component that will start the registration of a status. Remember that log will also work without triggering a component;
Event edge: select the type of front that must have the status to be considered in the registration;
Every (seconds): Time interval used to record the log. Leave it empty if not needed;
Log title: enter the title of the information content;
Additional information can be added in the content of the information (up to 4 information):
Information (#1): Drop Down, Color info, Text info, Info, Switch, Slider, Lock, or Changeable value component;
Information (#2): Drop Down, Color info, Text info, Info, Switch, Slider, Lock, or Changeable value component;
Information (#3): Drop Down, Color info, Text info, Info, Switch, Slider, Lock, or Changeable value component;
Information (#4): Drop Down, Color info, Text info, Info, Switch, Slider, Lock, or Changeable value component;
Log on change: if checked, the information will be recorded at each status change of the selected component. An example could be the doors that are opened or closed or an energy consumption that change.
Content: text that will be recorded, to enter the above information just enter the # symbol followed by the information number (eg # 1). If you need more component to be logged, remember to use this format:
YOURTEXT #1, YOURTEXT #2, YOURTEXT #3.
More than 4 information at once: If you need to log more than 4 information at once the implementation procedure is the following:
Inside the content text field add this text “##IDOFTHECOMPONENTTOLOG##”, with this procedure you are allowed to add as much components as you need.
Remember to use the comma, at the end of every information, that will divide and format your text in the right way inside your .csv file.
Send email on log event: Select an Email component in order to send an email message when the trigger component changes state.
Send Telegram on log event: Select a Telegram component to send telegram message on log event.
EXAMPLE OF CSV FILE VISUALIZATION
CSV EXAMPLE
This is a simple example of a log that checks if a door was opened or not. As you can see it will record the change of a status of a component and the exact time when the changes happened. If you want the file to be exported CSV you should add the extension in the “File name” field in Eve Manager.
LOG TIME
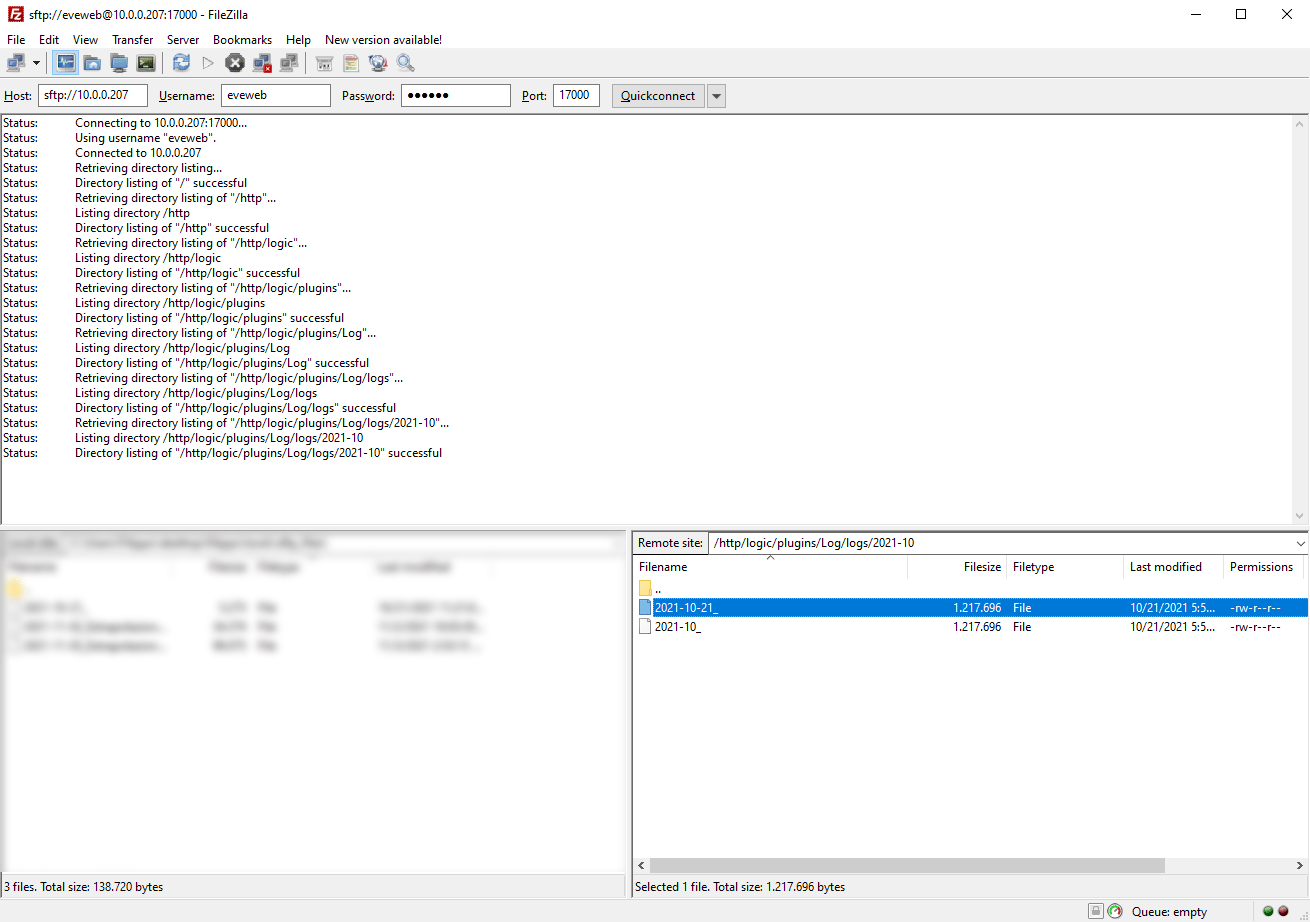
Inside the “logs” folder inside your server, you will find that we store two logs, one daily log called “today_YOURFILENAME” and one folder with the date(YY/MM) with all the logs of the month, this will help to organize all your log files.
- Download and Install EVE Logic plugin to enable plugins (link);
- After loading .eve project to the server, wait a couple of minutes for logics activation.
How to download the Log file
Below you will be illustrating the procedure how to download the Log file:
1. Download an FTP software to access the server, by clicking here you will be able to access the download page of the FileZilla software;
2. Once installed on your PC, run the program and open the connection with the EVE server by pressing the top left “File – Site Manager”;
3. It will open a screen, click on “New site” and fill the following fields: Host, Access type select “Normal” and then as user and password insert “
4. Now on the left you will see your local folders and, on the right side, you will see the folders in the EVE server;
5. Access the following file path:
6. Once you found the log file, first select the folder which you want to save file in, then double-click on the file you want to download;
7. To open this file, you first need to install the Libre Office or Microsoft Excel program if it is not already in your PC and then press the right mouse button over the file, “open with” and choose LibreOffice Calc.
ALTERNATIVE WAY TO GET THE LOG FILE
You can also download the file through a “link” linked to the component log to download it without using the sftp software.
This is an example of download link:
http://Your_server_address/logic/plugins/Log/logs/last_sensors.txt
How to choose which timelaps to visualize the data from the web browser:
- Current day timelaps: http://Your_server_address/logic/plugins/Log/logs/today_filename;
- Current month timelaps: http://Your_server_address/logic/plugins/Log/logs/current_month_filename;
- Last recorded data: http://Your_server_address/logic/plugins/Log/logs/last_filename.


