MOTION SENSOR WITH COUNTDOWN WITH THE CUSTOM WIDGET
INTRODUCTION
In this guide it will be explained and shown how to configure a motion detection logic that, once triggered, will turn on a light and after a centrain period of time will turn it off automatically, This kind of logic is done using the Custom widget component. This logic exists already in the configuration among all the KNX motion sensor device parameters, in case the motion sensor device is not KNX, this logic could come in handy when the motion sensor device is not KNX.
Components configuration
Step 1:
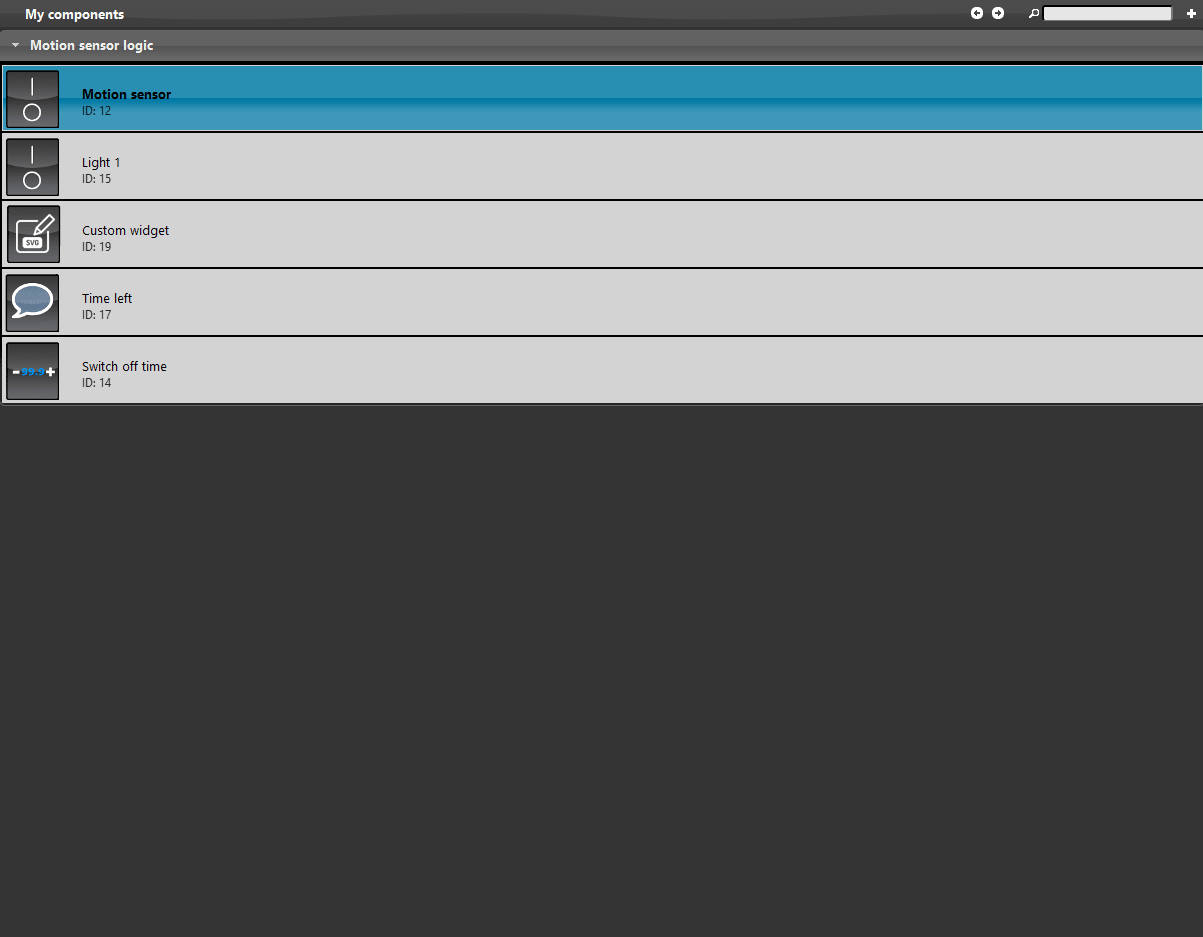
Add these components within the project:
- 2 switch components. You can find this component inside the section called Base within the Components library tab;
- 1 info component. You can find this component inside the section called Base within the Components library tab;
- 1 Custom widget component. You can find this component inside the section called Interface design within the Components library tab ;
- 1 Changeable Value component. You can find this component inside the section called Base within the Components library tab.
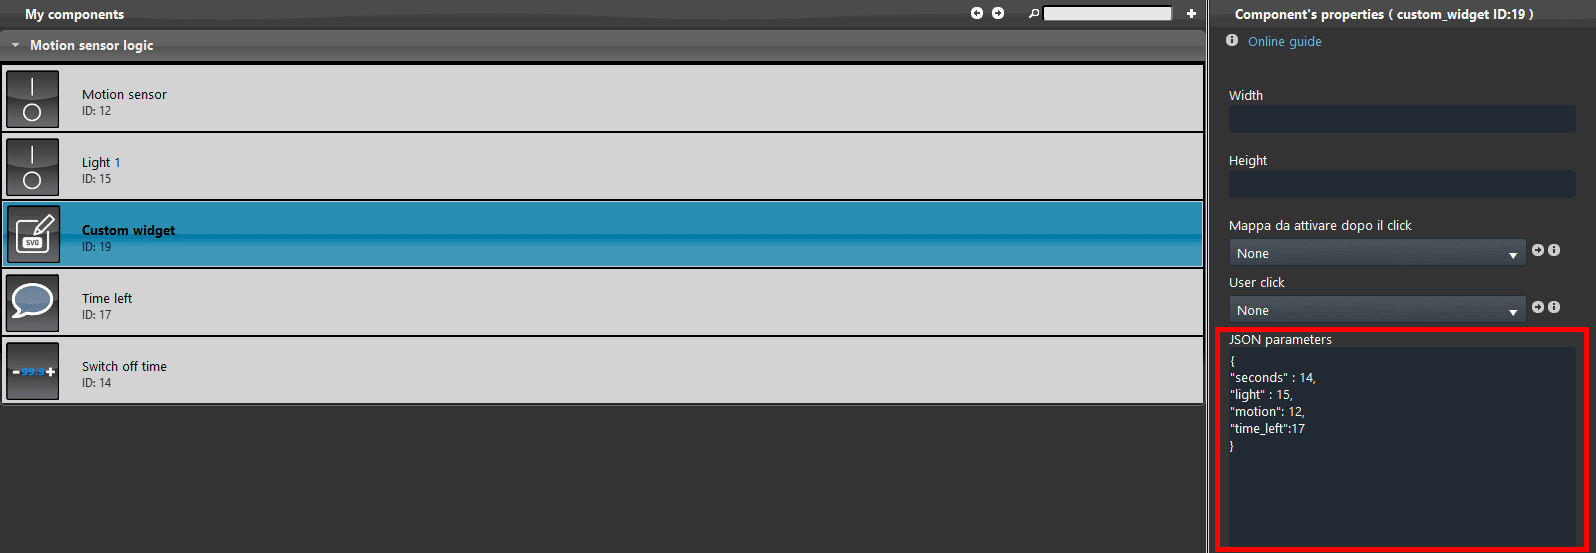
Add the variables inside the Custom Widget’s json text field. Add the variables as it is shown below.
Javascript code configuration
Step 3:
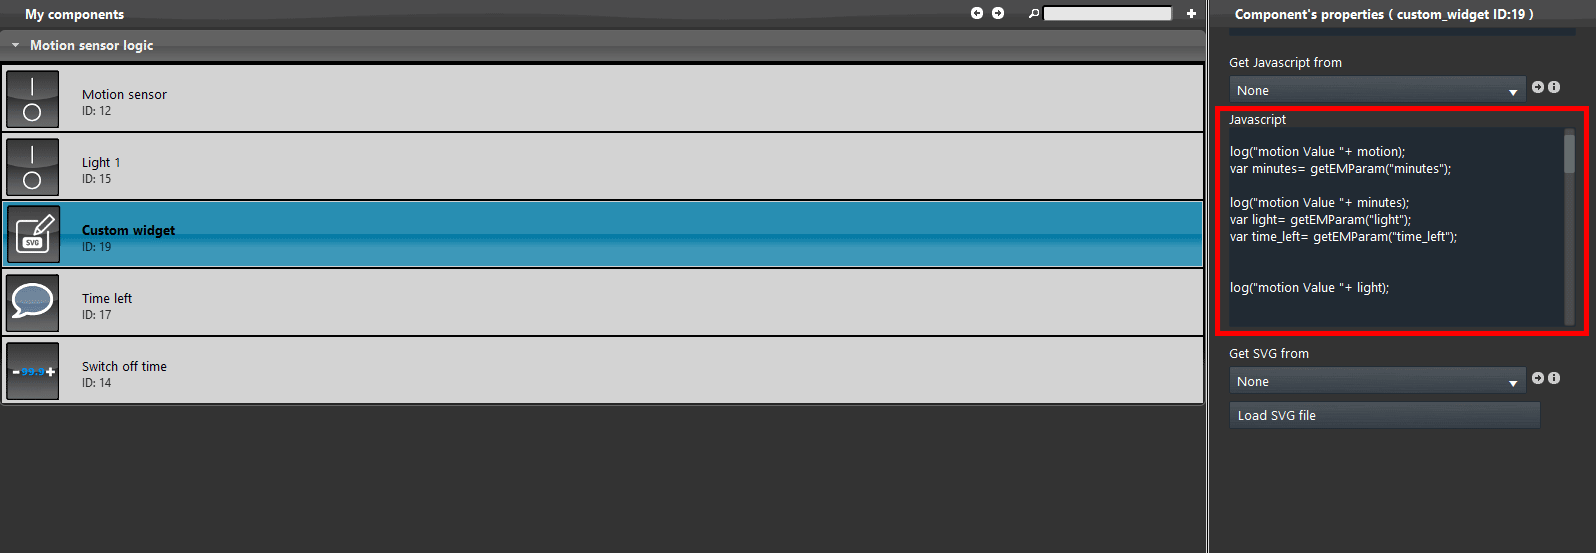
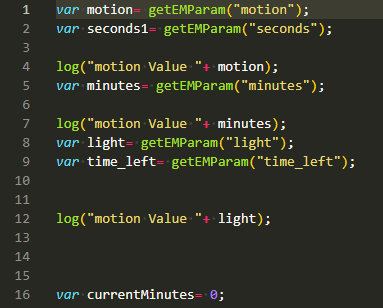
Within the Javascript text field you can add the code needed for the logic to work. The code is shown below:
Click the following link to consul the full Javascript code
First add the variable into the Code, this variables will get the values of the components specified within the Json text field inside the Custom widget component parameters.
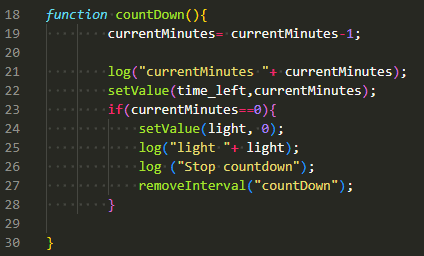
The first code function called countDown. This function will take the time value set by the user in the Changeable Value component and will proceed with count down time that specify when the light will turn Off.
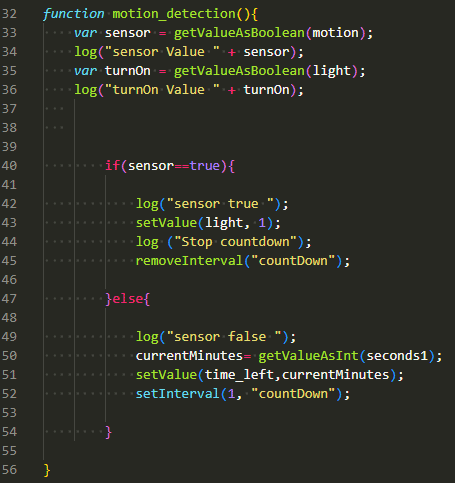
The second function will take the value coming from the Motion sensor component and turn On the light when the Motion sensor triggers. Once the Motion sensor state change to Off, this function, will start a time interval to the first funtion called “countDown“.
Finally set the setTrigger, this statement will get trigger the function called motion_detection each time the component Motion sensor change its state.
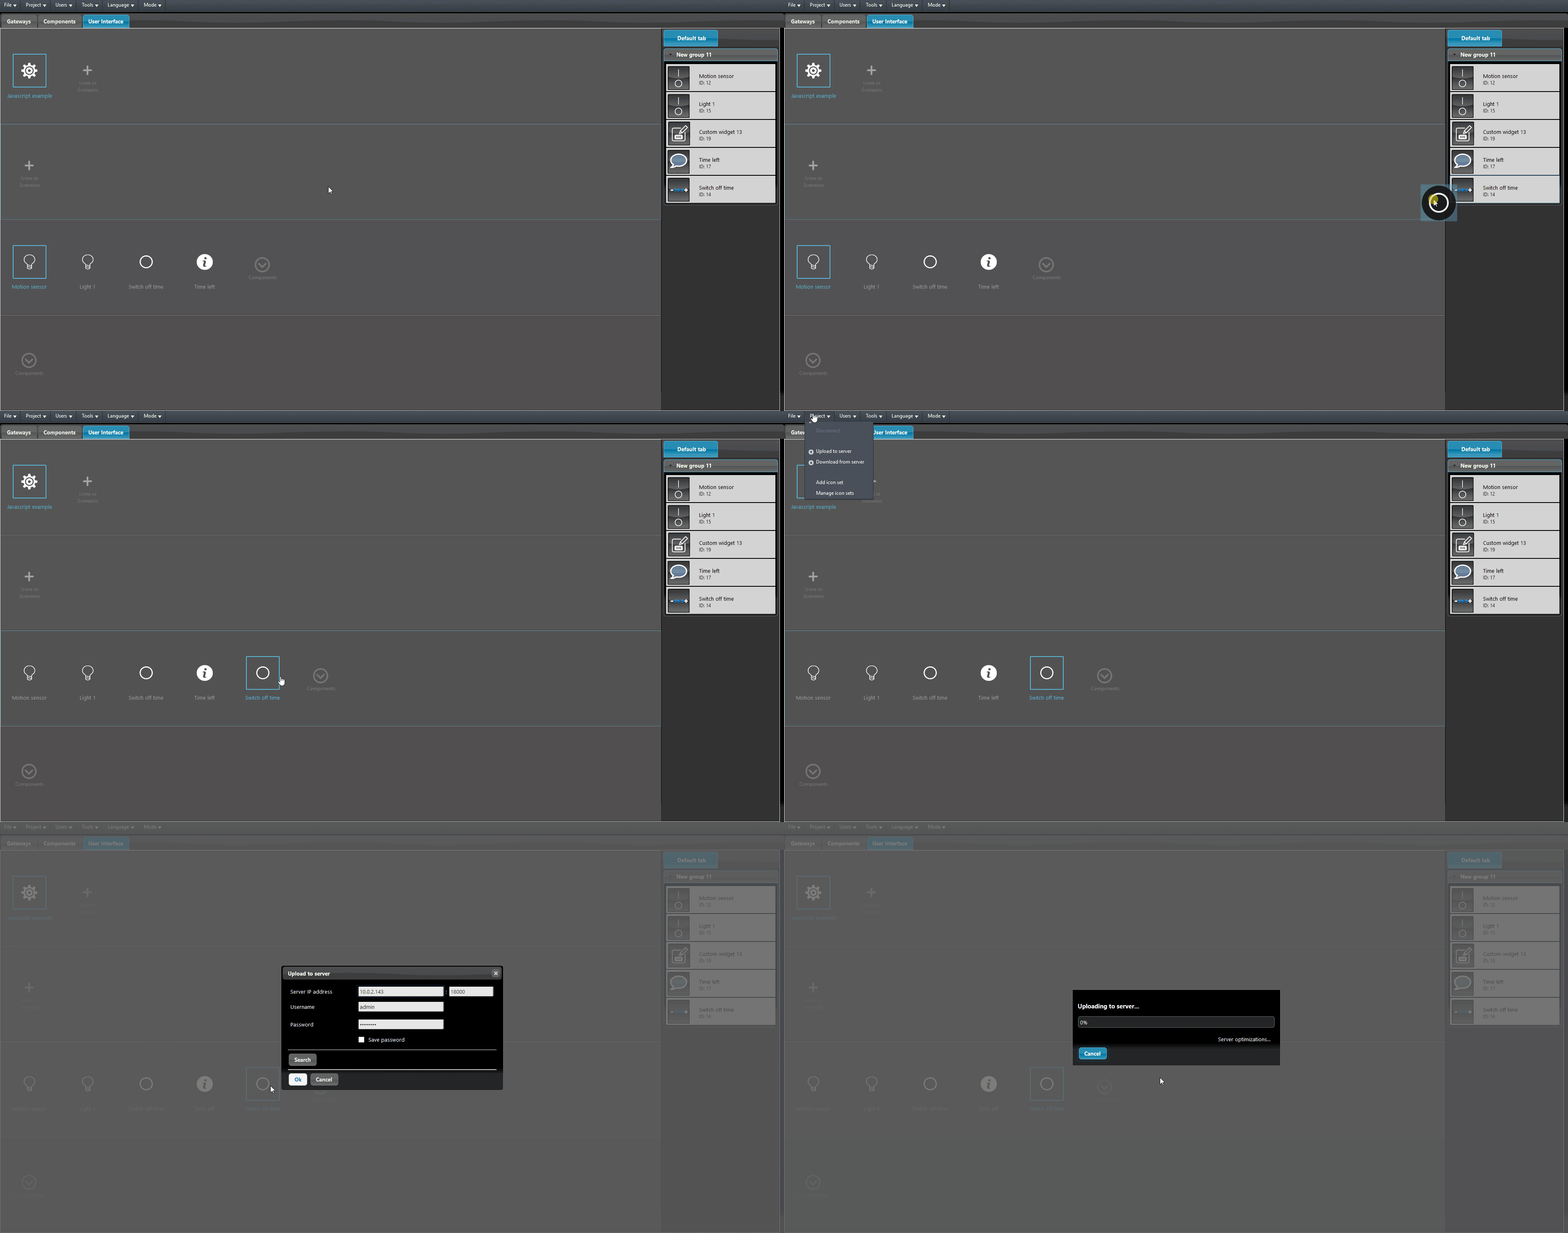
Add the components into the User interface and upload the project to the server.
VISUAL RESULT
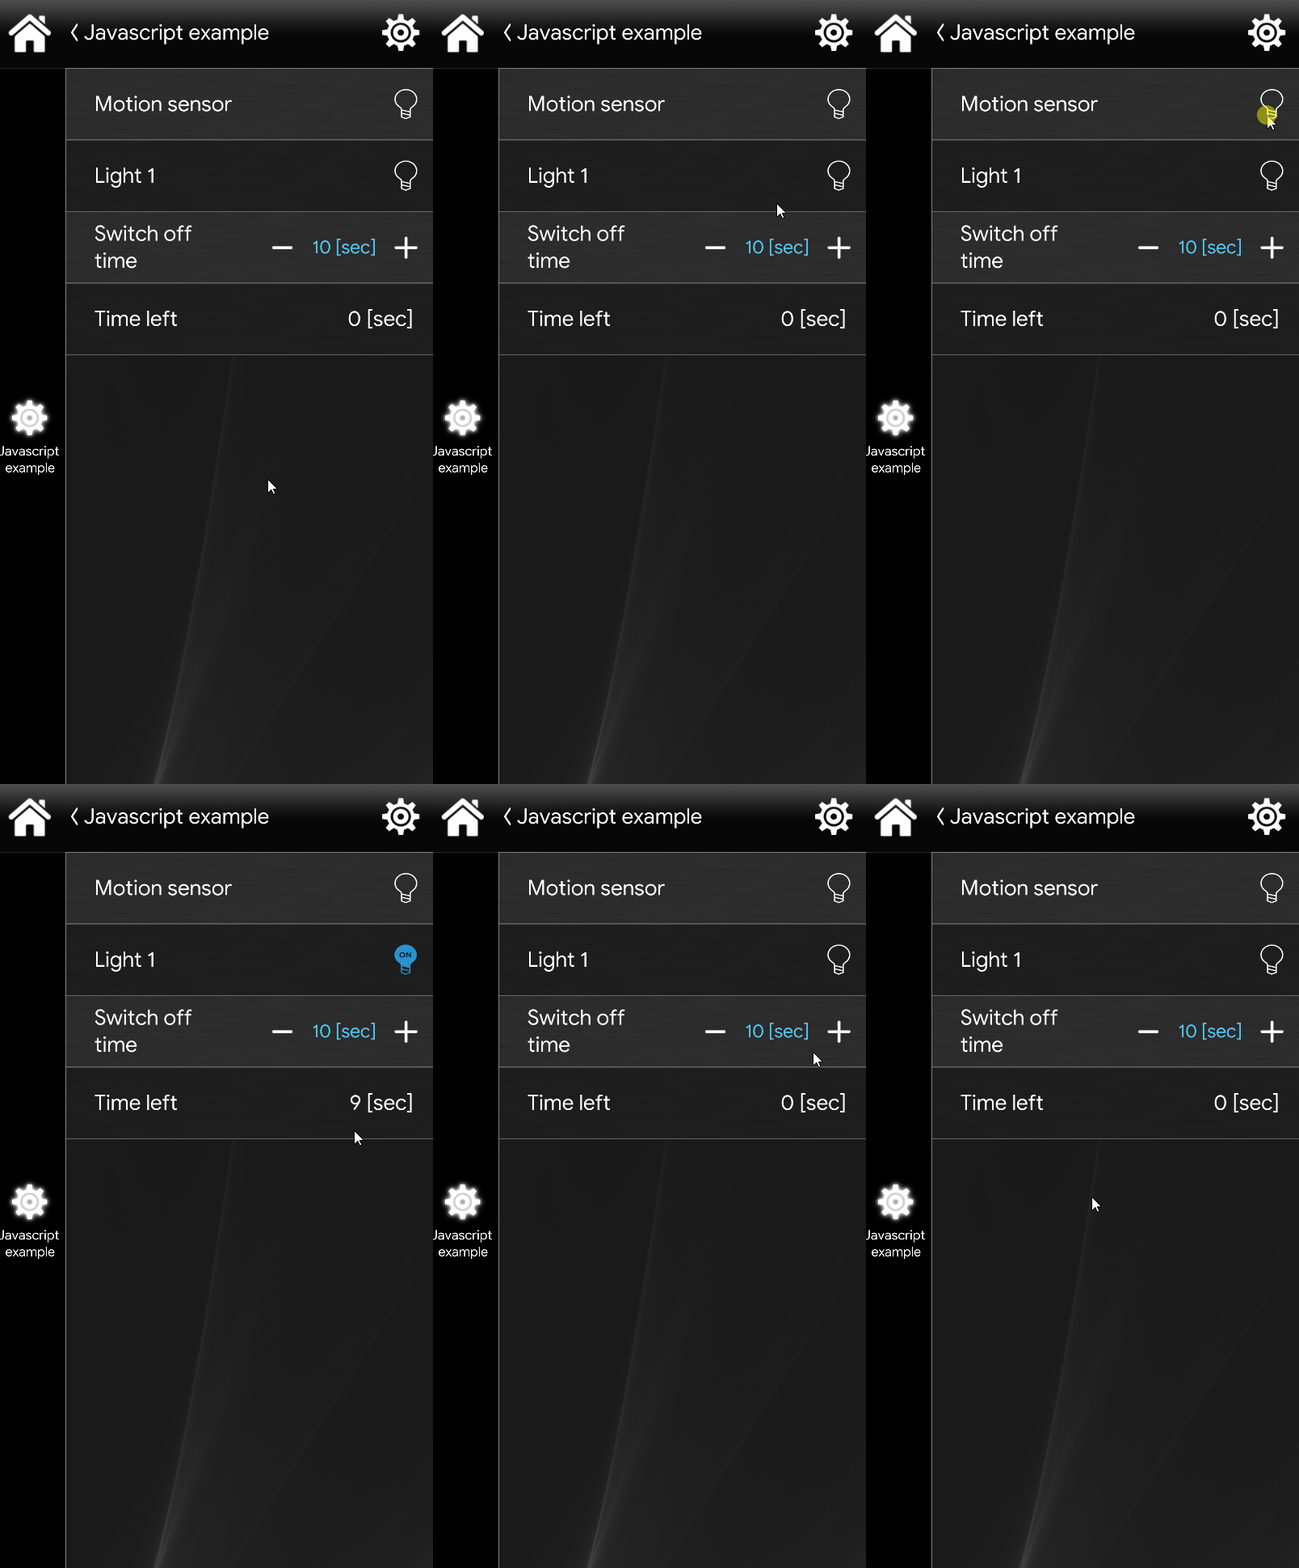
This is the final result of how the Motion Sensor logic works within the Ilevia app EVE Remote Plus.

