 User scenario
INTRODUCTION
This component allows the end user to define its own custom scenario using its own device. This allows the user not having to call system integrator for the configuration of a specific scenario which will be automatically saved on EVE system.
USE CASES
- The user wants several scenarios at disposal in order to customize and edit them as the best prefer;
- The user wants his scenario to be raised anytime a specific physical switch is turned On and/or Off;
- The user wants his scenario to be raised anytime a specific event occurs on the system.
COMPONENT’S PROPERTIES
Customizable component’s title and icon. Please refer to “Common properties” guide.
GUI
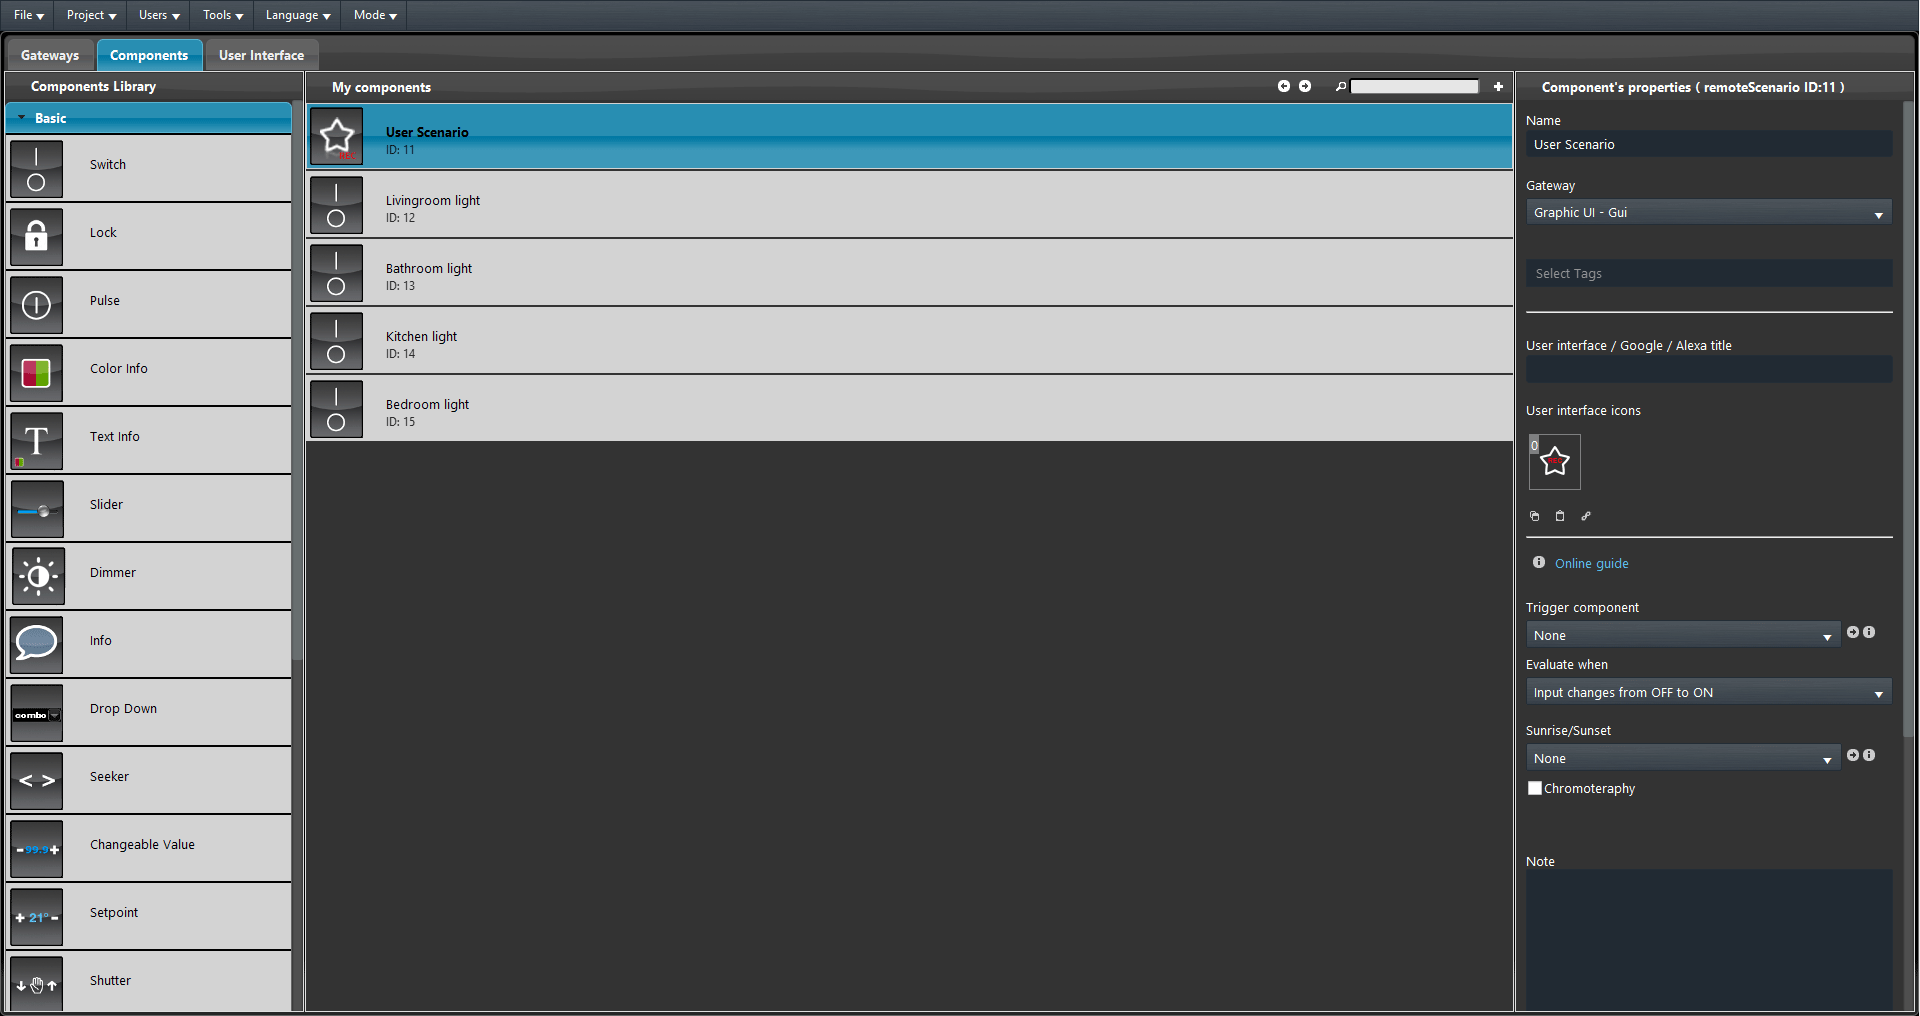
This component’s sample is made by using Graphic UI gateway.
Please refer to “Gateways / Protocols” chapter in order to get further info.
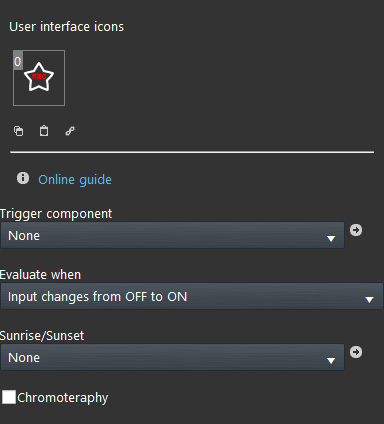
Follow optional settings, useful when you want to trigger the scenario depending on the value of a switch.
Trigger component: Switch / Pulse component that triggers the recorded scene;
Evaluate when:
Trigger changes from Off to On: User Scenario is triggered only when the trigger component goes to On;
– Trigger changes from On to Off: User Scenario is triggered only when the trigger component goes to Off;
– At any change of the trigger: User Scenario is triggered anytime trigger component goes to On or Off;
Sunrise/Sunset: You can choose to activate the scenario during the Sunrise or the Sunset, for this type of dropdown you can only use the Sunrise/Sunset component:
Chromotherapy: This checkbox add a fade effect between a colors that have been recorded inside the recording list of the User scenario component (feature not implemented yet);
Reminder before continuing:
- Download and Install EVE Logic plugin to enable plugins (link);
- After loading .eve project to the server, run EVE Remote app, log in and then wait a couple of minutes for logics activation.
 EVE Remote Plus
Three different view mode possibilities: “CLASSIC”, “MODAL” and “HIDDEN”. Learn more about the component’s view modes.
Action’s recording procedure (Classic/Map)
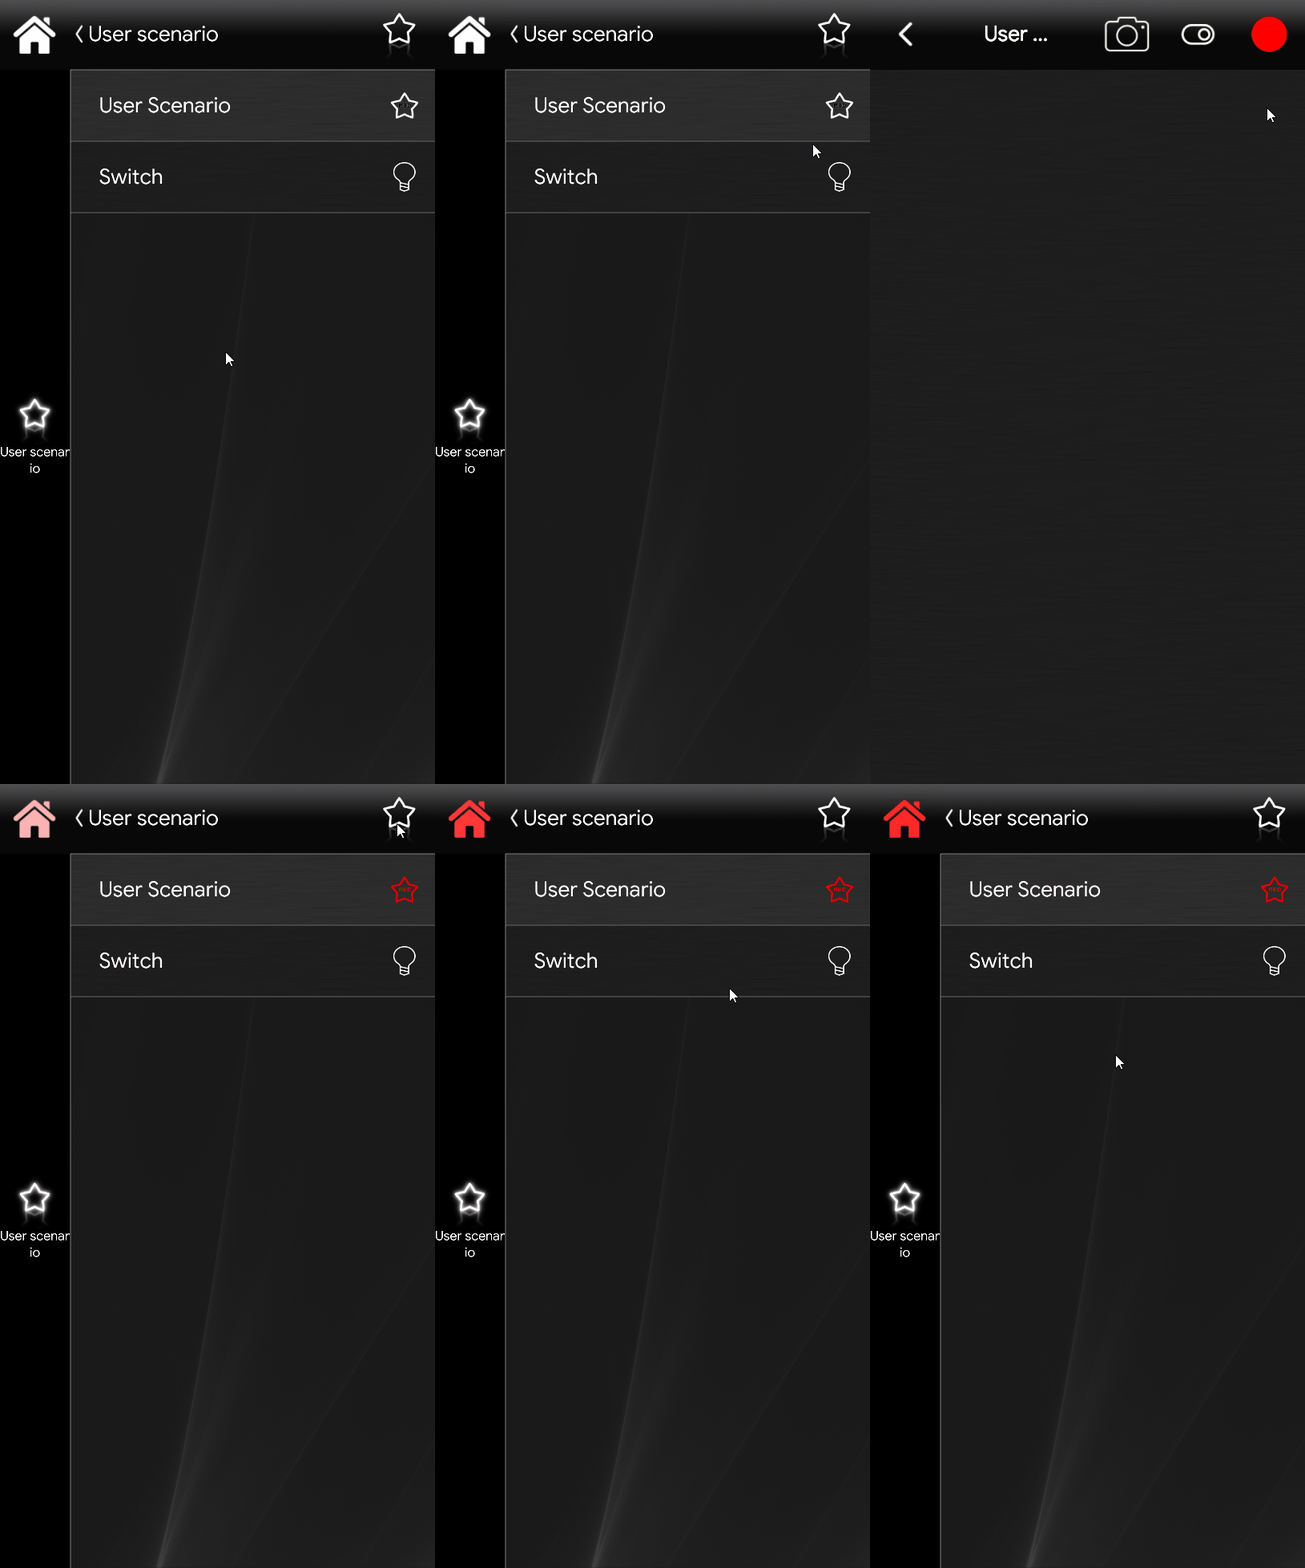
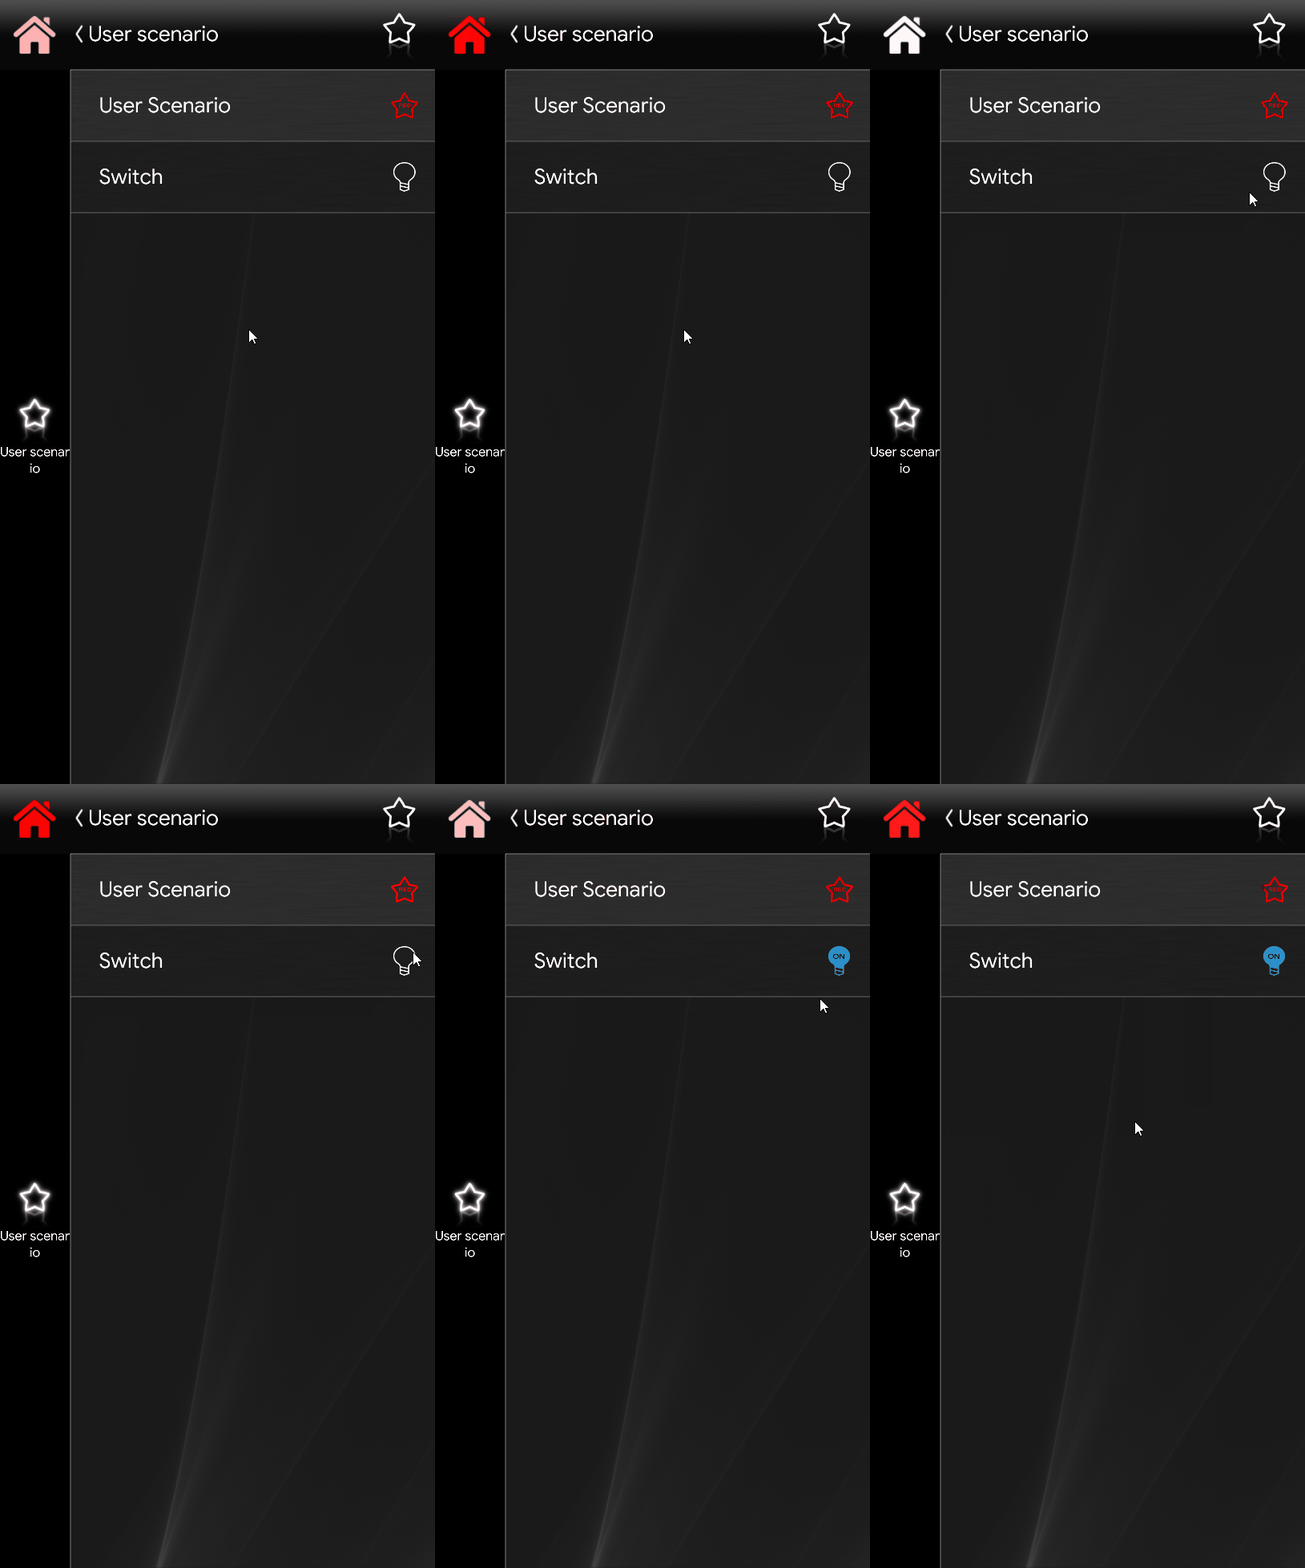
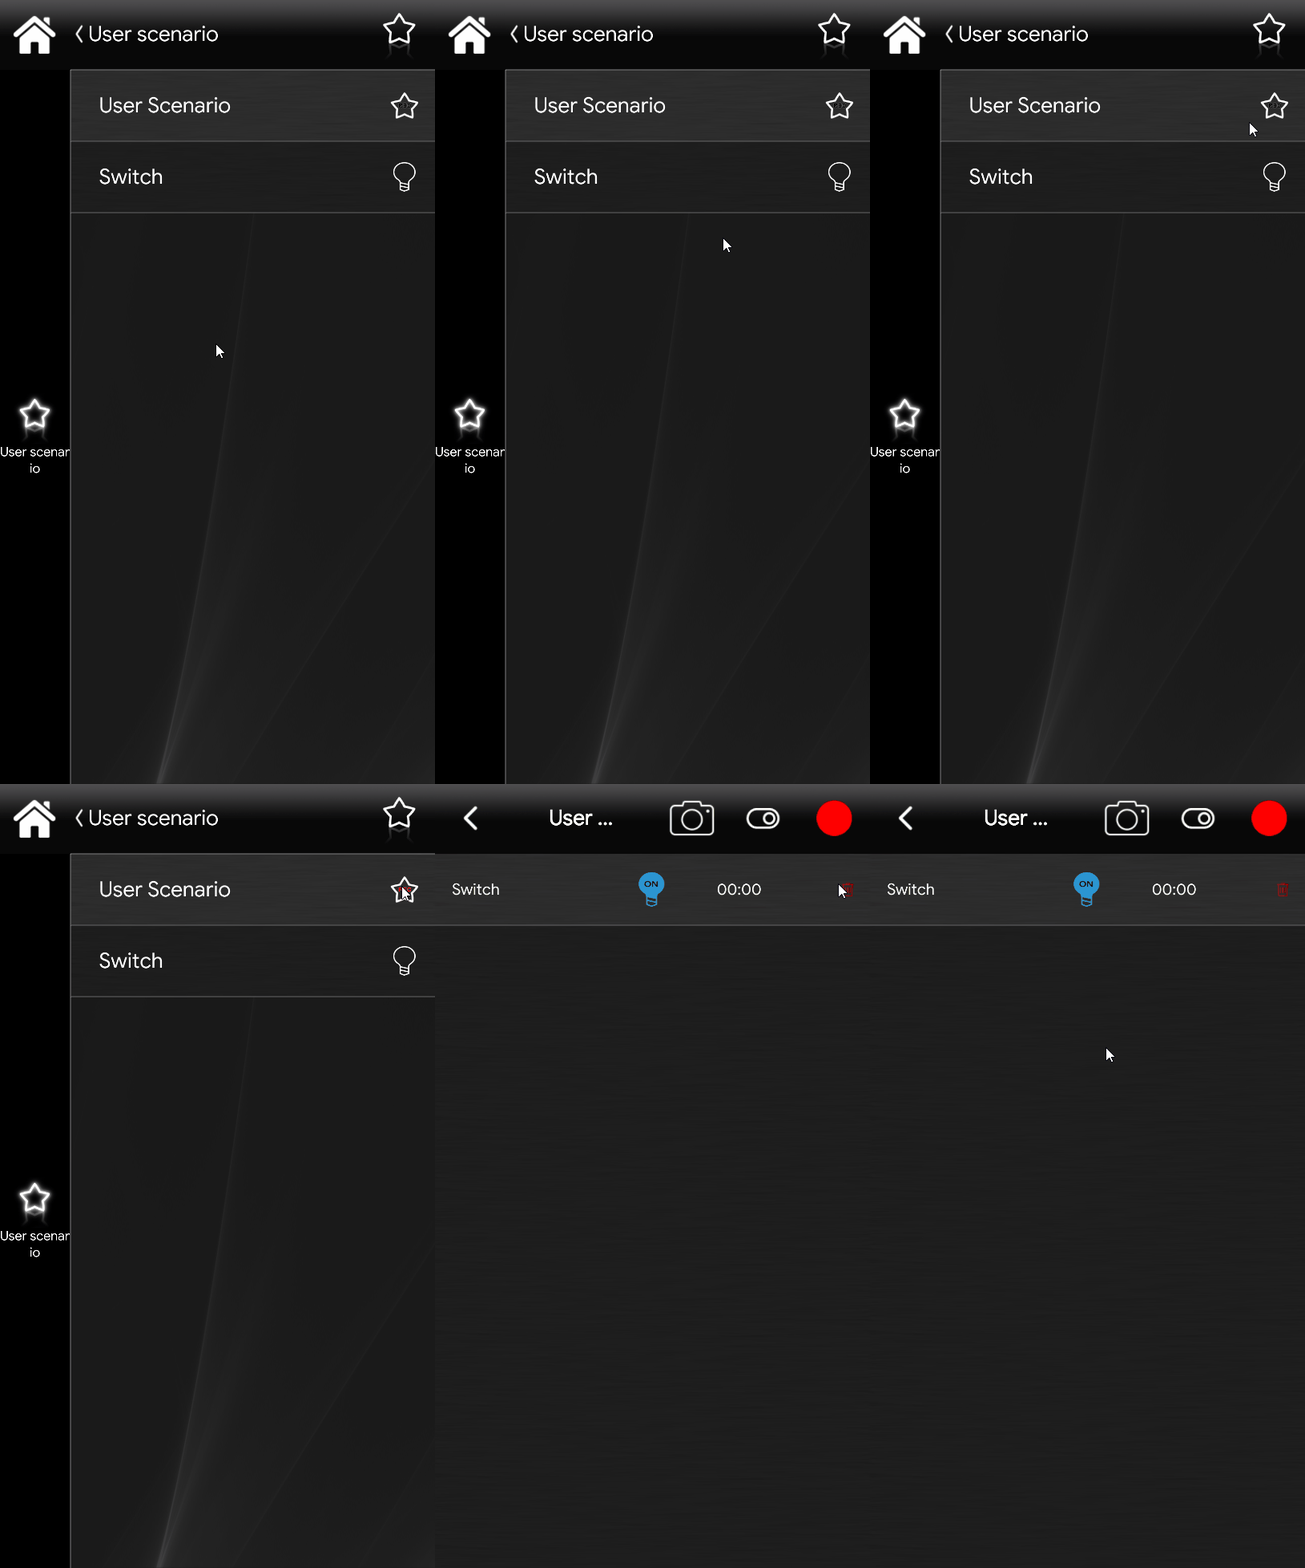
In order to start recording, hold down the “User Scenario” icon untill a new interface pops up, now click the Red circle shaped icon on the top right of the screen. You know you are in recording mode due to the fact that the “Home” icon will become completely red and start blinking indicating that recording mode is active.
You can save the registration at any time by clicking longer than a second on the “User Scenario” icon.”User Scenario” component icon will return back to the original color and the Home menu icon will stop flashing to indicate that the registration is over.
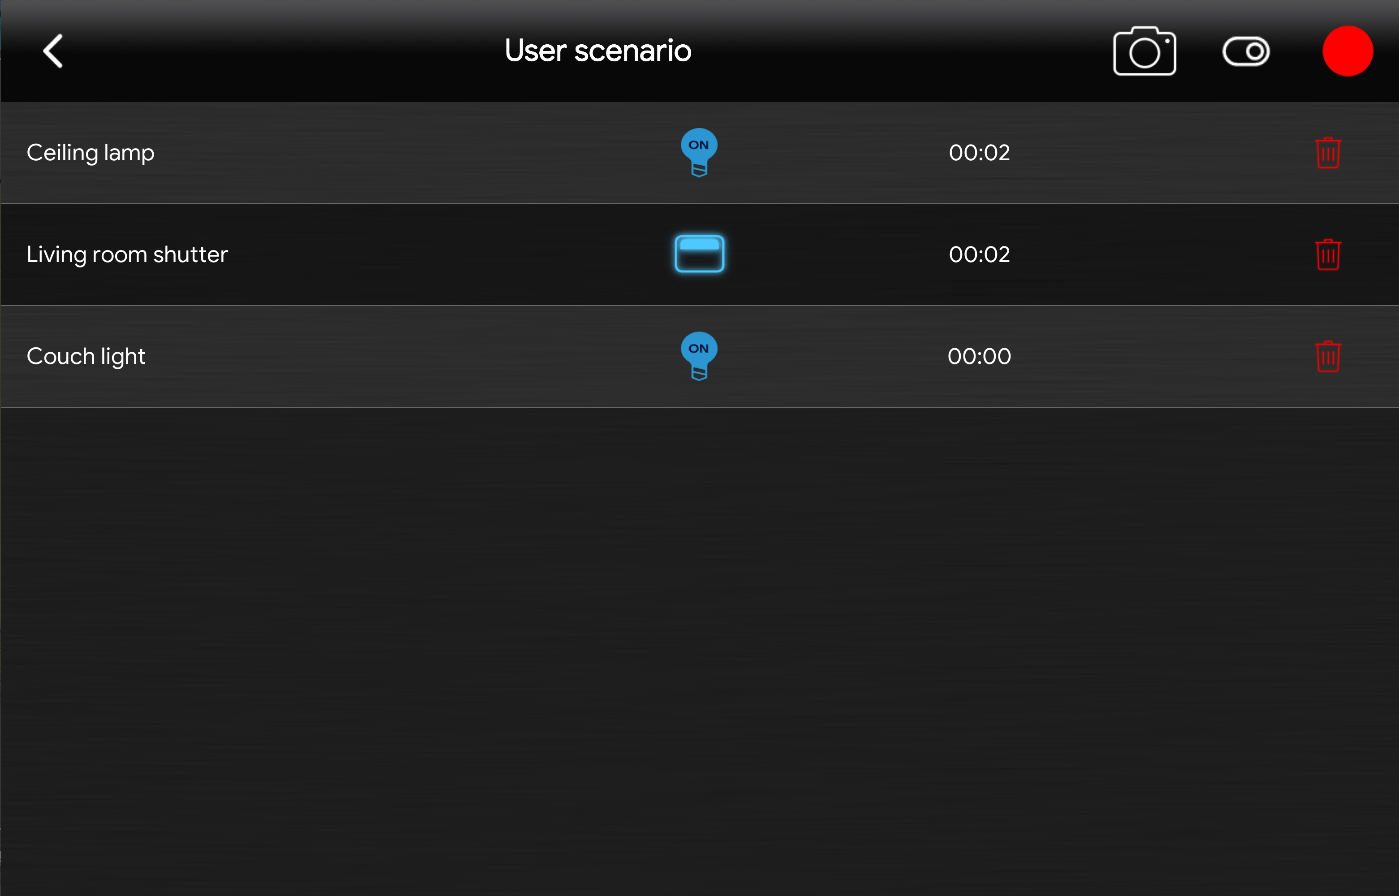
To consult the Recorded action list, hold the recorder Icon once again for at least one second, then the list of the recorded action will be displayed.
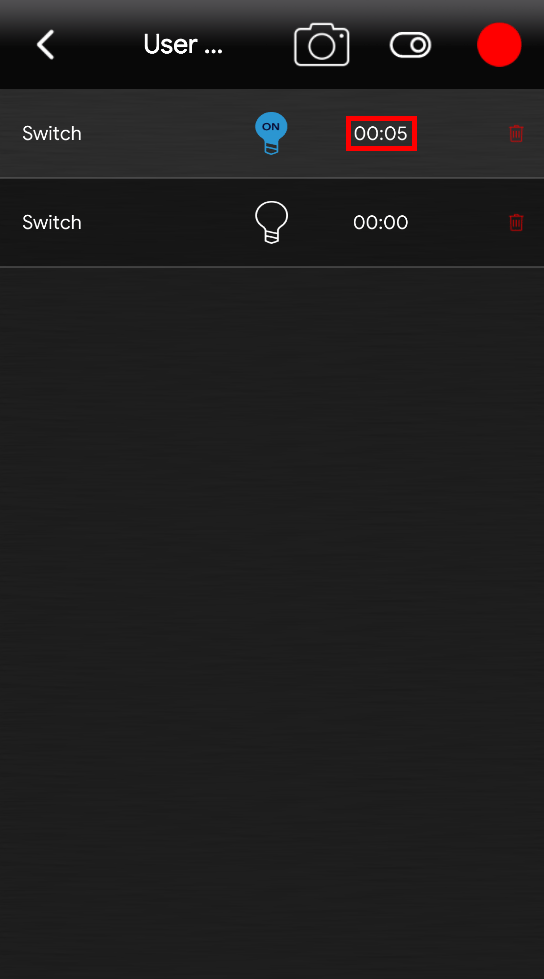
Once added a second action, in our case the light that turns OFF, you can add a timeout between an action and another by selecting a time from the Time selector placed on the right side of each recorded action, its format is mm:ss (minutes : seconds).
Final result
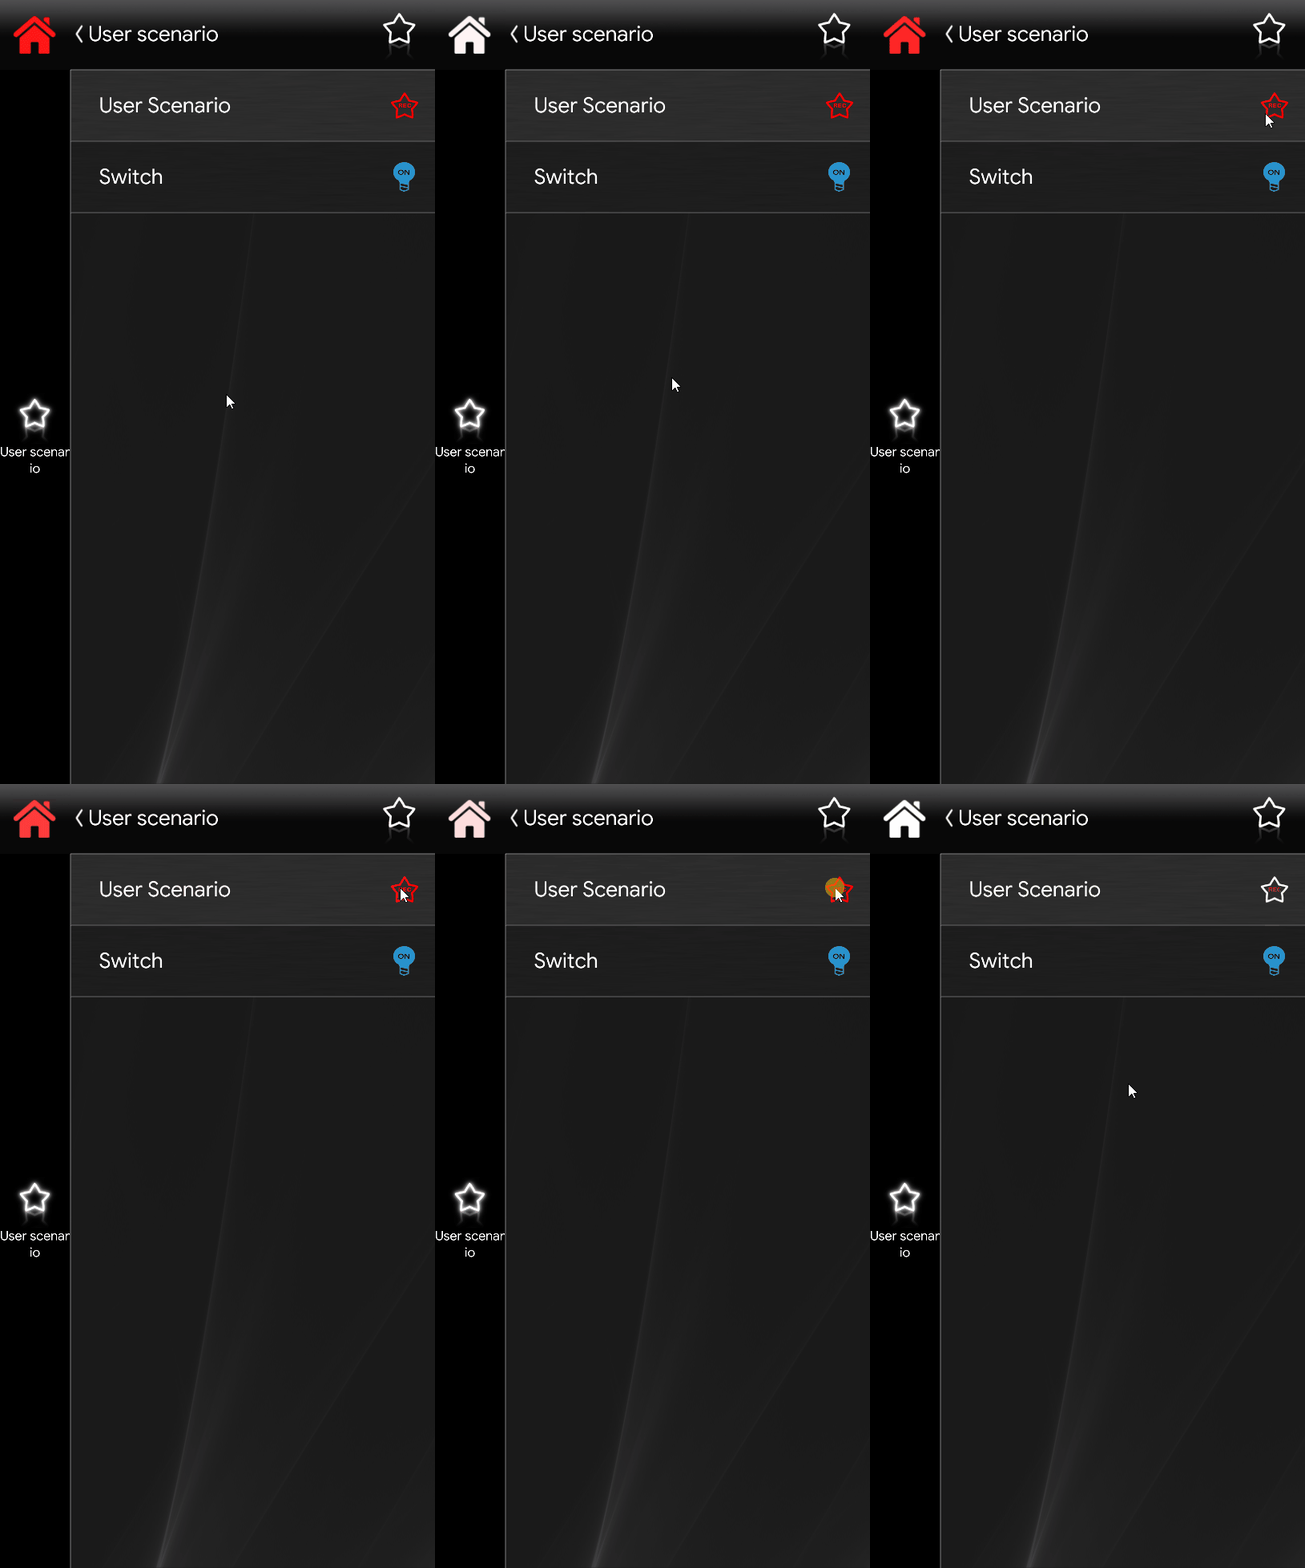
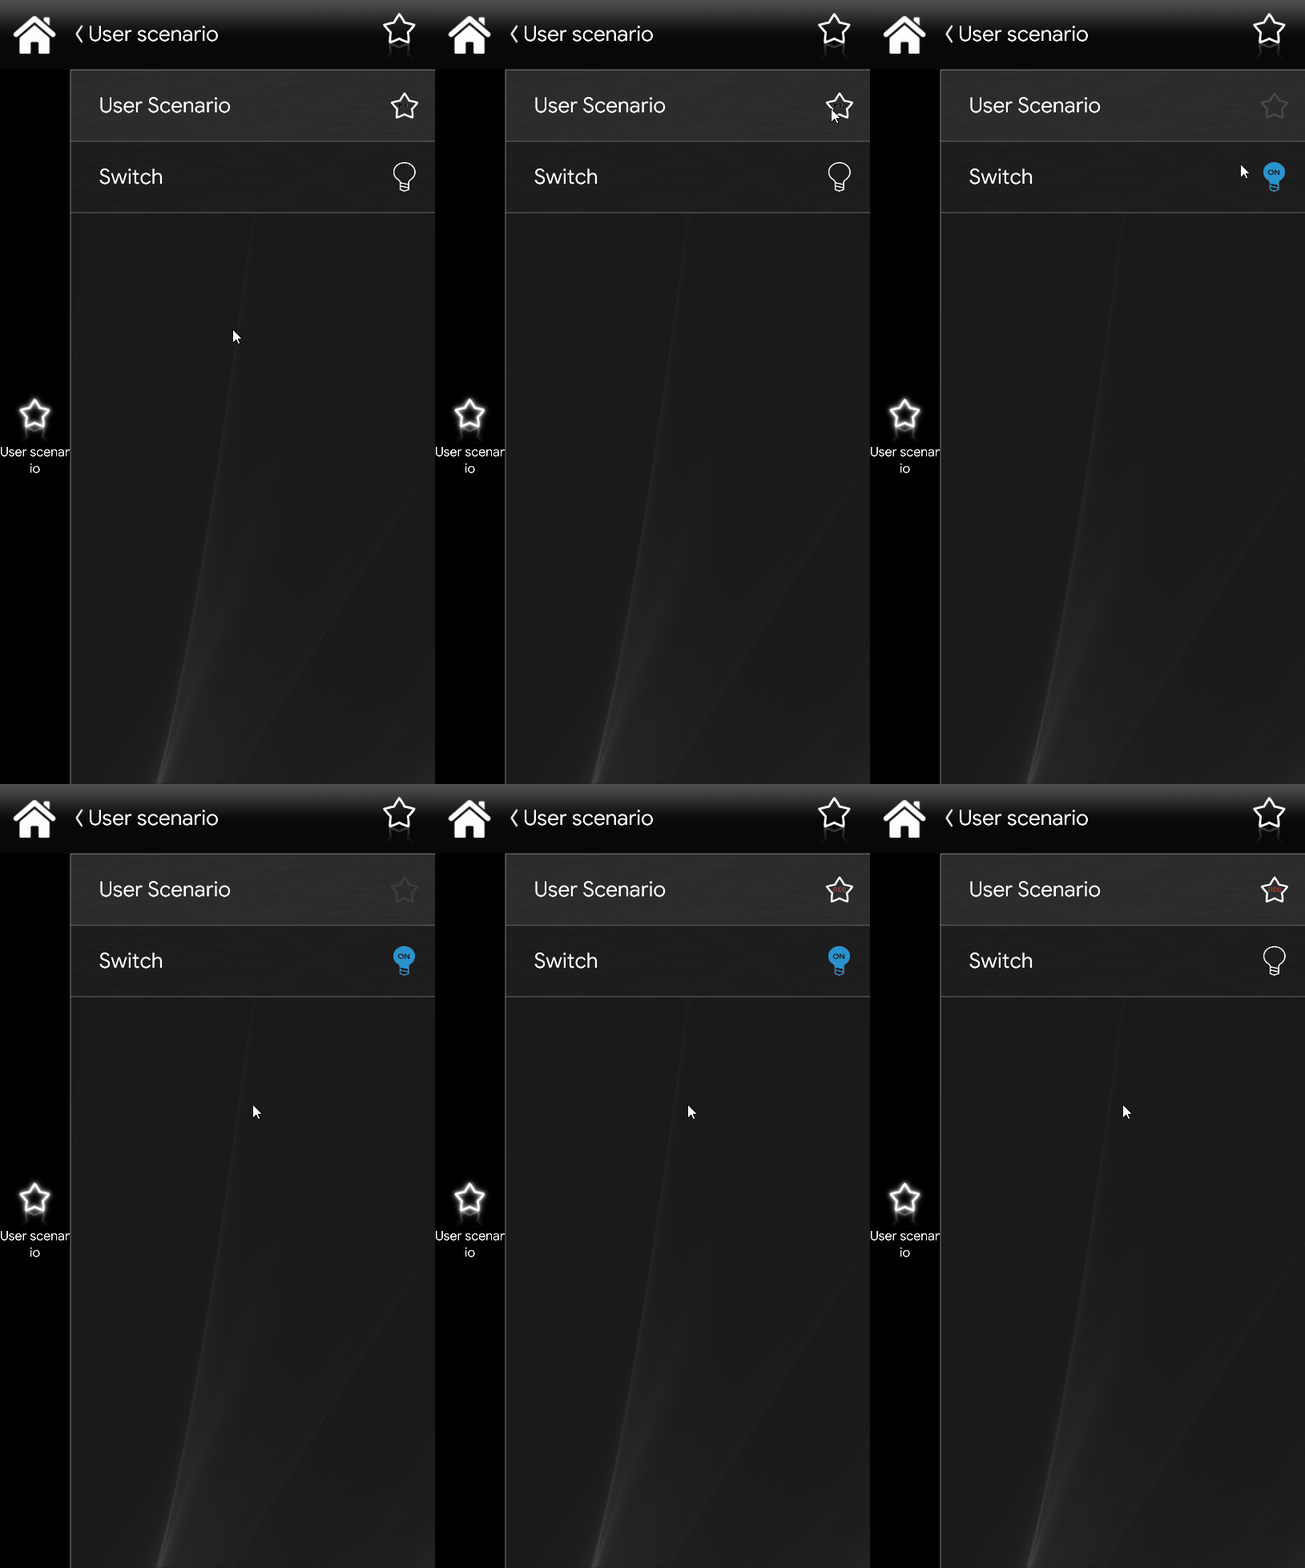
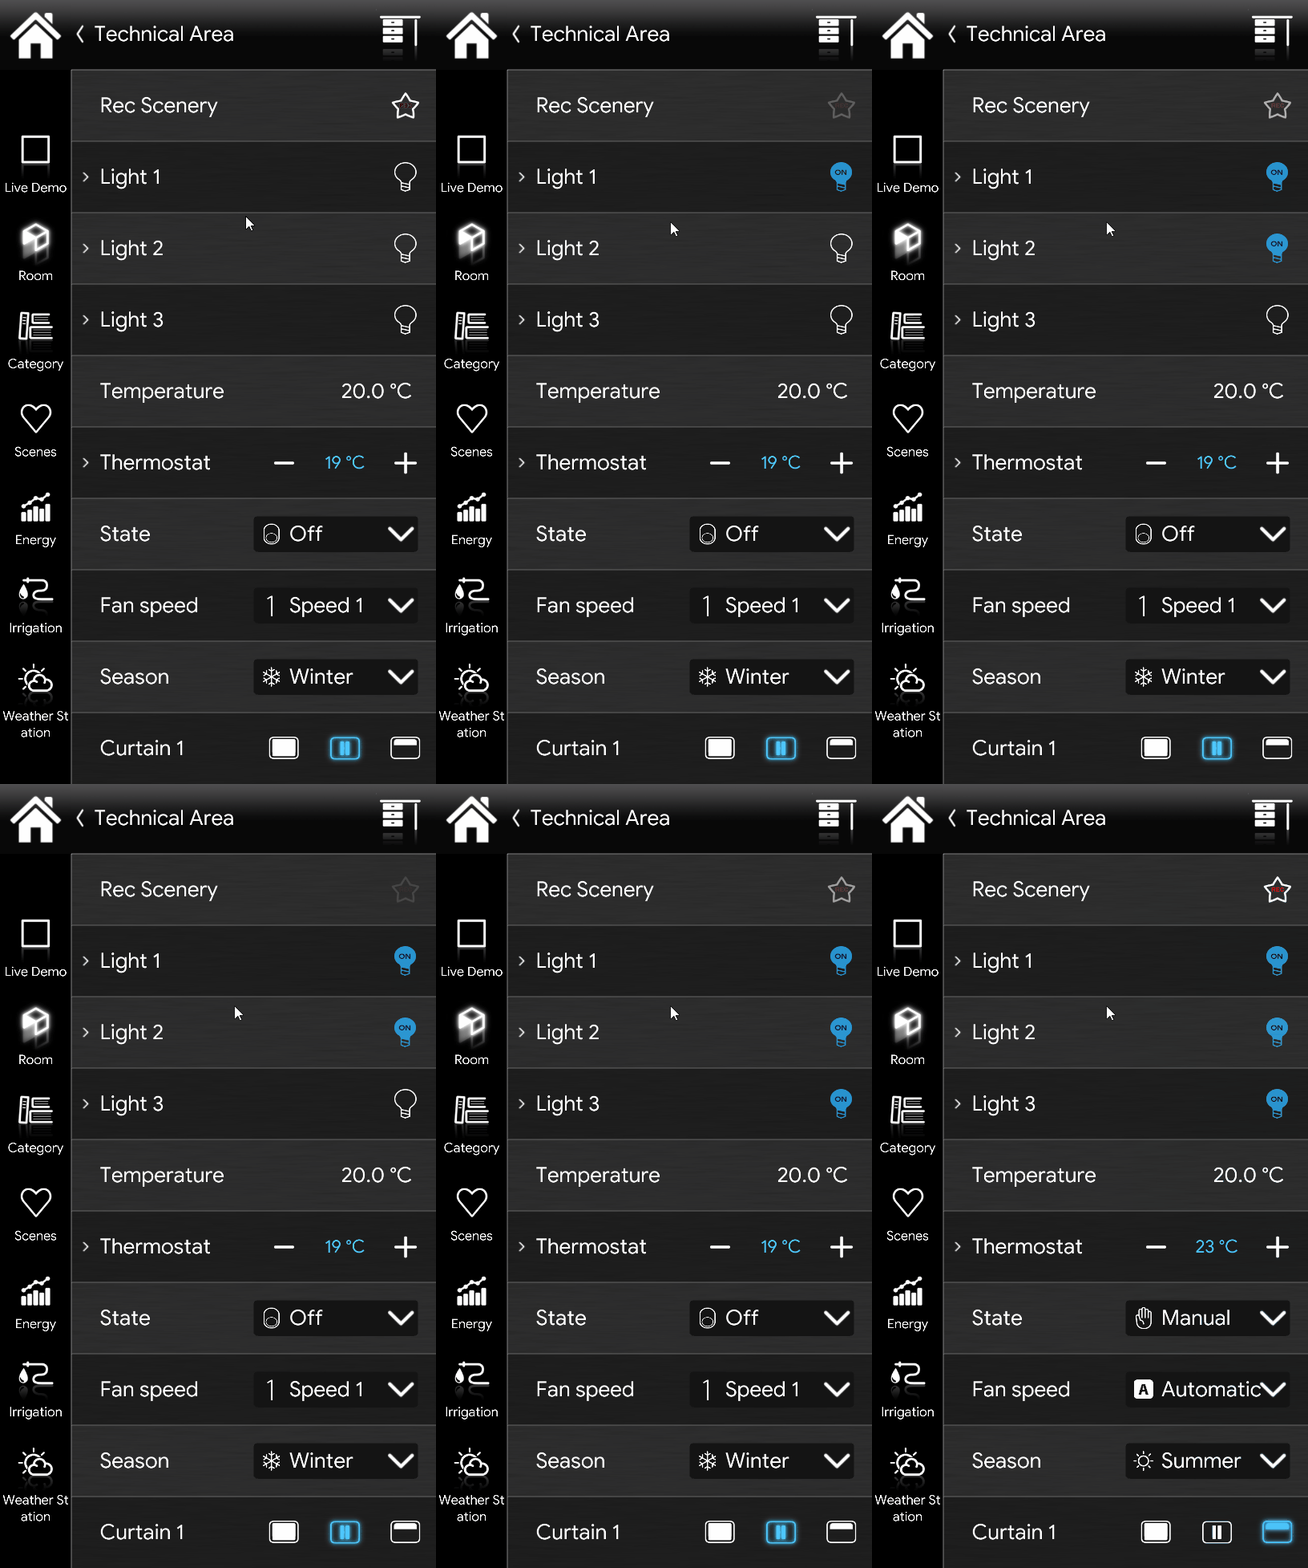
What you can see from the piceture below is the execution of the User scenario actions that have been recorded. As action have been set previously, once the User scenario is triggered, the light will trun ON, and after 5 sconds it will turn OFF.
CLASSIC VIEW MODE
Here below is shown how the User scenario looks like once triggered within the Classic User Interface of the Ilevia’s Home automation app EVE Remote Plus.
MAP VIEW MODE
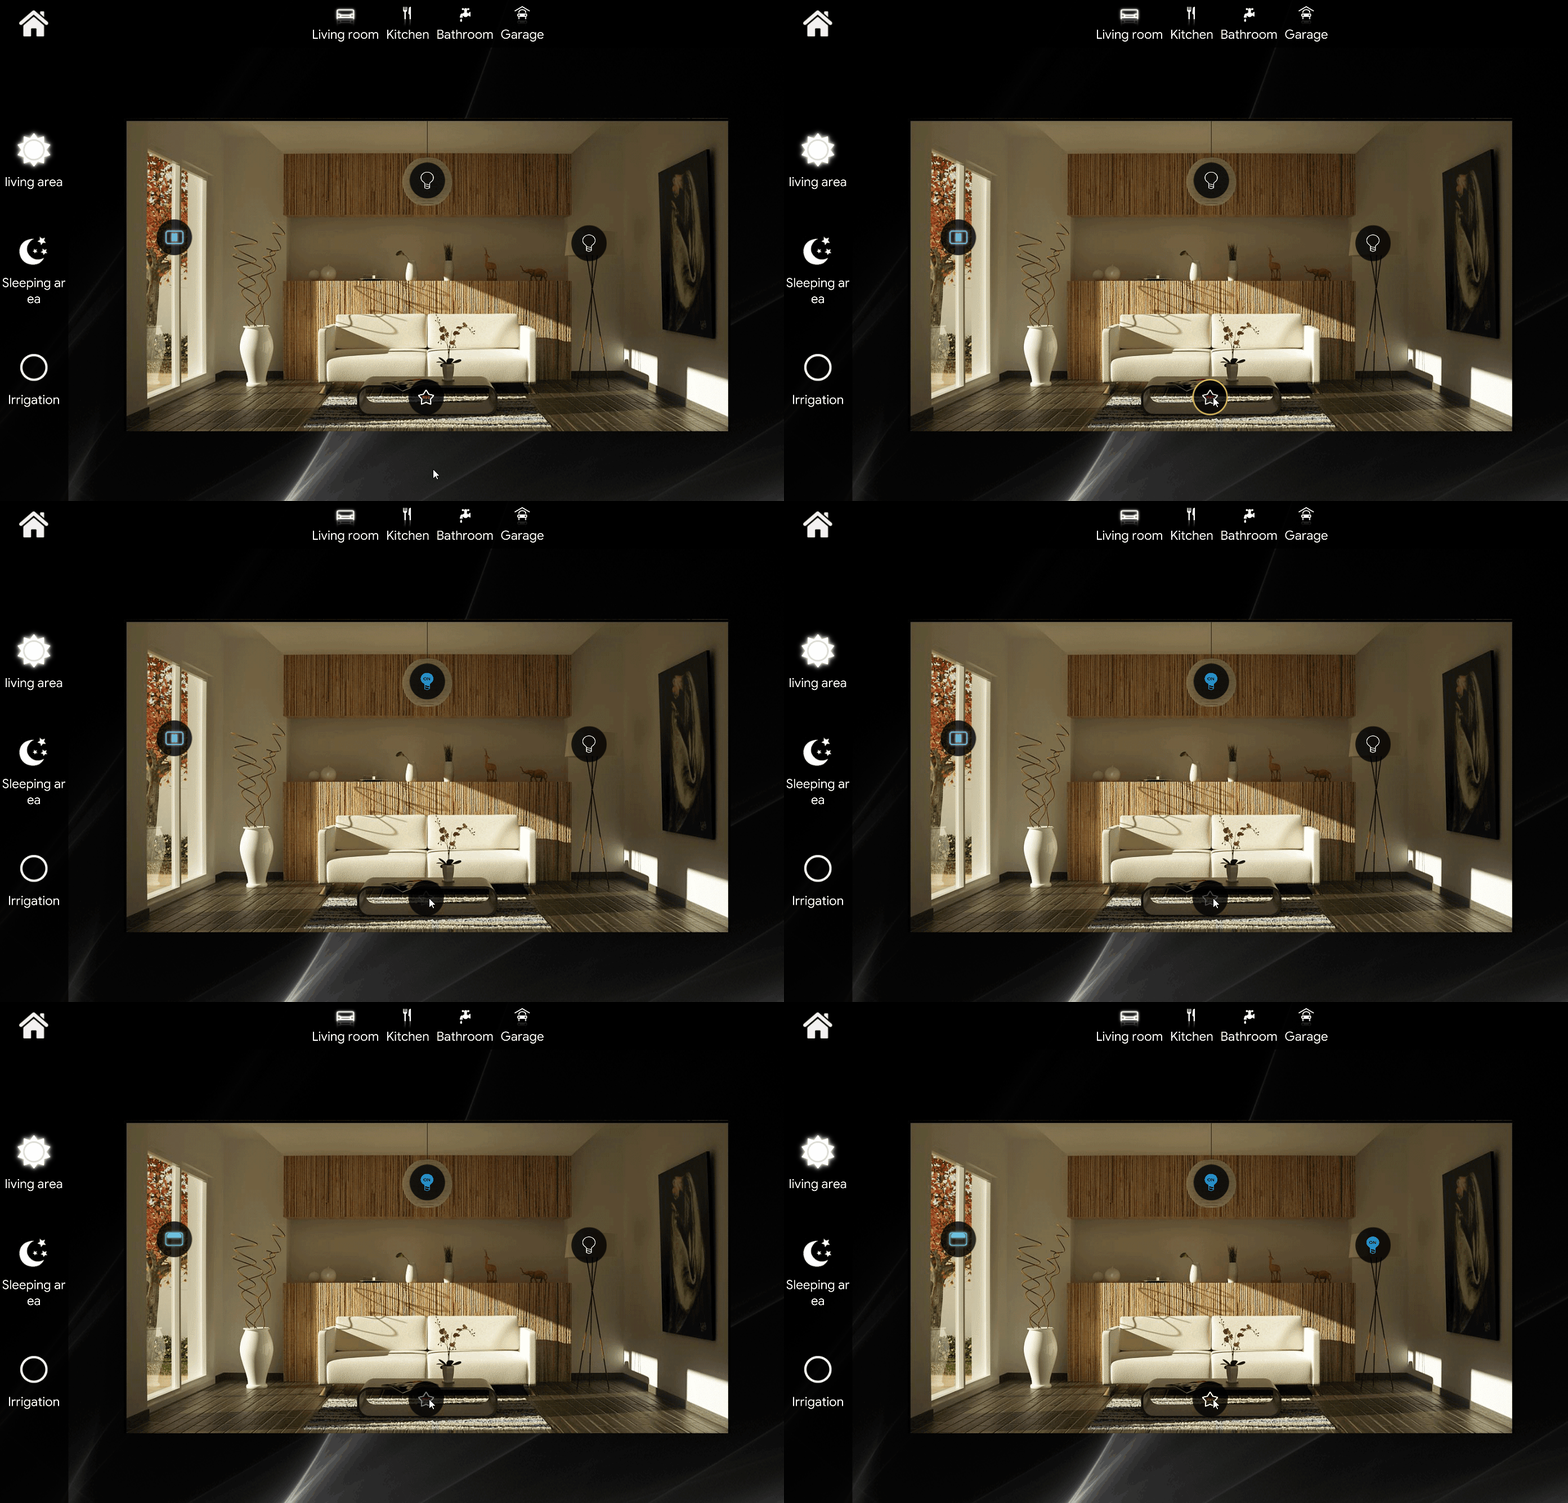
Here below is shown how the User scenario looks like once triggered within the Map User Interface of the Ilevia’s Home automation app EVE Remote Plus.
Click the link below to download the User scenario demo project and try it your self.
Tutorial video
PRESENCE SIMULATION
The presence simulation represents the impression that there is always someone at home. Using a user scenario it is possible to easily program events such as lighting a light, watering. movement of the shutters etc. in order to simulate the presence of people in the home and discourage any bad guys to sneak into the house while you are outside the home.
As a first step, add the components needed to create the presence simulation, in this case, we will use a User Scenario and 4 Switches that will represent for this example the lights inside the house. You can just add the User Scenario component within the project in order to be able to use this function with a previous configuration.
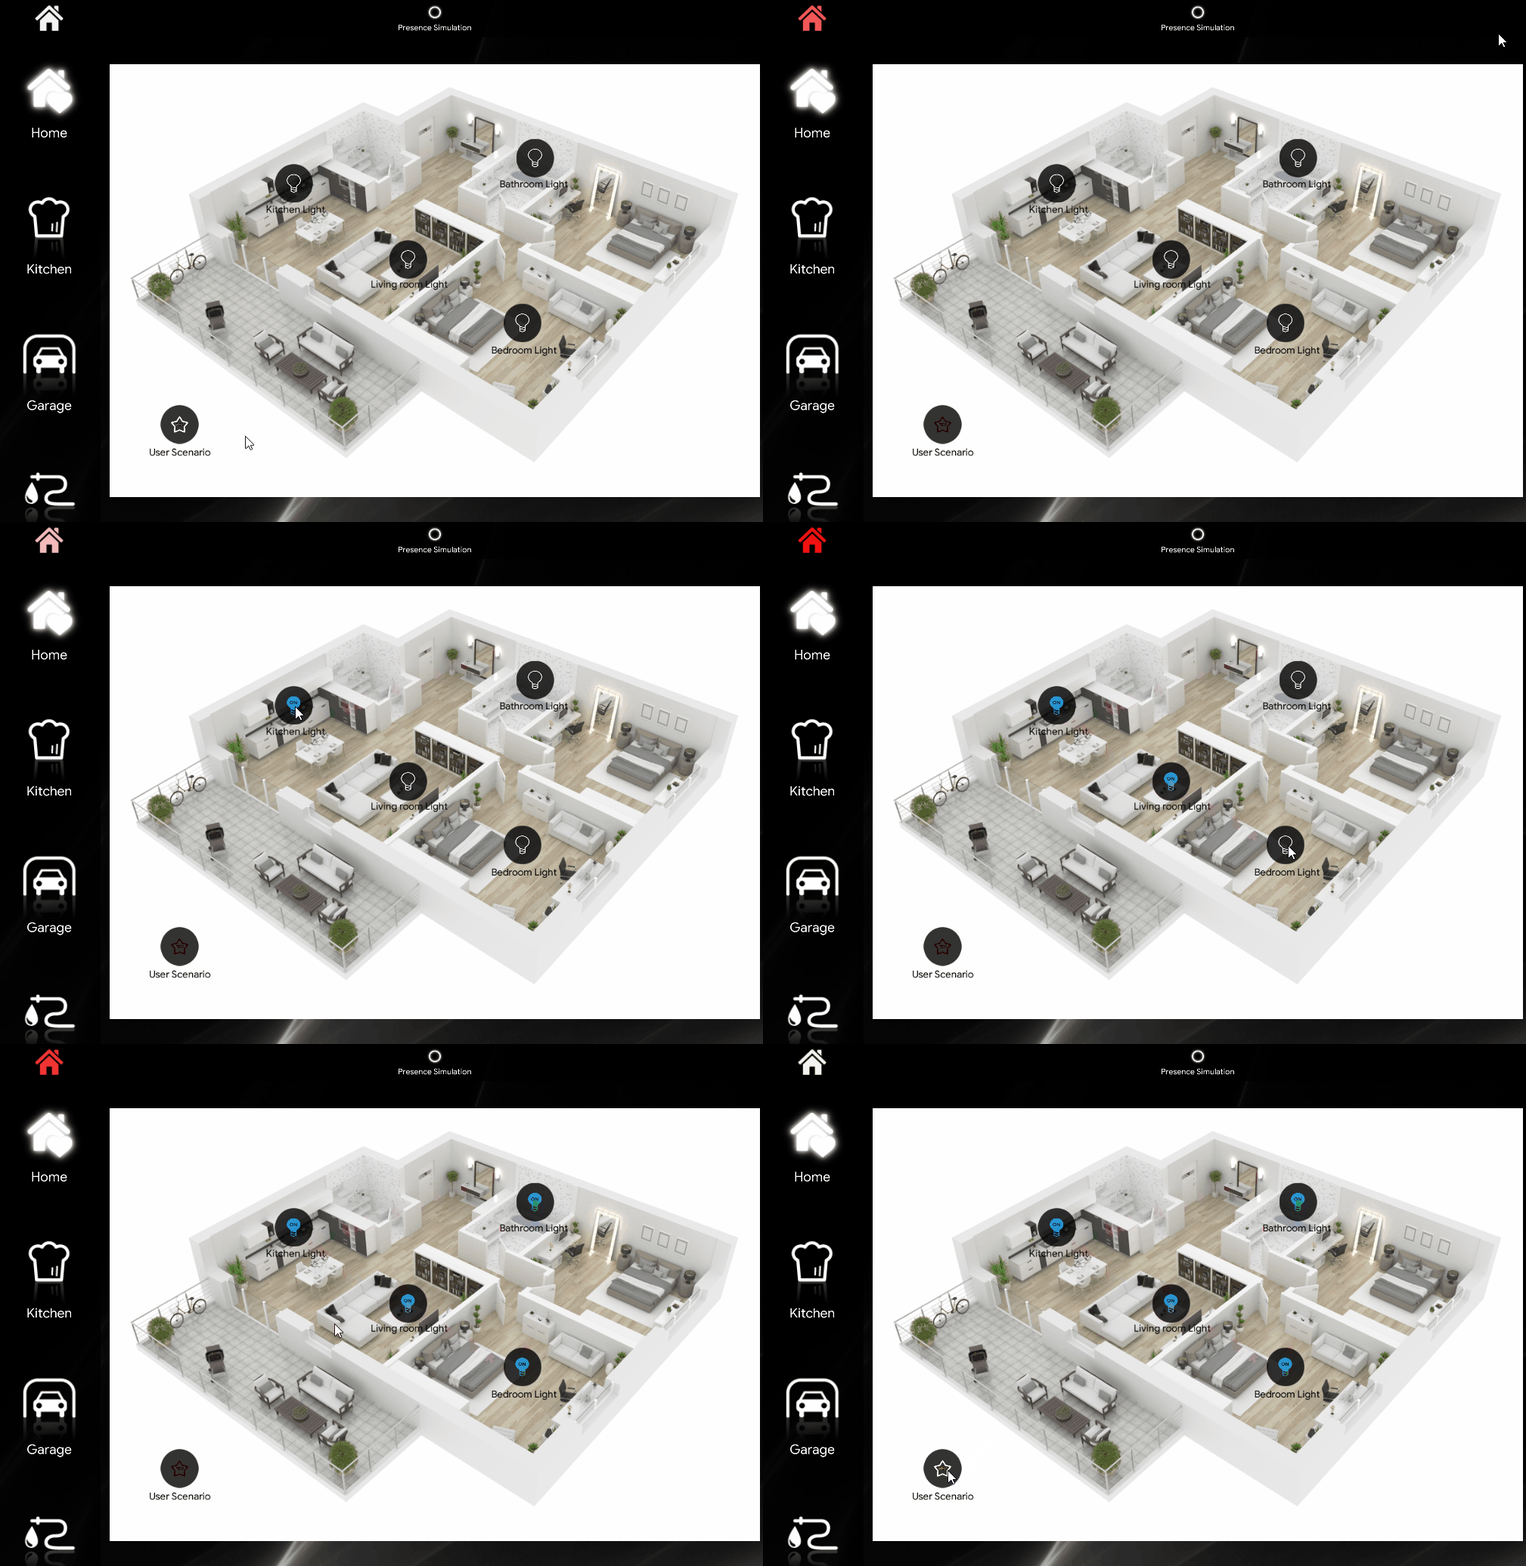
- Place the components inside the User interface (in this example the Map user interface has been used) and begin recording the presence simulation by holding down the User Scenario‘s icon until the scenario screen opens automatically;
- Then tap/Click the red circle shaped icon at the top right to start recording;
- You know that the recording stage is started correctly from the house icon in the top left corner red blinking;
- Now click on the lights components that you want to activate automatically. Once done, to end the recording stage, hold down the User Scenario icon (the red house icon in the top left corner will stop flashing).
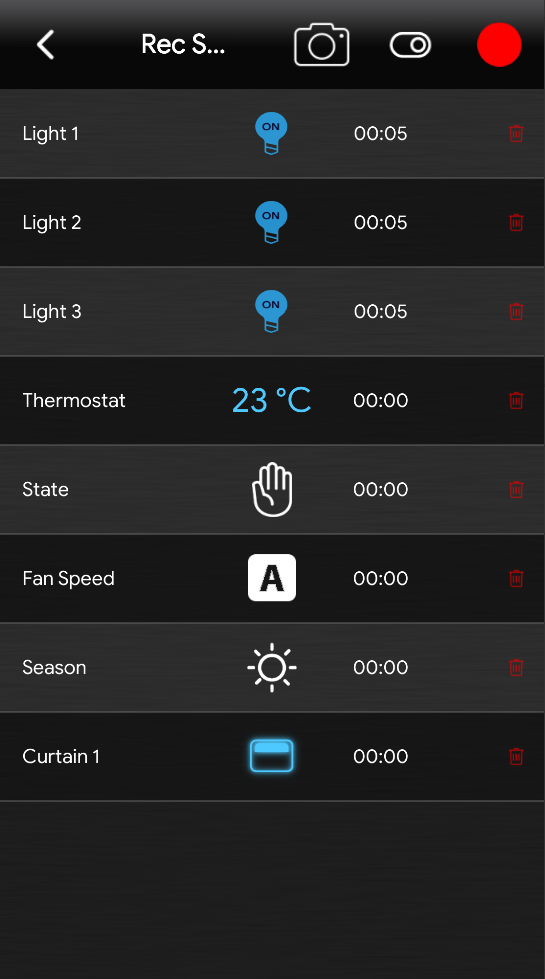
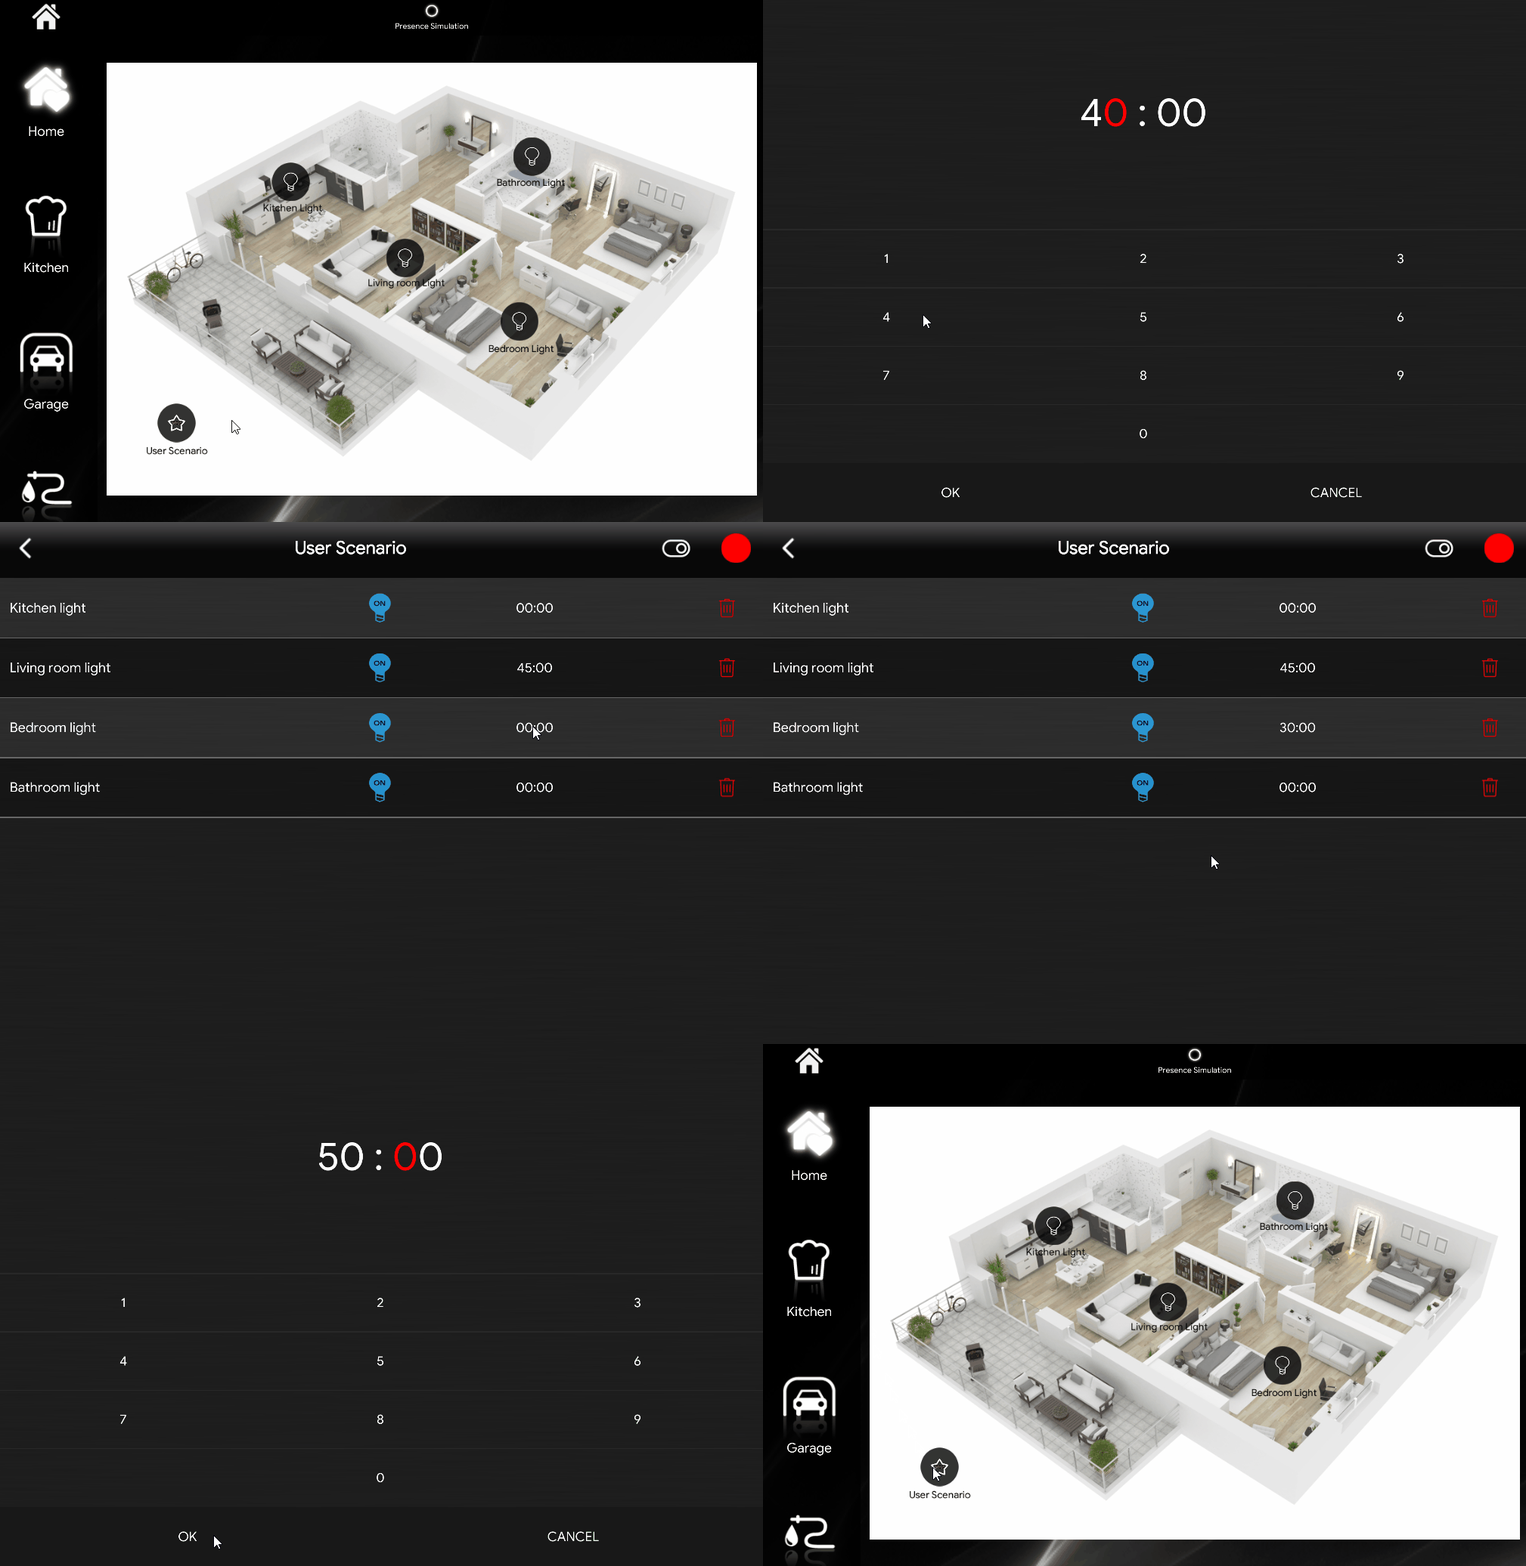
Holding down the User Scenario icon will display the scenario screen in which we will find our previous recordings. By clicking on each individual Timer we could set the waiting time between one component and another. In this case our Presence Simulation will start as follows:
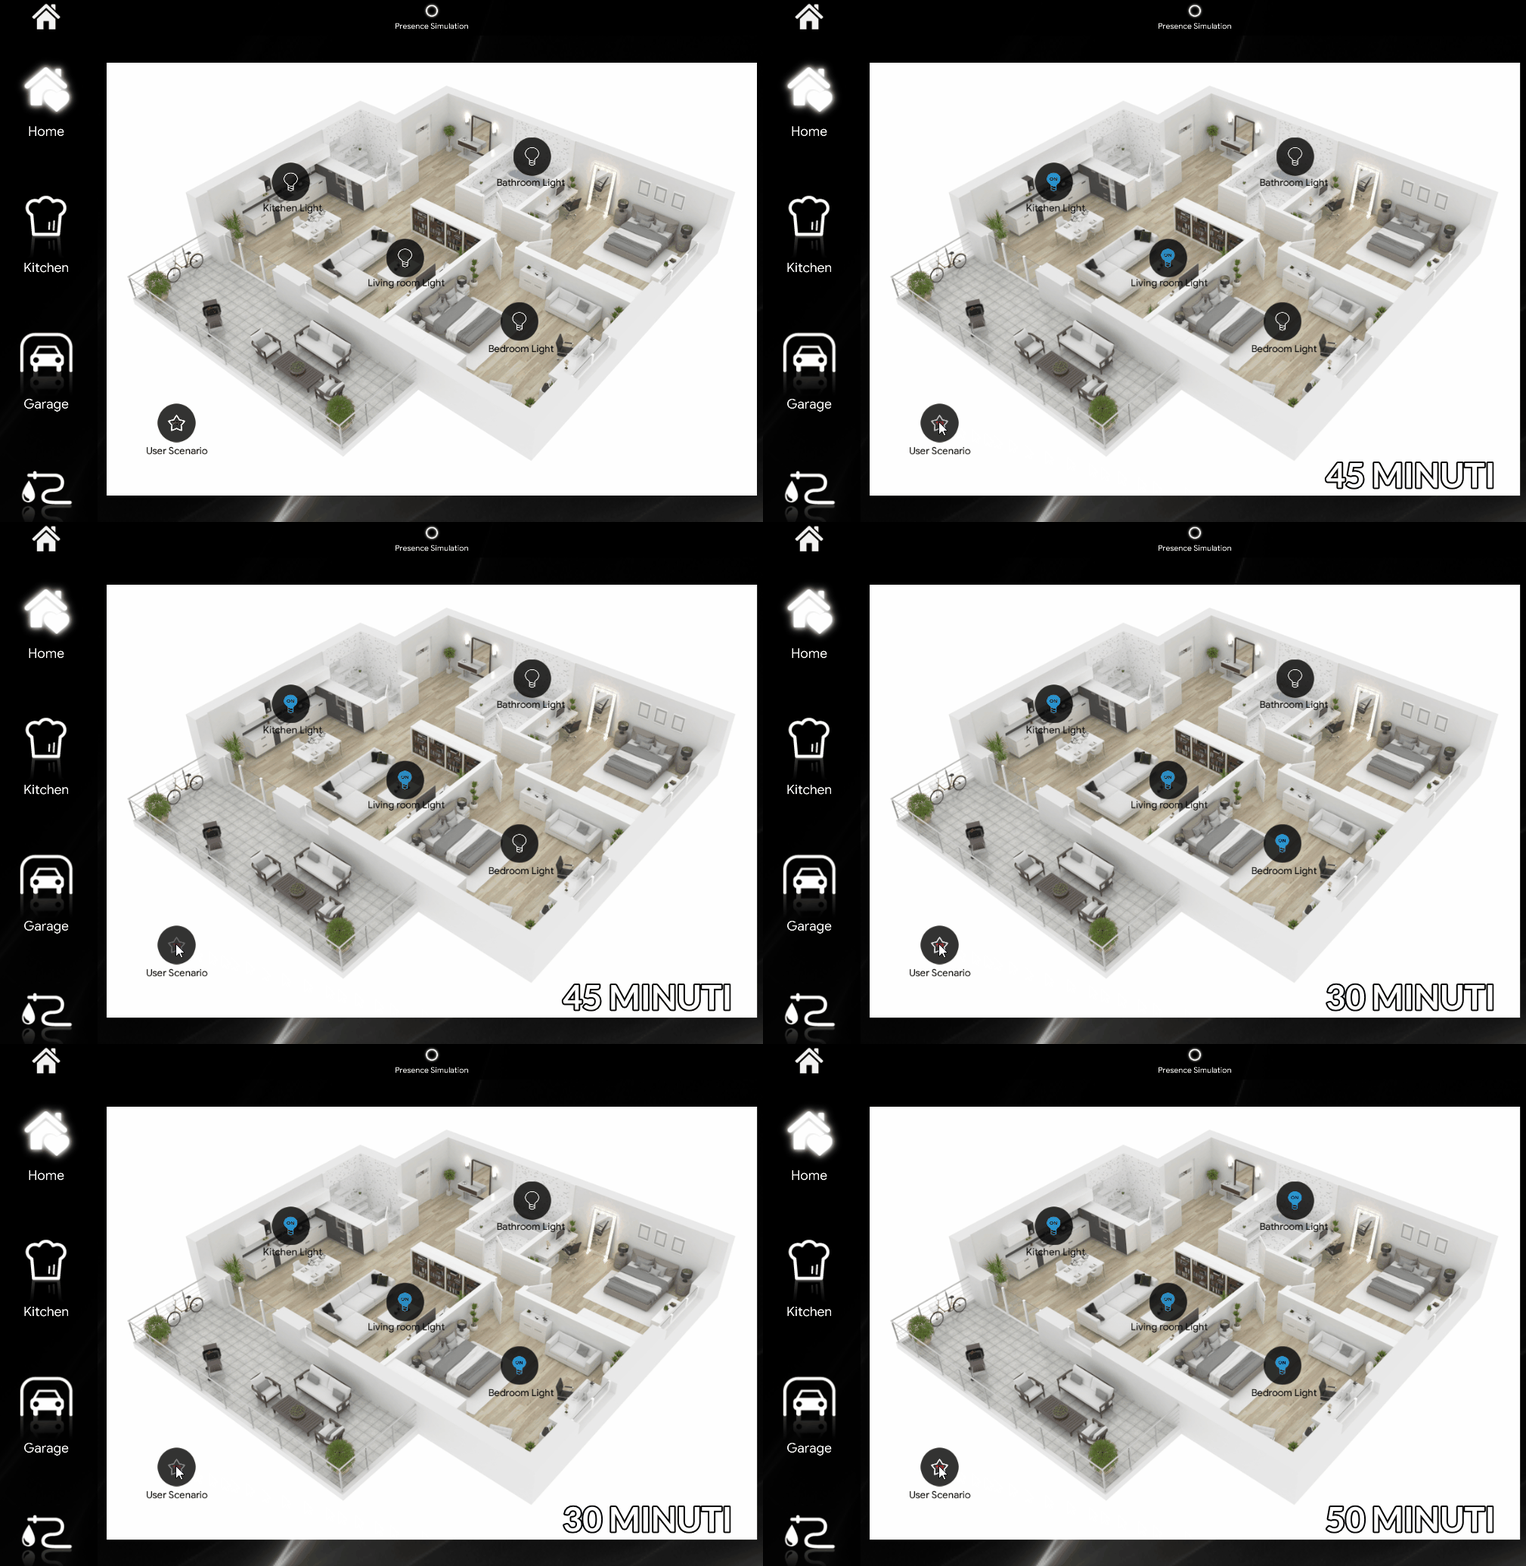
- Kitchen light will light up immediately.
- Living room light will turn on after 45 minutes.
- Bedroom light will turn on after 30 minutes.
- Bathroom light will light up after 50 minutes.
Once the Timers have been set, it will be possible to start our Presence Simulation simply by clicking on the User Scenario icon.

