 Script
INTRODUCTION
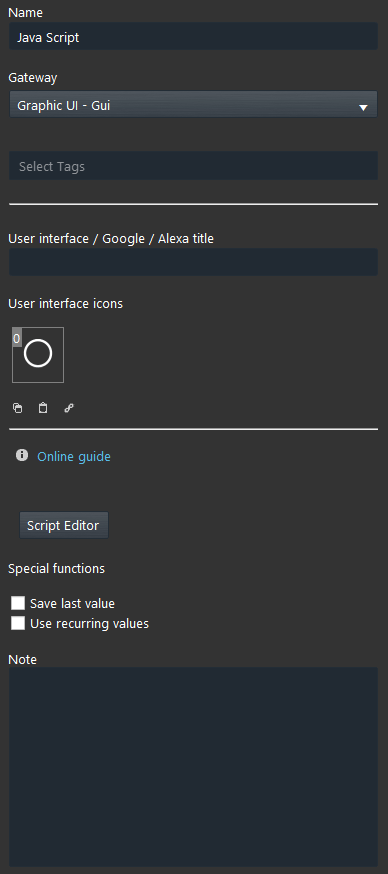
Thanks to the Script component it is possible to implement new and customized logics, from the most simple ones to the most complex, through writing code lines using Javascript.
USE CASES
- The user wants to create an additional rule customized on his necesities;
- The user wants to customize a rgb light to make it into a loop.
- The user wants to create a script that control a VMC device and record the max temperature and the date when the max temperature is reached. Click the link to find out more about this script.
- The user wants to make a logic where if there is enaugh power, it will change the set point of a thermostat accordingly with the season selected in a drop down if there is enough power. Click the link to find out more about this script
COMPONENT’S PROPERTIES
Customizable component’s title and icon. Please refer to “Common properties” guide.
Script editor: Once clicked it will pop up the script editor window, here you will be able to develoup your javasciript;
Script commands (getValues)
getValueAsString(IDComponent); this method will get the value of the component using the ID that you can find on EVE Manager as a String (“this is a string”.);
getValueAsInt(
getValueAsDouble(IDComponent); this method will get the value of the component using the ID that you can find on EVE Manager as a Float (1,5 2,4 3,7 ecc.);
getValueAsBoolean(
Script commands (setValues)
setValue(
setTrigger(IDComponent,”function”): This method triggers the specified event and the default behavior of an event, it’s really important to remember that the setTrigger will not work without a component ID and a”function”;
removeTrigger(component ID): This method will let you remove the specified trigger set for the specific component ID.
setTimeout(component ID): This method allows to apply a time out time to the specified function.
setInterval(seconds, “function”): This method will continue calling the function every X seconds set by the user.
removeInterval(“function“): This method will let you remove the specified function that you previously used inside the setInterval. object can be used to request data from a web server.
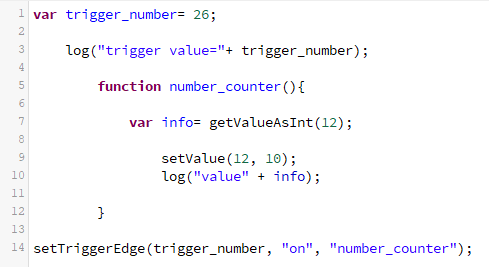
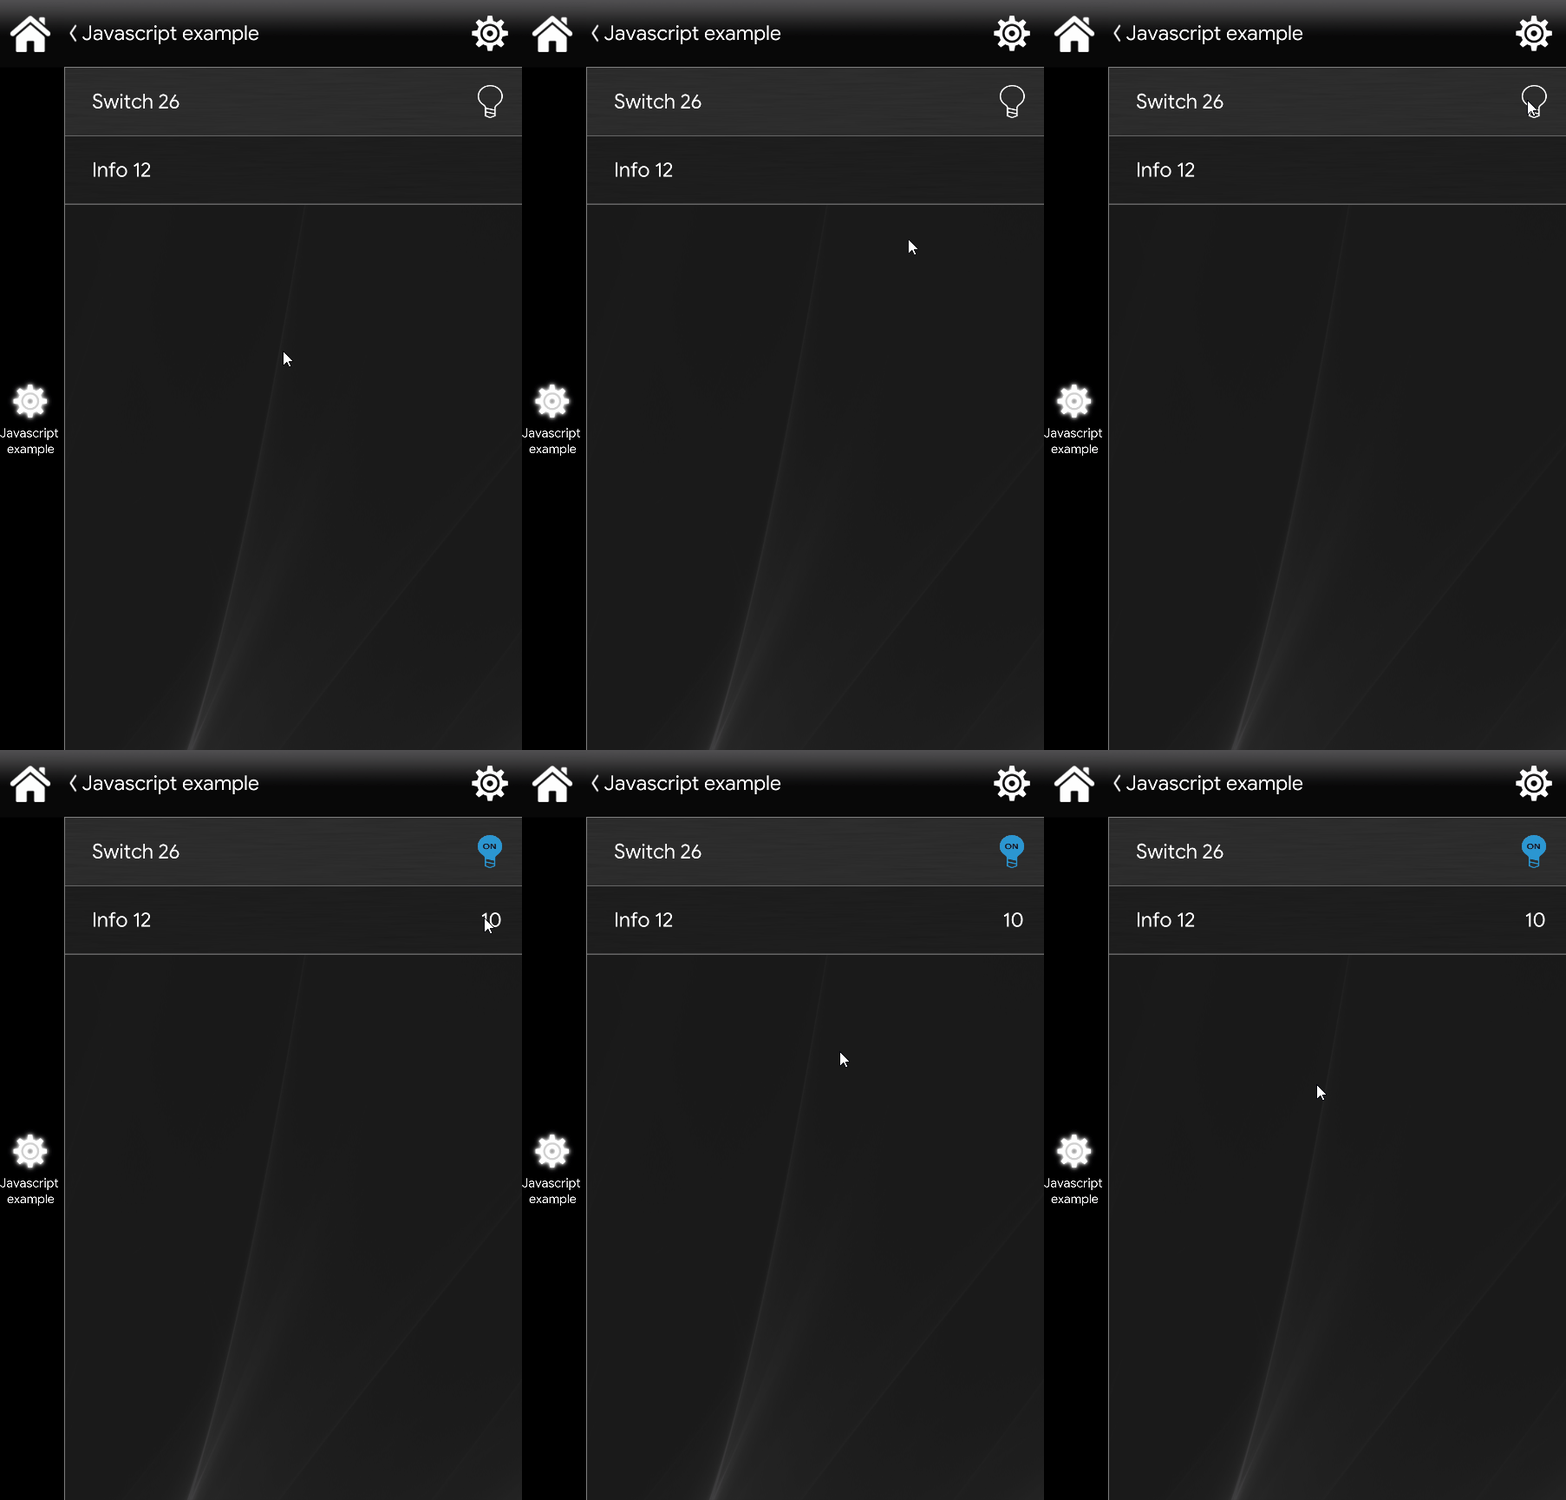
setTriggerEdge(Component ID,”value change from state”, “function”): This method will trigger the function only when the status of the component changes to the status that we specified as rising or falling in the field “Value change from state” of a Switch. This statement comes handy in case of function that requires an inversion of the trigger’s value.
Additional script functions
log: allows the user to keep tracking of what is happening inside the script. This functionality’s not still present and it will be available on the next release of the EVE Manager.
HTTPRequest: This method can be used to request data from a web server. An example can be:
var x =HTTPRequest(“URL”);
HTTPPost: The POST method is widely implemented in HTML files (Web pages) for sending filled-in forms to the servervar x: HTTPPost(“URL”, data);
Note: for any requests / suggestions please contact the technical support.
Reminder before continuing:
- Download and Install EVE Logic plugin to enable plugins (link);
- After loading .eve project to the server, run EVE Remote app, log in and then wait a couple of minutes for logics activation.
If…Else Statement
EXAMPLE N°1
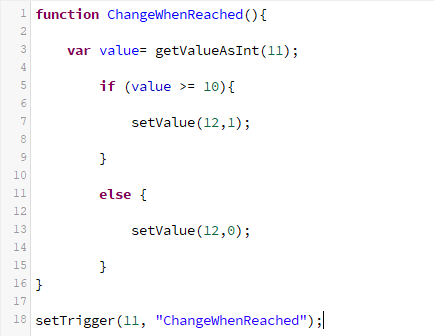
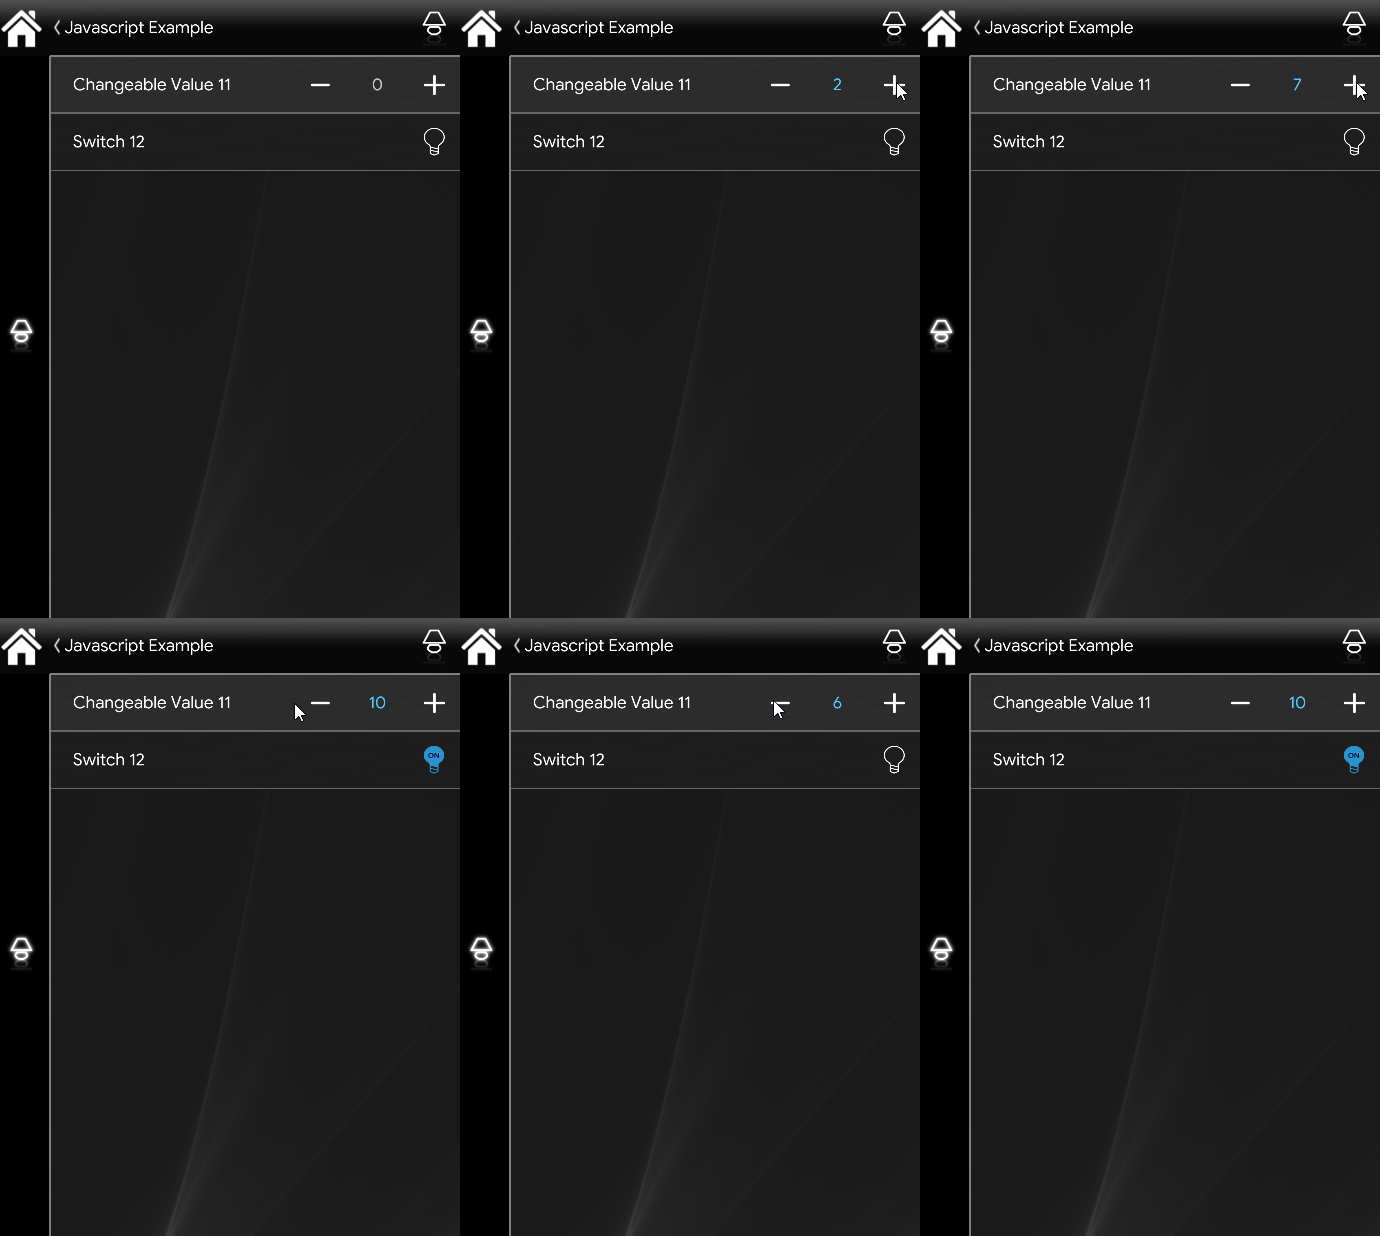
In this example we are using a Switch with the ID “12” and a “Changeable Value” with the ID “14”. Using an if statement we will able to tell to EVE Manager to enable the Switch when the Changeable Value reaches the number 10 or higher. A perfect use for this script is when you need something to happen when a certain value is reached.
Click here to download the project and test it your self!
EXAMPLE N°2
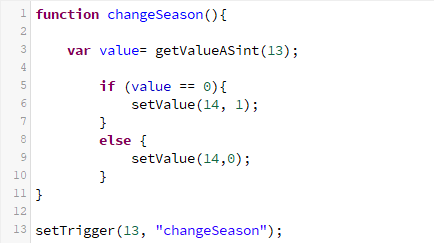
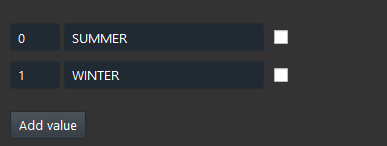
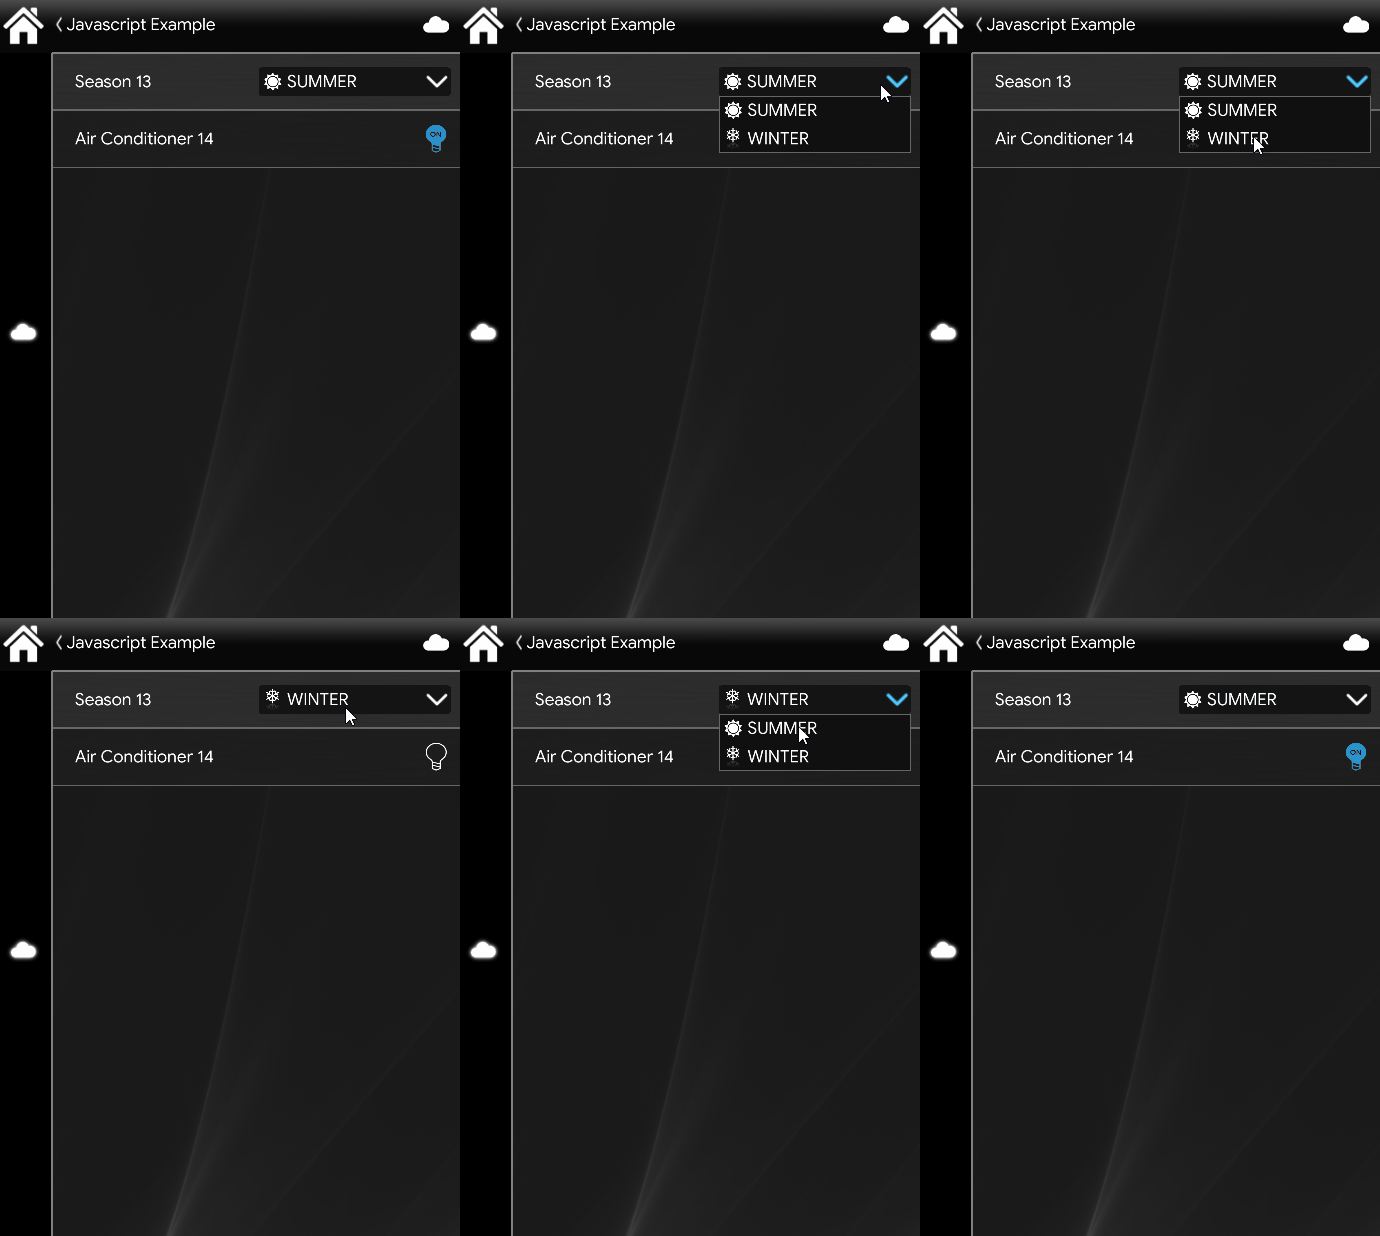
In this example we are using a Switch with the ID “14” and a “Drop Down” with the ID “13”. Using an if statement we will able to tell to EVE Manager to enable the Switch when the Drop Down reaches the number 0 of the index, this mean that if it reach the value 1 the “Air Conditioner” will turn off. A perfect use for this script is when you need something to happen a value of the Drop Down is chosen.
Click here to download the project and test it your self!
Javascript Functions
EXAMPLE N°3
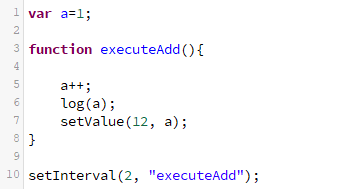
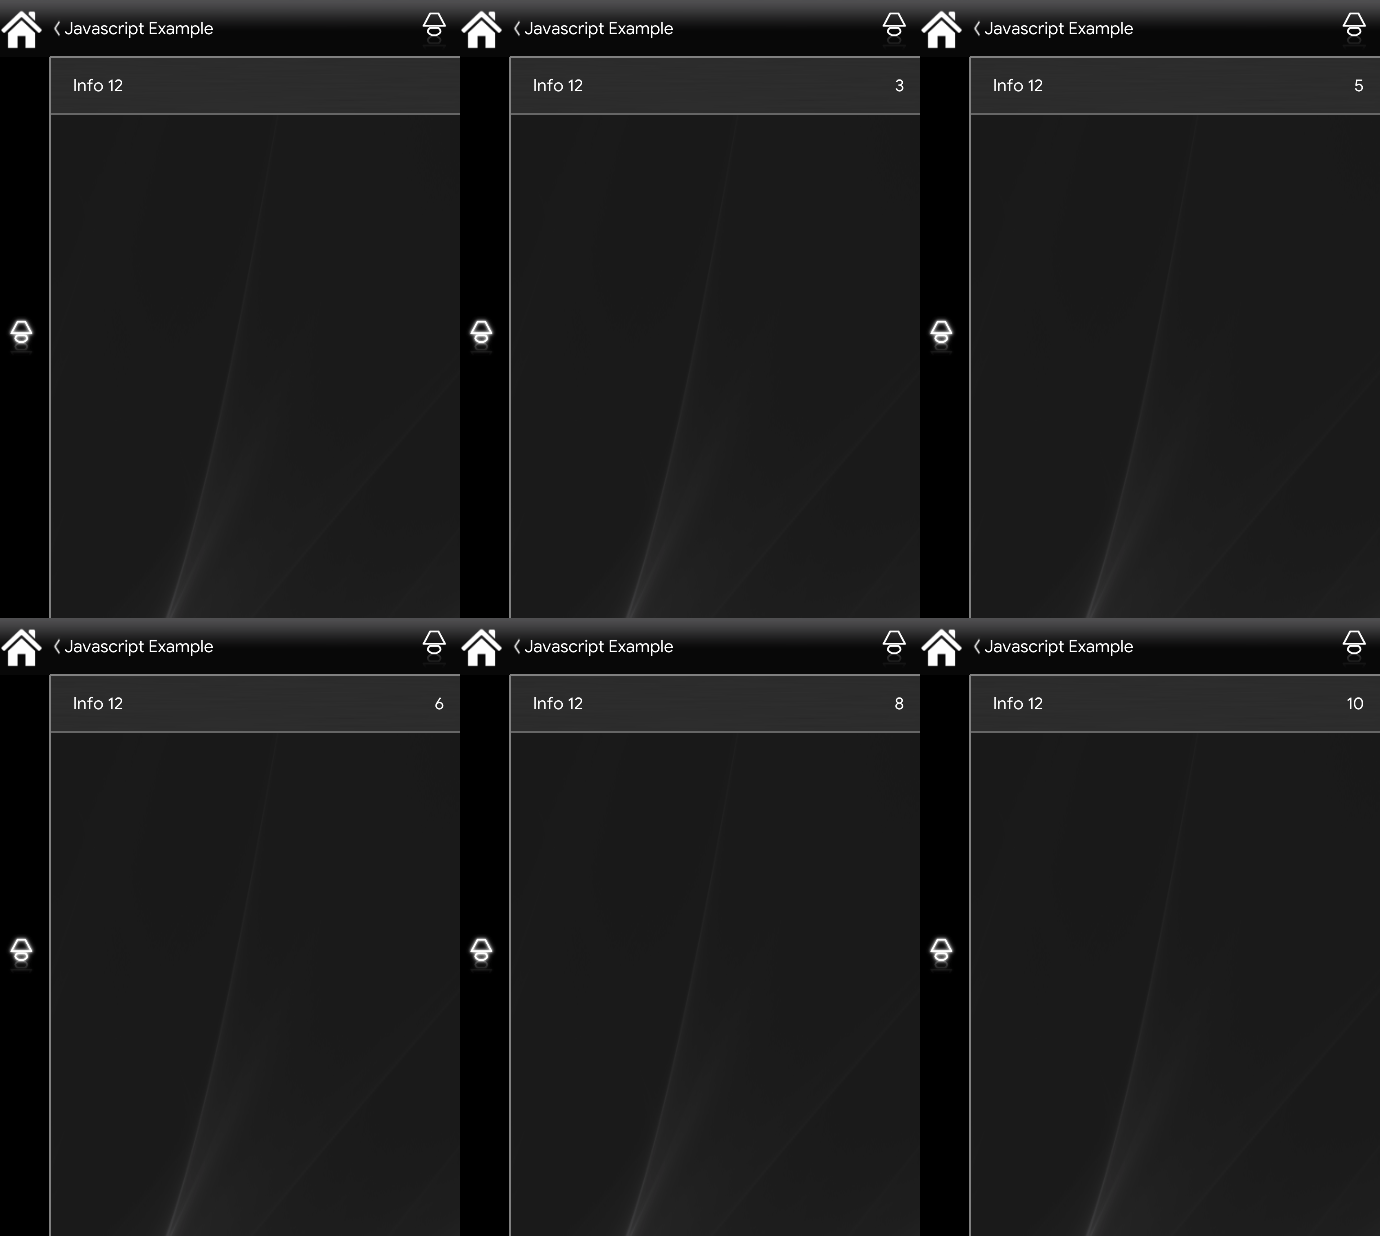
In this example we are using an Info component with the ID “12”. Using a function we will able to increase the Info value by 1 every 2 seconds. In this case to call the function we have to put it inside the method setInterval(2,”executeAdd”); as you can see the first argument inside the parenthesis is for how long in seconds we should increment by 1 (++) the value of the variable a, in the second argument we simply call the function.
Click here to download the project and test it your self!
EXAMPLE N°4
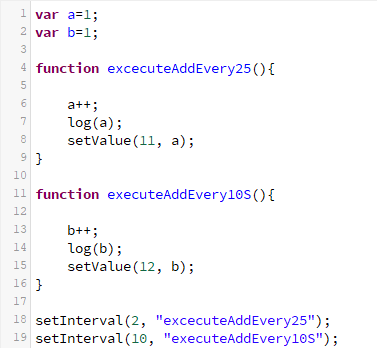
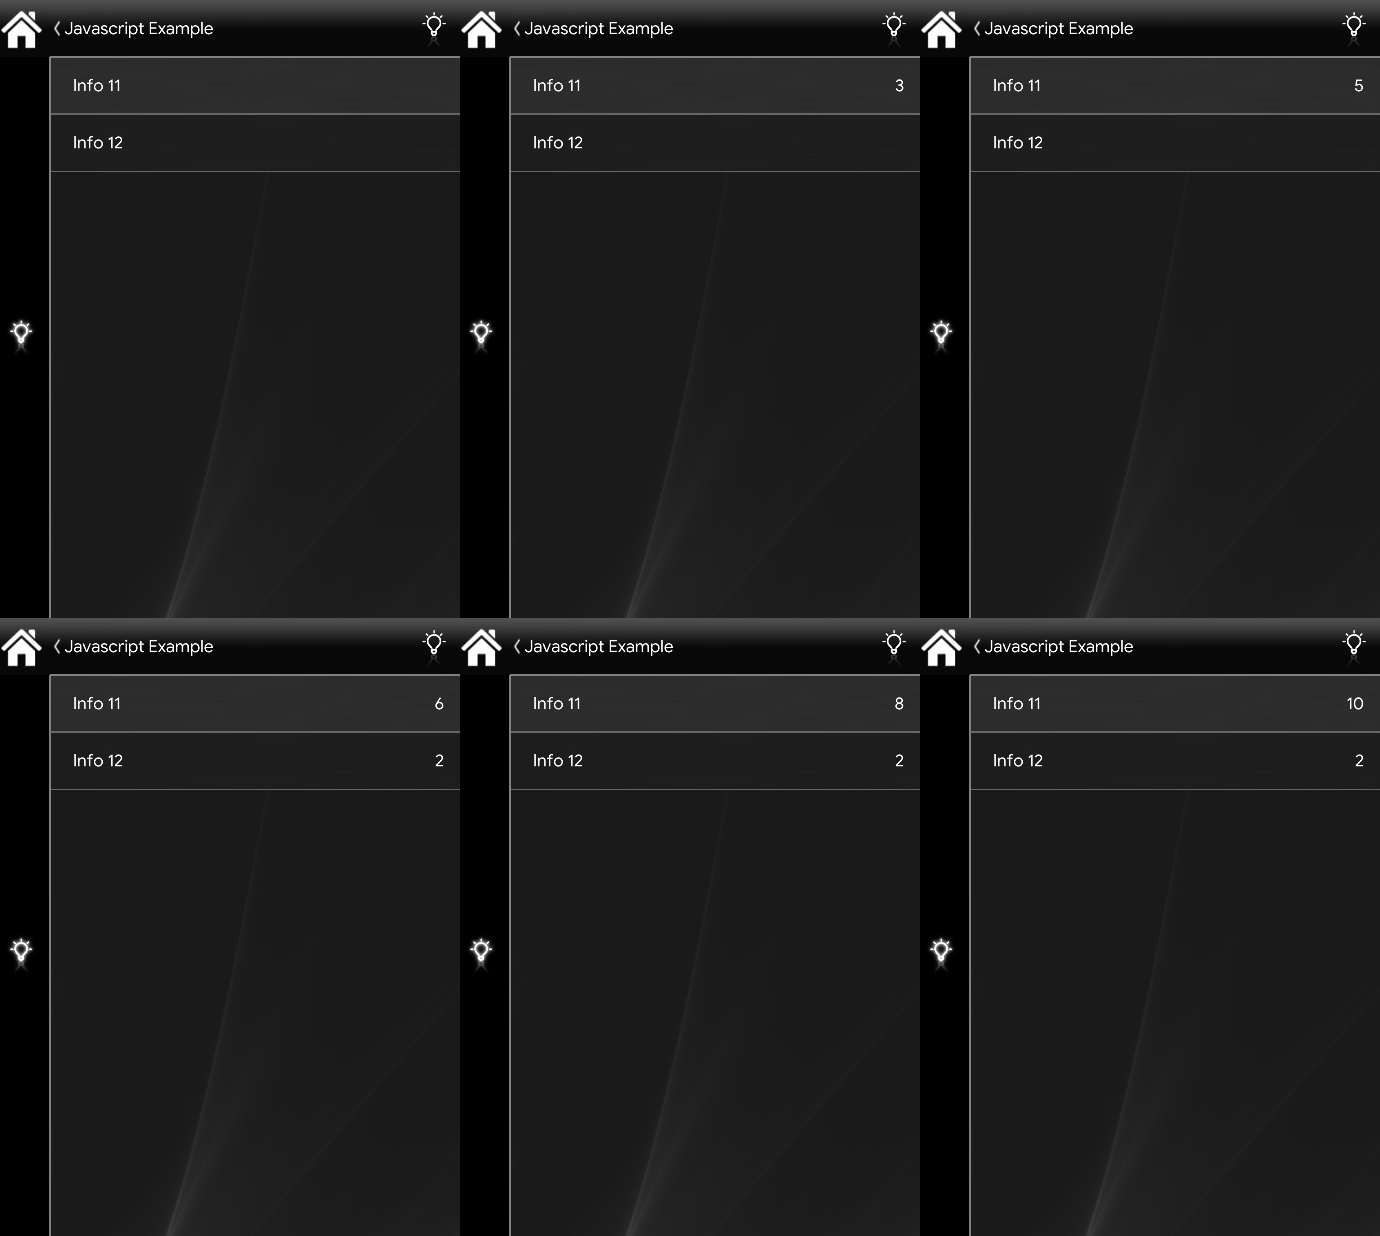
In this example we are using two Info components with the ID “11” and “12”. Using a function we will able to increase the first Info value by 1 every 2 seconds and the second Info by 1 every 10 seconds. In this case to call the function we have to put it inside the method setInterval(2,”executeAddEvery2S”) and setInterval(10,”executeAddEvery10S”); as you can see the first argument inside the parenthesis is for how long in seconds we should increment by 1 (++) the value of the variable a, in the second argument we simply call the function that will, as said before, add 1 to the variable a.
Click here to download the project and test it your self!
EXAMPLE N°5
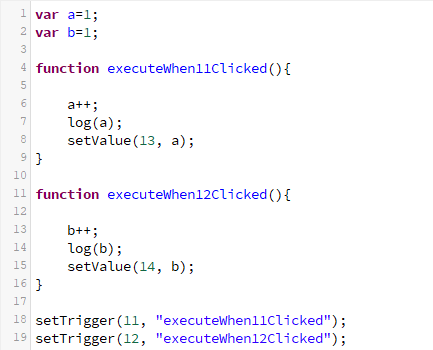
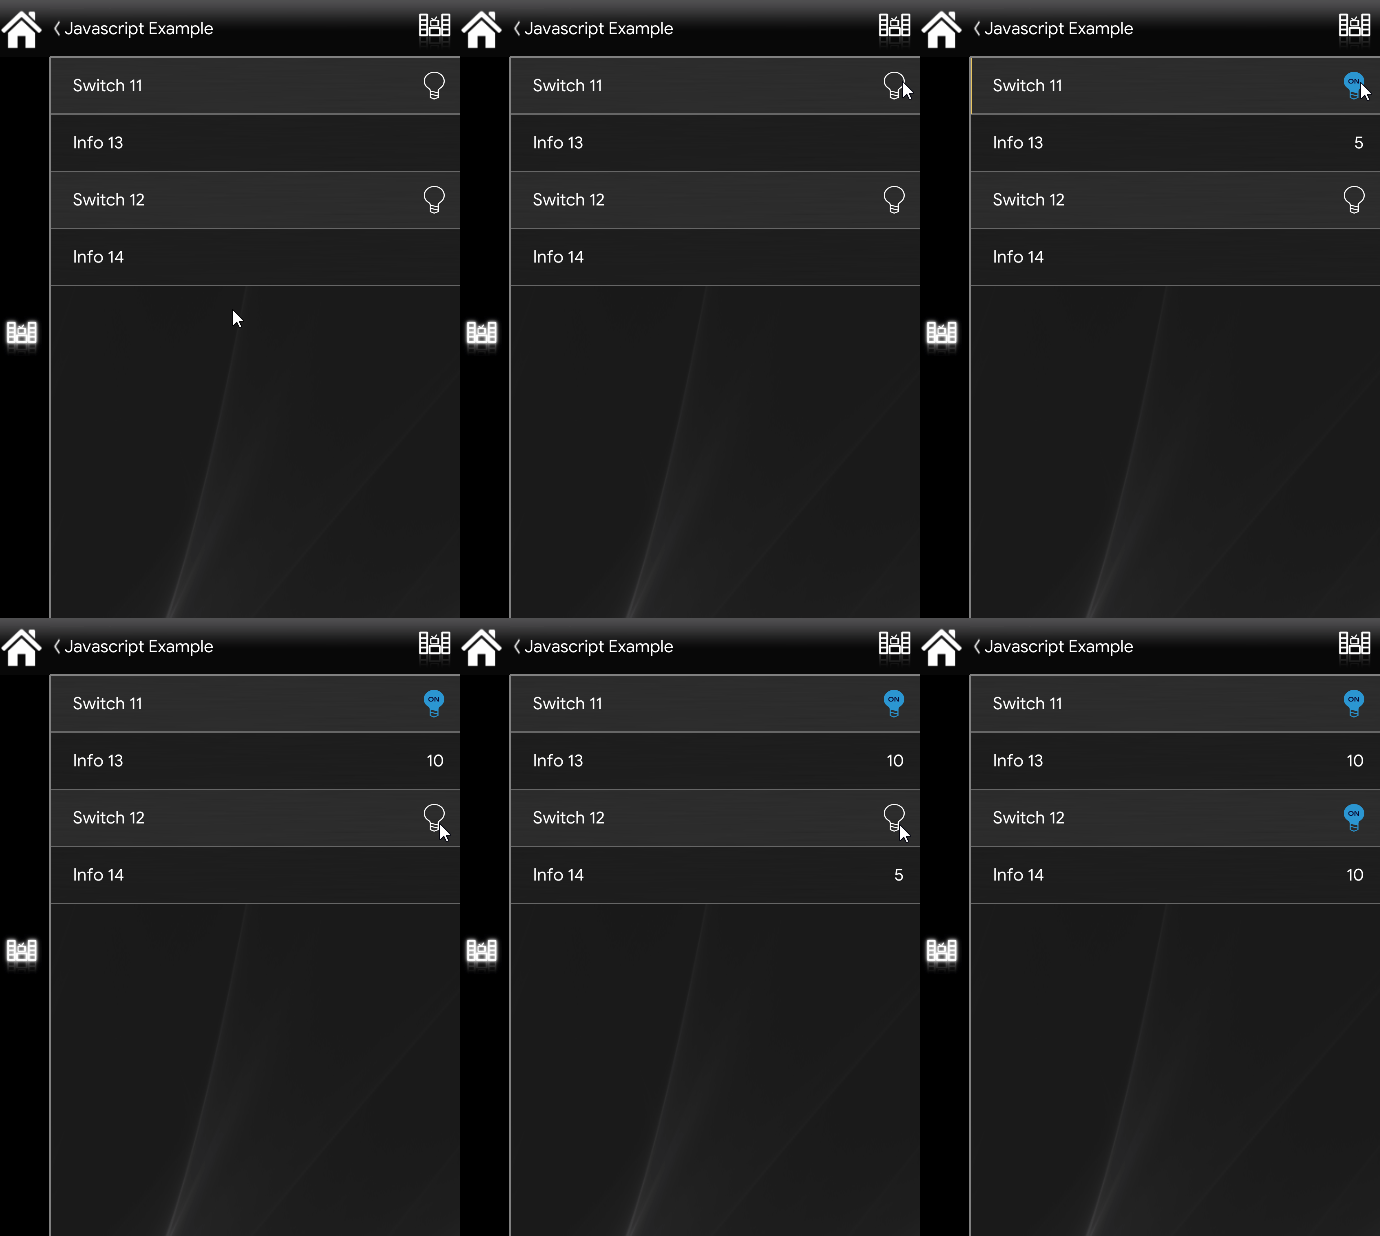
In this example we are using two Switch components with the ID “12” and “13” and two Info components with the ID “14” and “15”. Using a function we will able to increase the first Info value by 1 every click on the Switch the same happens if we click the second Switch with the other Info. A perfect use of functions is when you need to execute some code when something happens. In this case to call the function we have put it inside the method setTrigger(11,”executeWhen12Clicked”) and setTrigger(12,”executeWhen13Clicked”); as you can see the first argument inside the parenthesis is the component that we should increase by 1 (++) the value of the variable a, in the second argument we simply call the function that will, as said before, add 1 to the variable a after clicking the component 12 or 13.
Click here to download the project and test it your self!
EXAMPLE N°6
Click here to download the project and test it your self!
EXAMPLE N°7
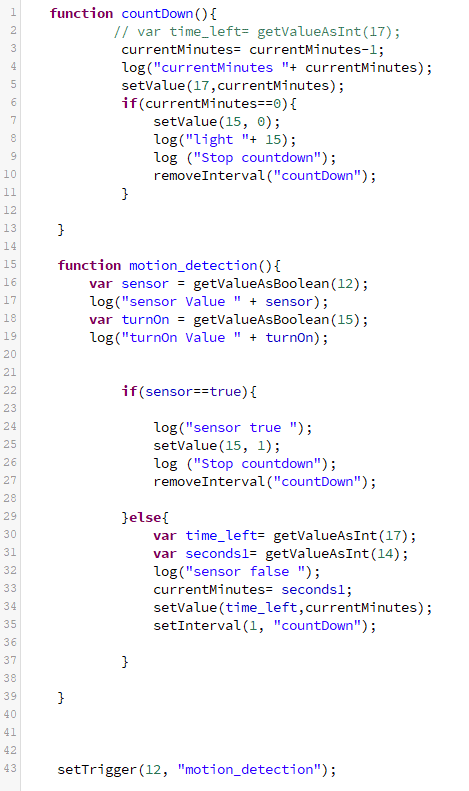
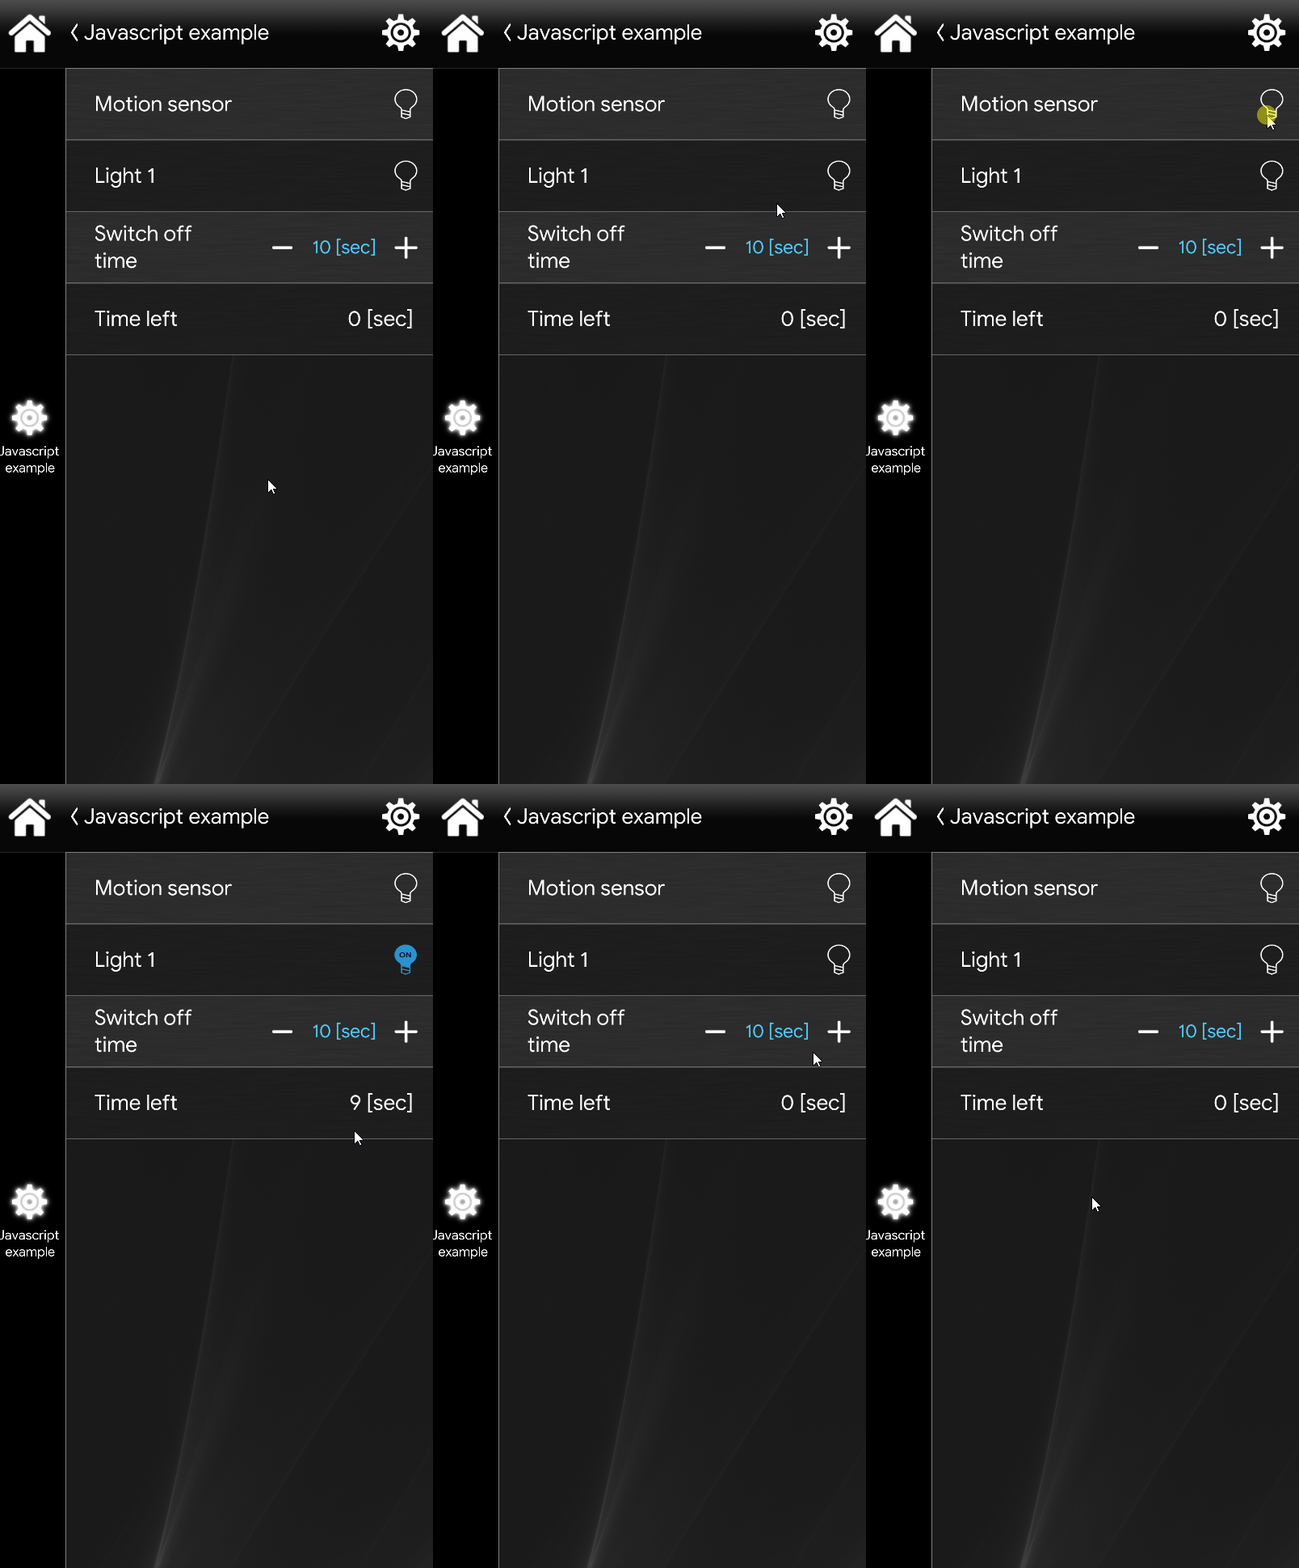
In this example it is explained how to set a time interval to a light when a motion is detected by a motion sensor. The first switch will be our motion sensor with “12” as component ID. The second switch component with “15” as its component ID. The last component we need is the Changeable value with “14” as componet ID, this component will contain the time value.
For further information about this script, consult the full explanatory guide here.
Click here to download the project and test it your self!
EXAMPLE N°8
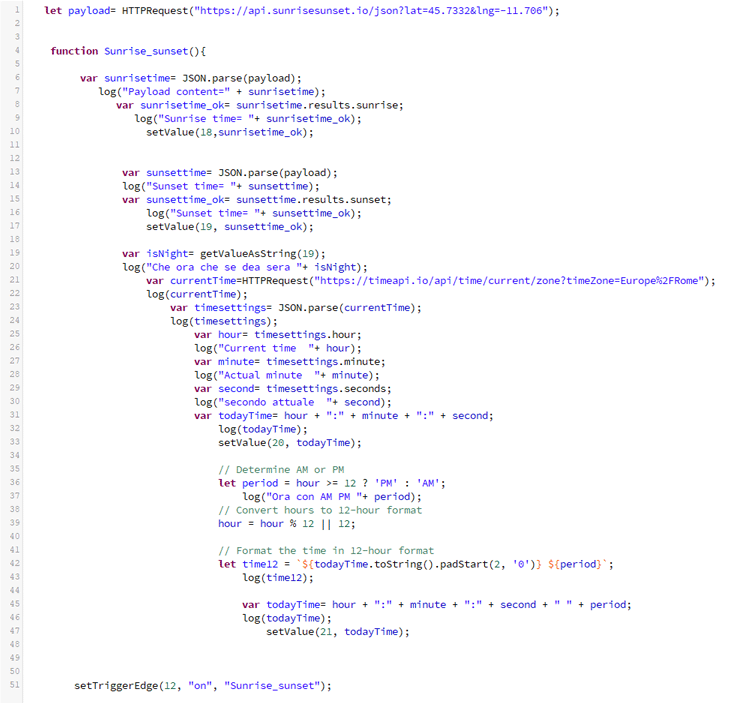
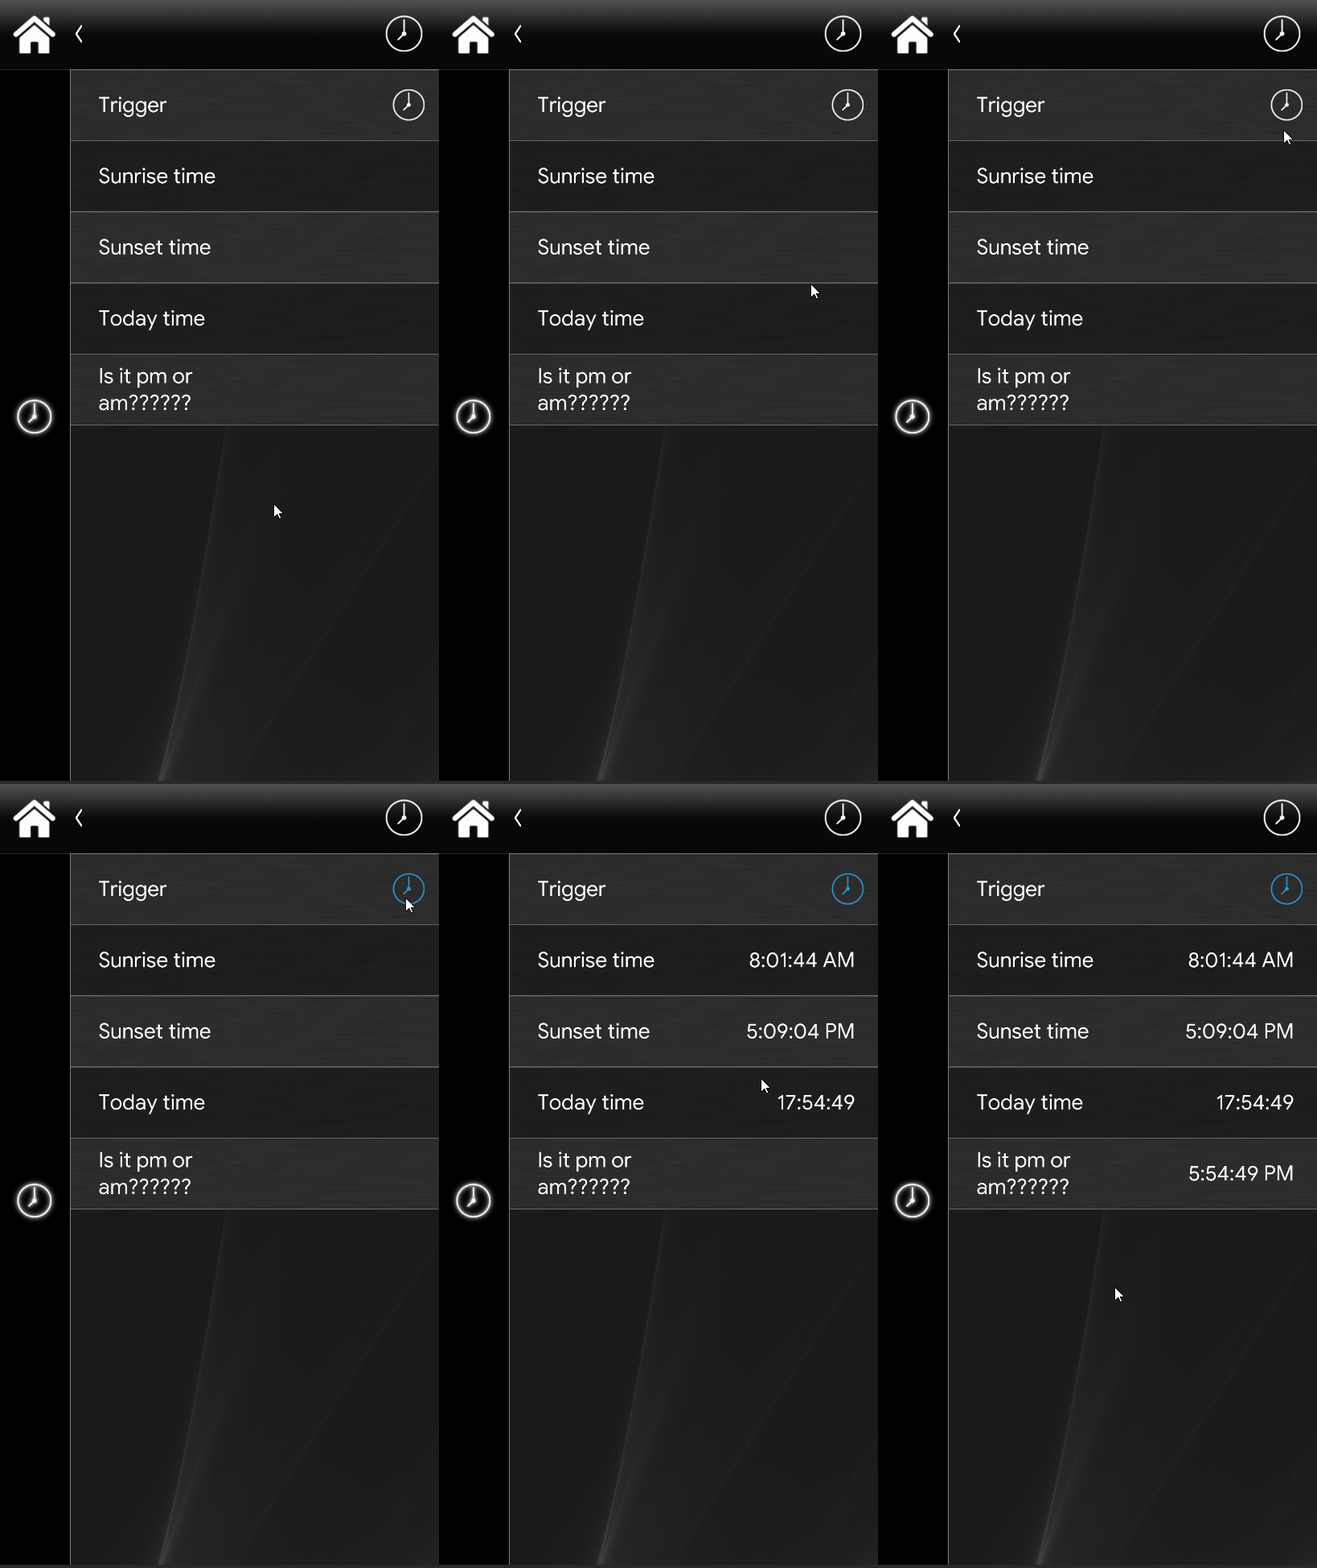
In this example it is explaned how to gather online information about the sunset and Sunrise times and the current to,e from specific coordinates from online APIs through the HTTPrequest method and then finally elaborate the current time and check if it is AM or PM and at the same time transform the time from 24 h clock to 12 h clock.
For further information about this script, consult the full explanatory guide here.
Click here to download the project and test it your self!
EXAMPLE N°9
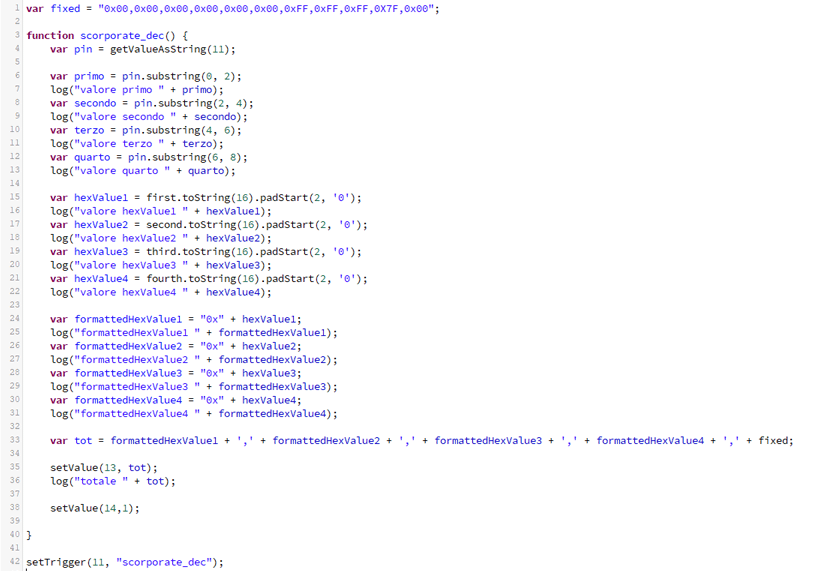
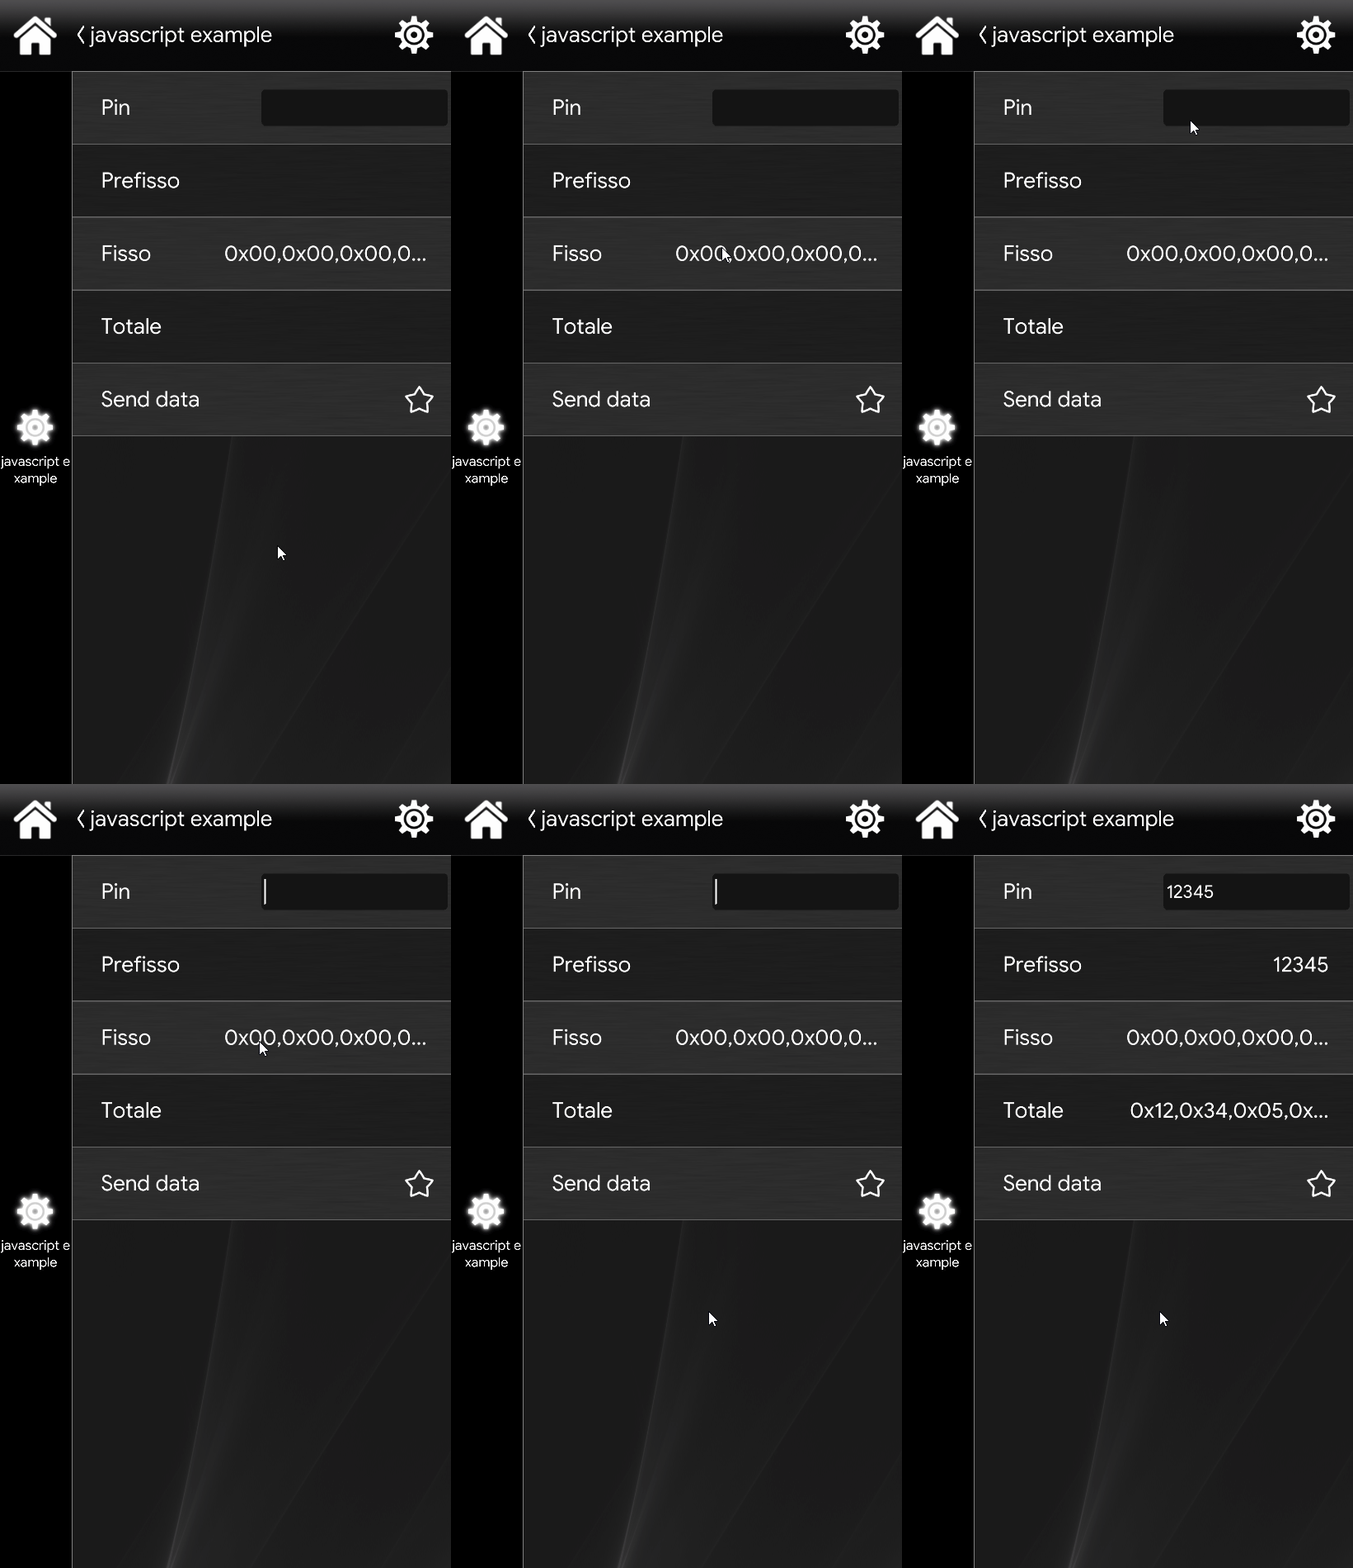
In this example it is explained how to build a script that will process the characters entered from a user through a text entry, then take those characters and transforming the decimal numbers to hexadecimal and finally triggering a scenario that will send the processed characters on the bus.
For further information about this script, consult the full explanatory guide here.
Click here to download the project and test it your self!

