SHELLY PLUS H&T INTEGRATION WITH THE ILEVIA SERVER
INTRODUTION
This Shelly’s device from the second generation of products of the “Plus” generation, allows to have a complete mesure of the temperature and Humidity of the enviroment where the device has been place in. In this guide will be shown how to setup this device with Ilevia.
Shelly’s device web interface configuration
Step 1:
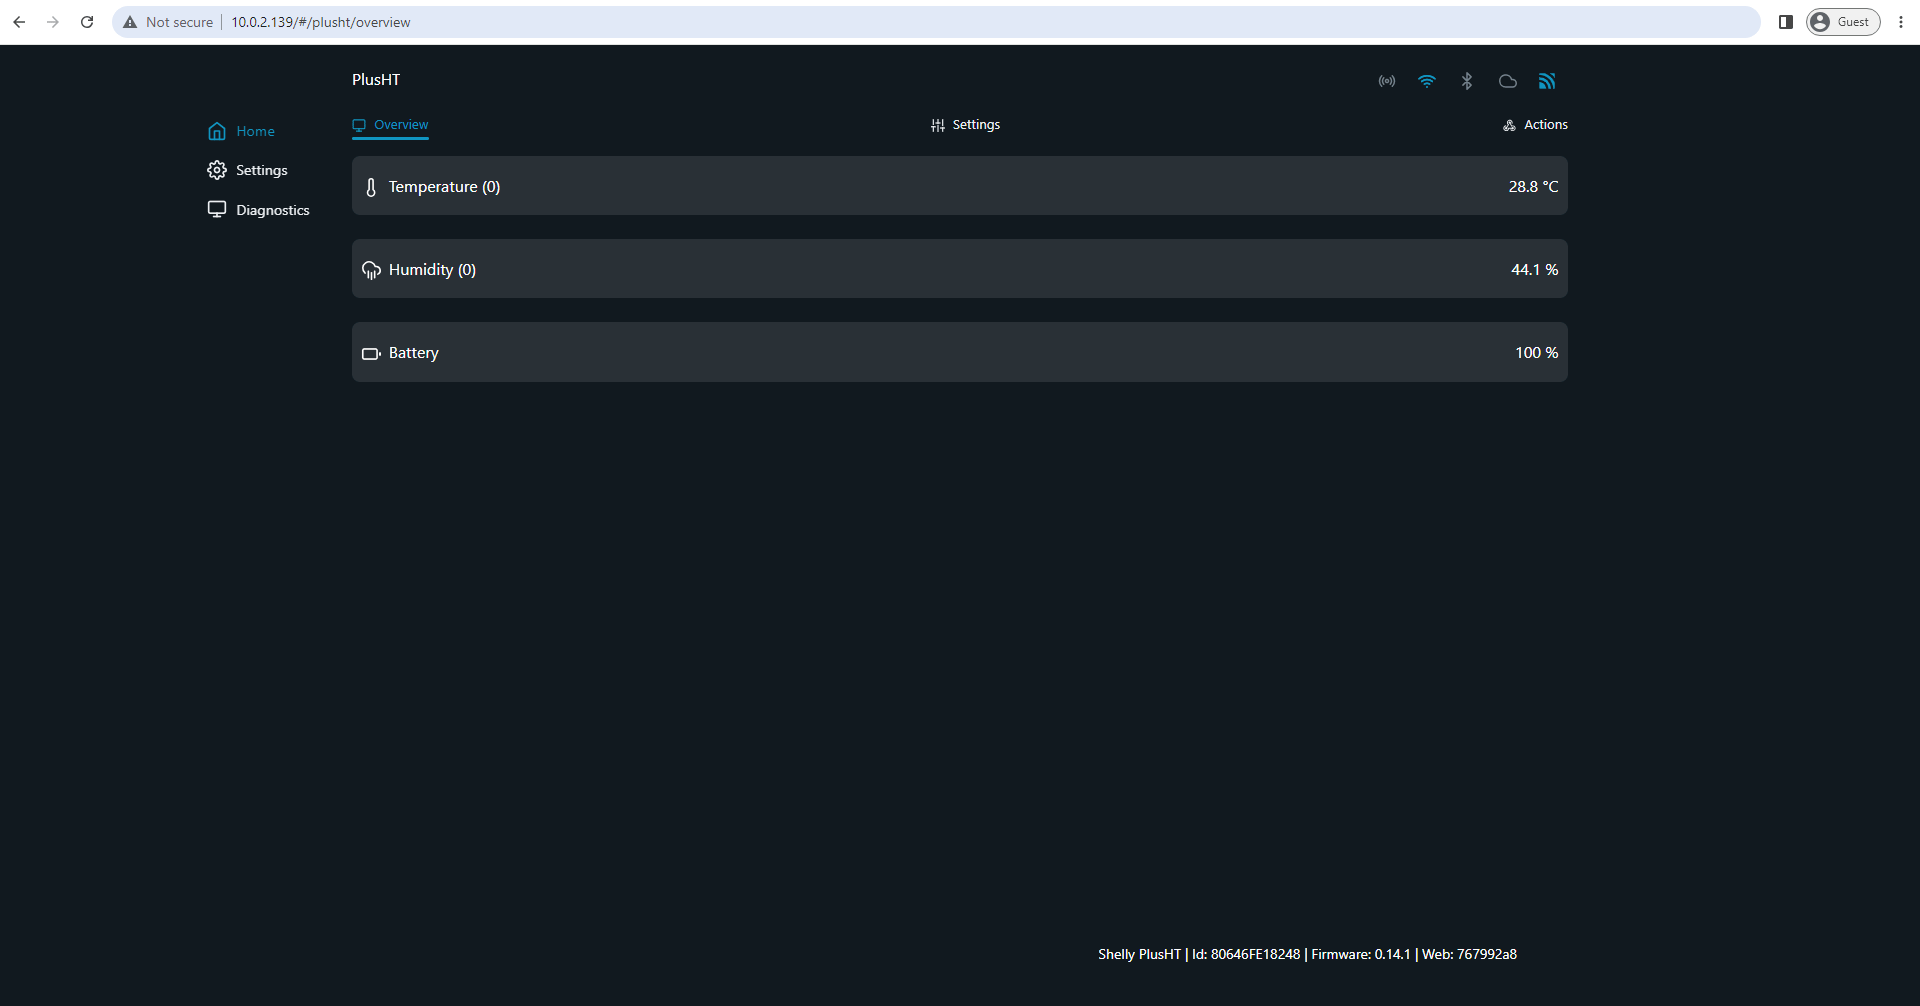
Enter the Shelly’s device web interface by entering its local IP address on the URL bar in your browser.
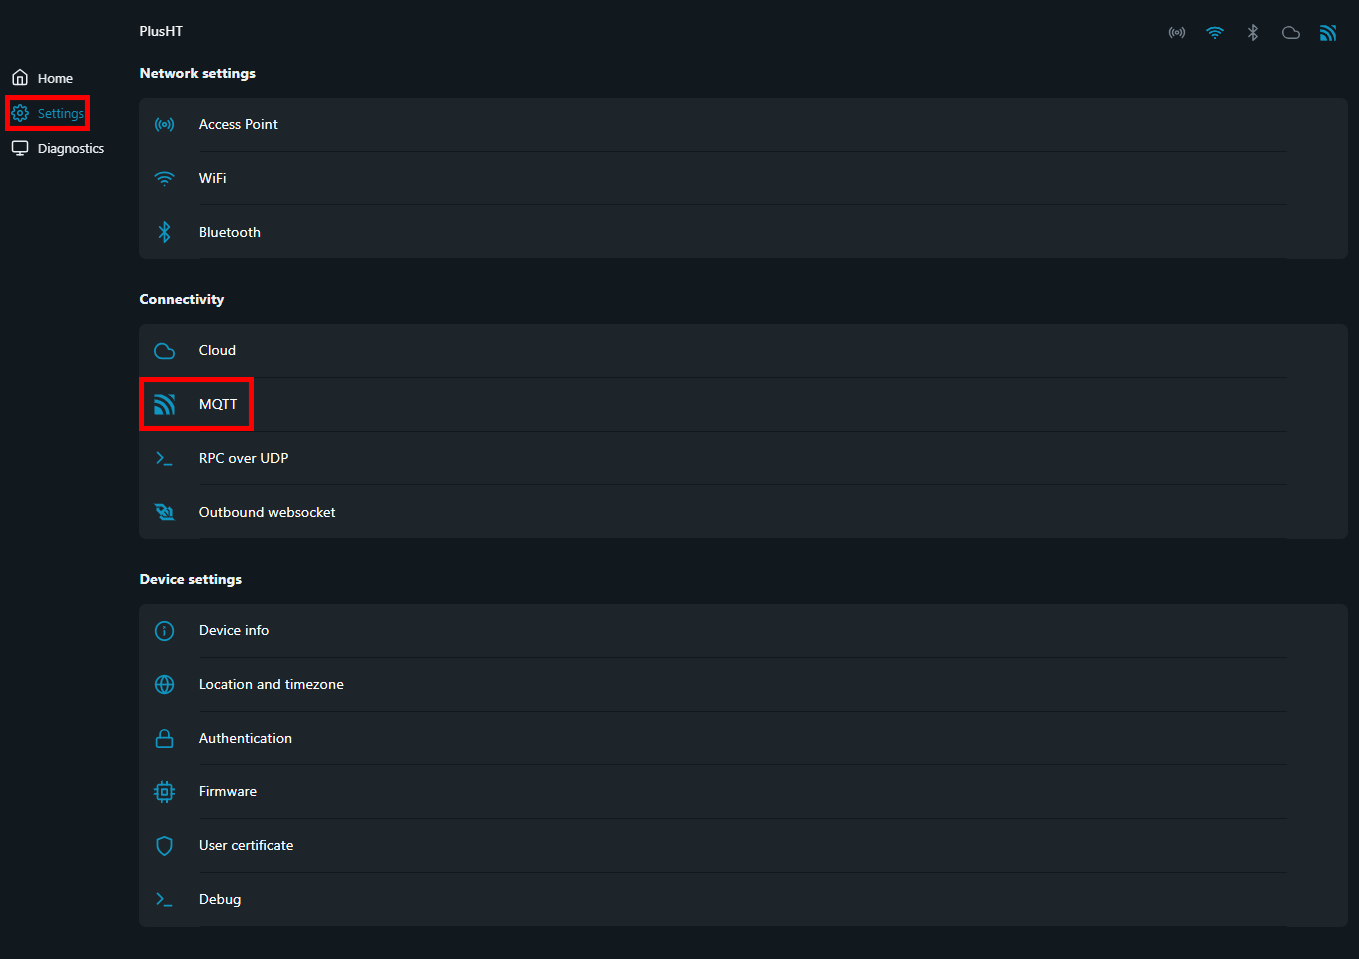
Then eneter the Settings menu and finally enter the MQTT setup menu.
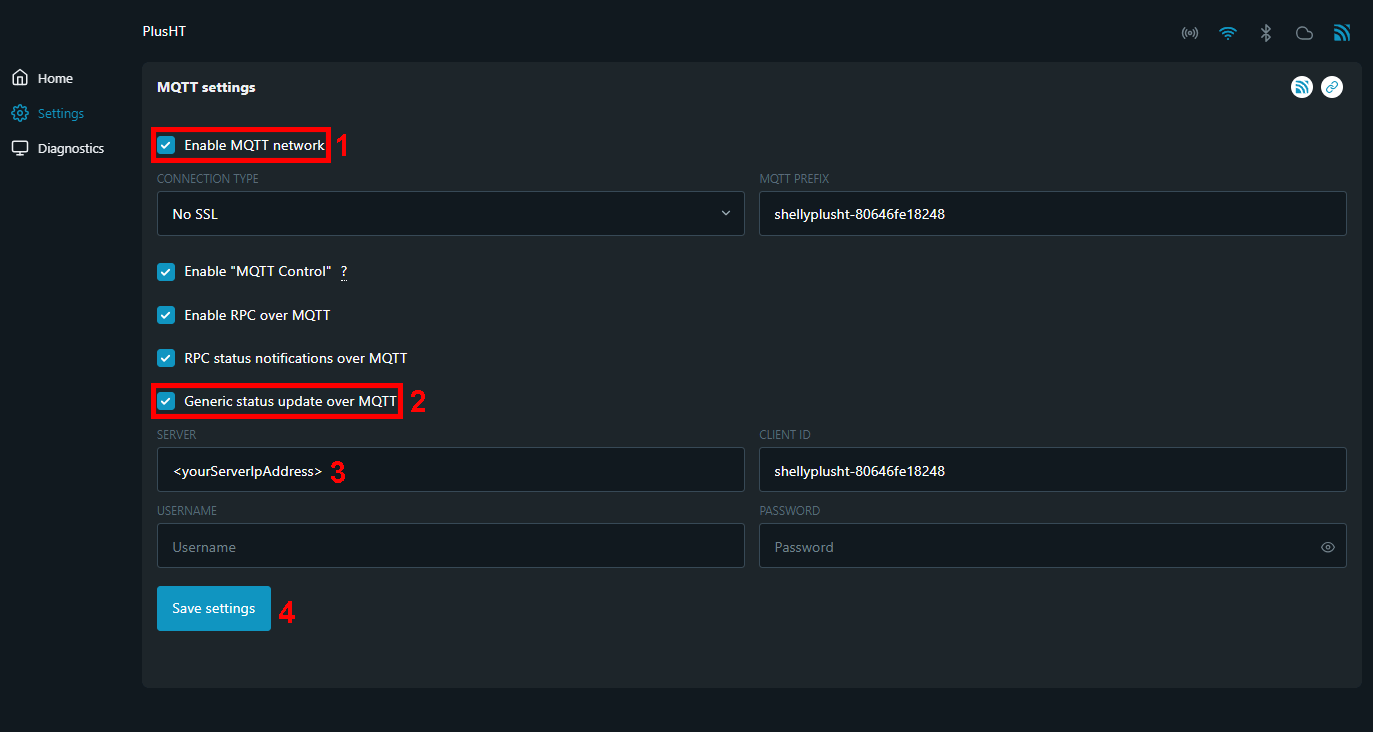
1. Enter the MQTT menu. Check the Enable MQTT network, 2. then Generic status update over MQTT checkboxes.3. Add the IP address of your Ilevia server, where <yourServerIpAddress> must be replaced with your ilevia server IP address. 4. Finally click Save settings and restart the device.
EVE Manager project configuration
Step 4:
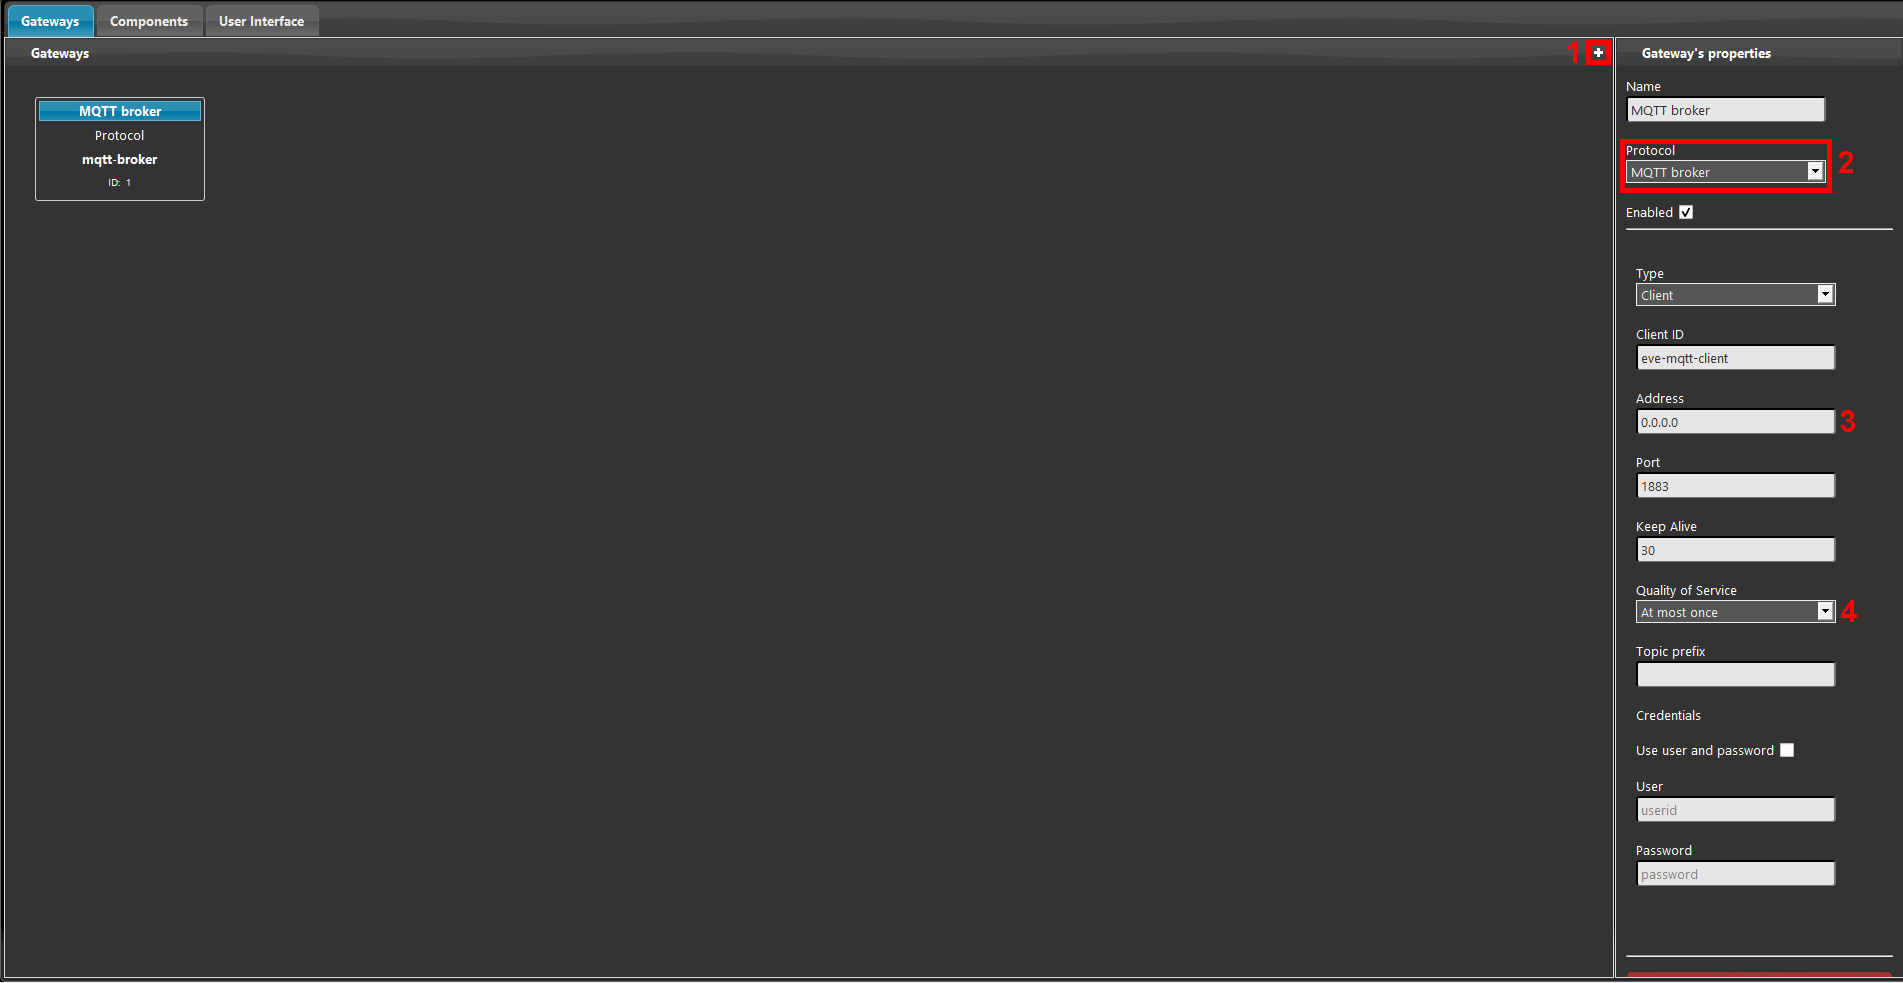
Enter the Gateway tab in EVE Manager and add a new MQTT gateway. 1. Add a new gateway by clicking the “+” icon on the top right of the screen. 2. Then select the MQTT gateway from the Protocol dropdown within the gateway properties. 3.In the Address text field insert “localhost” as the IP address. 4. Finally select exactly once as QoS setting.
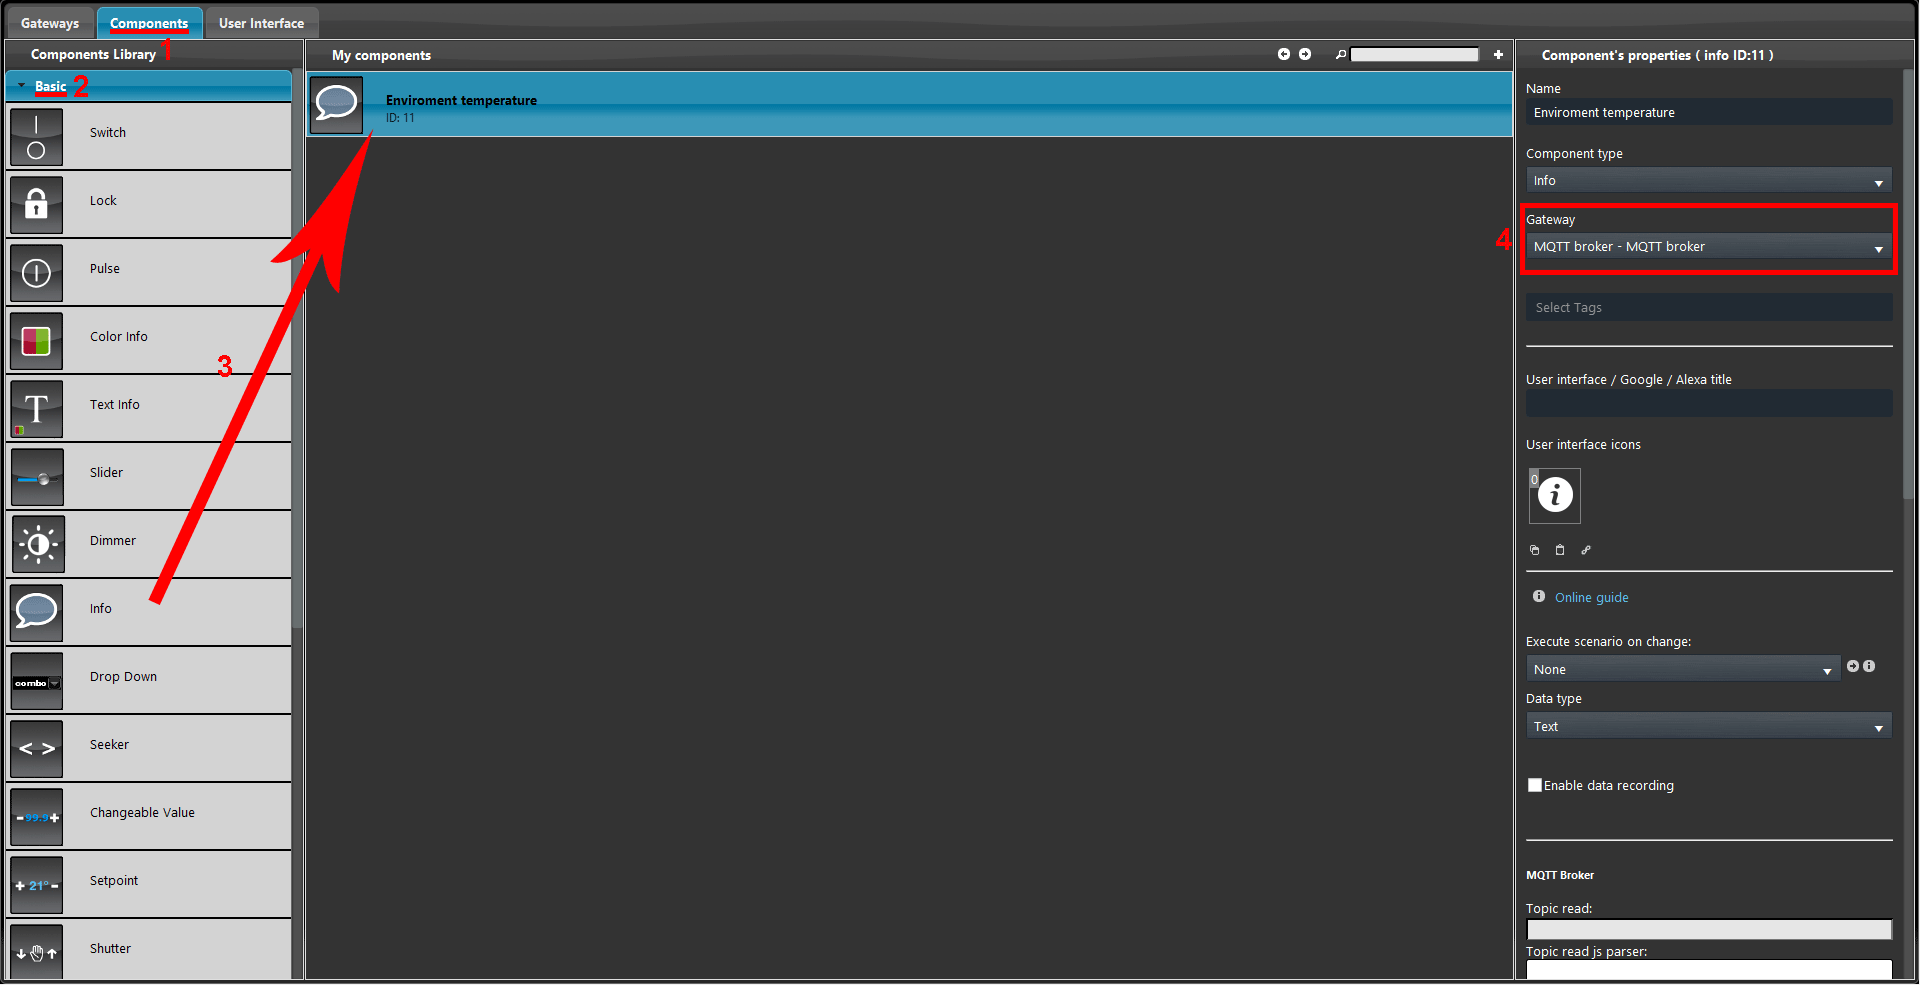
1. Move into the Component tab of EVE Manager and 2. open the Basic drop down menu within the Components library on the left hand side of the screen, 3. then add an Info component.
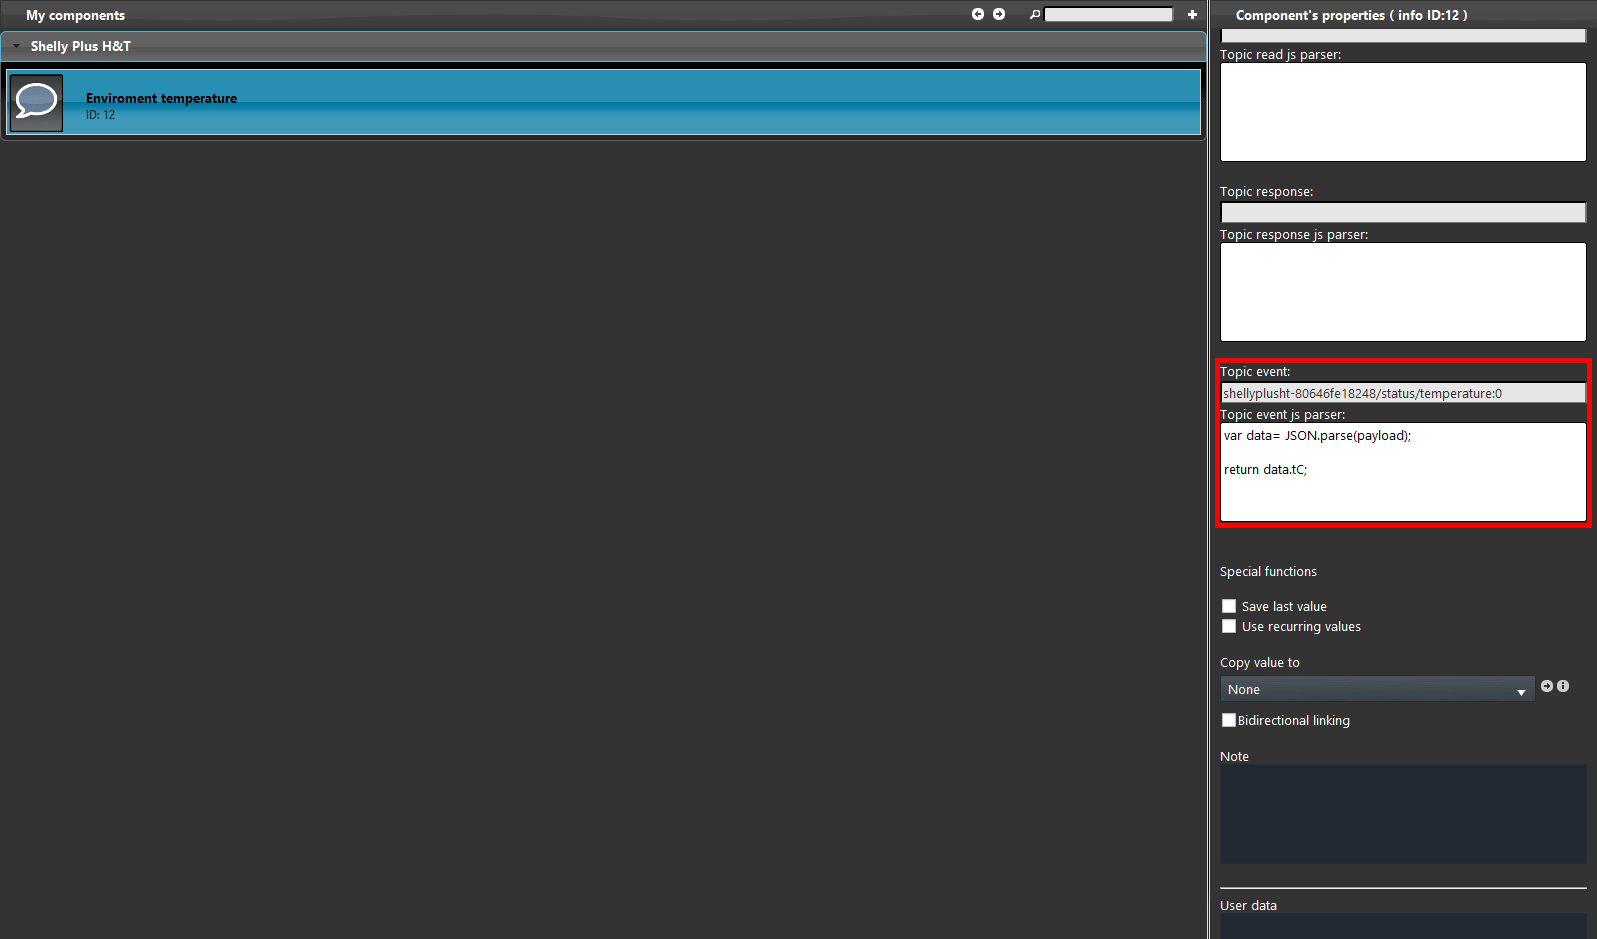
Make sure the component has MQTT as gateway selected in its properties. The topic that we will setup is the Event topic. This topic is used to receive the message from the Shelly device. This component will receive the Temperature value coming from the Shelly device through the following Topic: shellyplusht-<device-ID>/status/temperature:0 where <device-ID> must be replaced with your shelly’s device ID. Finally add the script to parse the payload coming from the Shelly device.
Click the following link to consult the topic and the script configuration.
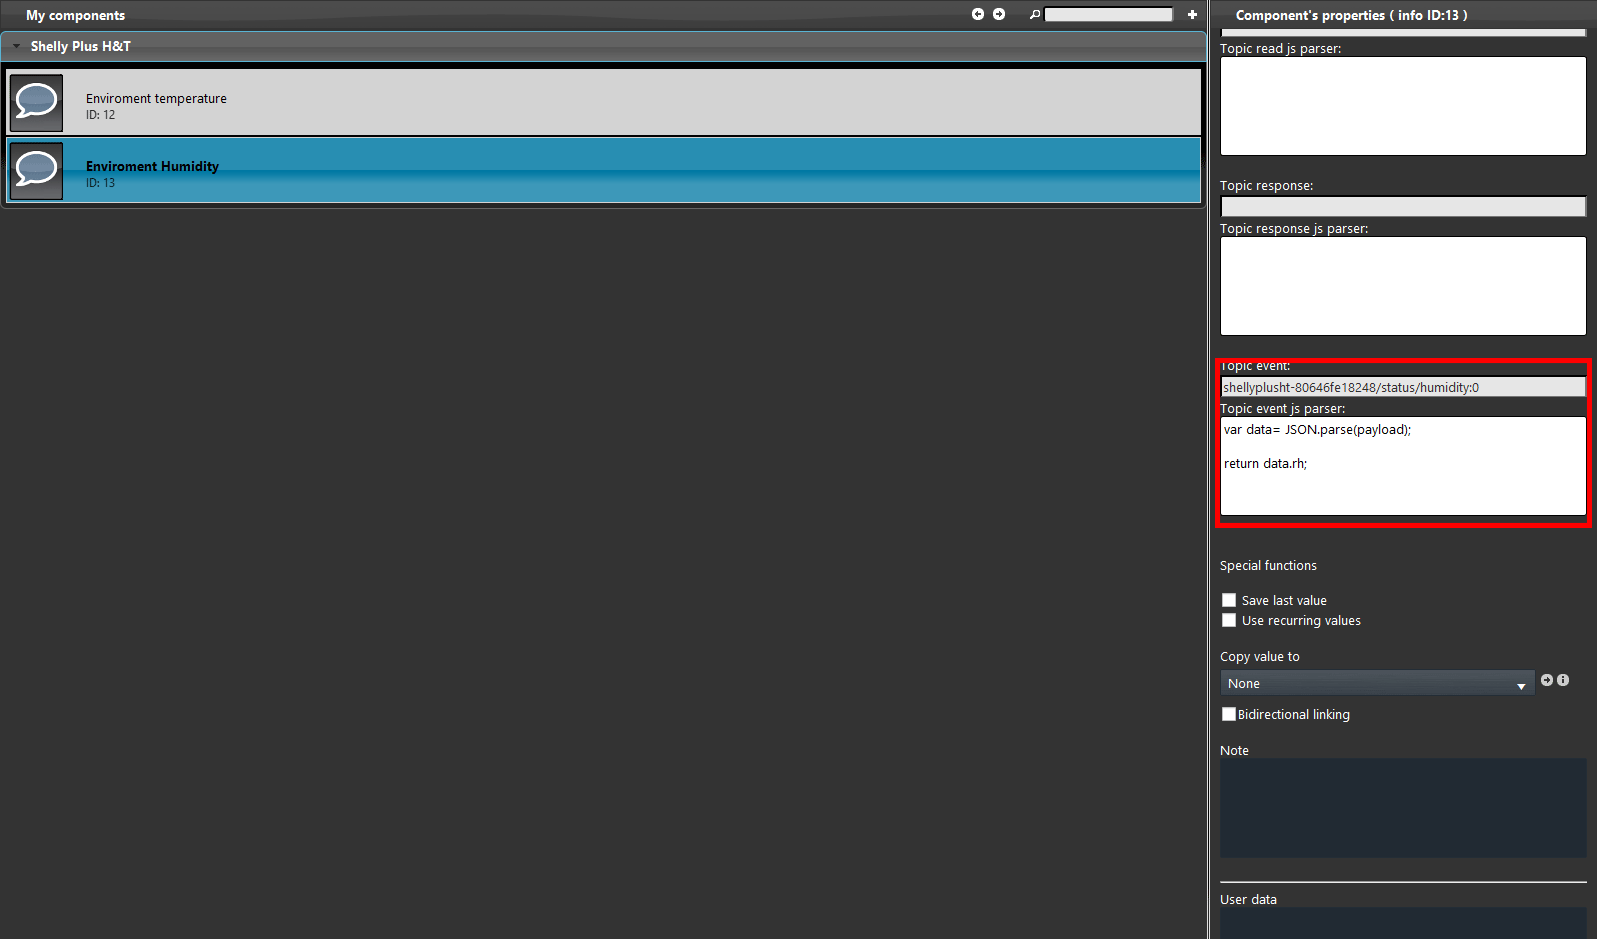
Add a second Info component into the project. This component will receive the humidity value coming from the Shelly device through the following Topic: shellyplusht-<device-ID>/status/humidity:0 where <device-ID> must be replaced with your shelly’s device ID. Finally add the script to parse the payload coming from the Shelly device.
Click the following link to consult the topic and the script configuration.
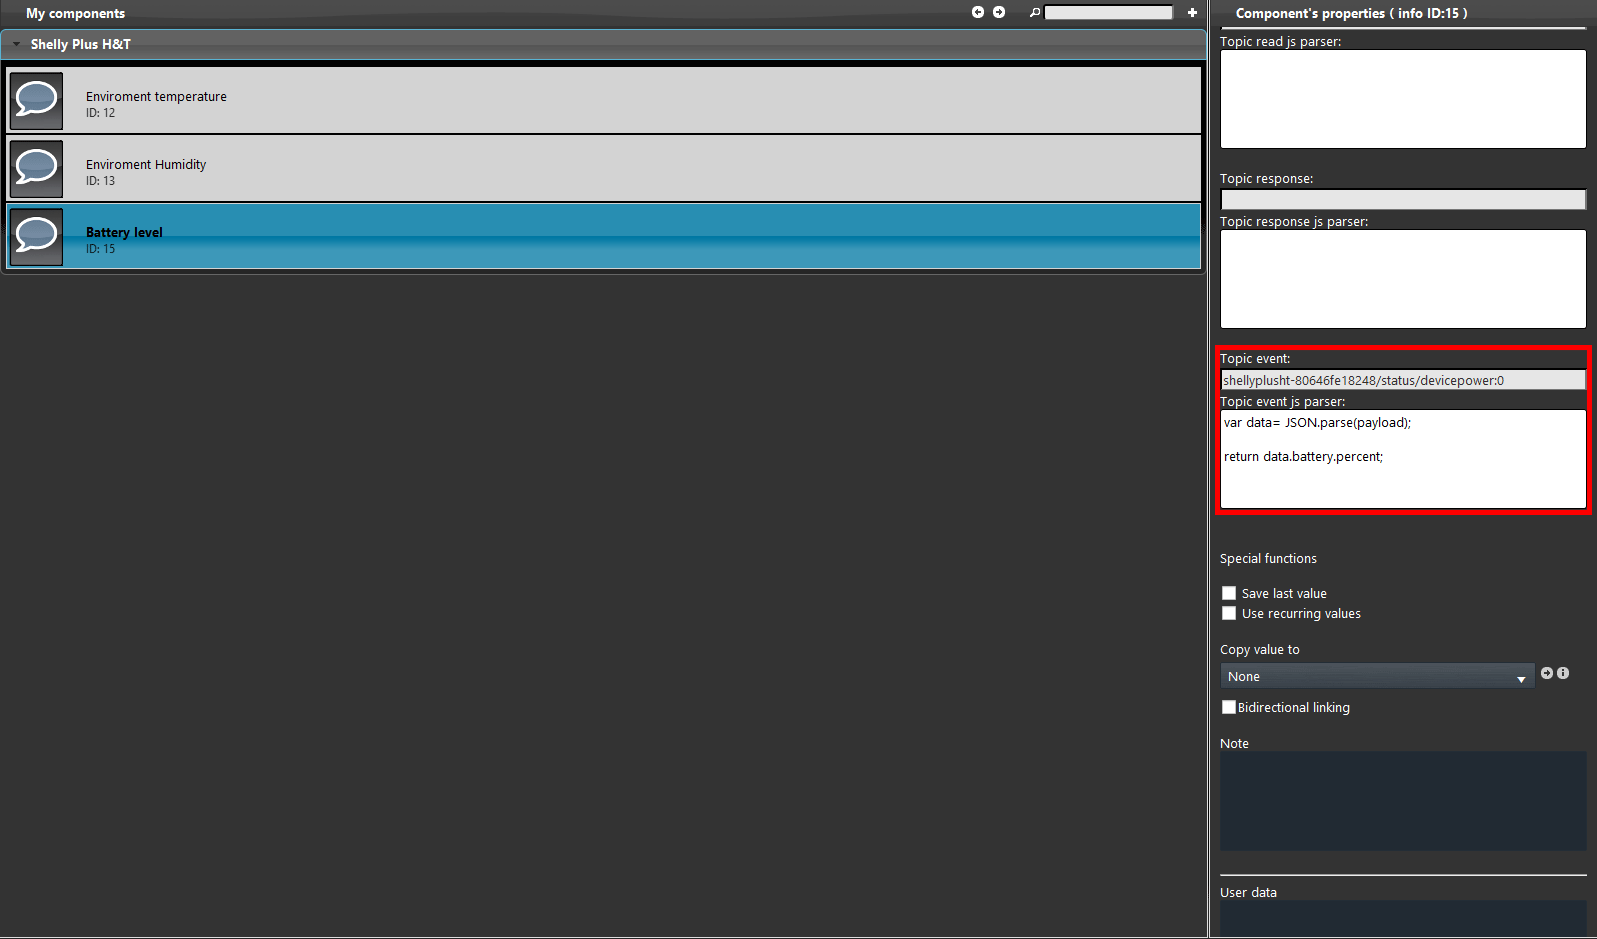
Add a third Info component into the project. This component will receive the battery level percentage coming from the Shelly device through the following Topic: shellyplusht-<device-ID>/status/devicepower:0 where <device-ID> must be replaced with your shelly’s device ID. Finally add the script to parse the payload coming from the Shelly device.
Click the following link to consult the topic and the script configuration.
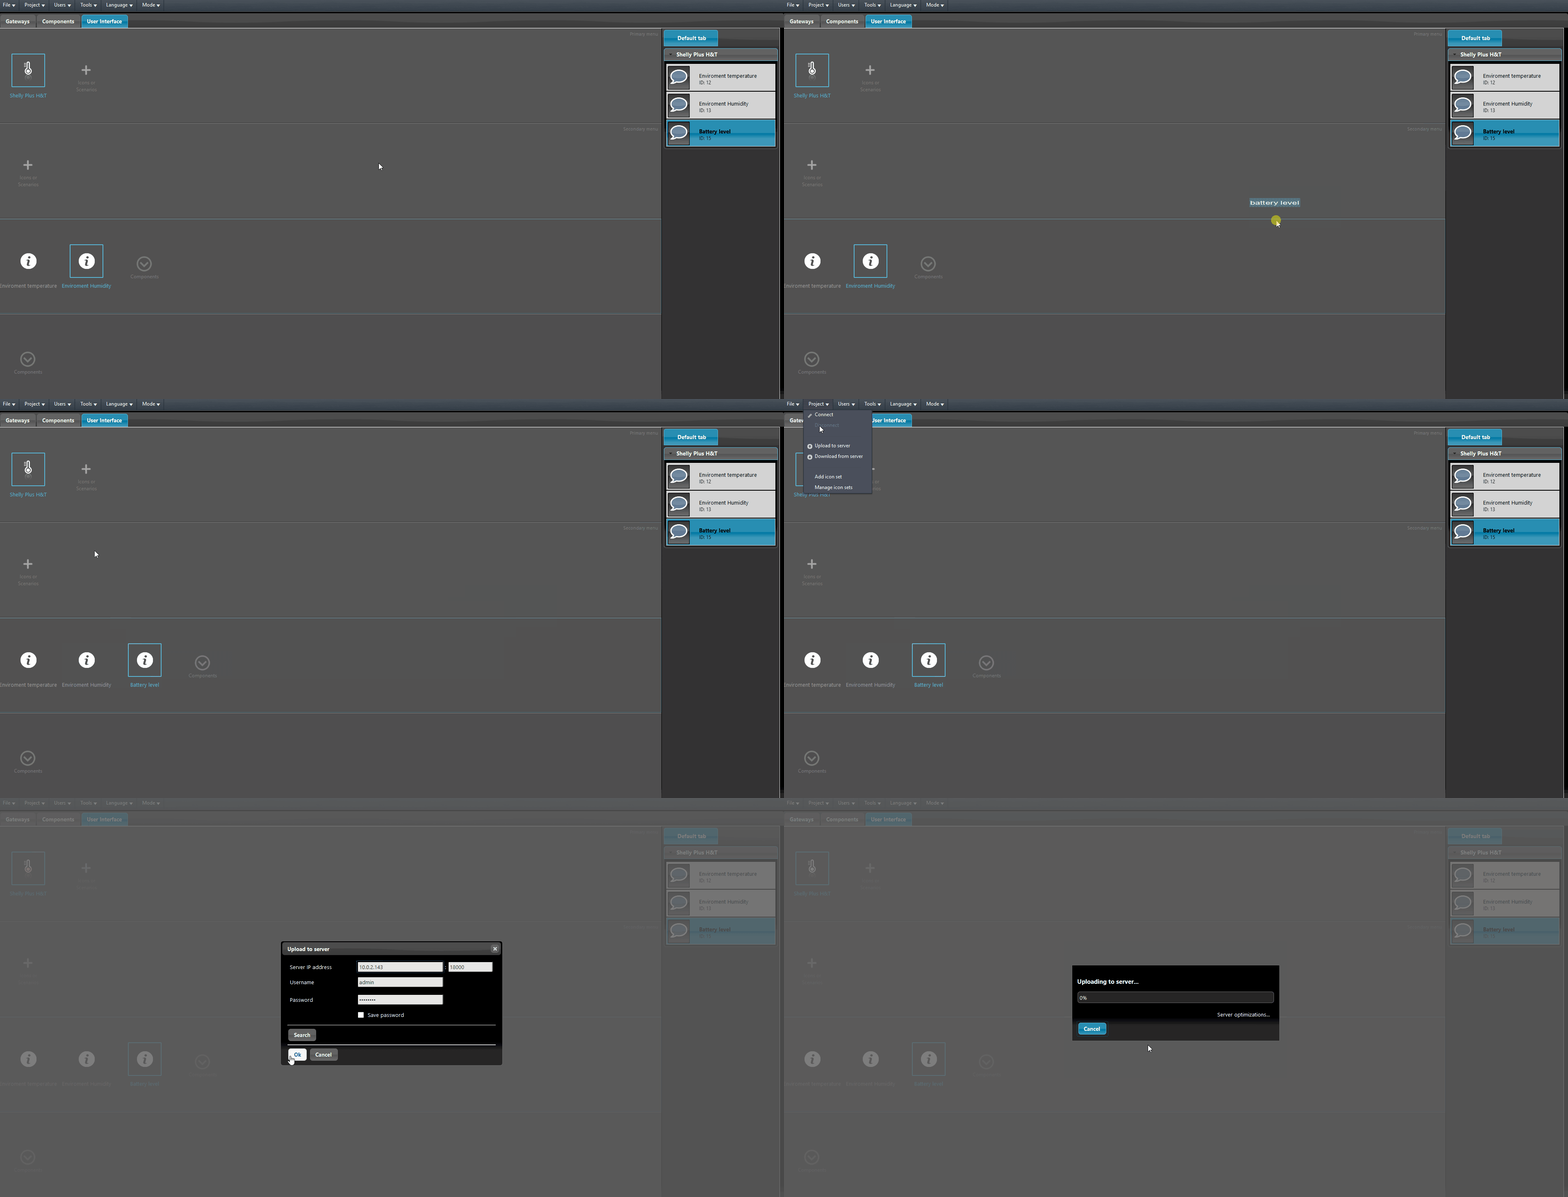
Finally add the components into the User interface and upload the project to the server.
INTERFACE VISUALIZATION
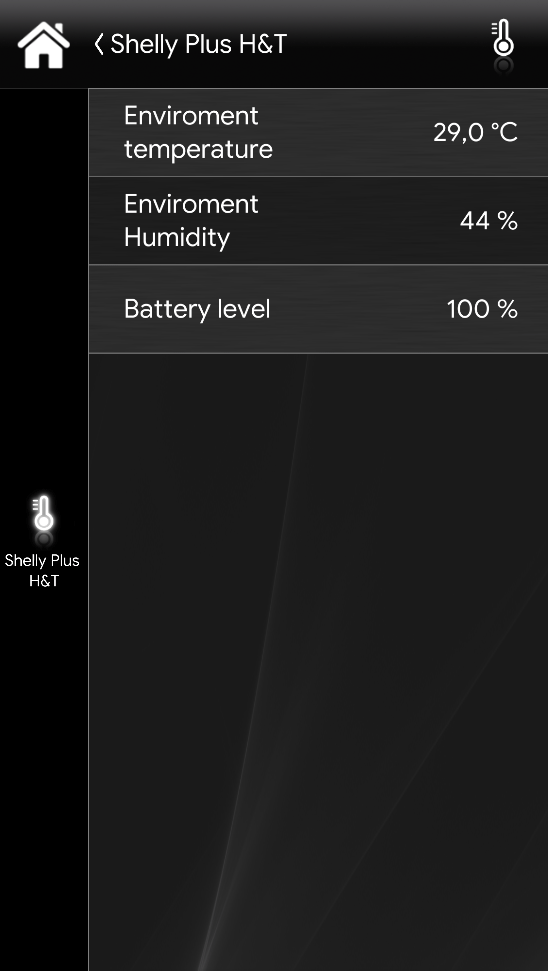
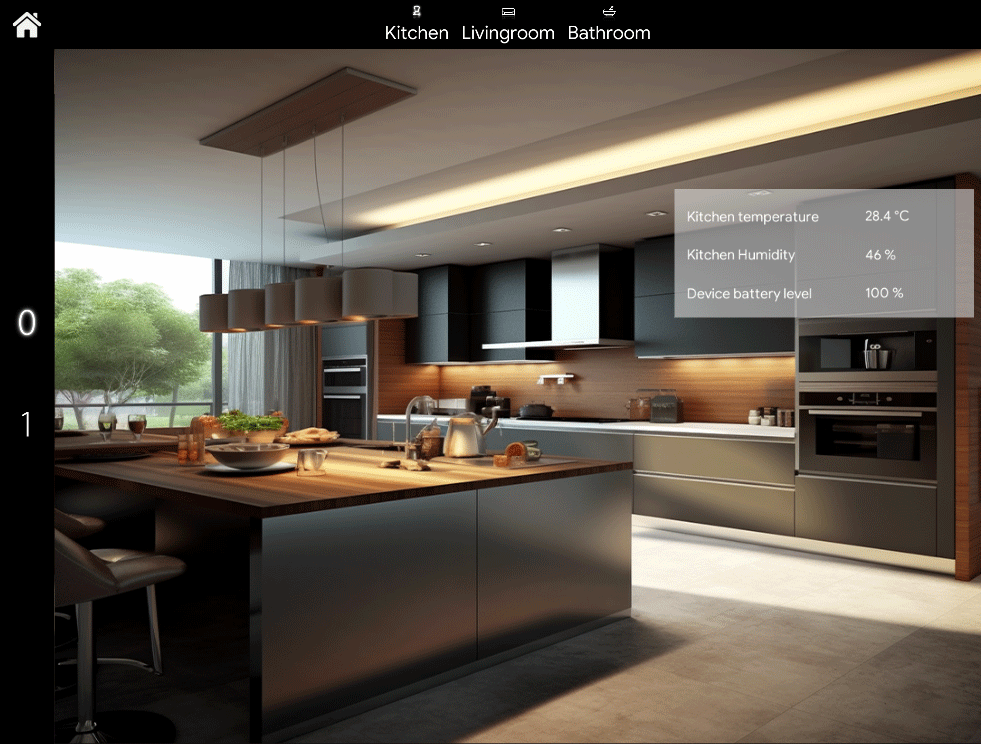
This is an example of how the component could be displayed in both type of interfaces (Classic, Map).

