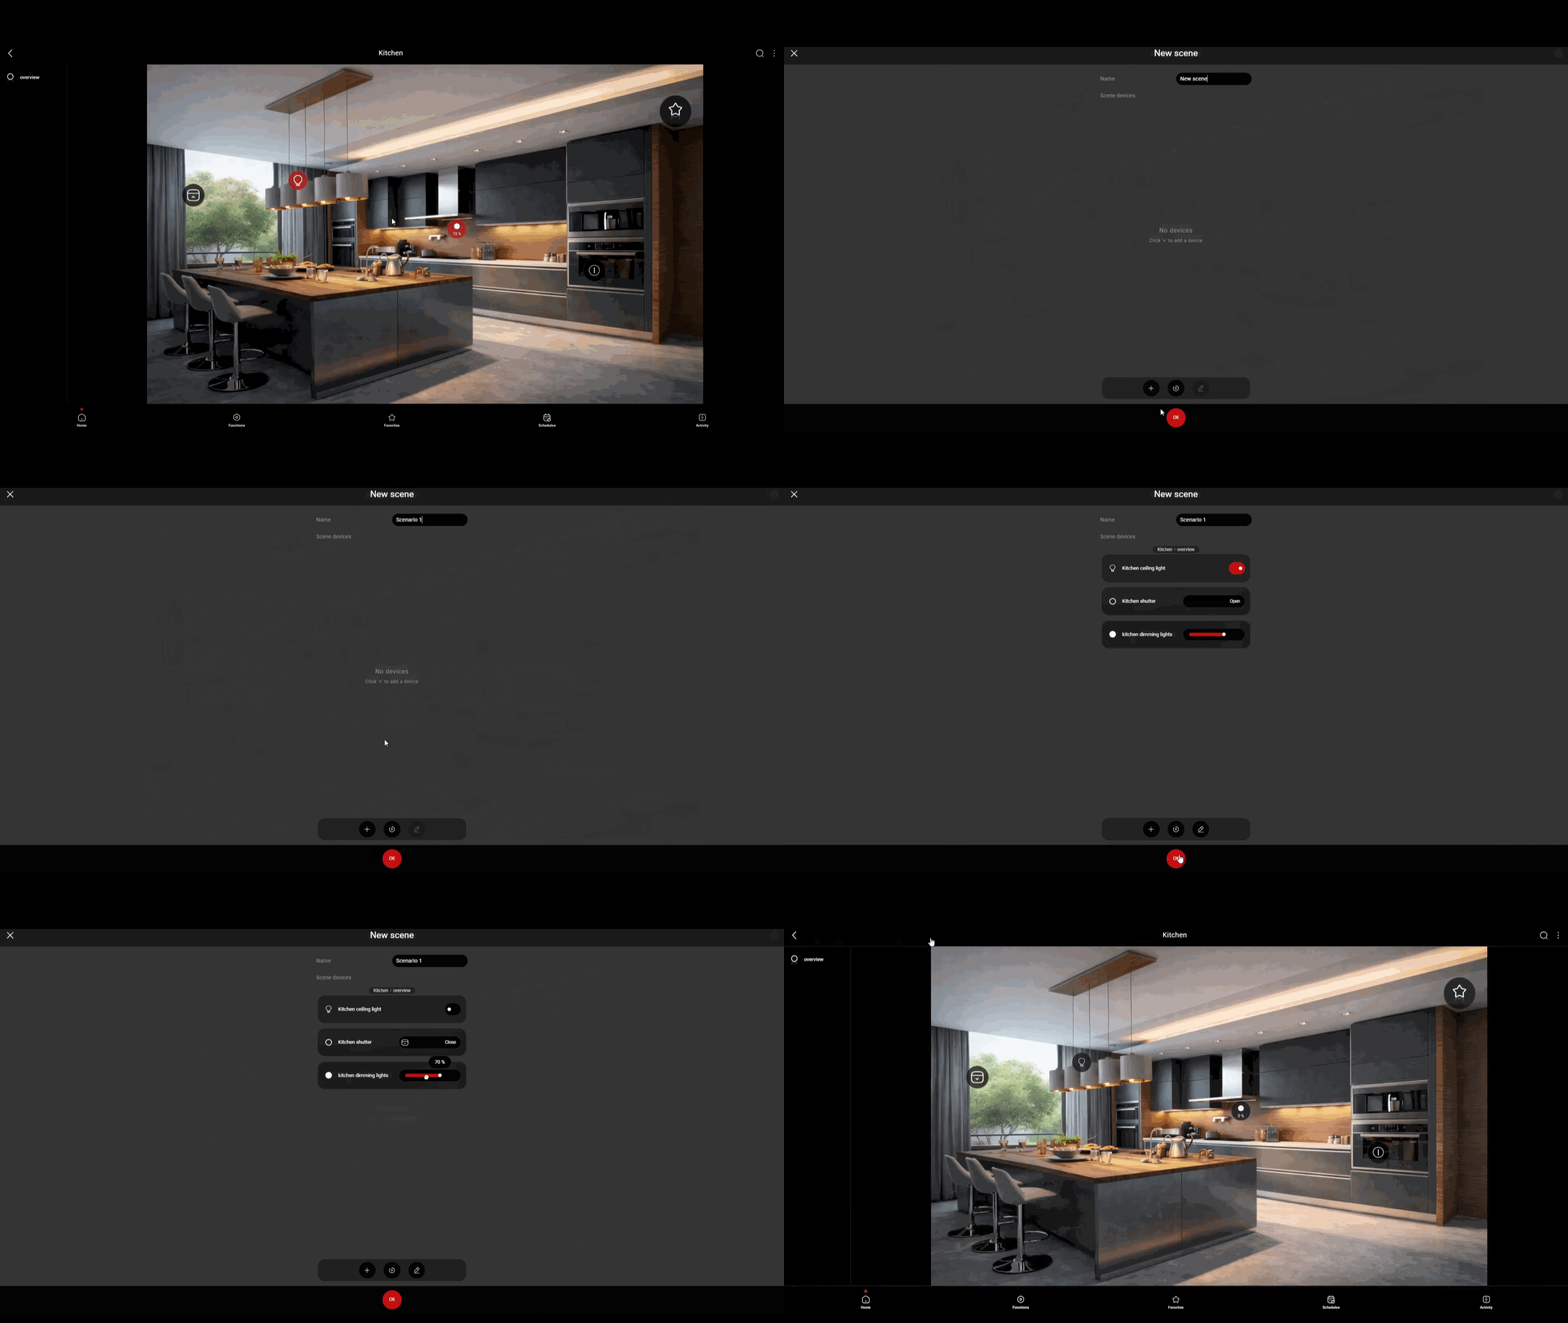
IN-APP SCENARIO
INTRODUCTION
The Ilevia In-App Scenarios feature allows you to create and manage custom user-defined scenarios directly within the application. Designed to be intuitive and quick to configure, it enables installers and users to automate common actions and personalize system behavior without complex programming. With just a few steps, custom scenarios can be created, edited, and deployed, providing a fast and flexible way to tailor the system to specific needs.
Ilevia control In-App scenario configuration (Classic interface only)
Sign in to your Ilevia Control account.
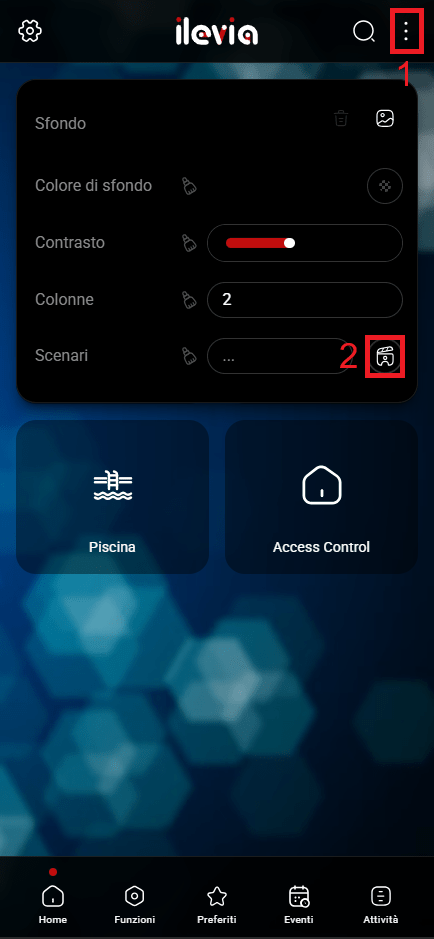
1. Then click the three-dot menu in the top-right corner of the screen.
2. Now, to create a new In-app scenario click on the Scenario icon.
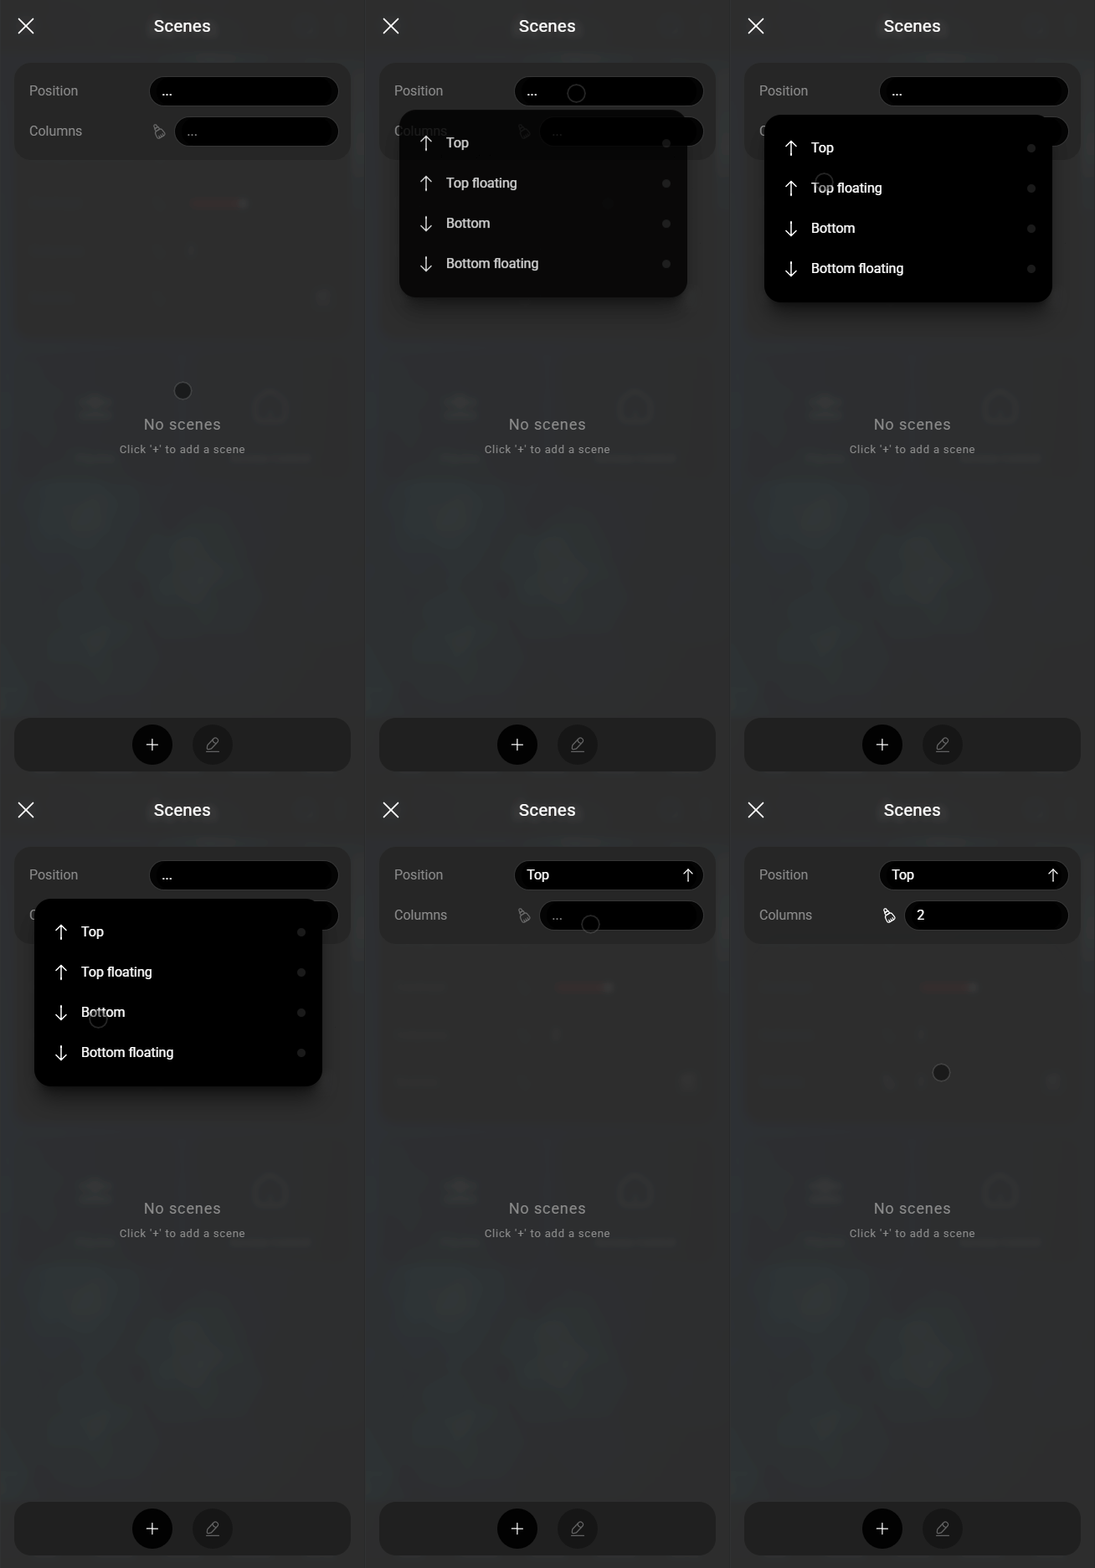
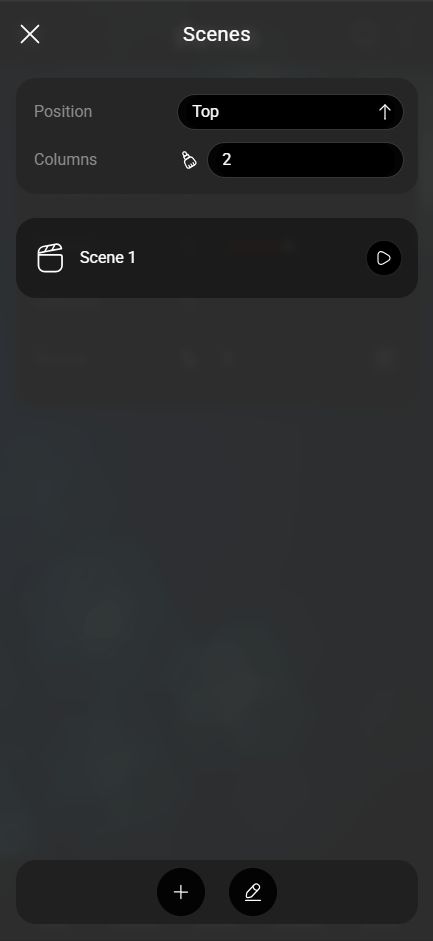
From the top menu, you can choose the preferred position of the In-App Scenario icon within the interface. In the Columns menu, you can select the number of columns used to display the In-App Scenarios.
Click the + icon at the bottom center of the screen to create a new scenario. Configure the scenario by defining its structure, then click Confirm to apply the configuration.
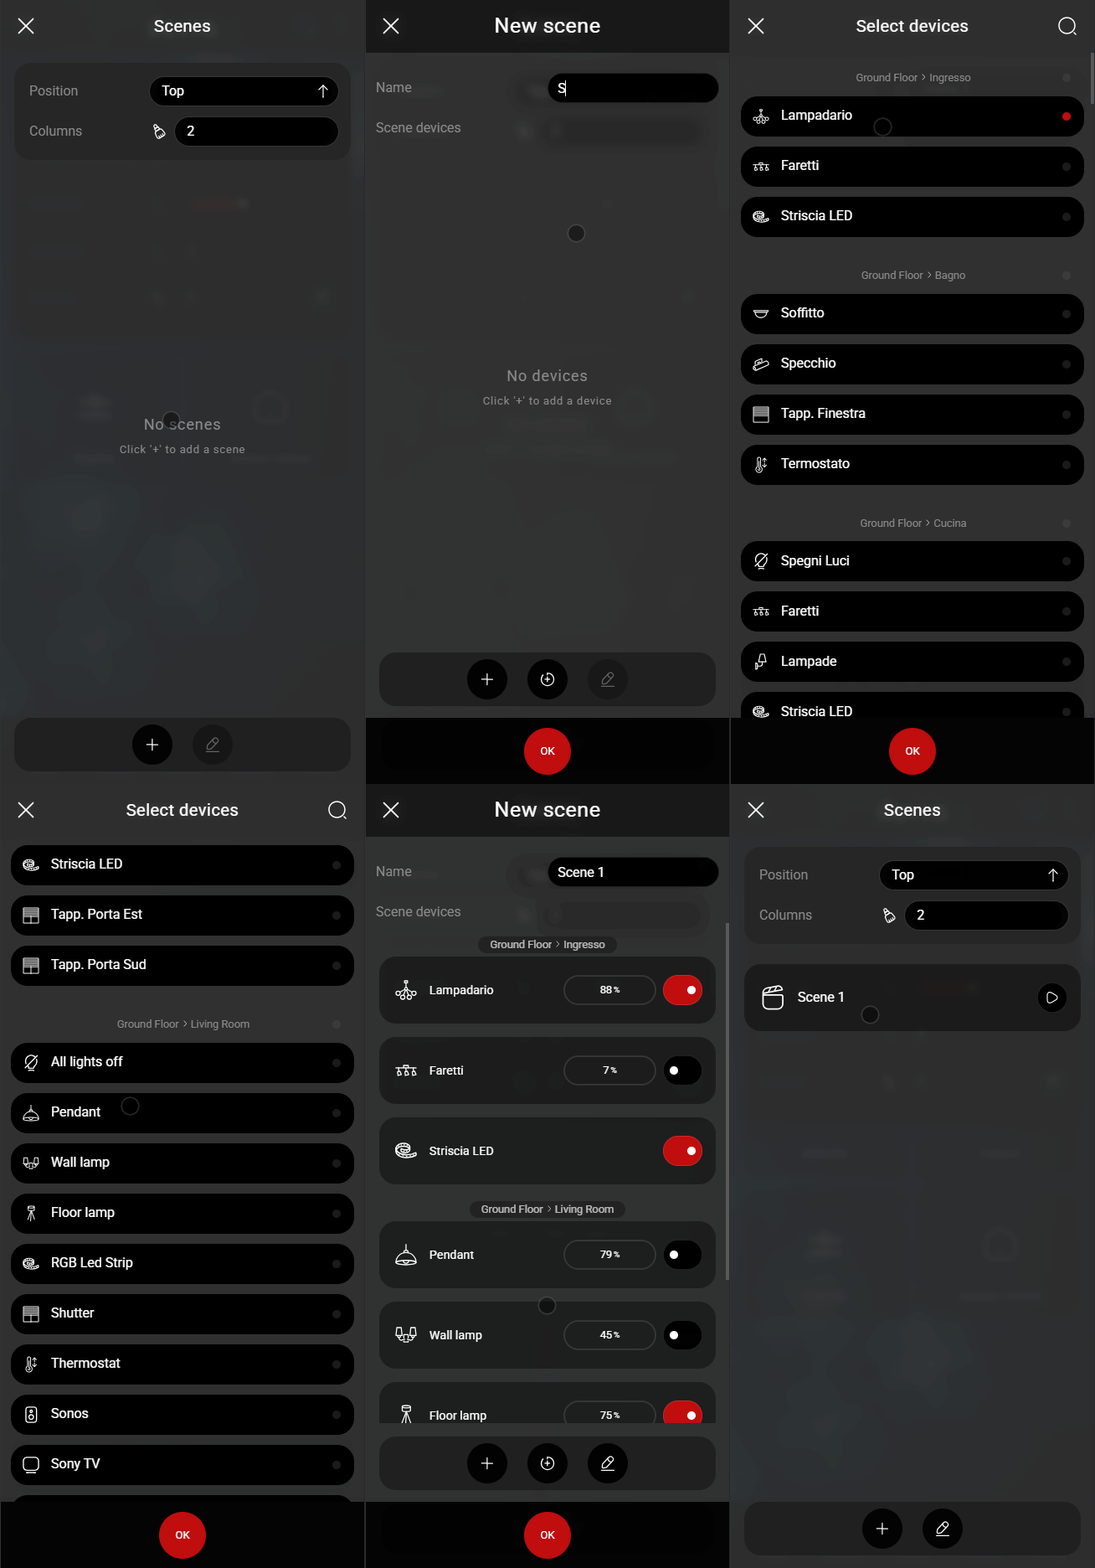
You can view the list of scenarios in the center of the screen within the In-App Scenario setup menu.
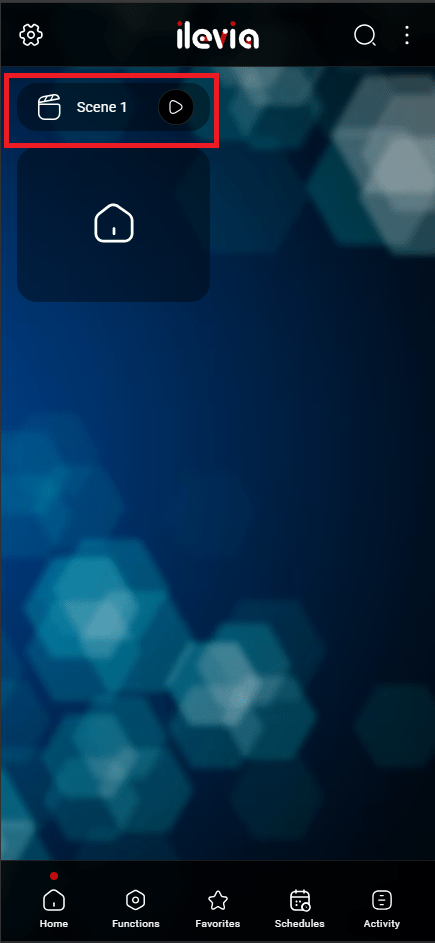
Final result
Once the configuration is complete, the In-App Scenarios will be displayed in the location selected in Step 2.1.
In App Scenario Ilevia Manager Component (Map interface only)
In this part of the guide it is explained how to setup the In-App Scenario for the Ilevia’s Map User interface.
Download and open the latest version of the Ilevia’s configuration software Ilevia Manager from the Ilevia’s website.
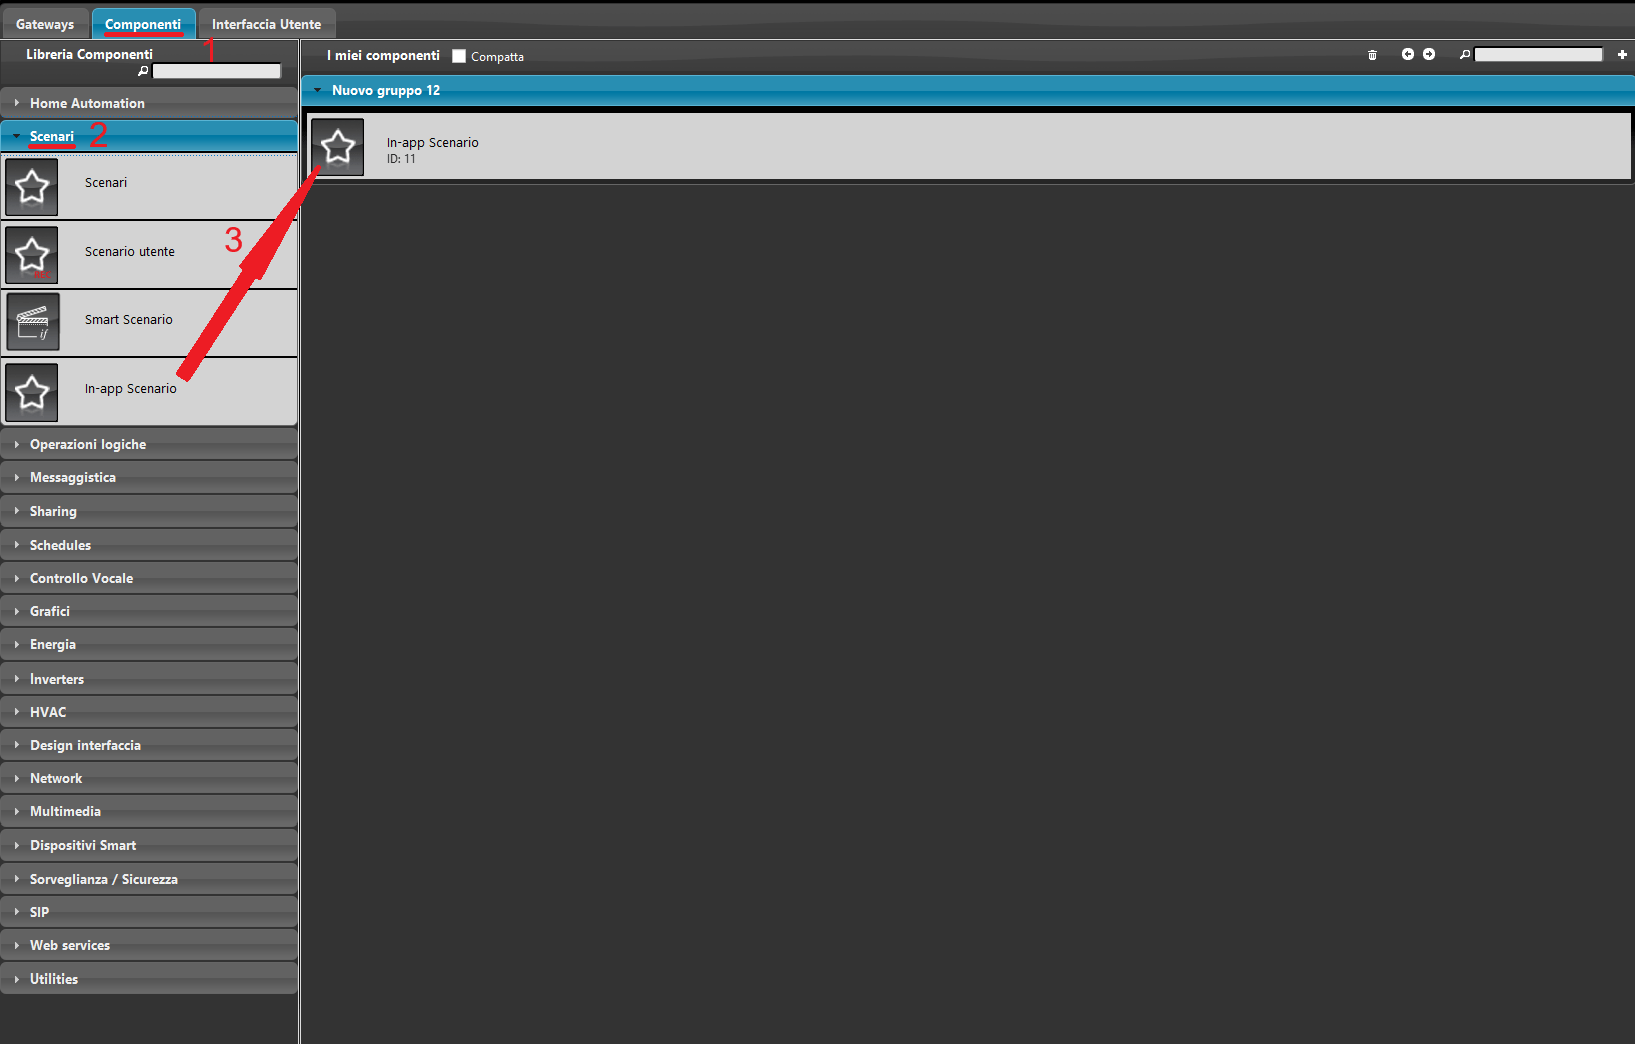
1. Open the Components tab.
2. Then expand the Scenario category in the Component Library.
3. Finally, drag the In-App Scenario component into the My Components tab.
Add the component into the interface then upload the project to the server. All In-App Scenario configuration is performed directly within the user interface.
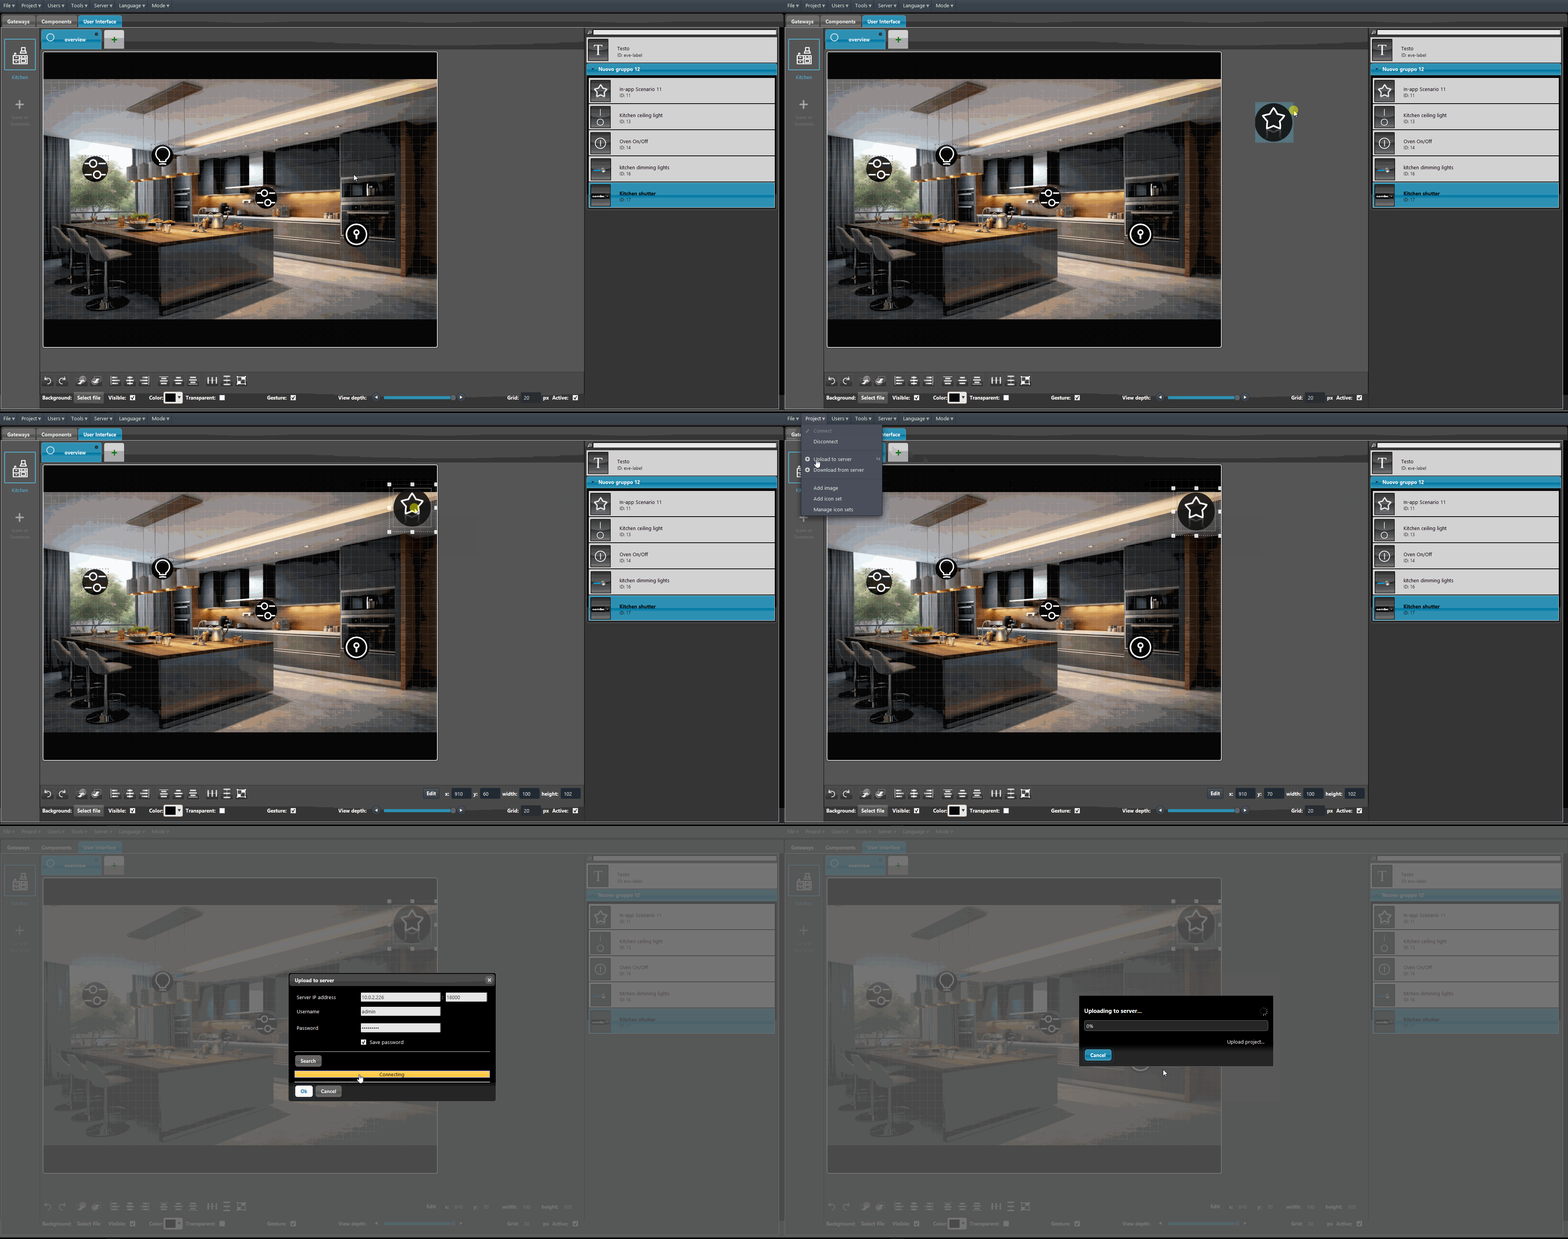
Click the In-App Scenario icon from the Interface. The configuration is the same of the Classic interface.