 Custom widget
INTRODUCTION
If you are working on a hotel project and the client asks for a view of all the states multiple rooms, you can do it but it will result in a graphic mess. With the Custom widget we can create graphics elements that rapresent the state of multiple parameters, for example you can build a graphic element that rapresent all the information of each single room. This way the client will be able to monitor the state of hundreds rooms on the same tab. This graphic element can be created by your self using SVG file editors such as Adobe illustrator.
Each Custom widget will rapresent a room and will chage when a parameter change. However, each widget has a script that allow to manipulate the graphic of the widget it self based on the parameters of the real devices.
USE CASES
- The user wants to build a responsive room map where he can check the components status of all of his house’s rooms.
- An owner of a B&B could use this widget to make a system where he has the chanse to check all the parameteres of the components inside a specific room such as: temperature or state of a room if it’s empty or if there still someone inisde.
Reminder before continuing:
- Download and Install EVE Logic plugin to enable plugins (link);
- After loading .eve project to the server, run EVE Remote app, log in and then wait a couple of minutes for logics activation.
COMPONENT’S PROPERTIES
Width: In this text field you can set the parameter that will be set to the svg image inside the User interface.
High: In this text field you can set the high parameter that will be set to the immage inside the User interface.
Map templat to activate on click: Drop down that allows you to link an existing map template to open once the user click on this custom widget inside the user interface.
User click: In this field you will which component will be added to the svg image to open the map, the component you set in this field will open a Map Template component when clicking over the SVG image.
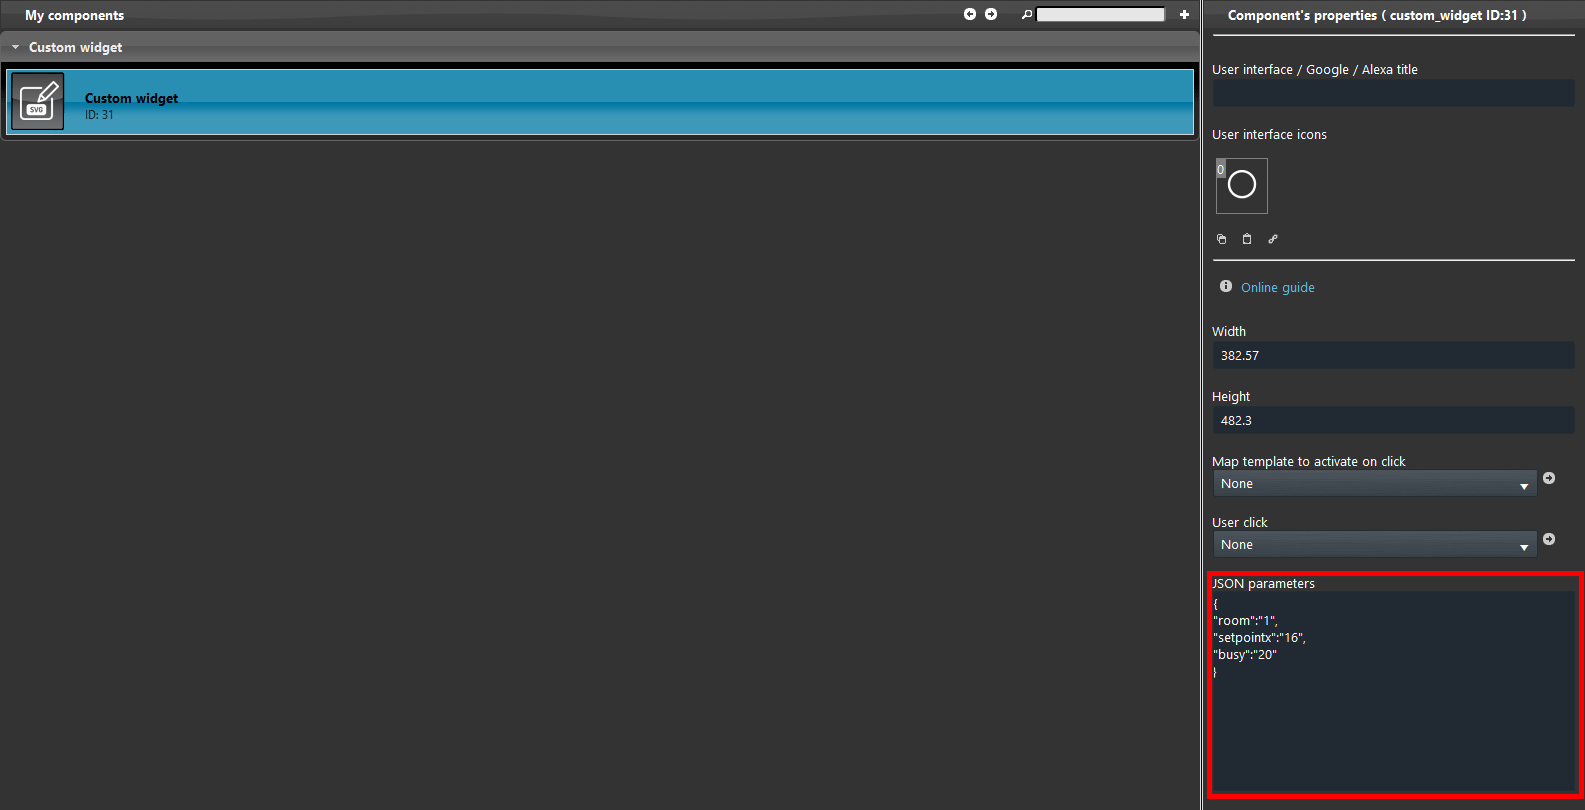
Json parameters: In this text field you will be able to code a custom json, for example you could build custom field inside the SVG file that will automatically update once the svg is applyed into the user interface, for instance the number of a hotel room that will autoamtically update once you add a new custom widget inside the user interface.
Get javascript from: This drop down allows you to select a source for the javascript, for example if you need to create more object with the same javascript parameters.
Javascript: This text field allows you to import the javascript that will effect the svg file by tapping it from the User interface.
Get svg from: This drop down allows you to link an existing svg file from an already existing custom widget component inside EVE Mananger Pro.
Load SVG From: This drop down allows you to load an .svg file from your local device.
HOW TO IMPORT THE SVG FILE INSIDE THE CUSTOM WIDGET COMPONENT
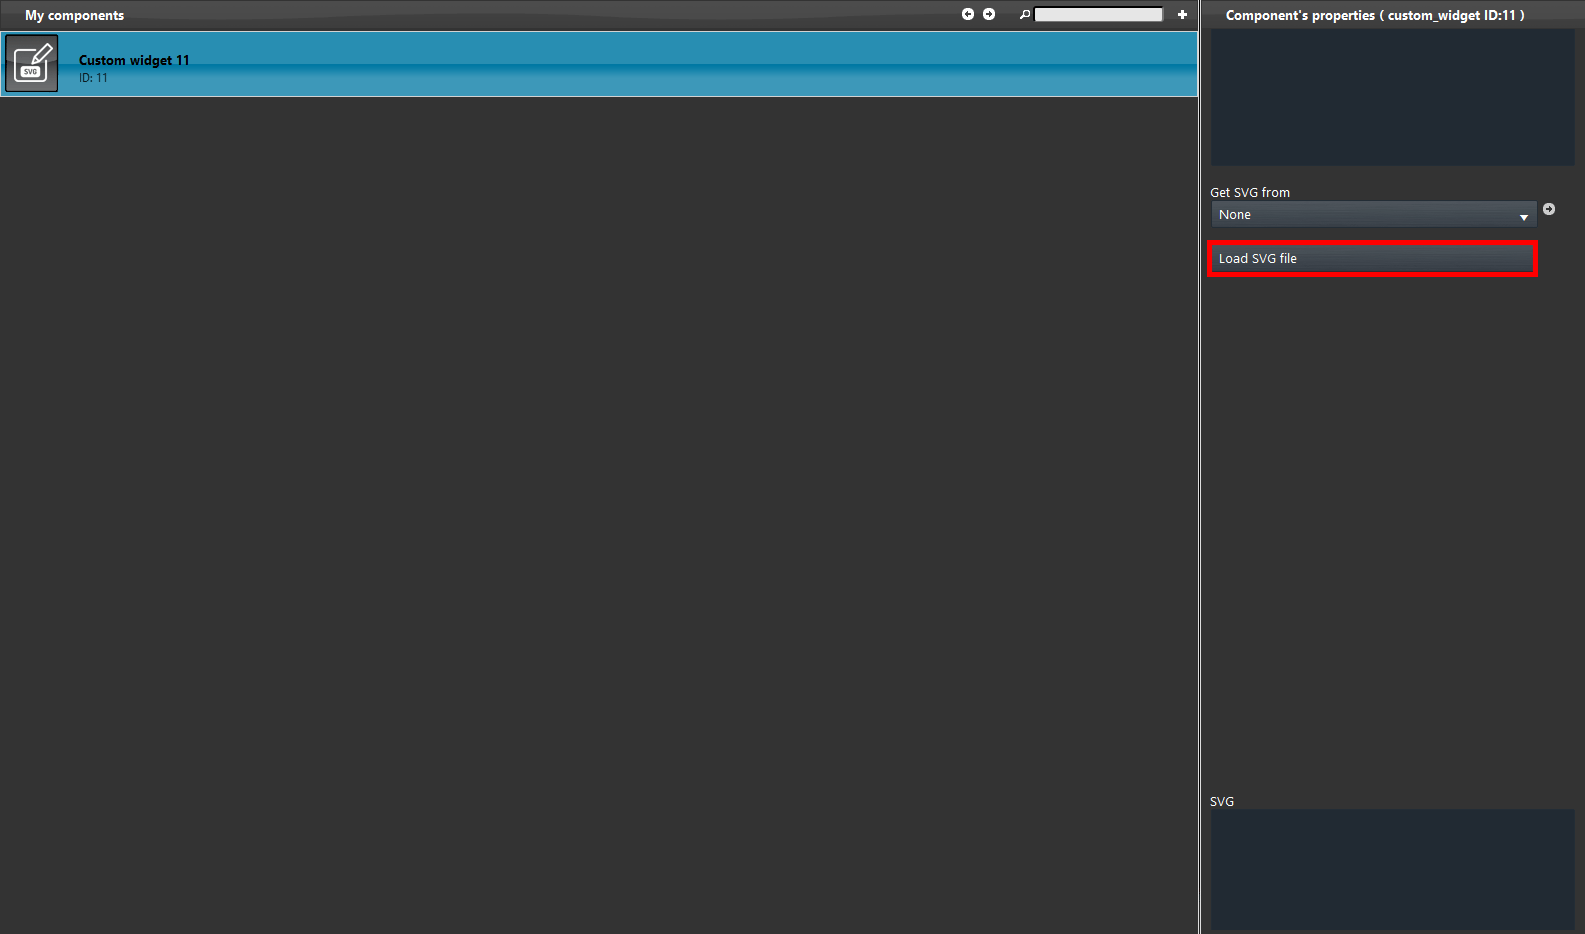
This component allow you to select a SVG file directly from your local files. So click on Load svg file in the Custom widget properties, then select the file and click open.
Javascript configuration
The Custom widget component needs a script in order to link the components from the EVE Manager project such as: Infos, Setpoints, Drop down, Switch, etc to allow the current values visualizzation inside the svg file on the User interface.
In order to link the svg file with the component inside the project you will need to build a dedicated javascript. This script will change based on the svg file and its purpose and structure. We have a dedicated page where is explaned how to build and structure it. click here to check the script configuration.
How to set up the Custom widget component with the same javascript and same svg file but with a different json.
It is needed to create specific parameters in order to apply them on the custom widget components inside the User interface. By following the exaple shown in the picture below you will be able to set them to the component.
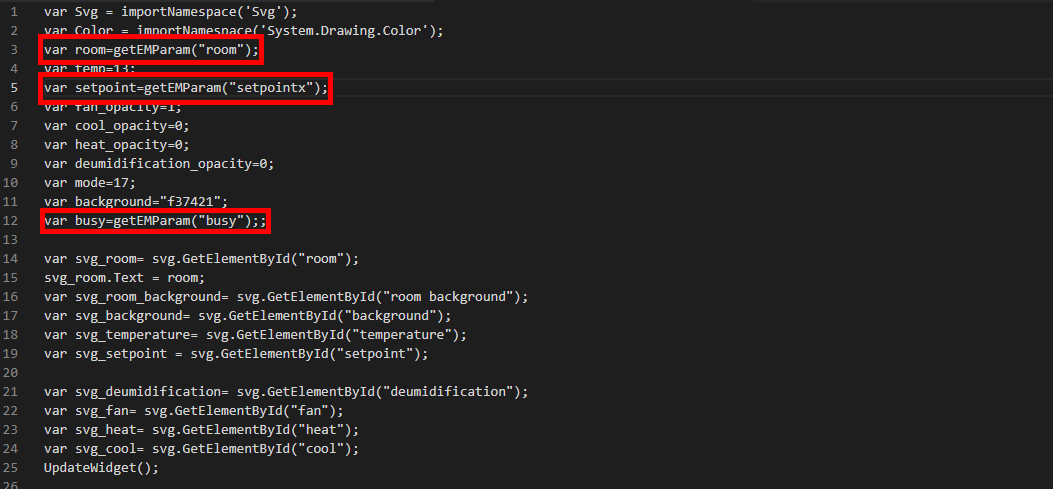
To set up a proper json inside the custom widget component you will need to set up the variables that will take the value based on which custom widget you are displaying inside the User interface.
Variable settings: var Nameofthevariable=getEMParam(“NameOfThejsonparameter“);
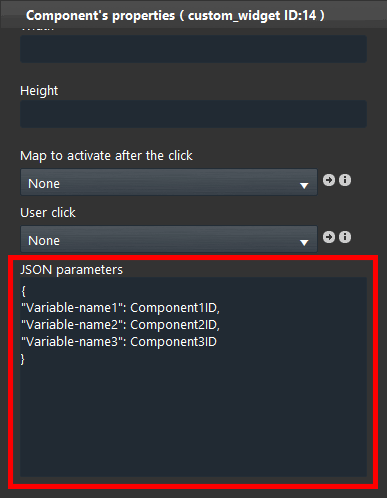
After building the variables inside the javascript code, you will need to specidy these variables within the EVE Manager project. Head to the Custom widget component’s properties, as you can see from the picture below, in the Json text frame, we specified the number of the room, which set point will be taken to display the current room temperature and the component that determine if the room is “busy”.
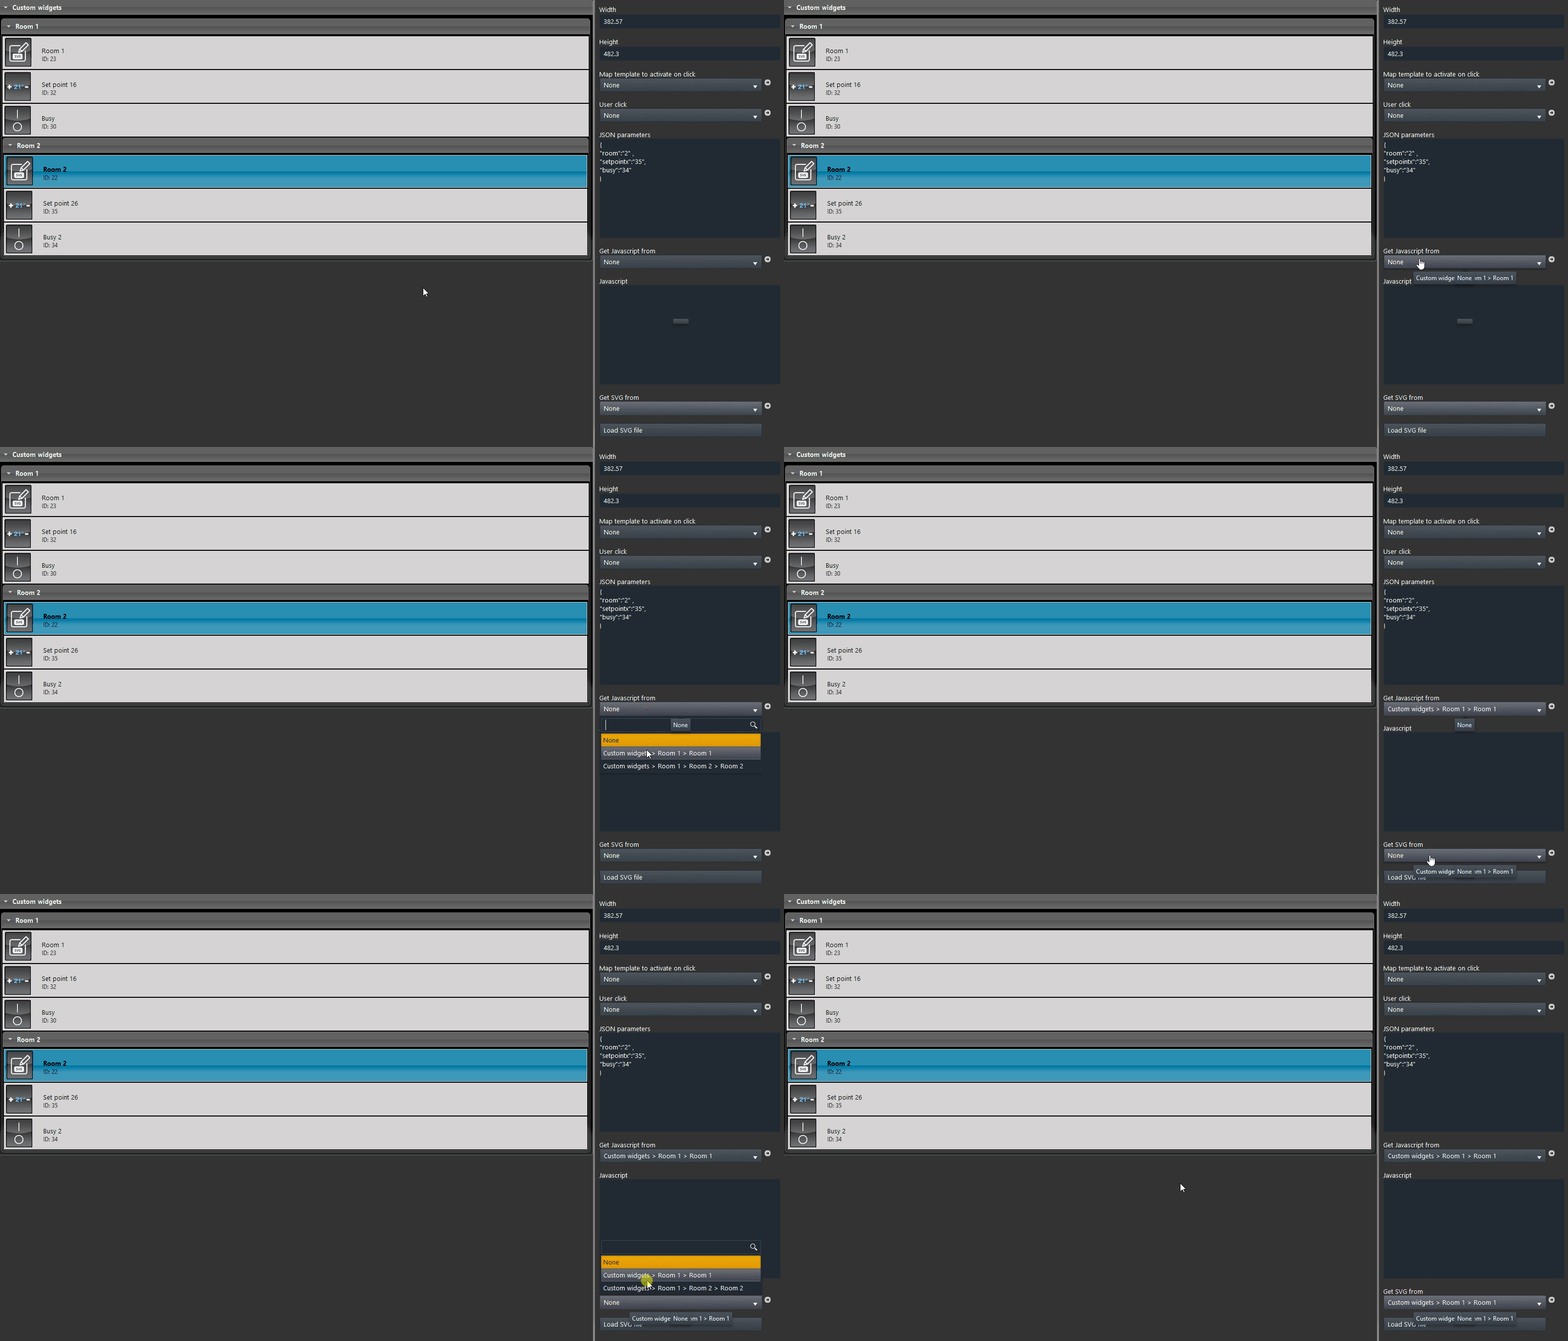
In case you have more than one Custom widget inside the project, this allows you to link already imported javascript and the svg file from other Custom widget components from the current EVE Manager project.
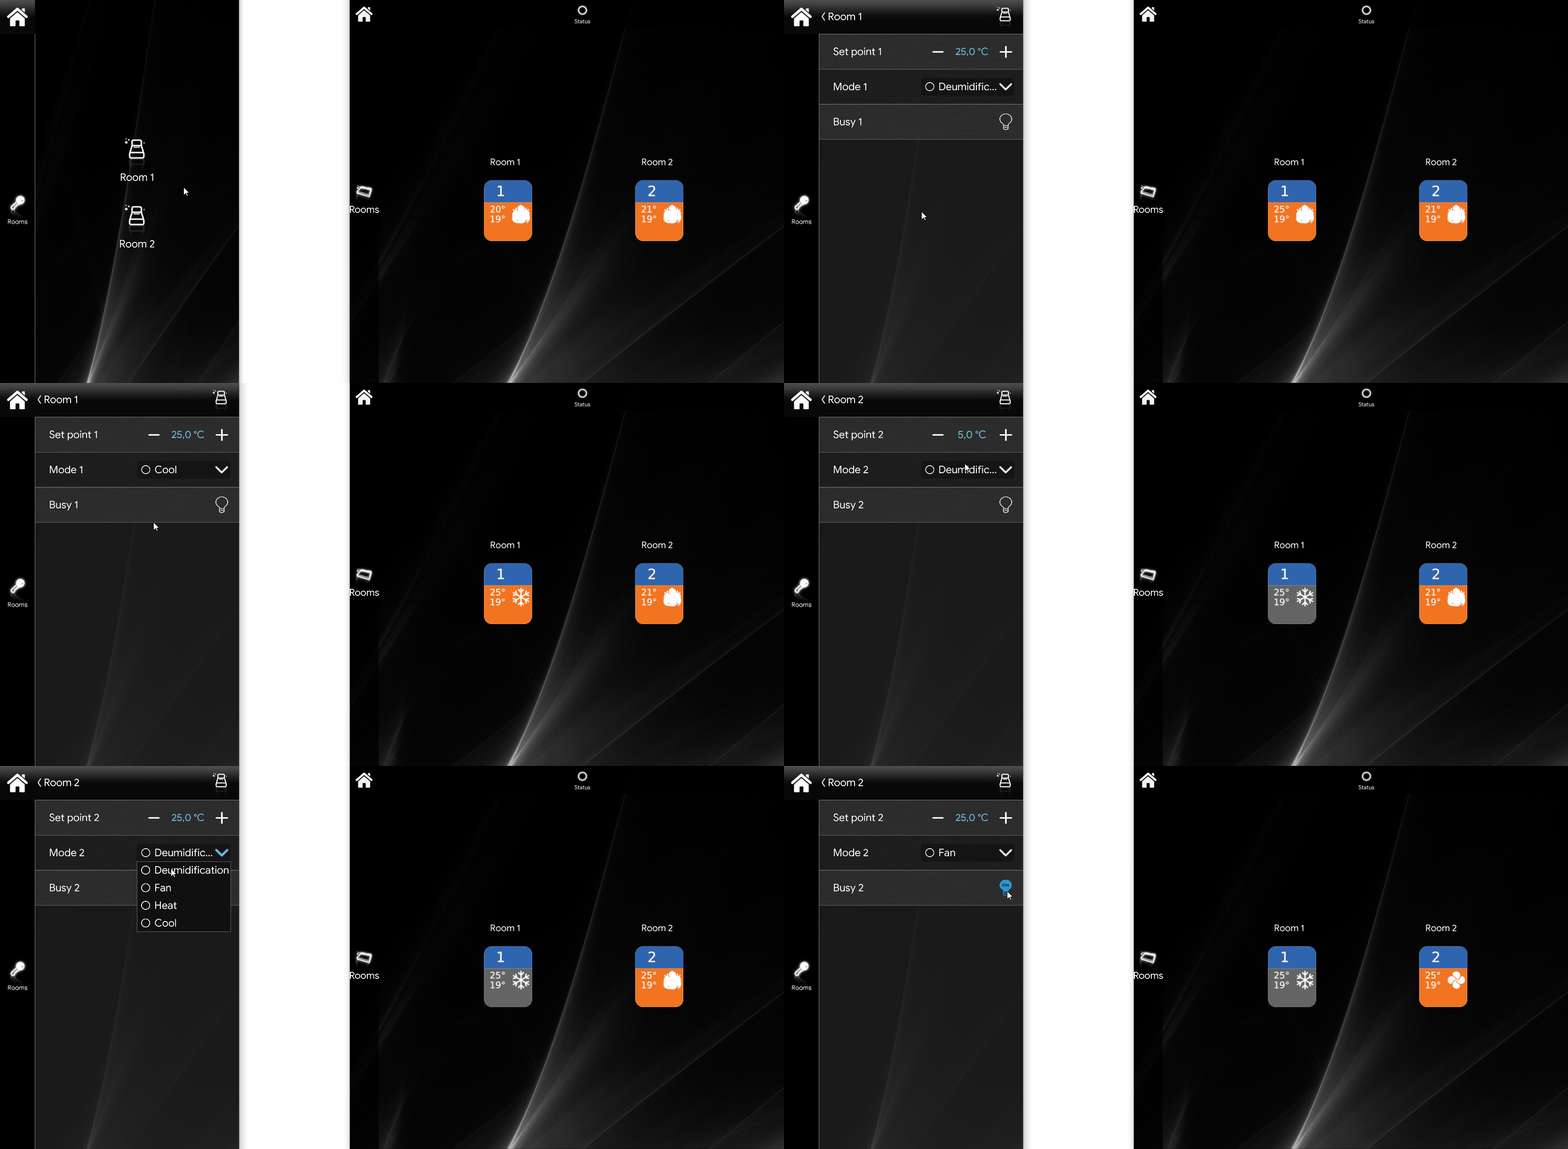
This is a visual result with the configuration we made inside the eve project, this is one of the countless configuration possible with this Custom Widget component.
HOW TO LINK YOUR MAP TEMPLATE TO THE CUSTOM WIDGET COMPONENT
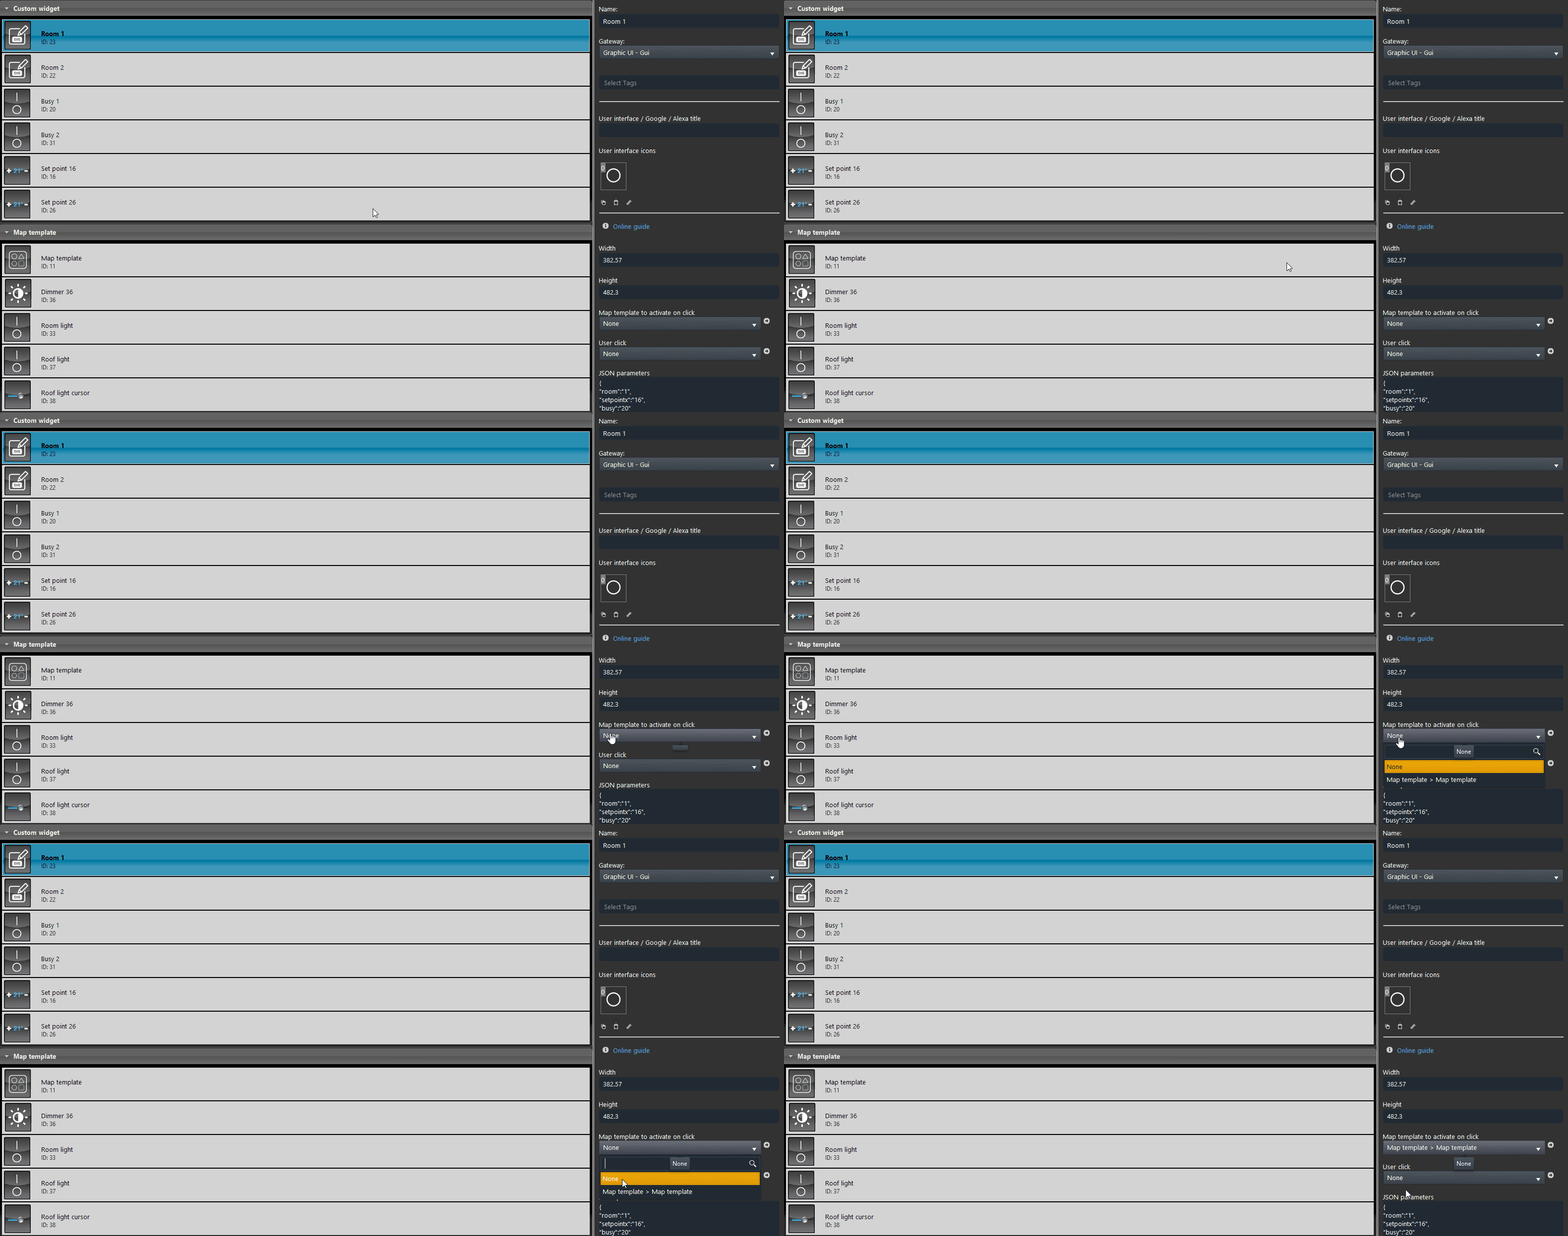
The Custom widget component allows you to link a Map template component inside its configuration, this will allow you to open a Map once tapped the Custom widget inside the User interface.
From inside the Custom widget component’s properties choose the Map template you want to show once clicked on the custom widget object inside the User interface within the Home automation App EVE Remote Plus.
HOW TO OPEN A MAP TEMPLATE BY CLICKING ON A CUSTOM WIDGET
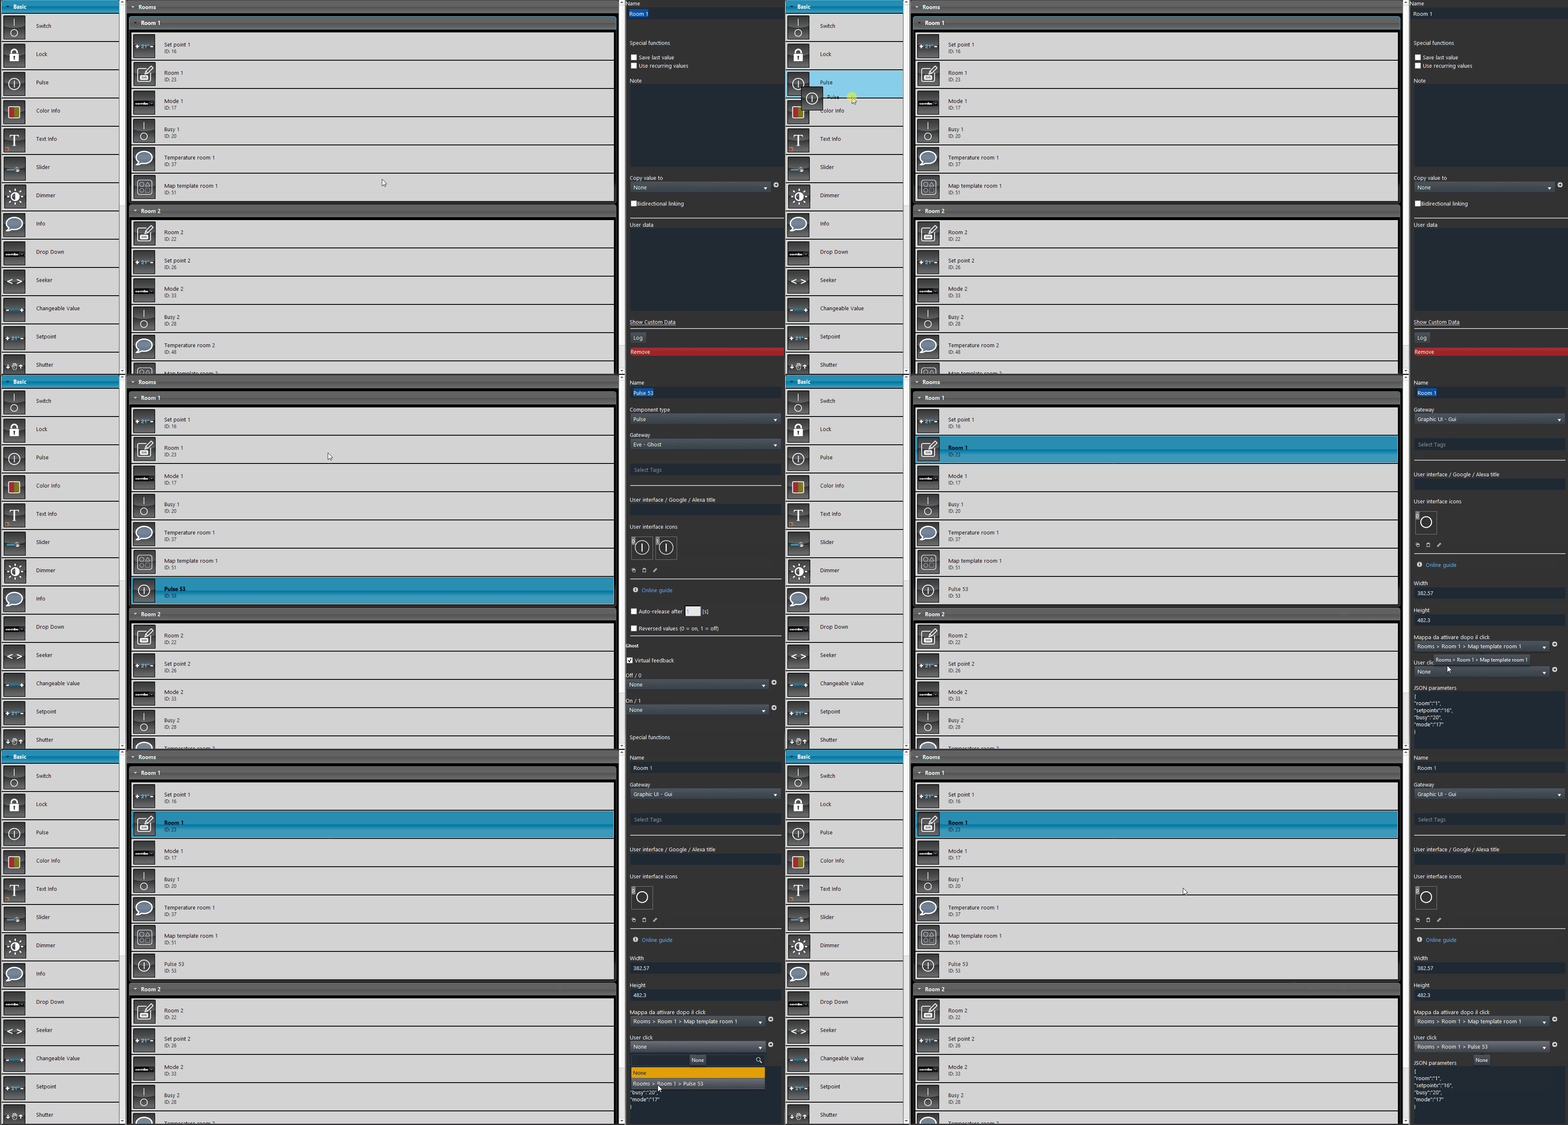
In order to be able to open the Map template component it is required a trigger component that once pressed will open the choosen Map template on the drop down “User click“.
So drag a new Pulse component inisde the project and select it from the Custom widget component properties.
JAVASCRIPT CODING FUNCTION IN THE CUSTOM WIDGET
INTRODUCTION
Since the Custom Widget has its own javascritp enviroment, you are allowed to build a custom javascript, that can be replicated multiple times, without interfering with others within the same EVE Manager project. This means that you are allowed to use the same variable names thanks to the Json text field.
Add the variables within the Json text field like shown in the example below:
{“Variable-name1”: Component1ID, “Variable-name2”: Component2ID, “Variable-name3”: Component3ID, etc…}
You can add as many custom widject as you need, containing the same variable name and Code and the same variables’ names.
Here below you can find practical example of how to build the multi custom widget Javascript is done:


