 Map Template
INTRODUCTION
This component allows you to build a customized map template inside the Classic user interface, wich means that you can create multiple Maps with interactible components within it. Each map template can be customized singolarly.
USE CASES
- The user wants to build a custom interfae where to check each room by consulting a map instead of a menu.
- An owner of a B&B could use this component to check the status of each of its building rooms.
COMPONENTS PROPERTIES
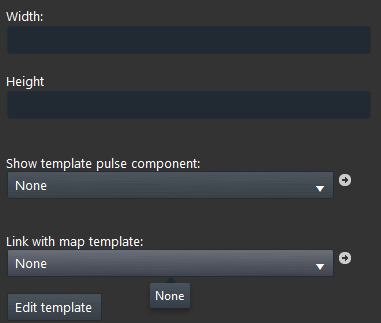
Width: This text filed allows you to set a specific width to the map template component inside the User interface;
Hight: This text filed allows you to set a specific Hight to the map template component inside the User interface;
Show template pulse component: This drop down allows you to link a Pulse component in order to open the Map template inside the User interface;
Link with map template: This drop down allows you to link another Map template;
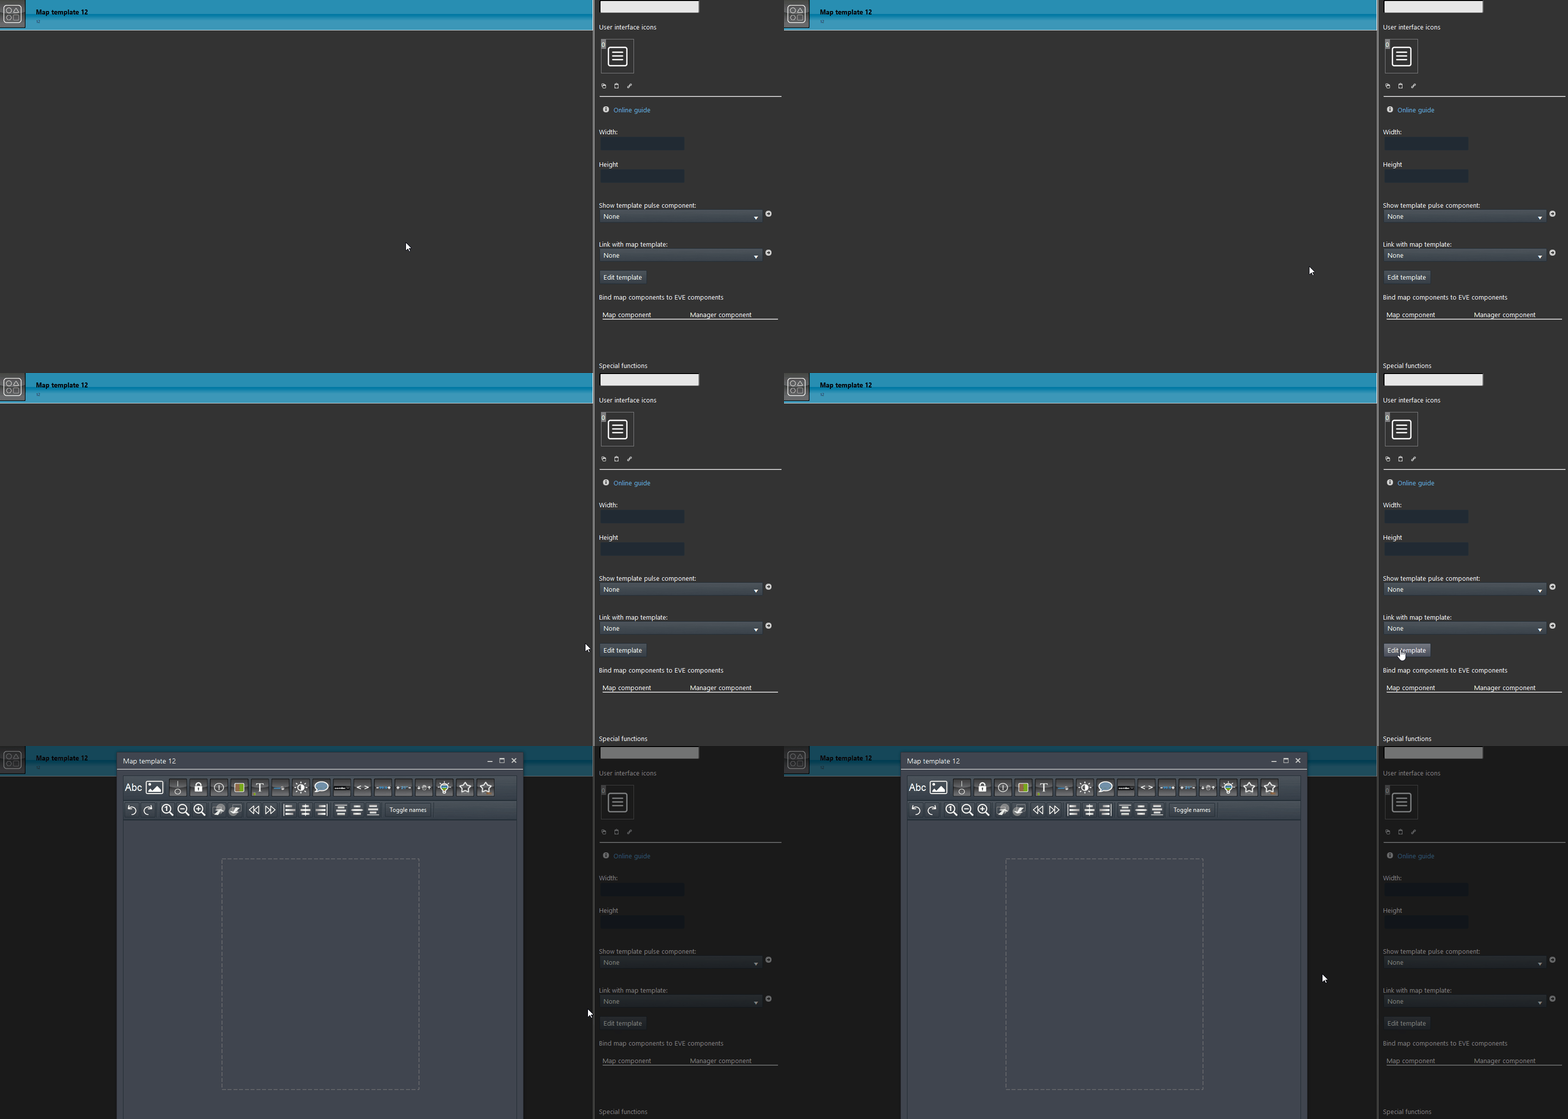
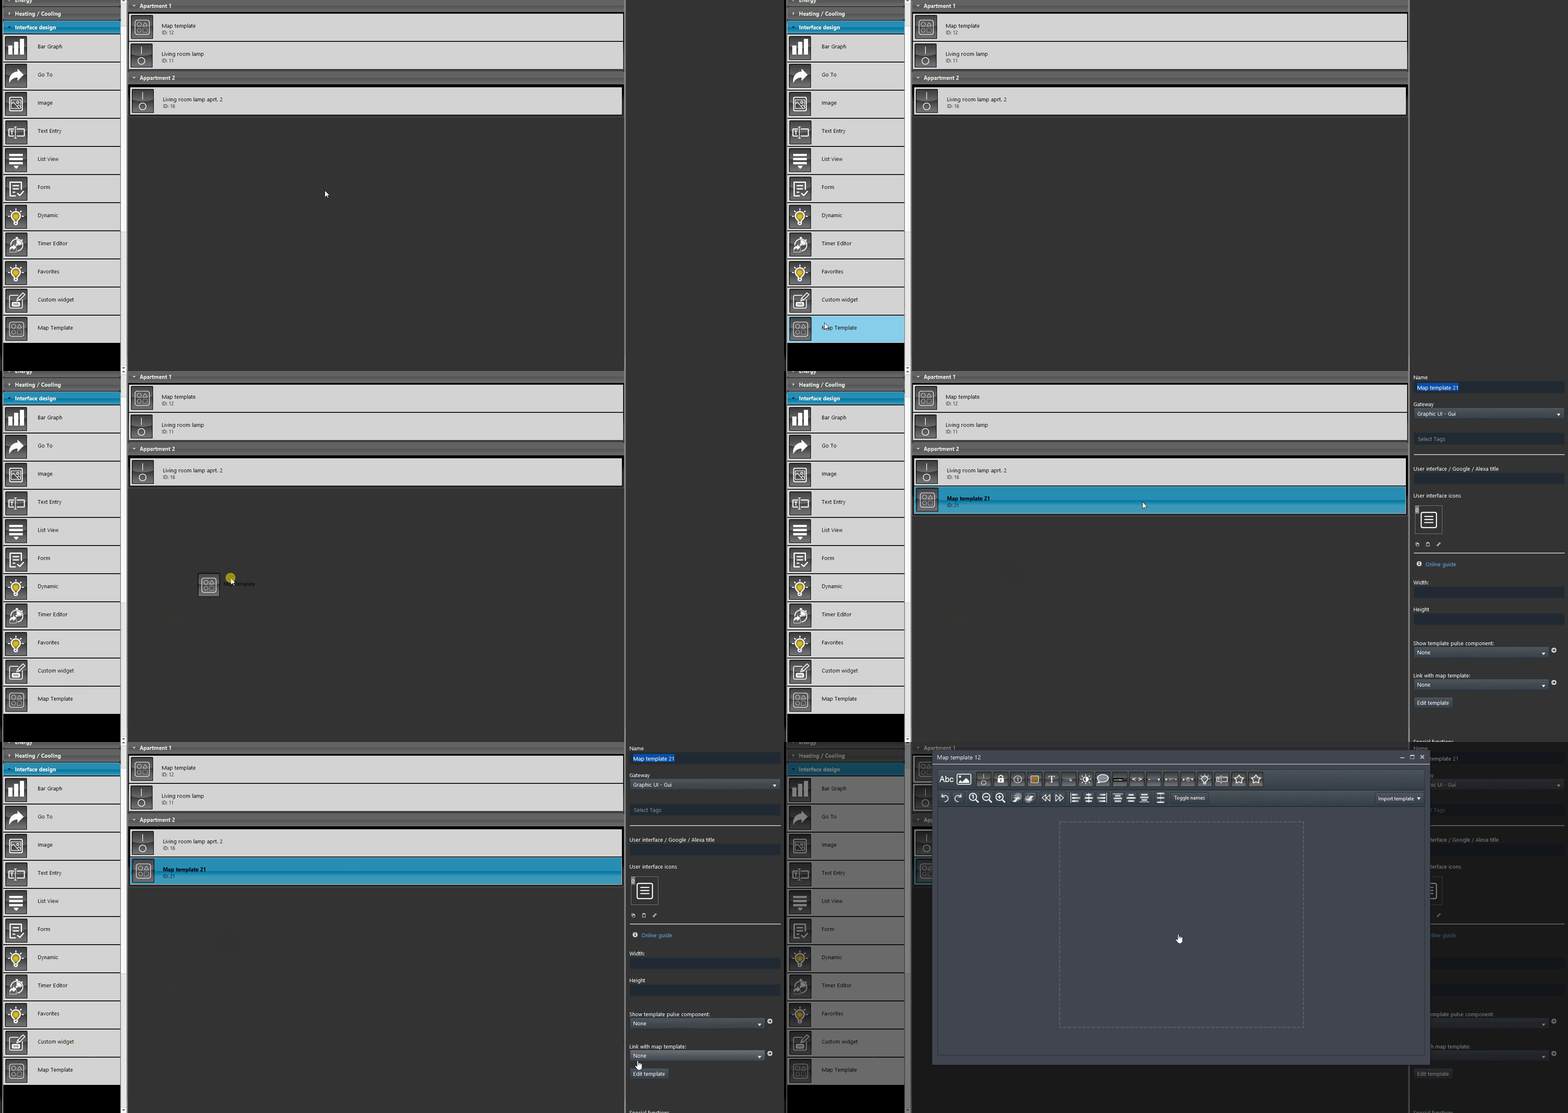
Edit Template: By clicking this button a dialog window will apear, this window allows you to build the actual map template with the components set in the project.
TEMPLATE EDITOR
By clicking on the “Edit template” button inside the component’s properties you will have access to the map template edit table, here you will be able to build your custom map template with the components you have set up inside the project with their own gateways.
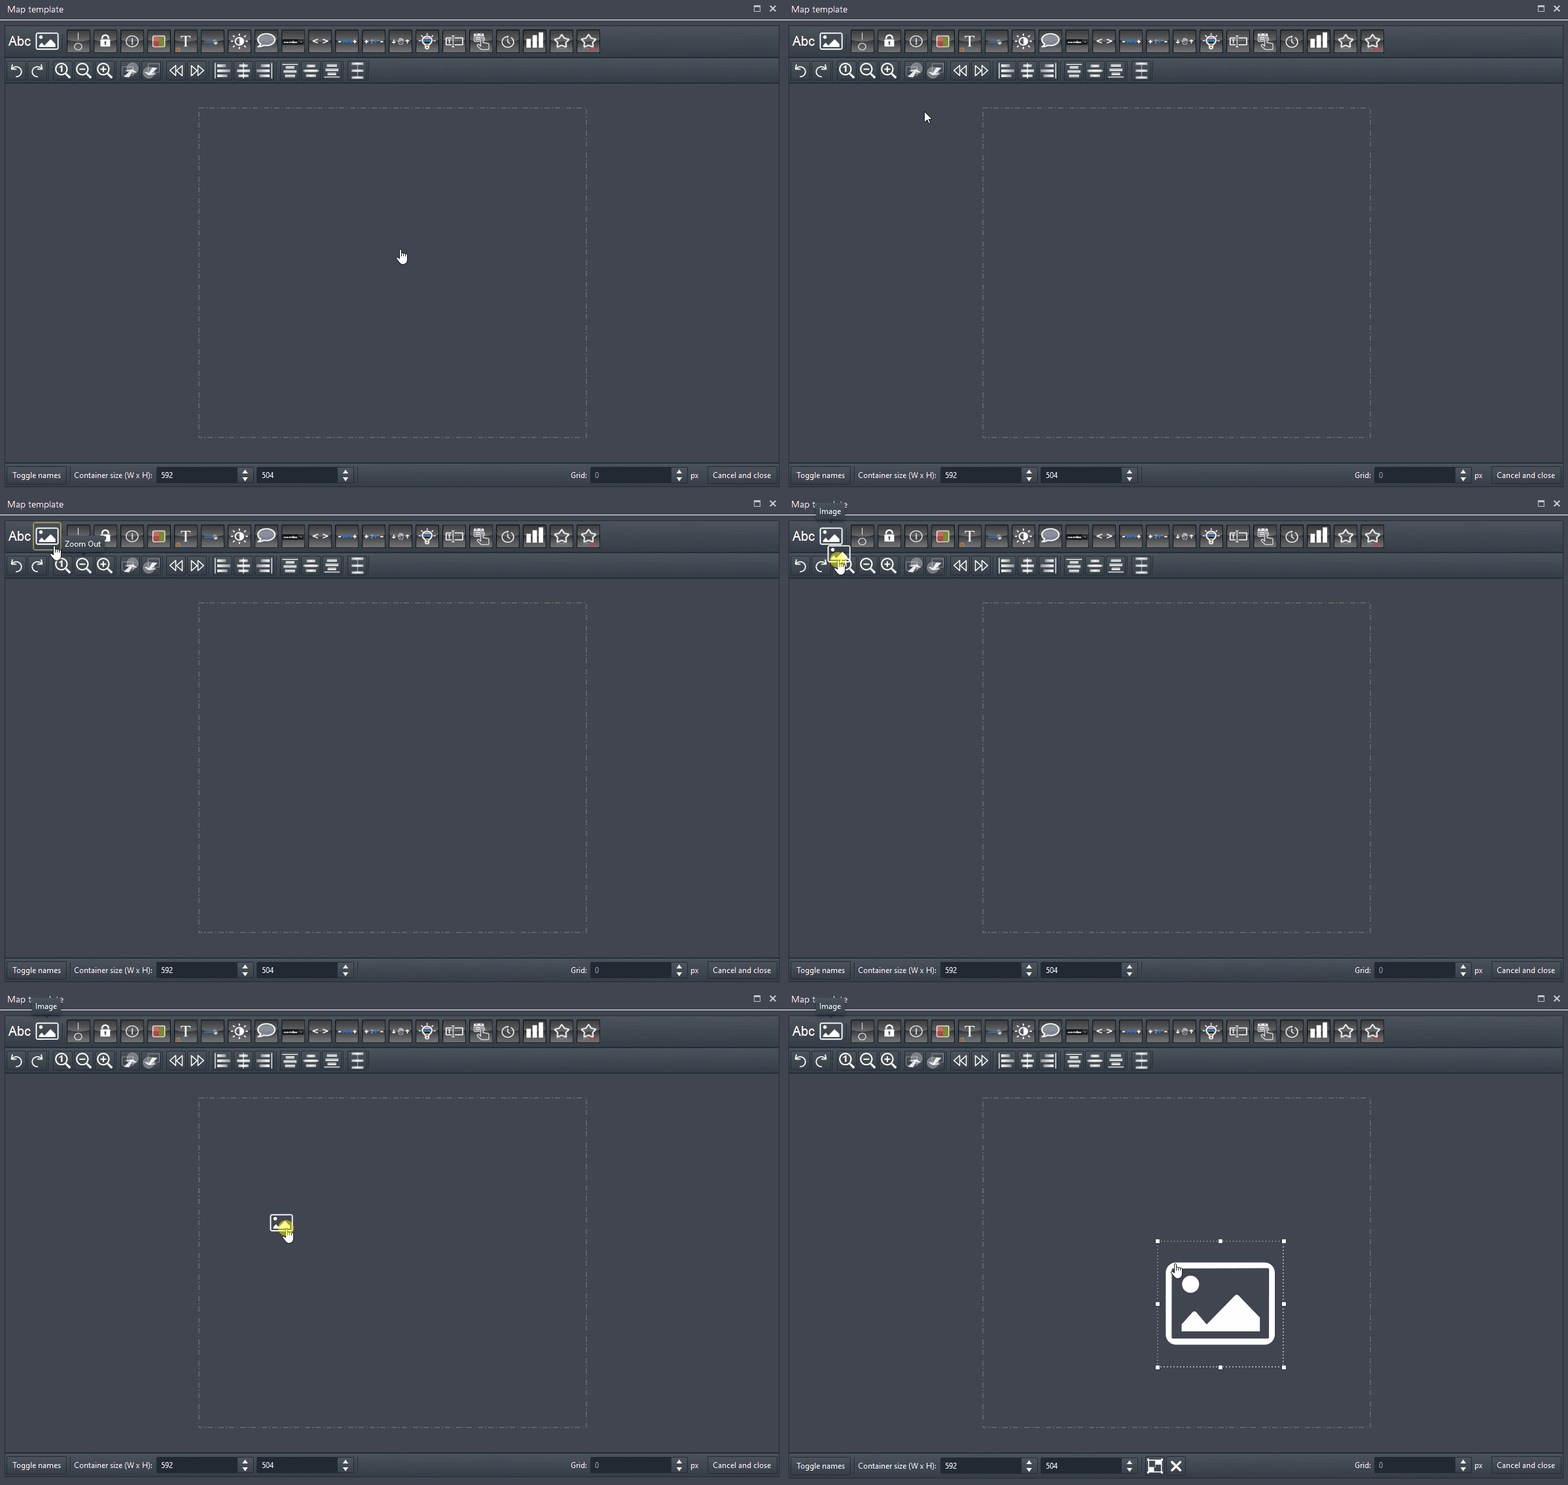
How to add a background image inside the Edit template tab
Step 1:
In order to add a background image inside the map template, you will need to get indie the edit template tab and add a image component.
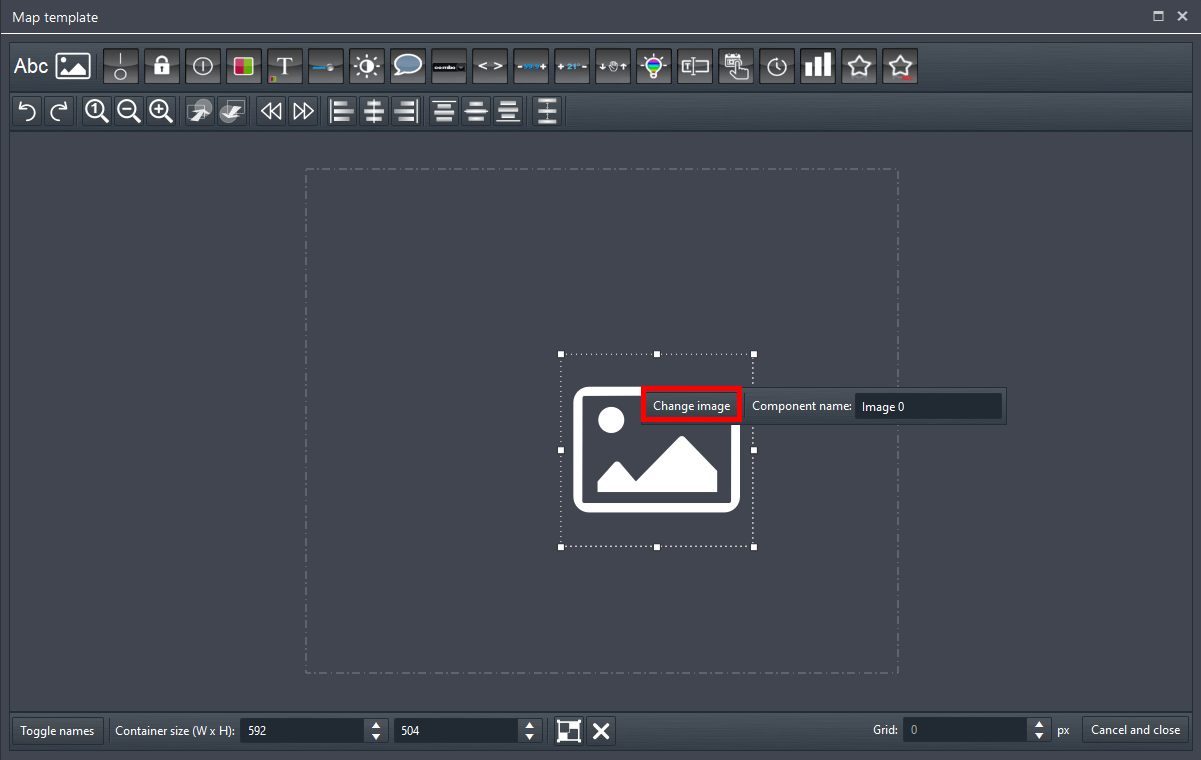
Step 2:
Now in order to select the desired image, double click on the image component then click on change image and select an image.
Note: The image can be resized to your discretion, you can add more then one image component.
How to link the project’s components inside the Map template component editor
The Map template component gives you the possibility to create new components that will be linked to existing components inside the “My components” section.
To link the components inisde the Map template component you will need to:
Step 1.1:
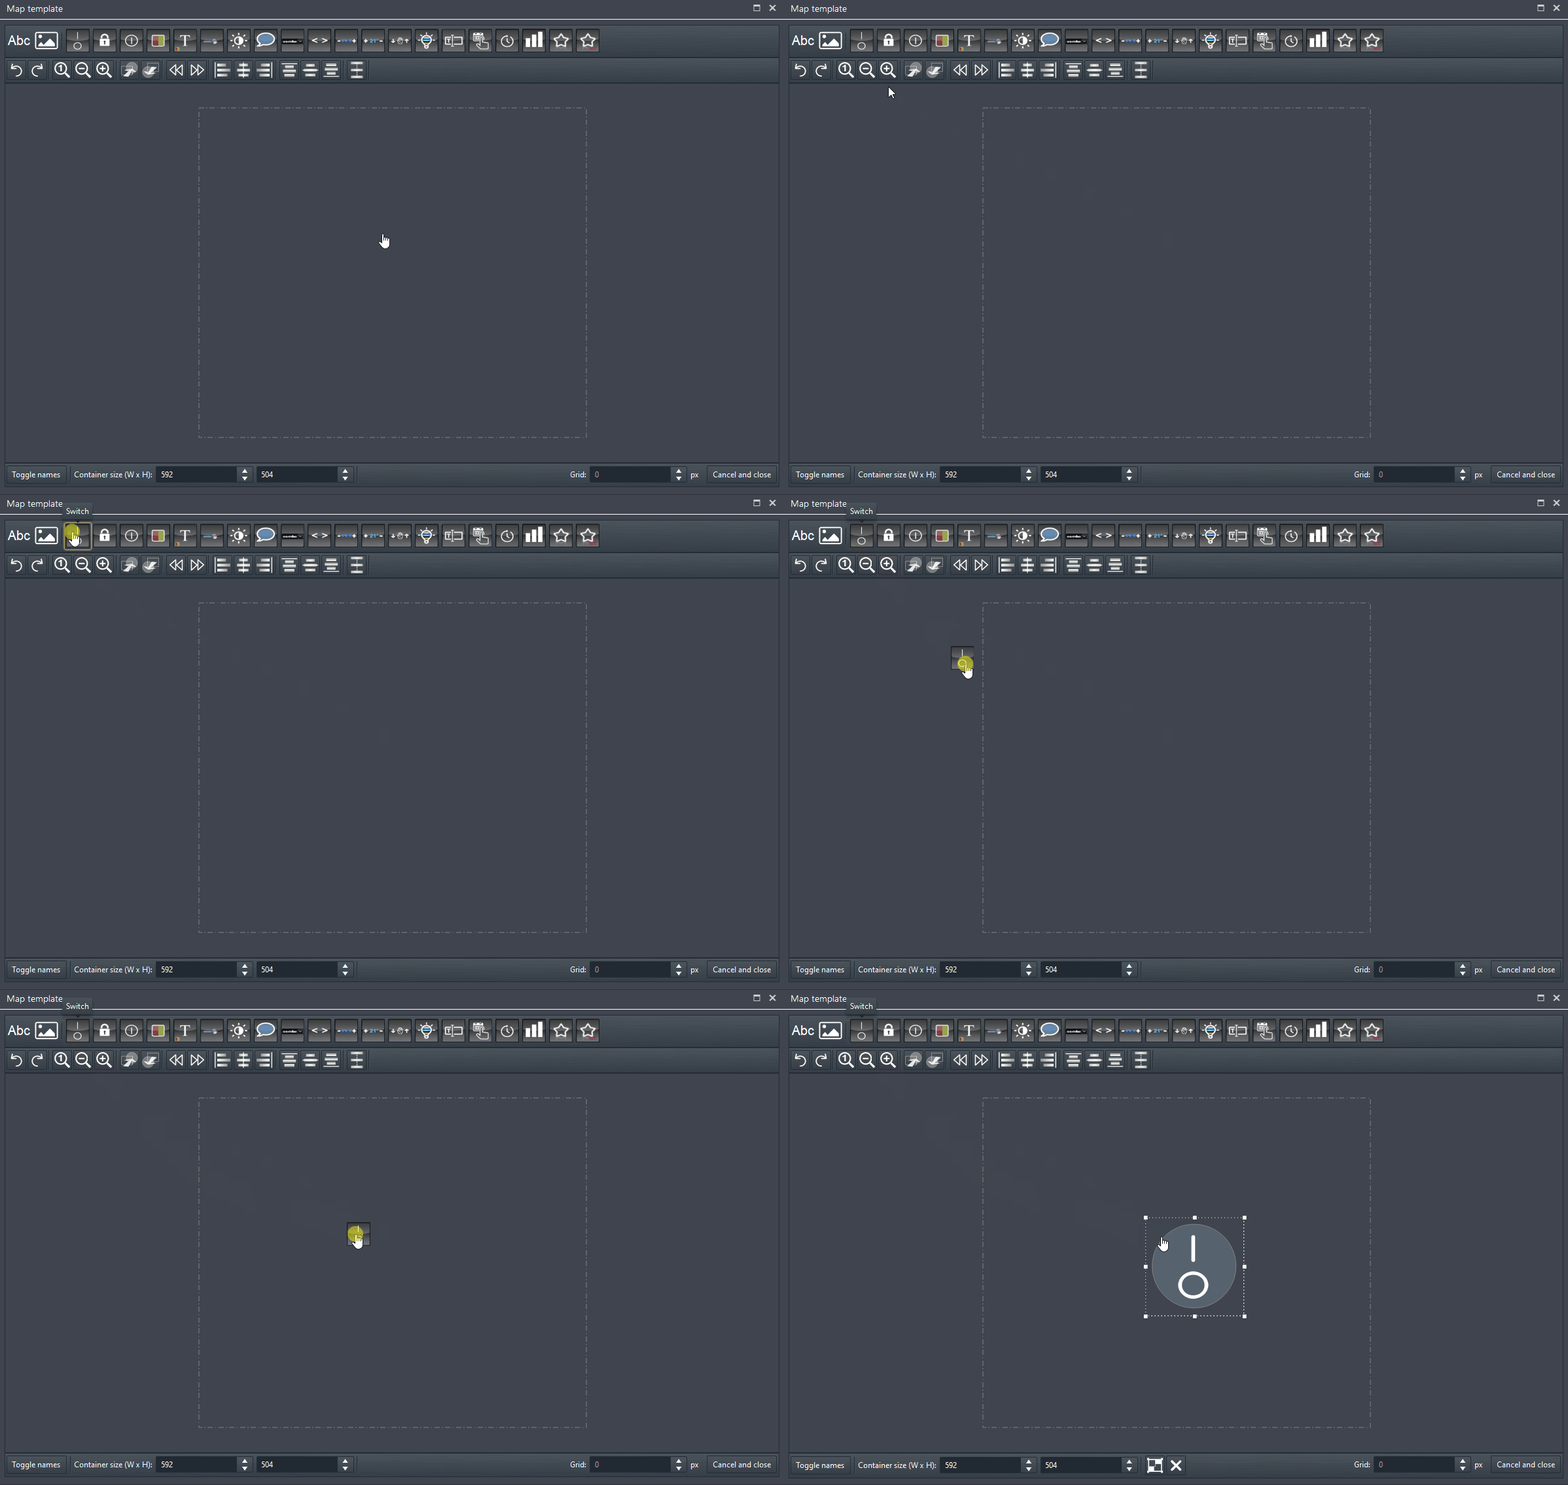
Add the specific component by dragging it from the component’s menu inside the edit table of the Map template component properties;
Step 1.2:
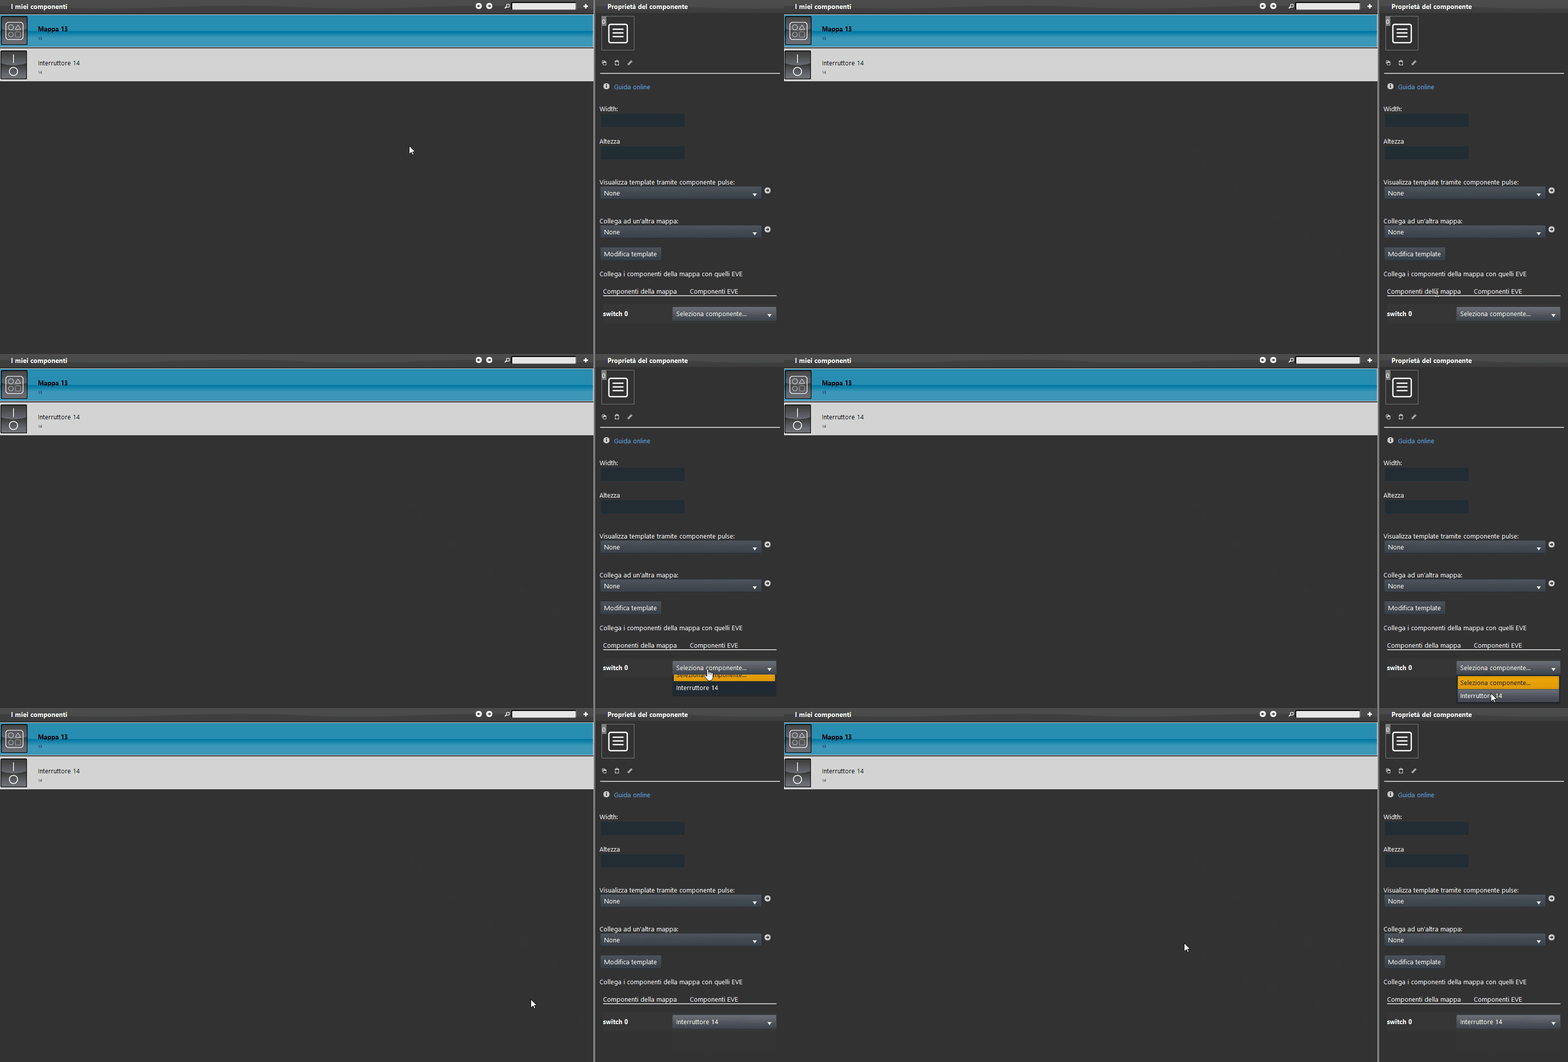
To link the component added inside the Edit template table, enter the Map template editor, below the edit template button a new section will appear, this section allows you to link the switch inside the “My components” tab that we added previously.
Edit table interface’s tools
Inside the Edit Template table are available tools to make the interface as customizeable as possible for the best user experience.
Tool bar
|
Undo & Redo
|
This two buttons allow you to undo or Redo action inside the Edit Template Tab. |
|
Zoom Reset,In,Out
|
This three buttons allow you to do zoom actions within the edit Template Tab. |
|
To Front,Back
|
This two buttons allow you to move behind or move in front of the background image a specific object |
|
Previus and Next shape
|
This two buttons allow you to select the next shape inside the Map Template editor. |
|
Aligne Left, Centre or Right
|
This three buttons allow you to align the selected components to the closest component side of the choosen align position |
|
Aligne Top, middle or Bottom
|
This three buttons allow you to align the selected components to the closest component side of the choosen align position |
Container settings
This tool bar allows the overall resizing of the container and to set a Grid value taht will be applied when moving components within the template editor.
Toggle names
![]()
This button allow to toggle the component’s names inside the Edit template editor.
Container Size
![]()
Here you will be able to set the size of the Map template container.
Grid
![]()
Here you will be able to set the size of the Grid that will be applyed to the container. This grid allows you to place the components inside the contaier with a grid pixel criteria.
Cancel and Close
![]()
This button allows you to close the Map template editor without saving, this mean that the changes you have made sice you opened the editor won’t be saved.
How to choose the container background colour
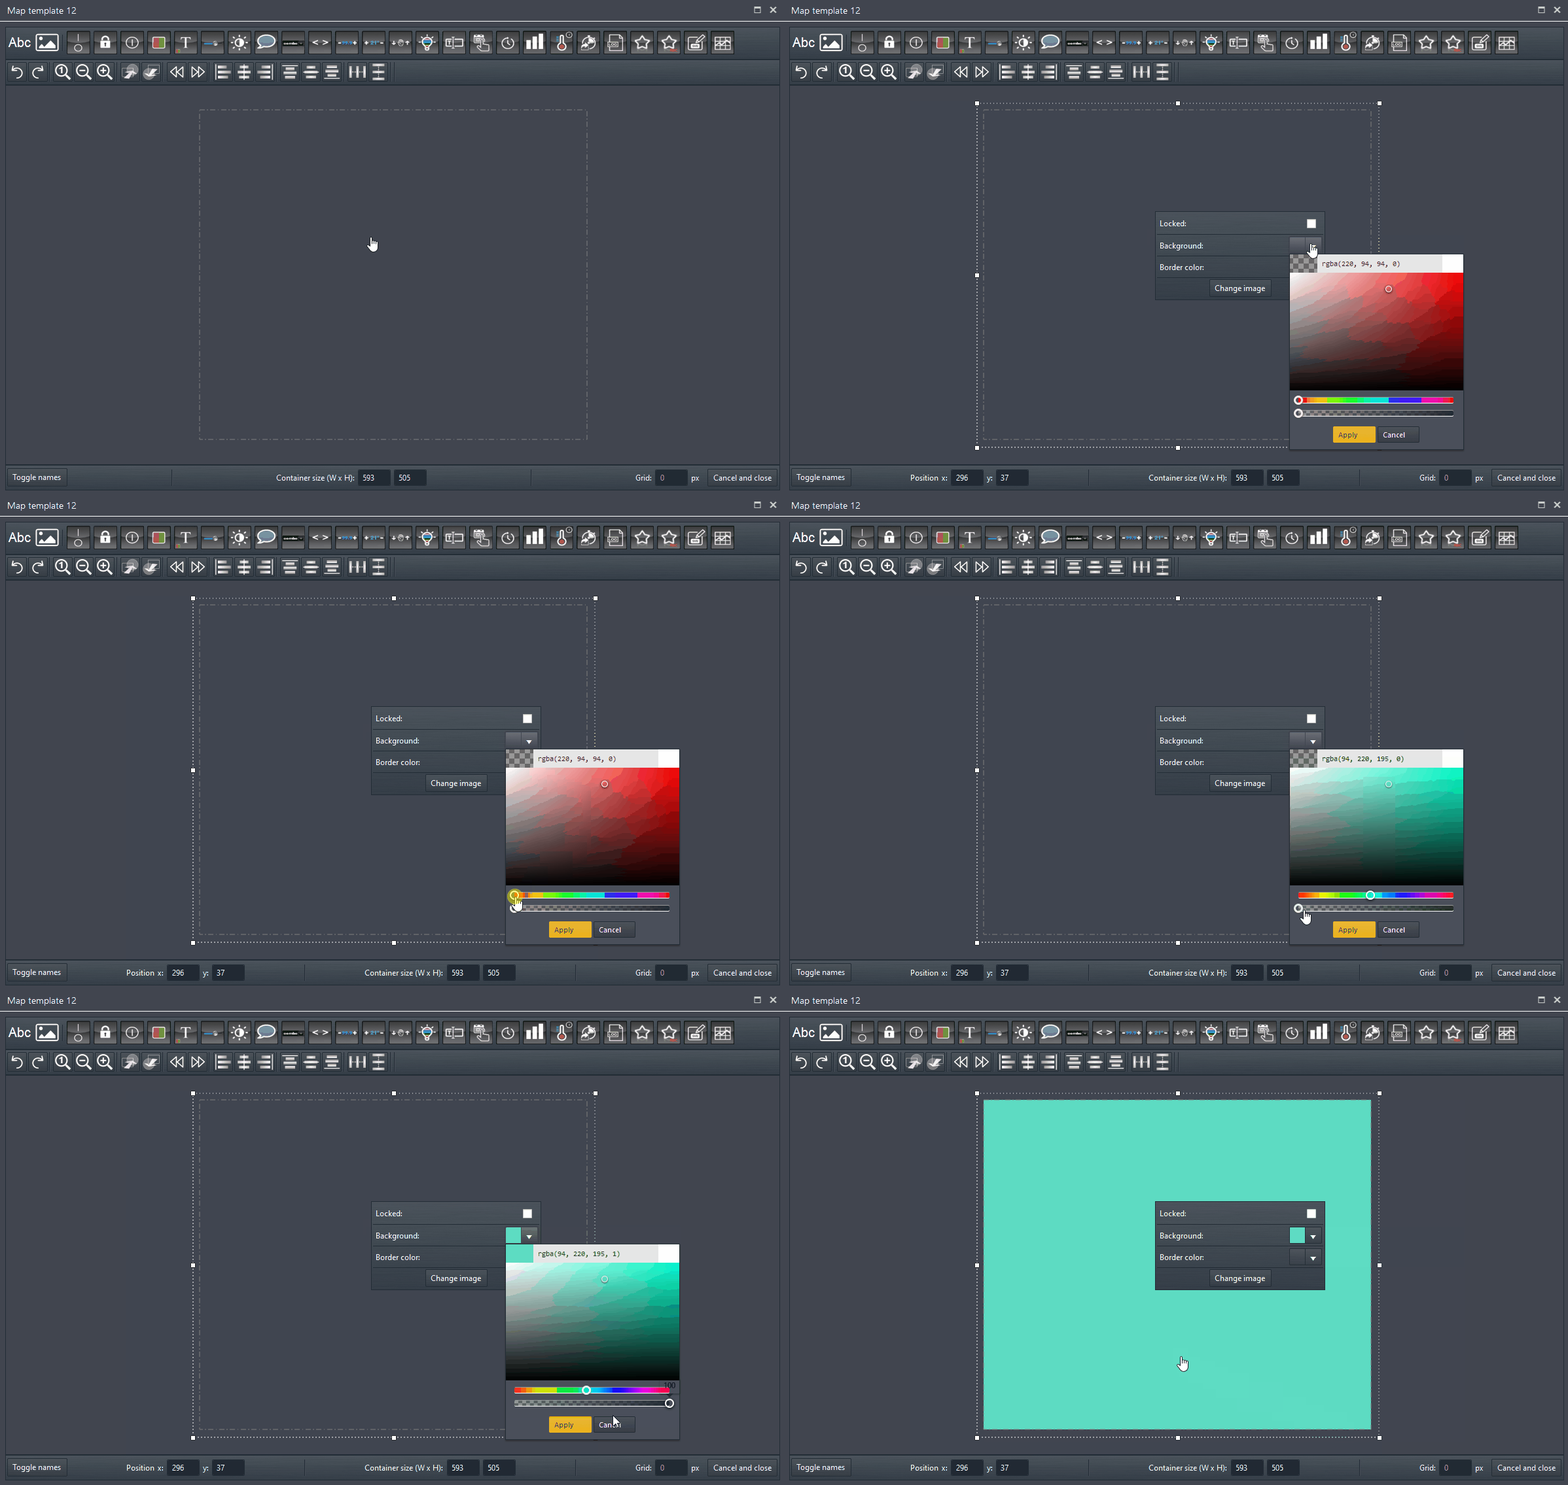
The Map template’s background can also be left wothout any image, enabling the background and border colours pick.
To do this just click on a empty spot of the container, now a new option will appear. The click on the first colour picker called background. Once clicked it will open a colour palette, enabling you to pick the colour you want which will be applyed to the container.
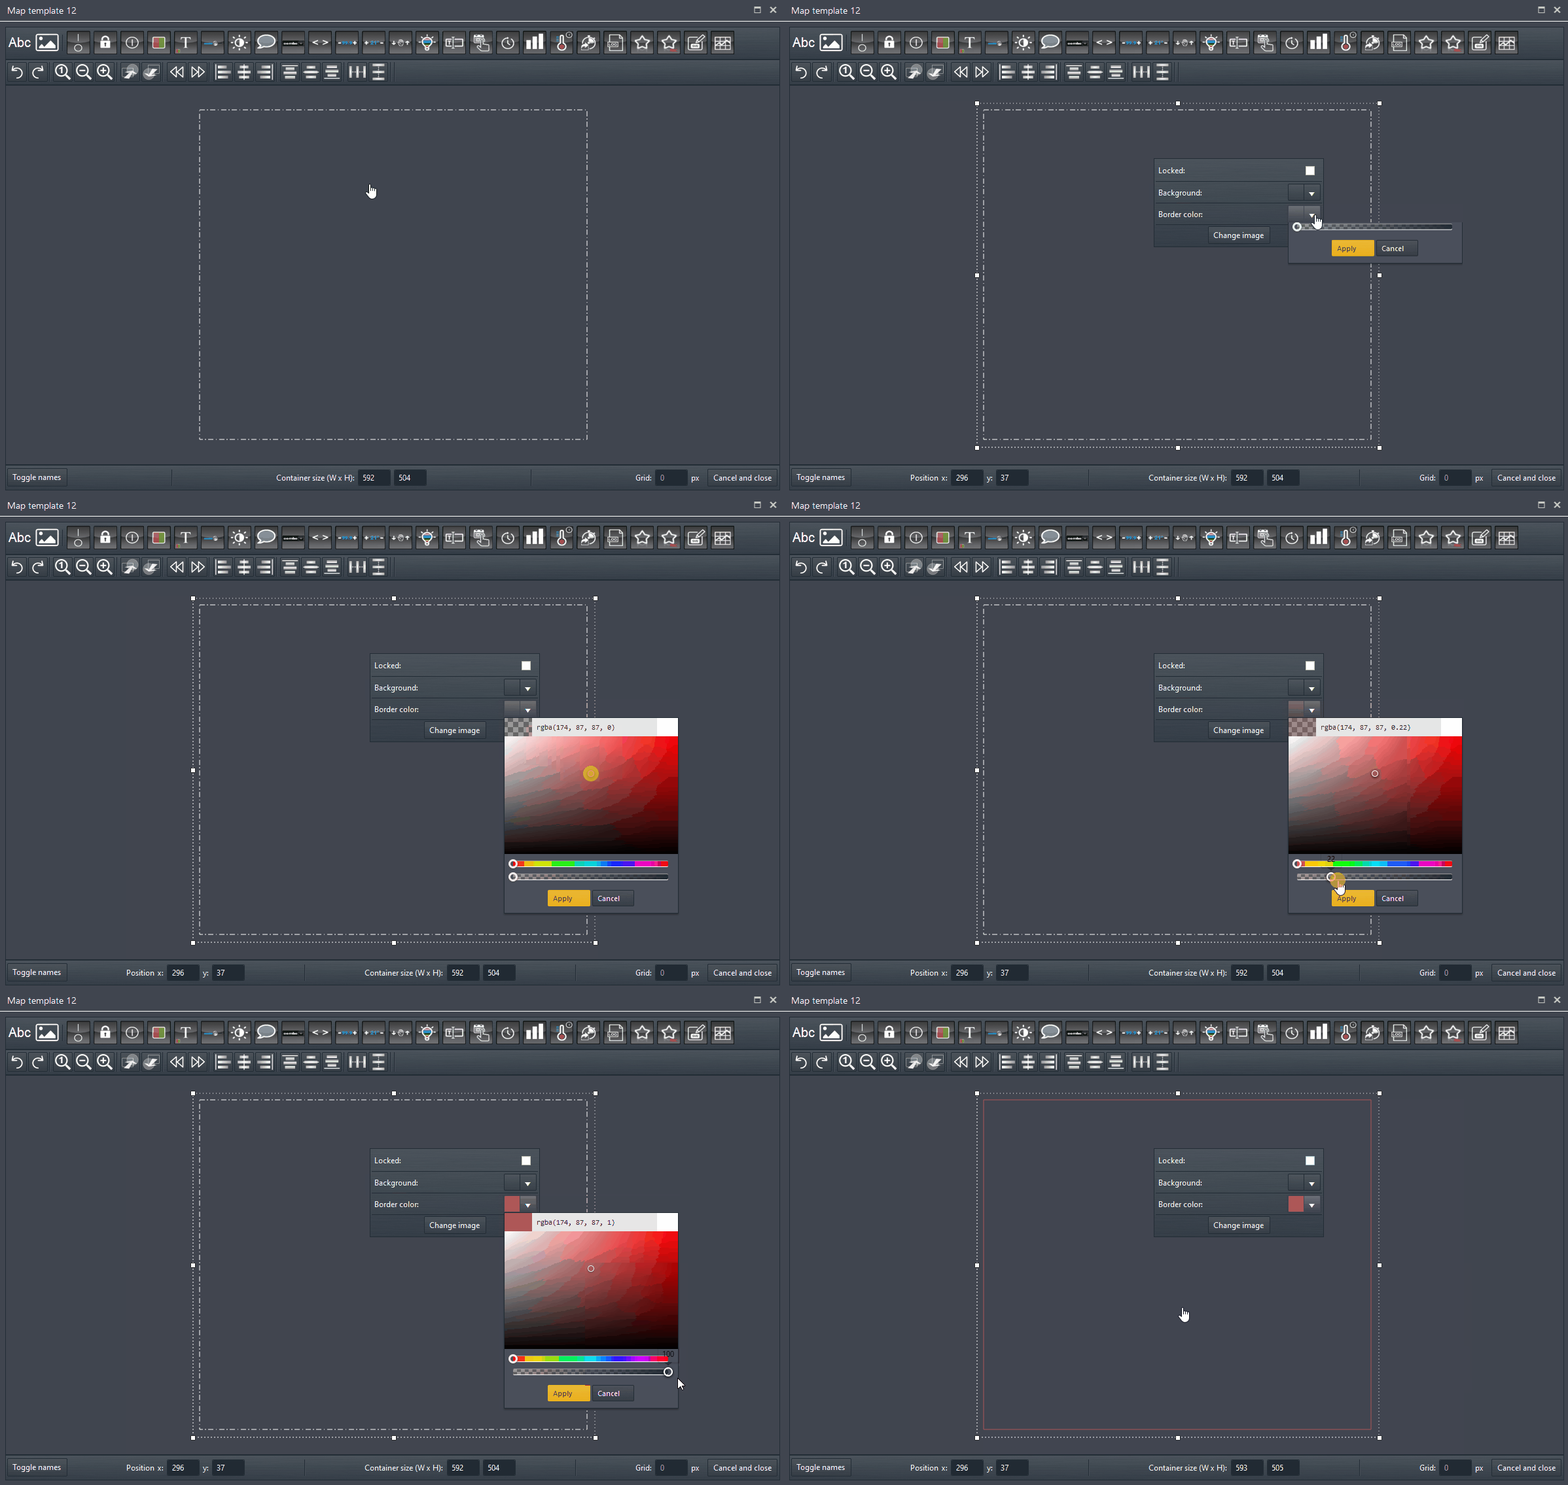
You also able to select a border colour for your Map template’s container. Click the left mouse button on the container then click on the color picker called Border color.
Map template Visual result
In order to place the Map template correctly inside the user interface, you will need to add a trigger component to make possible for the user to open the Map template.
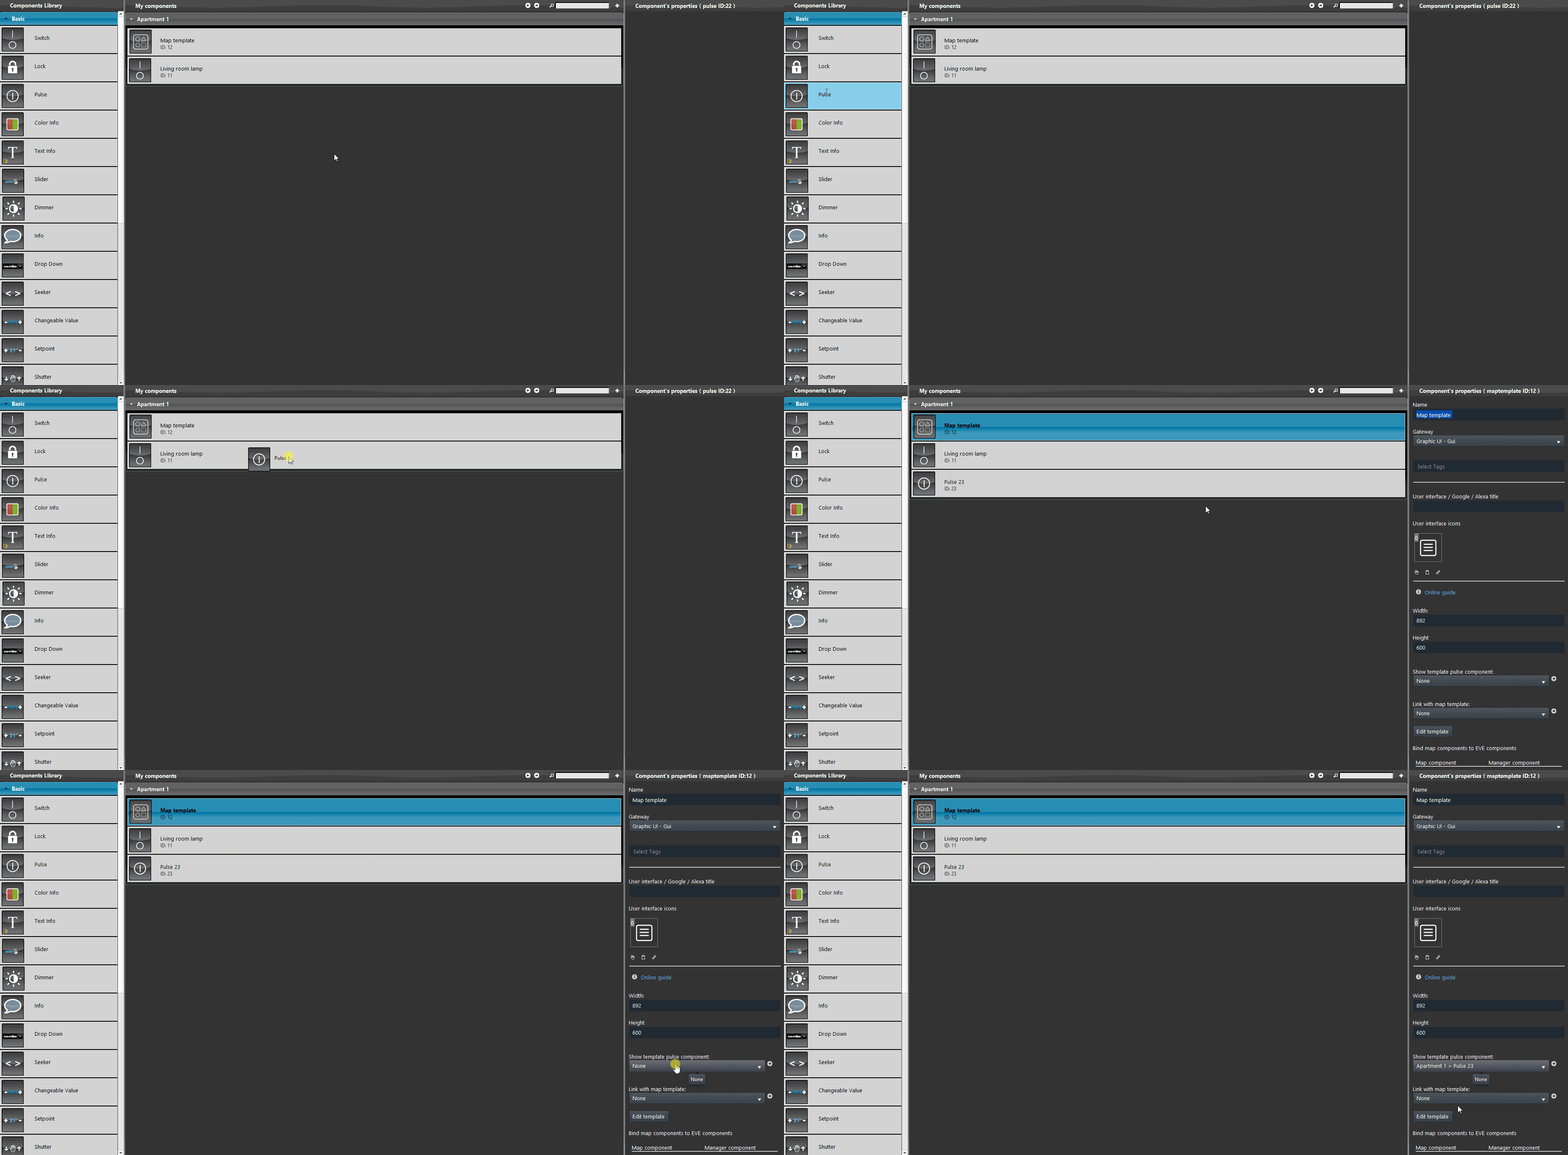
So add a new Pulse component inside the project, then open the Map template component properties by clicking it. Click on the drop down menu called “Show template pulse component” and select the pulse you have added before.
Open the User interface Tab and add the components Pulse and Map template inside the user interface by drag and dropping the component in the interface perimeter. We suggest to adapt the scale factor in order to have a right resolution once you open the component inside the user interface, in our case we applyed a resolution of “1440 x 900” in the user interface and a scale factor of 300% insdie the properties of the component Map template.
Configuration of multilple Map template components
Let’s pretend to have more than one Map tempalte components inside the same project, and you need to take the configuration from the first map template component. There is a drop down made just for this feature, let’s see how it can be done!
Step 2.1:
Add a new map template inside the project, then open its Template editor.
Step 2.2:
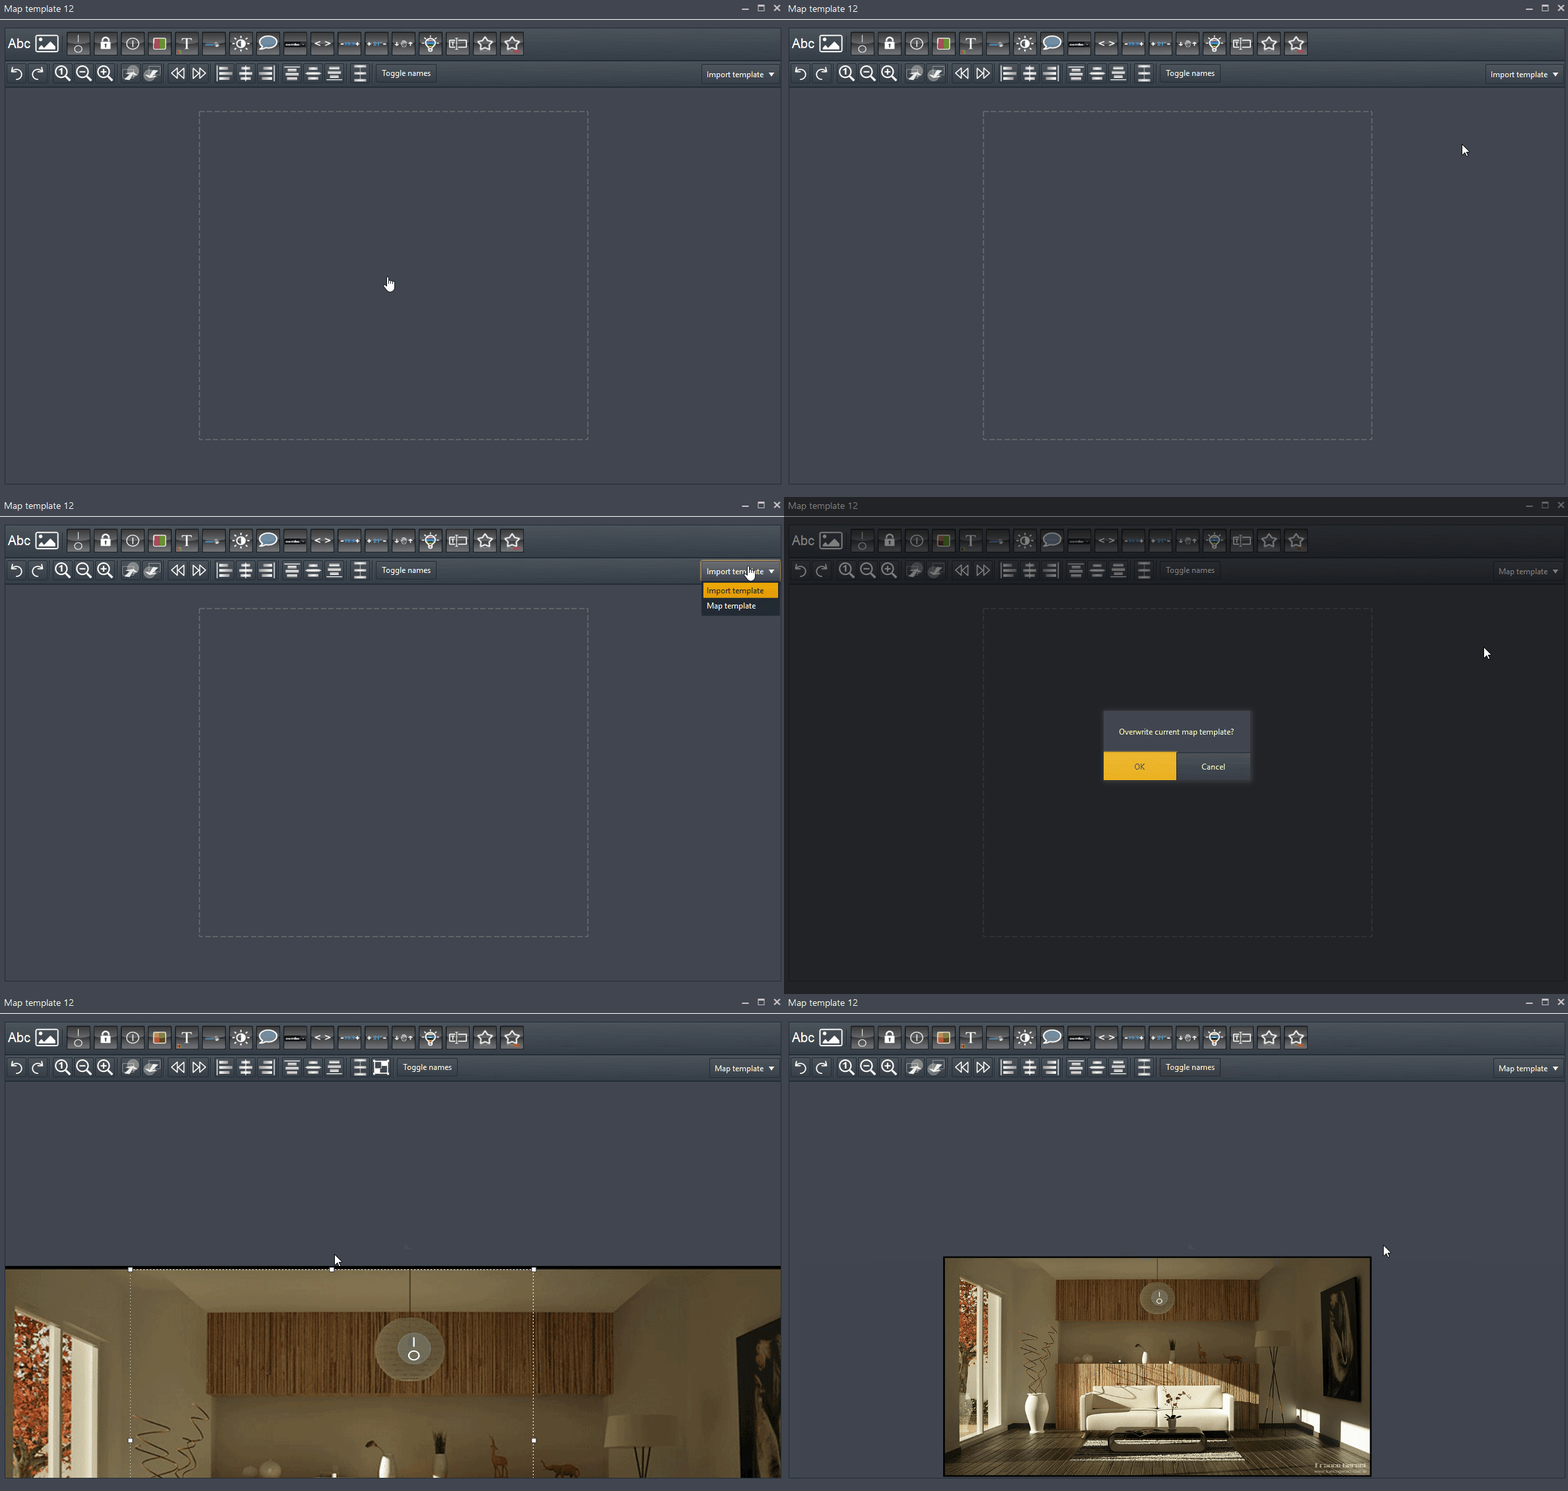
Now if there are more than one Map template components inside the project a new drop down menu will appear on the right corner of the Tool bar called “Import template“, click on it and select the source Map template component that you want to copy the template from. Once selected the Map template it will be asked to overwrite the current Map template, confirm by hitting OK.

