SHELLY RGBW2 INTEGRATION WITH THE MQTT PROTOCOL WITHIN THE ILEVIA SYSTEM
INTRODUCTION
This shelly device can control rgb lights.
In this guide you will learn how to set up this device in Eve automation system.
Web interface configurations
Connect to its wifi and type the default IP address (192.168.33.1) your browser search bar.
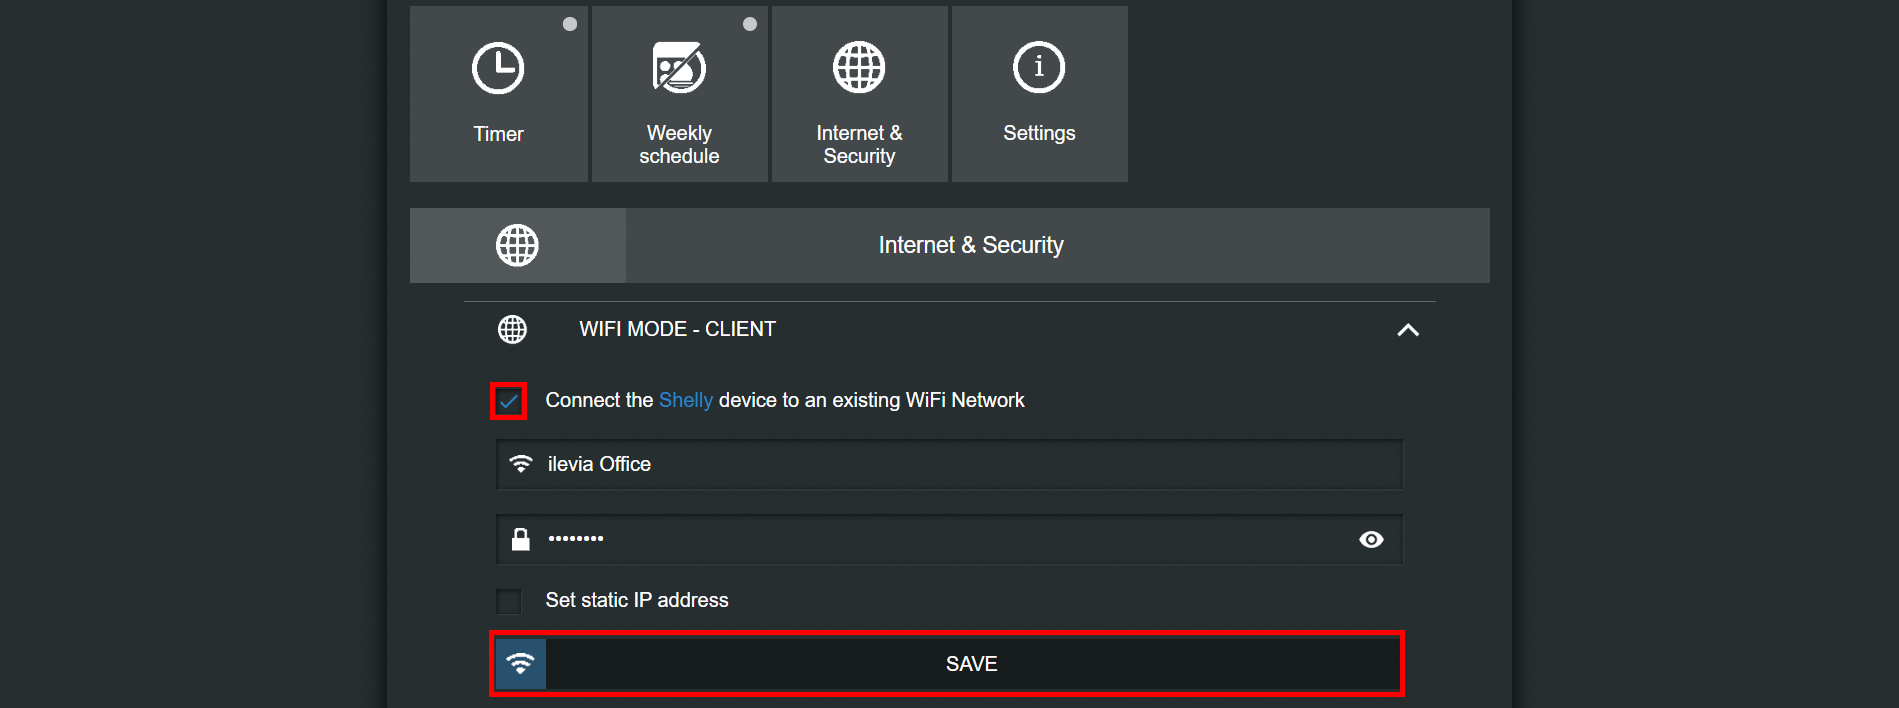
Get inside the internet security settings tab,
select the tab wifi client and check the box to enable the device to connect inside your networ.
Put your wifi credentials inside the text boxes.
To enable the MQTT protocol get inside the ADVANCED DEVELOPER SETTINGS tab and check the box to enable MQTT.
In the text field called server, put the IP address of your EVE x1 server.
Set the QoS (Quality of Service) to 2 and click save.
After this operation the MQTT protocol will be enable in the shelly device.
Step 5:
The topics:
Refer to the shelly website for further information about the topics we will use.
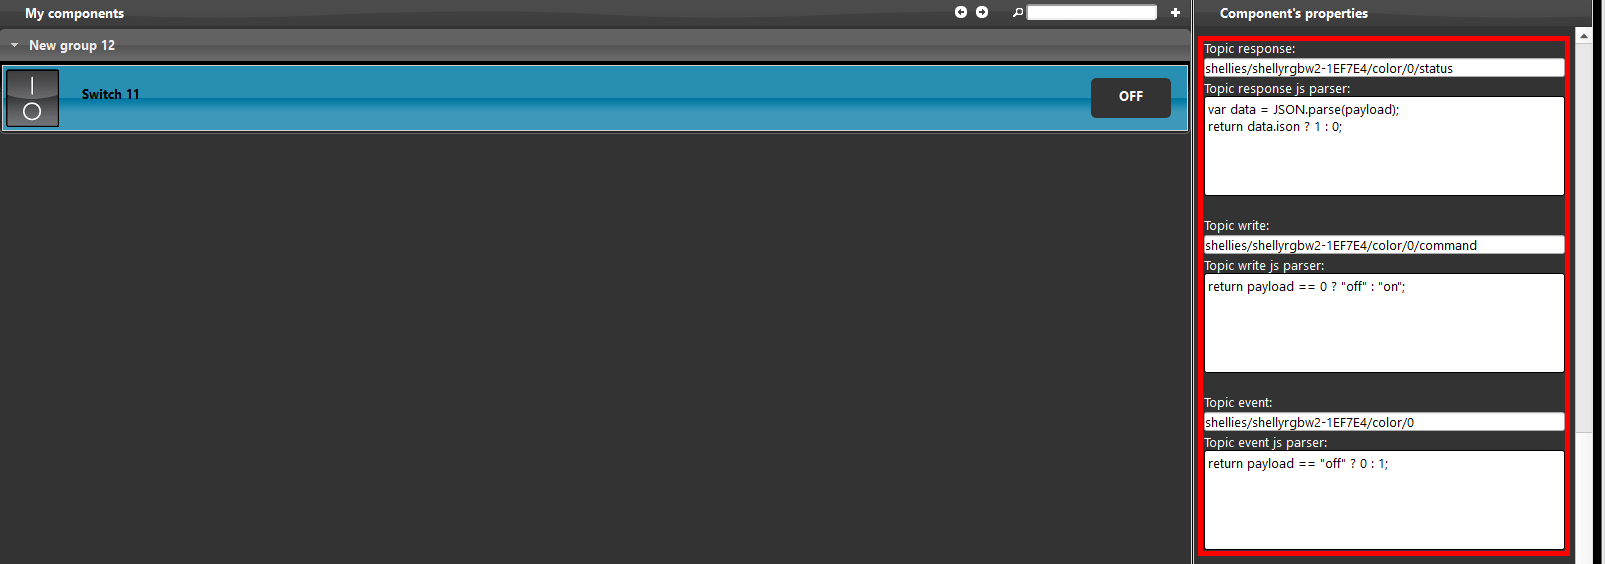
Here below explaned how the topics are been set up.
By clicking this link you wil be able to see the topic configuration
Step 7:
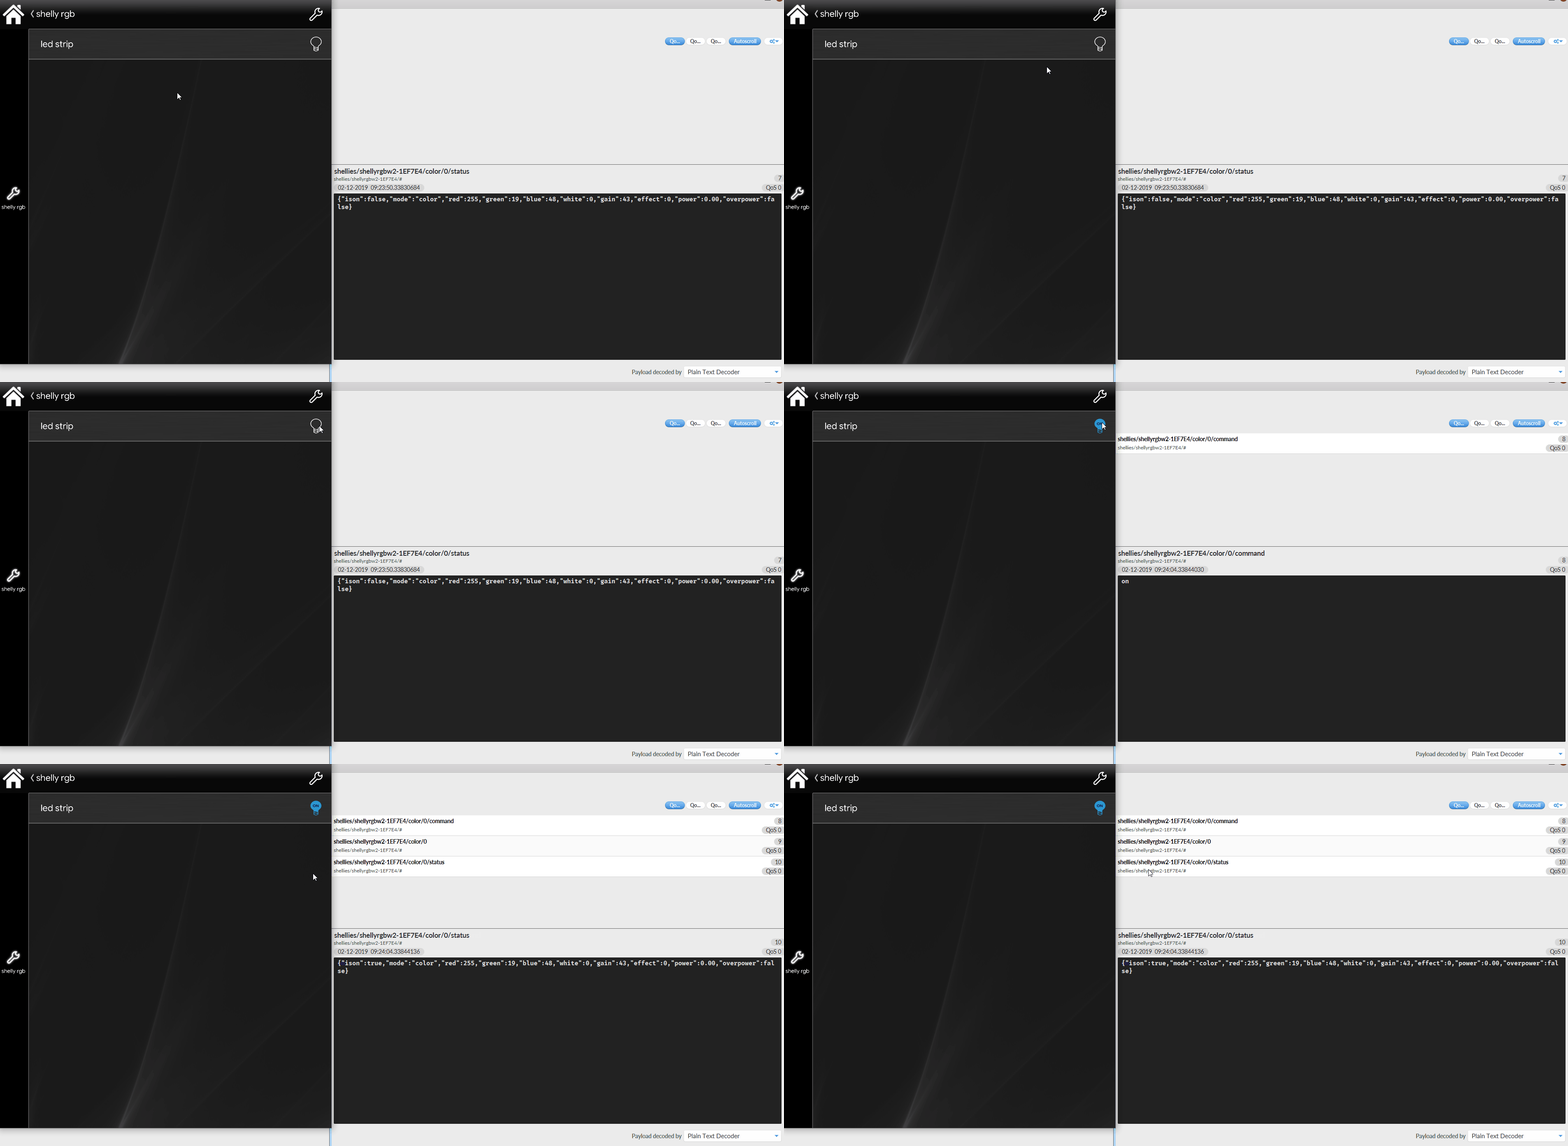
MQTT protocol is working you will able to see the topics you’ve set in eve manager.
COLOUR CHANGER
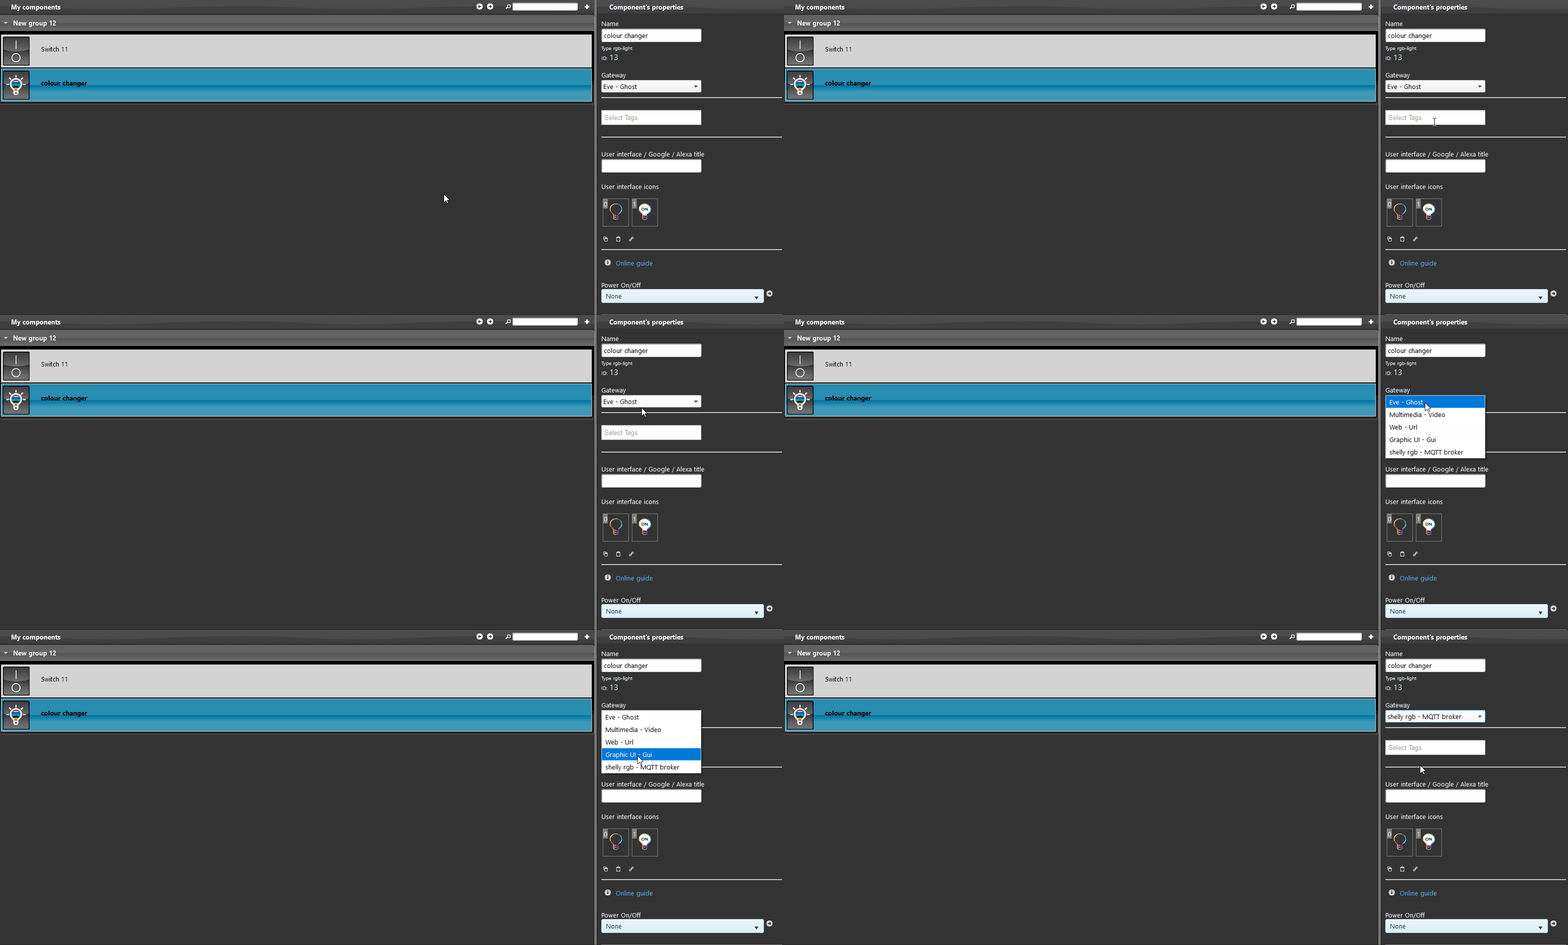
Add a new rgb light component,
select from the drop down menu of the component the broker we have set at the begining of this guide.
Step 1.2:
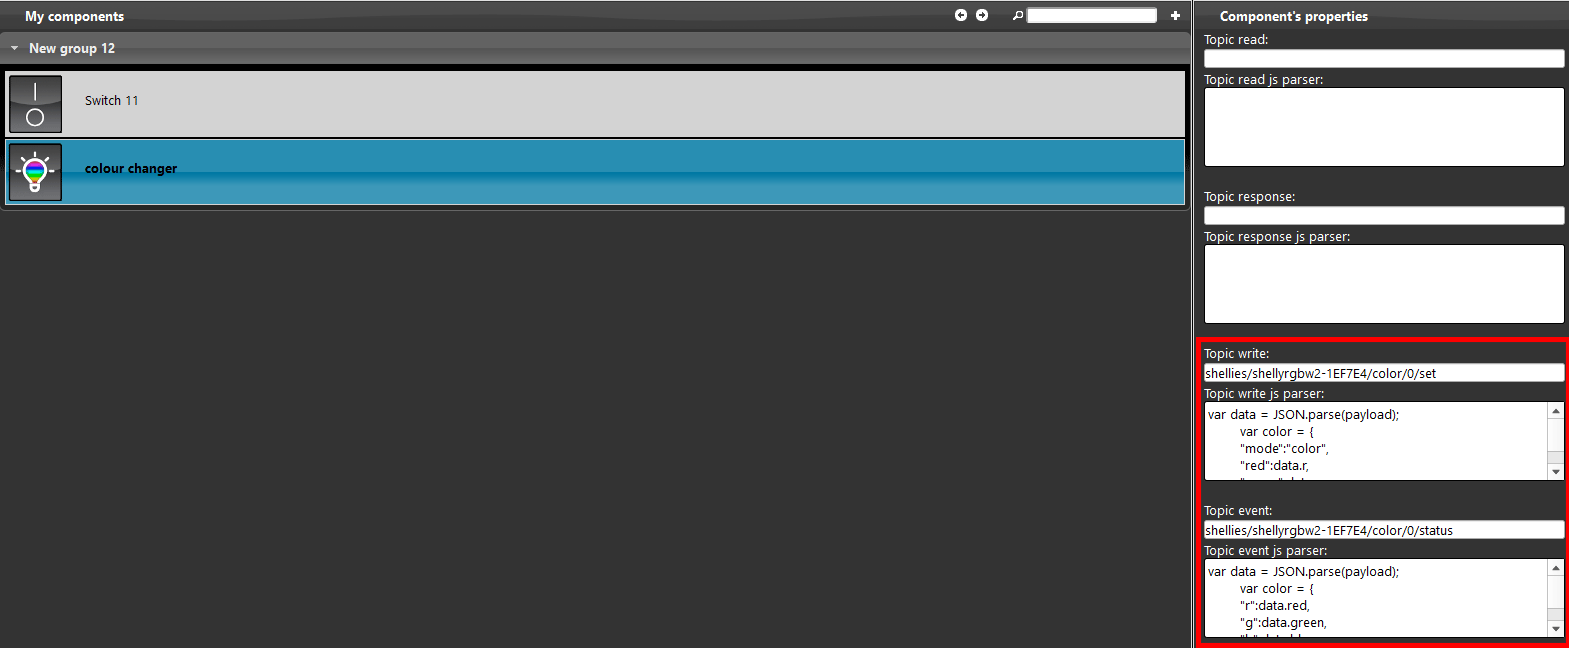
Set up the topics, the topics that we will set are “write” and “event“. As show in the picture below these are the two topic that Eve will subscribe to.
You will need to put the string written below inside the topic corrispective text box.
By clicking on this link you will be able to see the topic conifiguration.
Add the component inside the user interface and upload the porject into your Eve X1 device.
Then open your Eve automation app, you should be able to see the rgb device changing colour.
COLOUR WHITE
Here explained how to configure the white colour power on in the shelly RGBW2 using the MQTT protocolo inside EVE Manager Pro.
First thing that is needed in order to make the white mode works is:
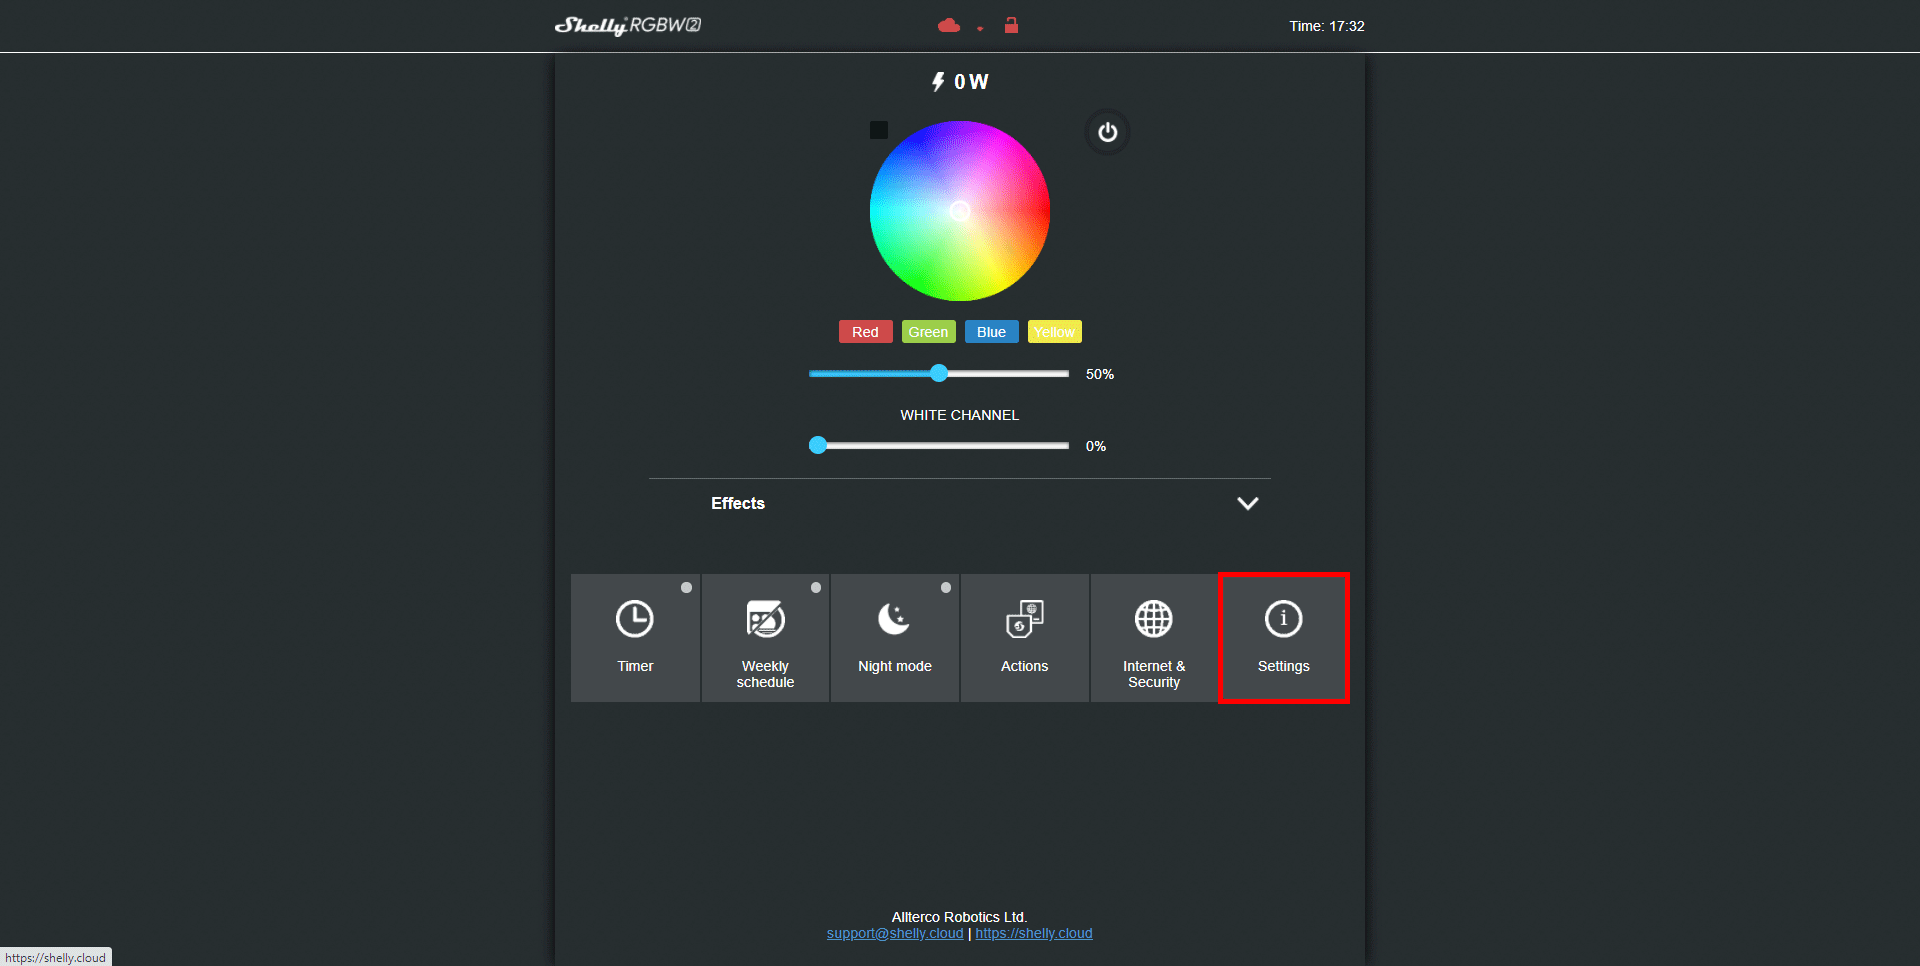
Head to the your shelly rgbw2 web interface and on the setting button on the bottom right of the page;
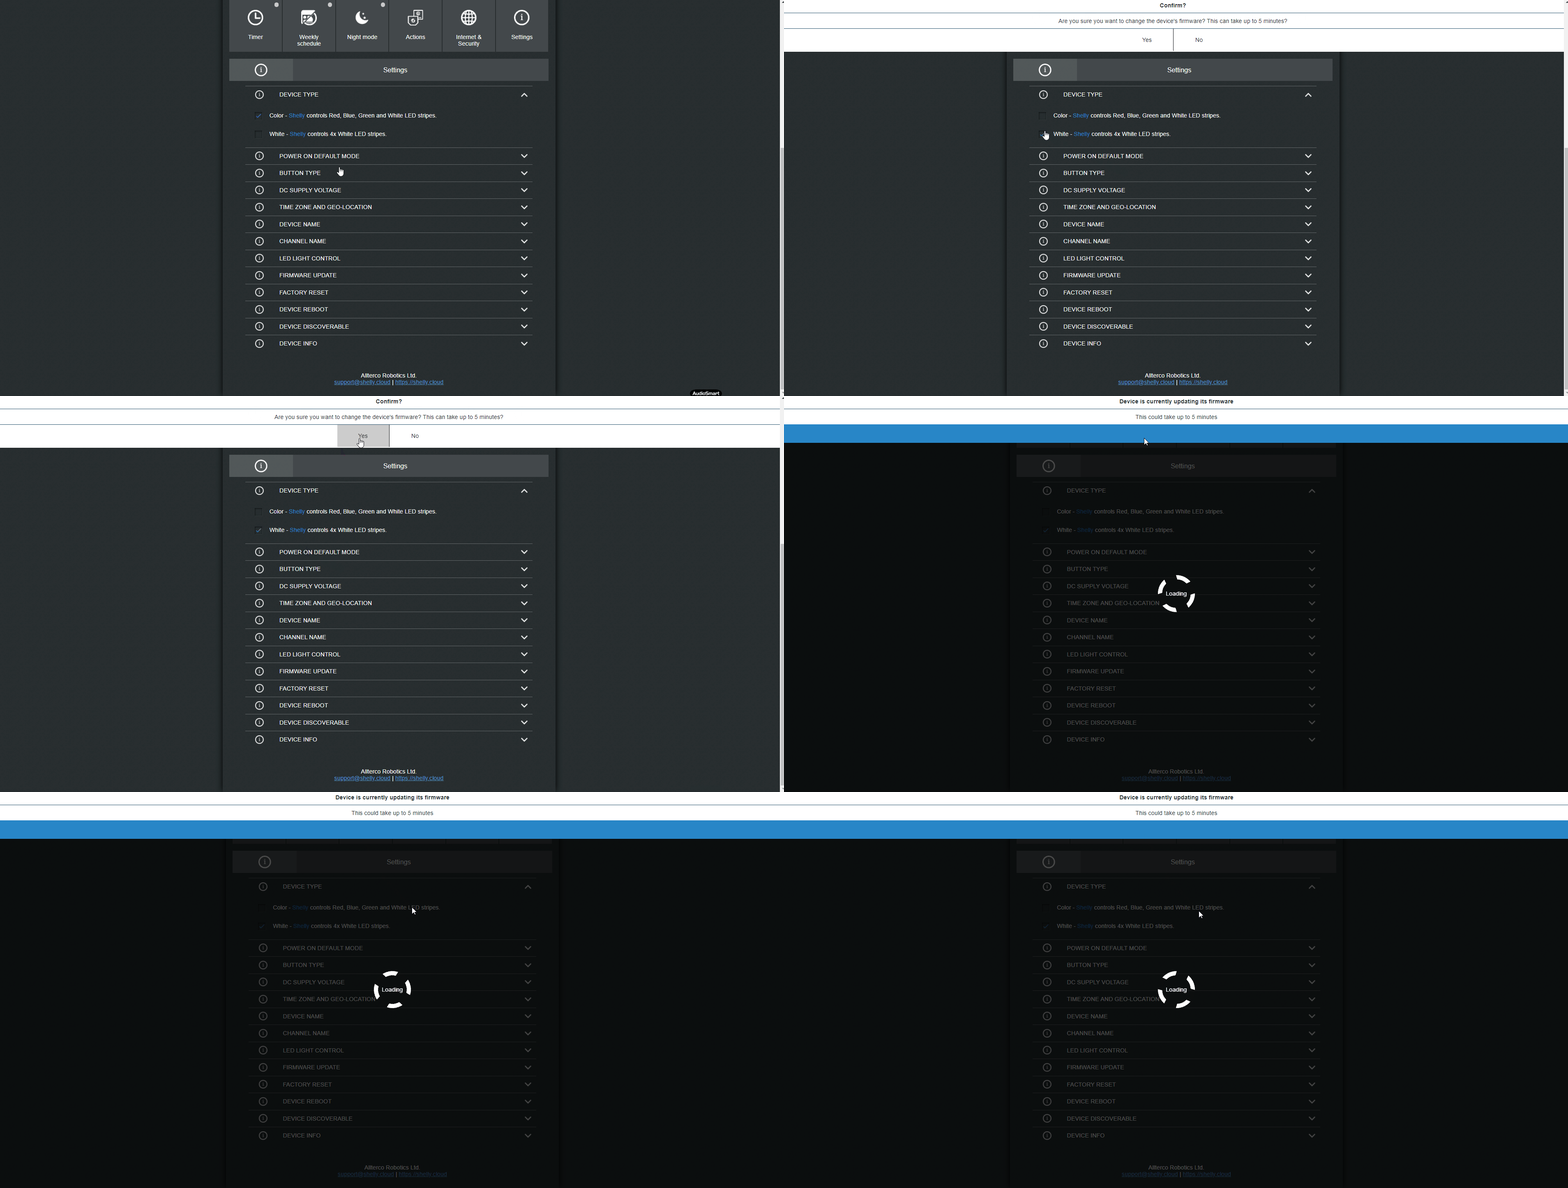
Now Click on “device type” section, and select the second option “White – Shelly controls 4x White LED stripes”, now the shelly will reboot and set up the white color mode.
Step 2.3:
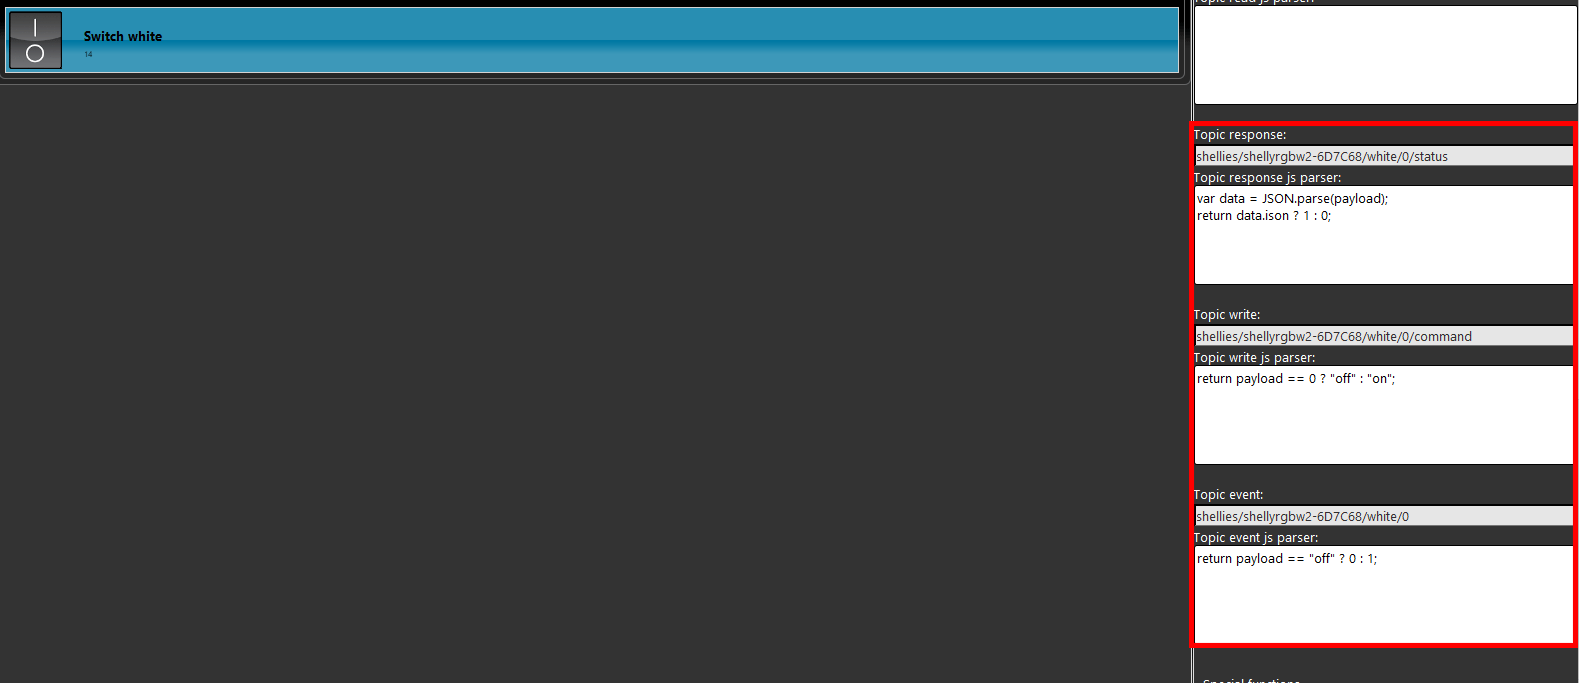
The configuration of the white function inisde the shelly’s EVE Manager Configuration are similar to the standard power coniguration but with a topic exeption as shown below. Yoi will only need to switch the word color and write the word “white”.
Indipendetly on which channel you will use. the steps are the same.
By clicking this link will open the configuration of the switch component.
Step 2.4:
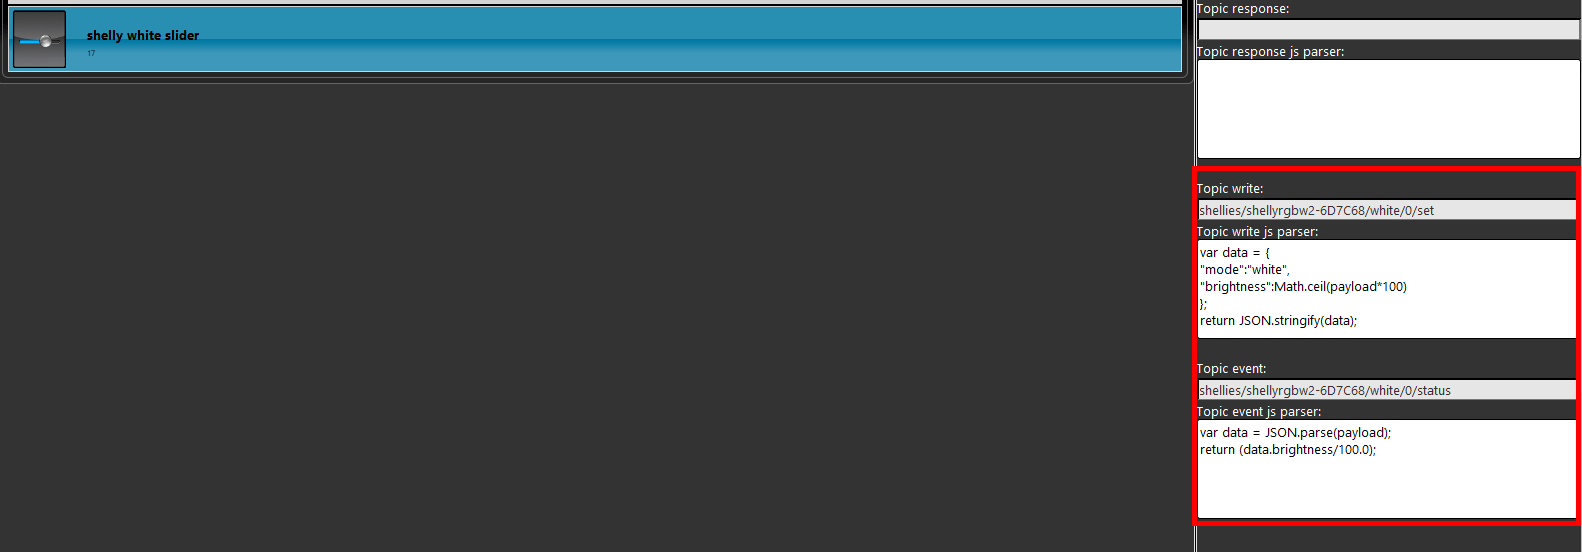
Now let’s build the slider that will set the brightness of the white light. Add a slider component inside the component section in EVE Manager and configure it like shown in the pitecure below.
By clicking this link you will open the configuration file of the slider.
Step 2.5:
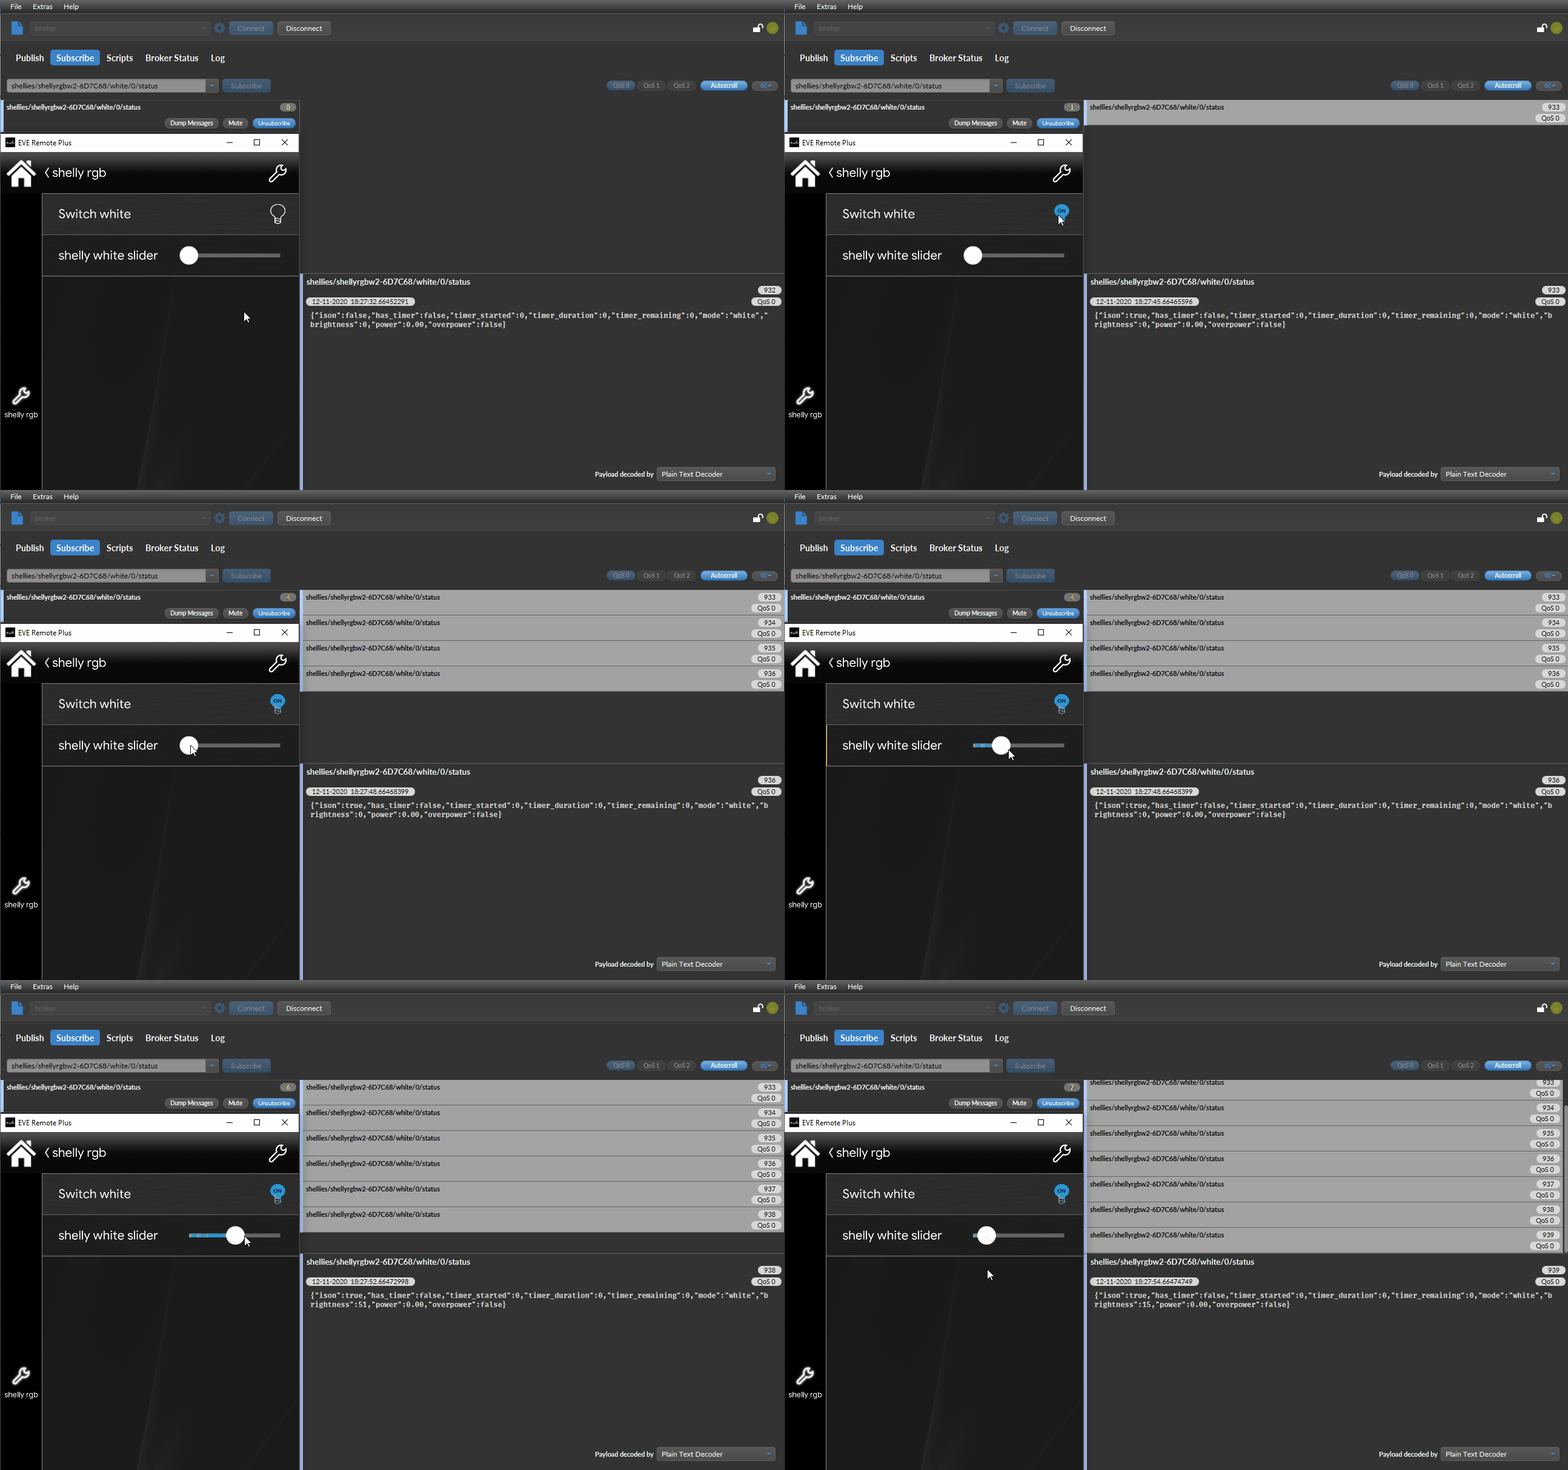
As you can see from the picture below, once the component is clicked from the EVE Remote App interface the led strip, which the shelly device is connected to, will turn on in white colour.
1- Make sure to have the last version available for EVE manager and Eve X1 server
2- Make sure the shelly plug is connected in your network
3- If you can’t connect to the broker check if the X1 server ha been wired correctly.
Discover more about our Shelly dedicated solution.
FAQ:
My shelly device won't connect into my wifi
Check if the credentials of your wifi network are correctly written and if the are changed, and check if your connection has particular settings such as mac address filtering.


