CONNECTION TO RASPBERRY SERVER FROM ILEVIA MANAGER
INTRODUCTION
When connecting for the first time, connect the LAN wire to the LAN adapter on the device, then connect the power on the device. The server will then boot from the on board card (from the MicroSD card for Raspberry Pi) which stores all the firmware and user data. The Server will now get an IP address automatically from the router (DHCP server). It is important that your server is connected to the same network as your computer, so you can use the Server Connection command on configuration software Ilevia Manager.
Connection to the server (Router)
PROCEDURE
Step 1:
Open Ilevia Manager configuration software (download)
Step 2:
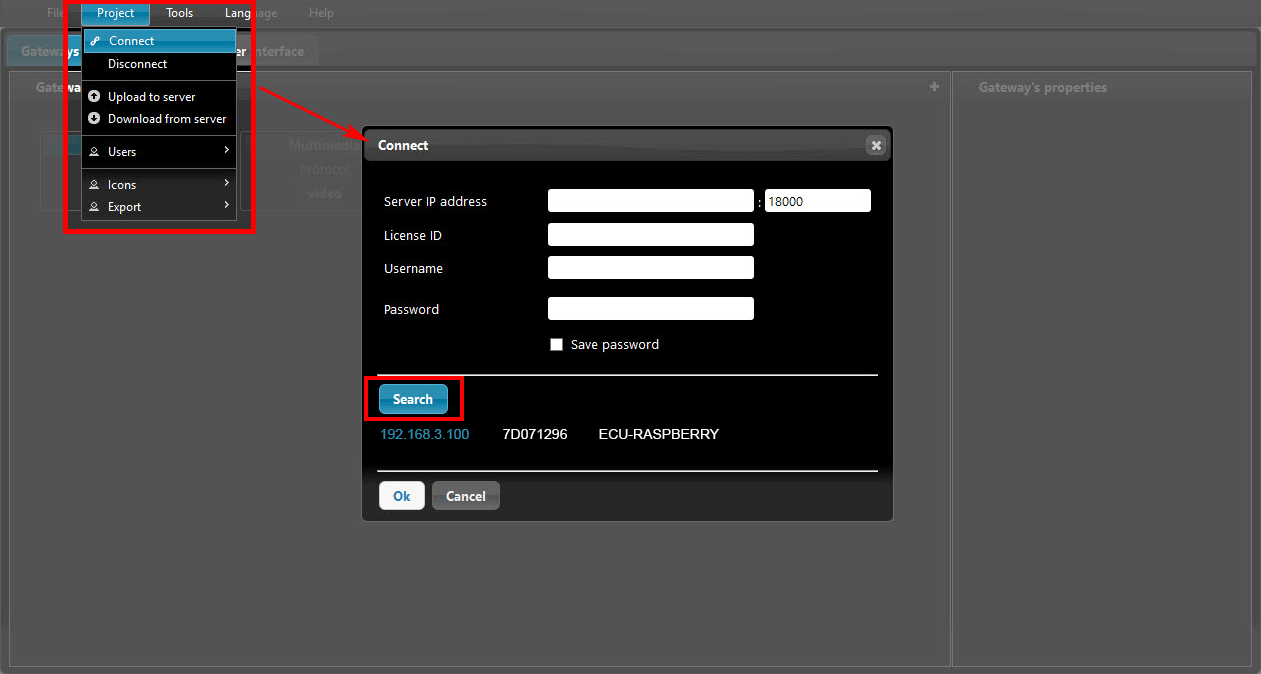
Select Project from top menu, then Connect command. Connection dialog box will appear.
Step 3:
Click Search button to find the server on the whole network. Your server main details will be displayed below.
Still cannot find your server?
Then use this link. The internet browser will open and display a list of IP addresses of all the servers in the network. In presence of a single EVE server in the network you will land on the web configuration panel login of the only server connected to the local network. Copy link from the URL and paste it on the Server IP Address field on the connection dialog box of Ilevia Manager.
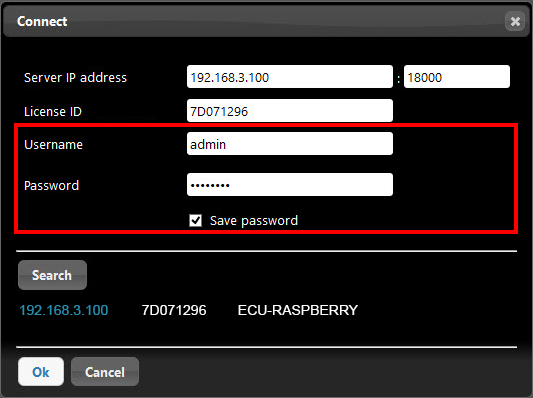
Click on the server IP address of your server from the list that appears on the connection dialog box
Step 5:
Fill in the credential fields and click Ok (Default credentials: Username: admin / Password: password)
Congrats ! Now you are connected to your EVE server and you can start configuring your project !
Connection to the server (Direct)
If there is no router available or you want to quickly program the server then you can connect directly to the server with your Pc.
Setting a manual IP address
If there is no DHCP server or router to assign an IP address to the Server, you must set one manually. By default, this should be in the range 192.168.1.x. > How to change network settings (disable DHCP and use static IP address)
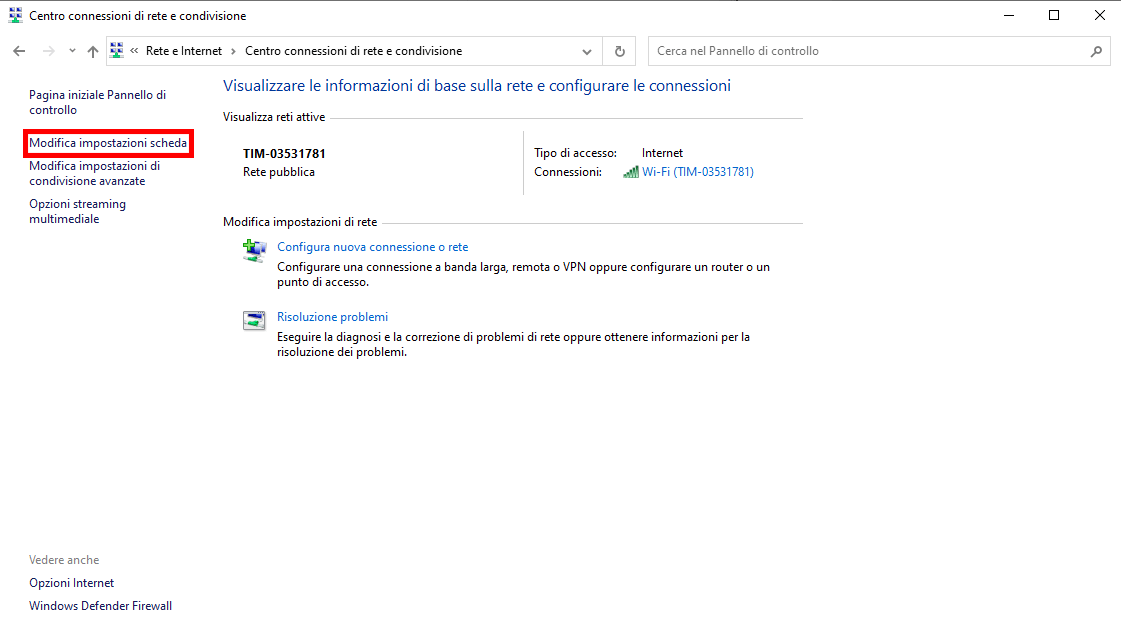
Open Windows Control Panel and go to the Network and Sharing Center. On the left you will see the Adapter settings option, click on this to see the adapters of your computer.
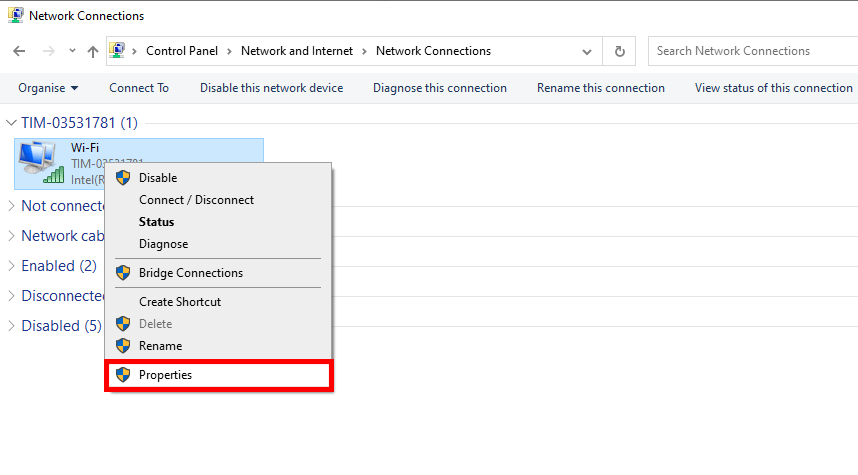
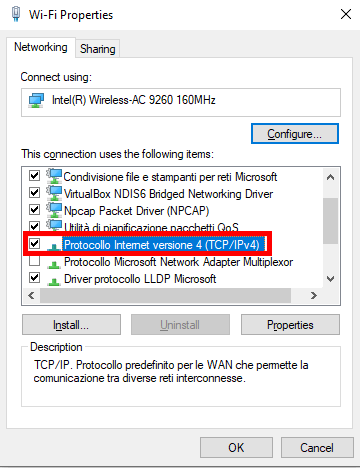
Right click on the Ethernet adapter (the one connected to the Server) to go the Properties of the adapter.
Scroll down in the Networking tab to the entry ‘Internet Protocol Version 4 (TCP/IPv4) and then click on the Properties button to edit the IPv4 properties of the adapter.
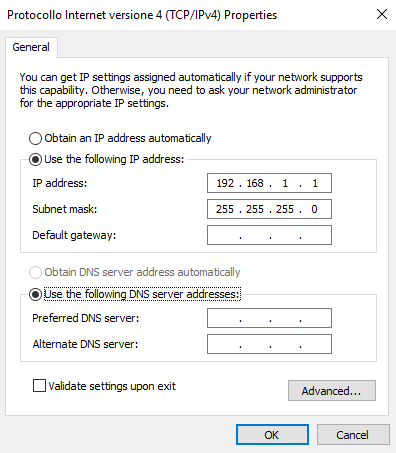
Here you can assign your computer a static IP address. Click on the option ‘Use the following IP address:’ and then fill in an IP address and subnet. The IP address for your laptop should be one that the Server would not be using. By default with no router the Server IP address is 192.168.1.100 so set your laptop IP address to a different address of your Server IP address, for example 192.168.1.1 (mimicking a router).
Hit enter after entering the IP address and the subnet will automatically be filled in as 255.255.255.0. This is fine, you can now click OK and then exit the Control Panel network adapter windows.
Congrats ! Now you are connected to your EVE server and you can start configuring your project !

