 Voice Call
INTRODUZIONE
This component allows to receive a Voice call from the Ilevia server that will repeat the message entered within the “Content” parameter section. This component comes handy to receive real time alerts on each device connected to the Ilevia Control account.
COMPONENT PROPERTIES
Customizable component’s title and icon. Please refer to “Common properties” guide.
GUI
This component’s sample is made by using Graphic UI gateway.
Please refer to “Gateways / Protocols” guide in order to get further info.
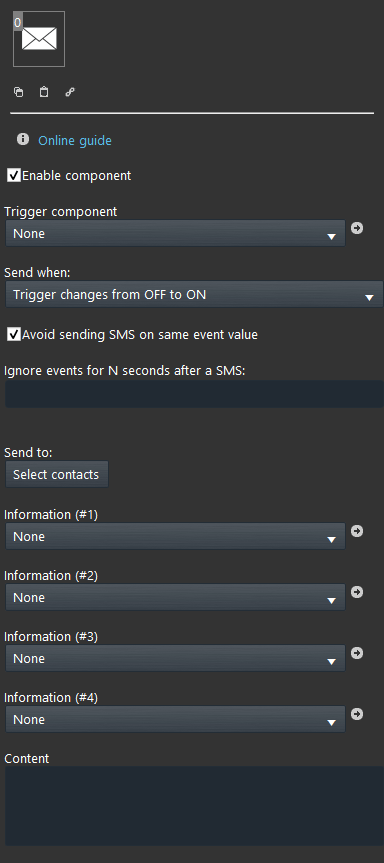
Enable component: Checkbox which defines whether the function is enabled or disabledon the EVE server
Trigger component: Drop Down, Color info, Text info, Switch, Lock or Pulse component that triggers the Voice call;
Send when:
Trigger changes from OFF to ON: The voice call is sent only when the trigger goes to OFF;
Trigger changes from ON to OFF: The voice call is sent only when the trigger goes to Off;
At any change of the trigger: The voice call is sent anytime trigger goes to On and Off;
Trigger ON event: The voice call is sent when the ON event is triggered;
Trigger OFF event: The voice call is sent when the OFF event is triggered;
Trigger ANY event: The voice call is sent at any change of trigger.
Send to: List of contacts which the messages will be sent to. Follow this guide to know how to configure the “Contact” component.
Further information can be added to the Voice call content (up to 4 information):
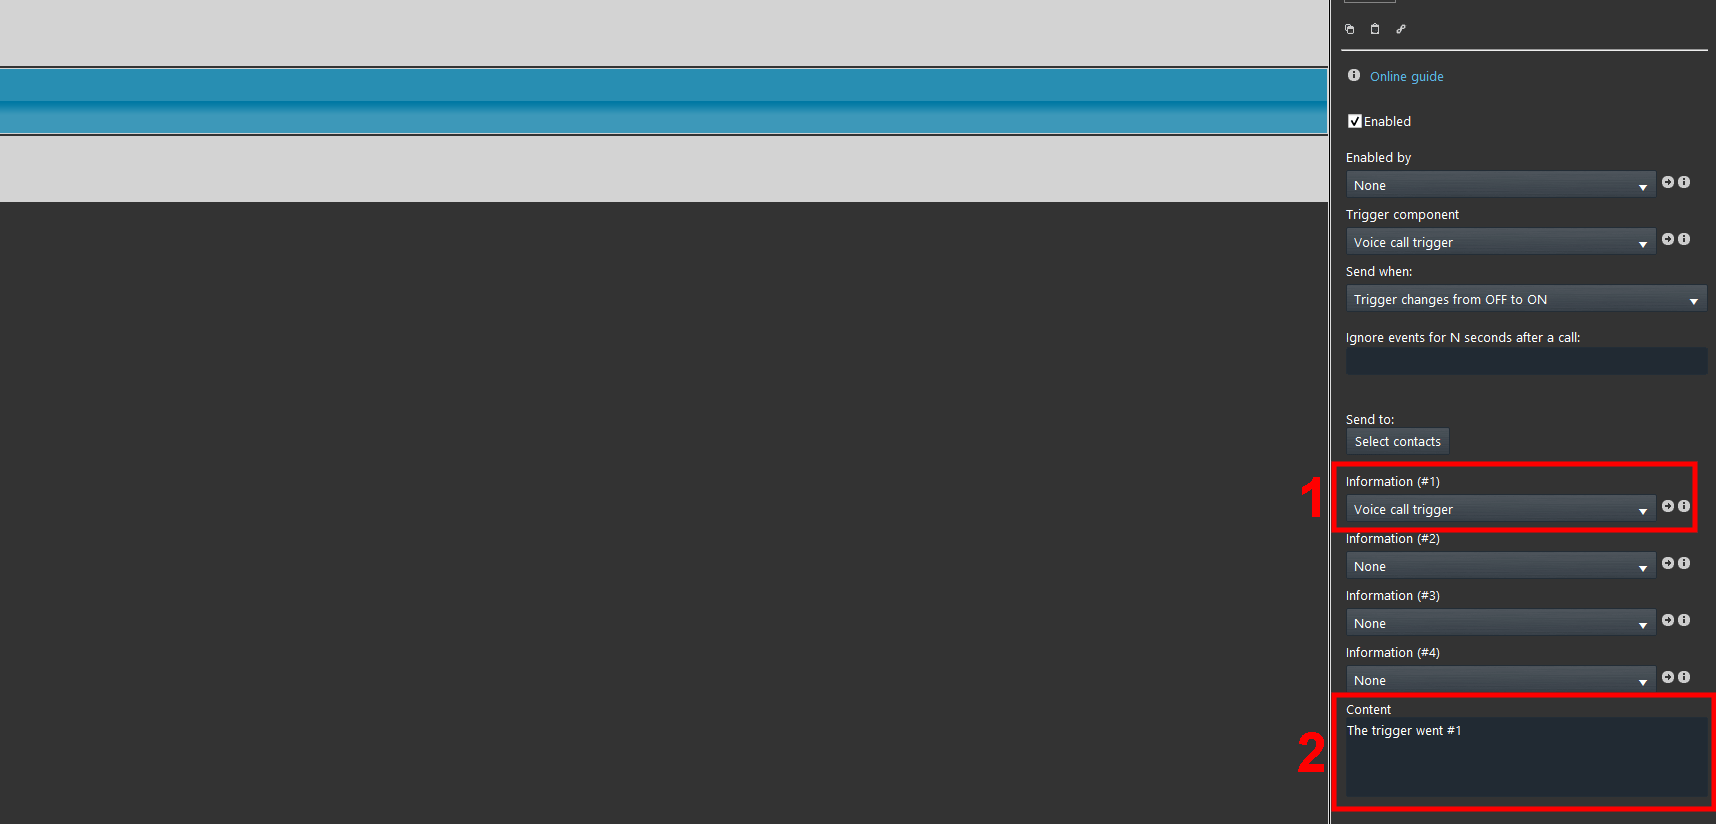
Information (#1): Drop Down, Info, Color info, Text info, Slider, Switch, Lock or Changeable Value component;
Information (#2): Drop Down, Info, Color info, Text info, Slider, Switch, Lock or Changeable Value component;
Information (#3): Drop Down, Info, Color info, Text info, Slider, Switch, Lock or Changeable Value component;
Information (#4): Drop Down, Info, Color info, Text info, Slider, Switch, Lock or Changeable Value component;
Content: Text of the Voice call that will be send once the trigger status changes. The above information to be implemented inside the content of the voice call needs must be added as follow: # followed by the number of the information (ex: #1 (first information), #2 (second information), etc..).
Component configuration
In the following steps it is explained how to setup the Voice call component to be able to receive Voice calls from the Ilevia server.
The Voice call component service rely on a online service that allows the server to send the call to the clients. Create a new account on Clicksend on the following online service first.
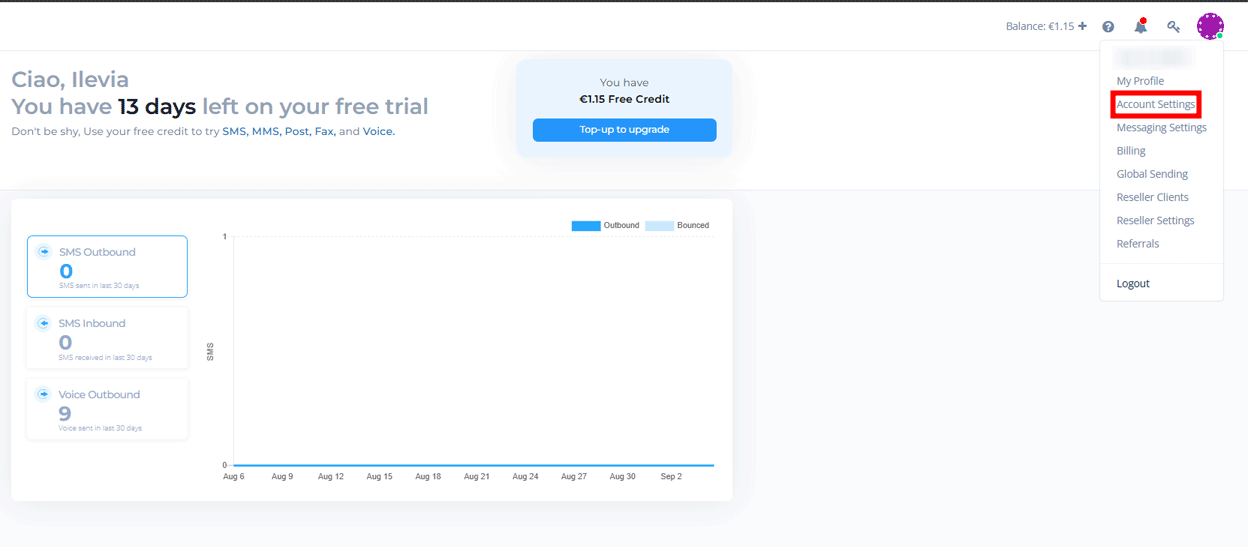
Once logged in your Clicksend account and access the Account settings and finally copy the API Key.
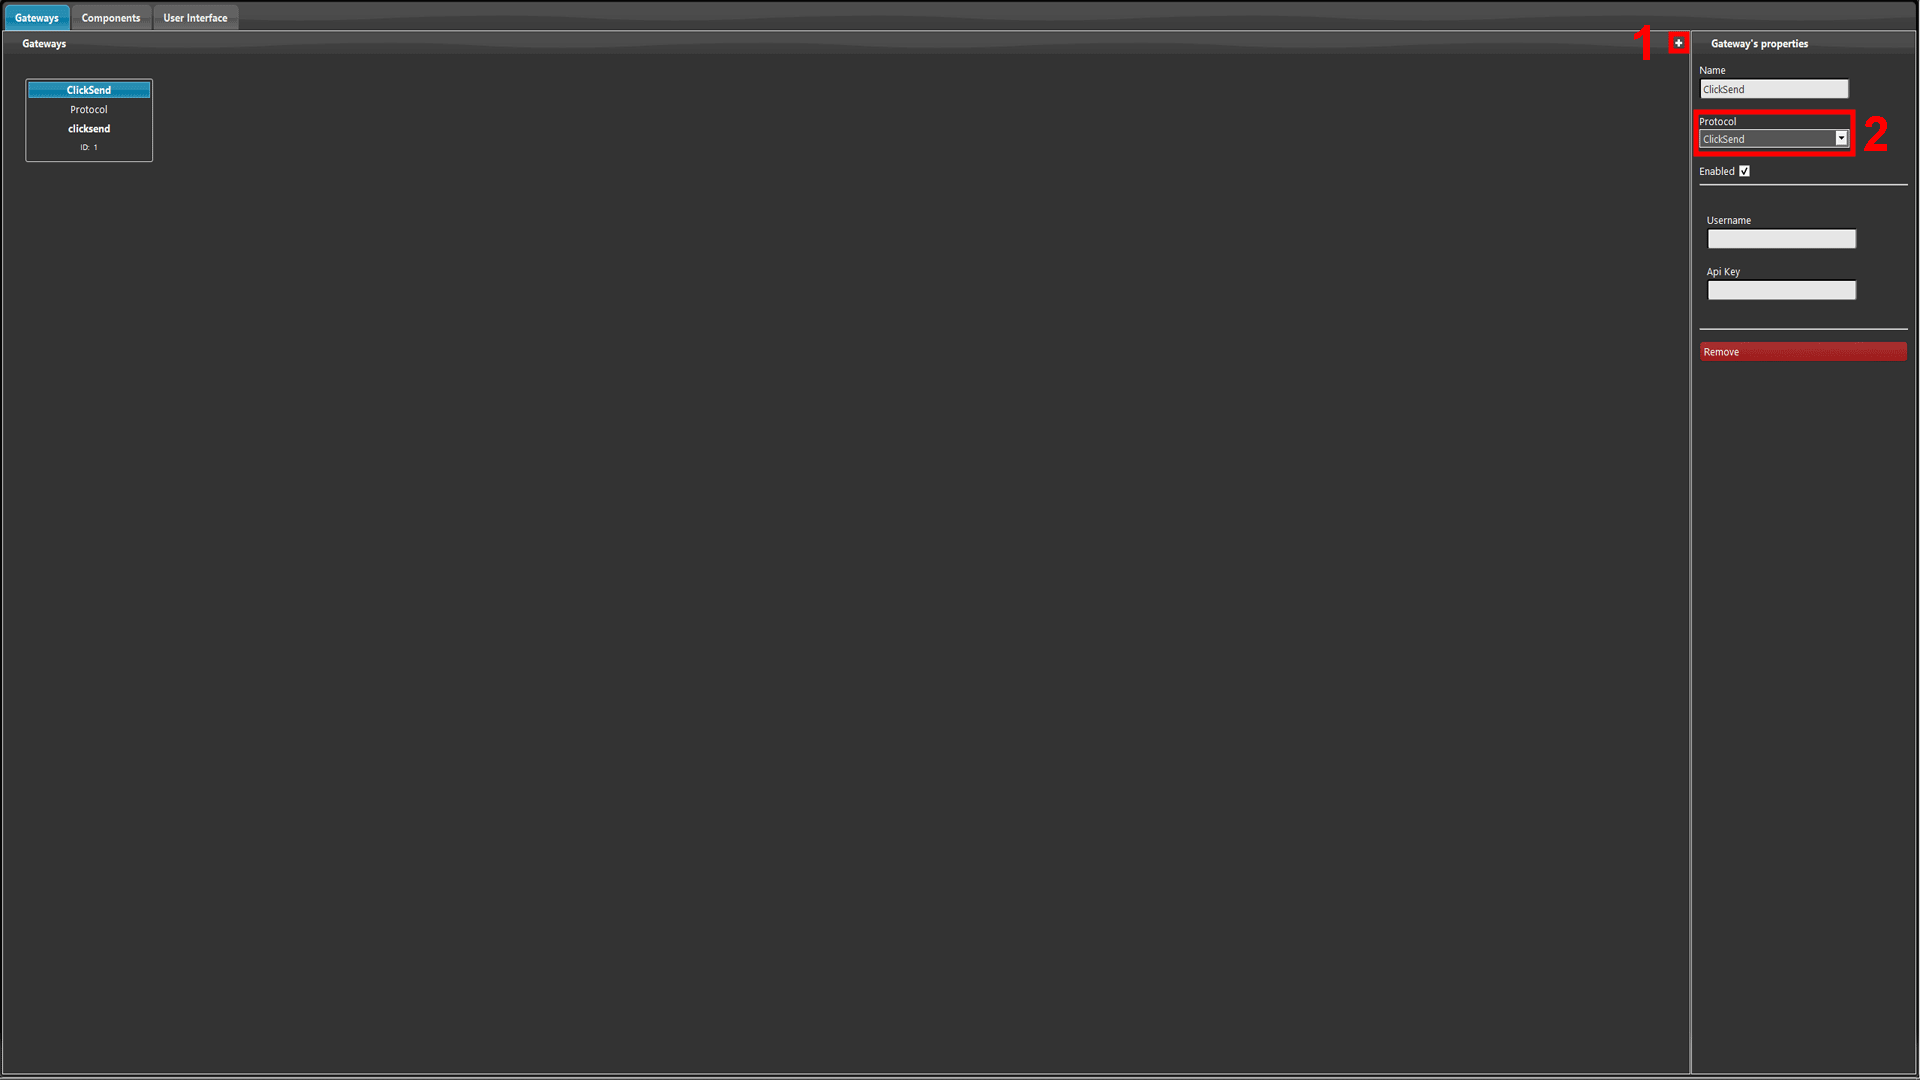
Now complete the ClickSend parameters with the ones of the ClickSend account User name and the API Key copied earlier.
Now open the Ilevia Manager, then access the Gateway section of the software finally add a new gateway and select the ClickSend protocol.
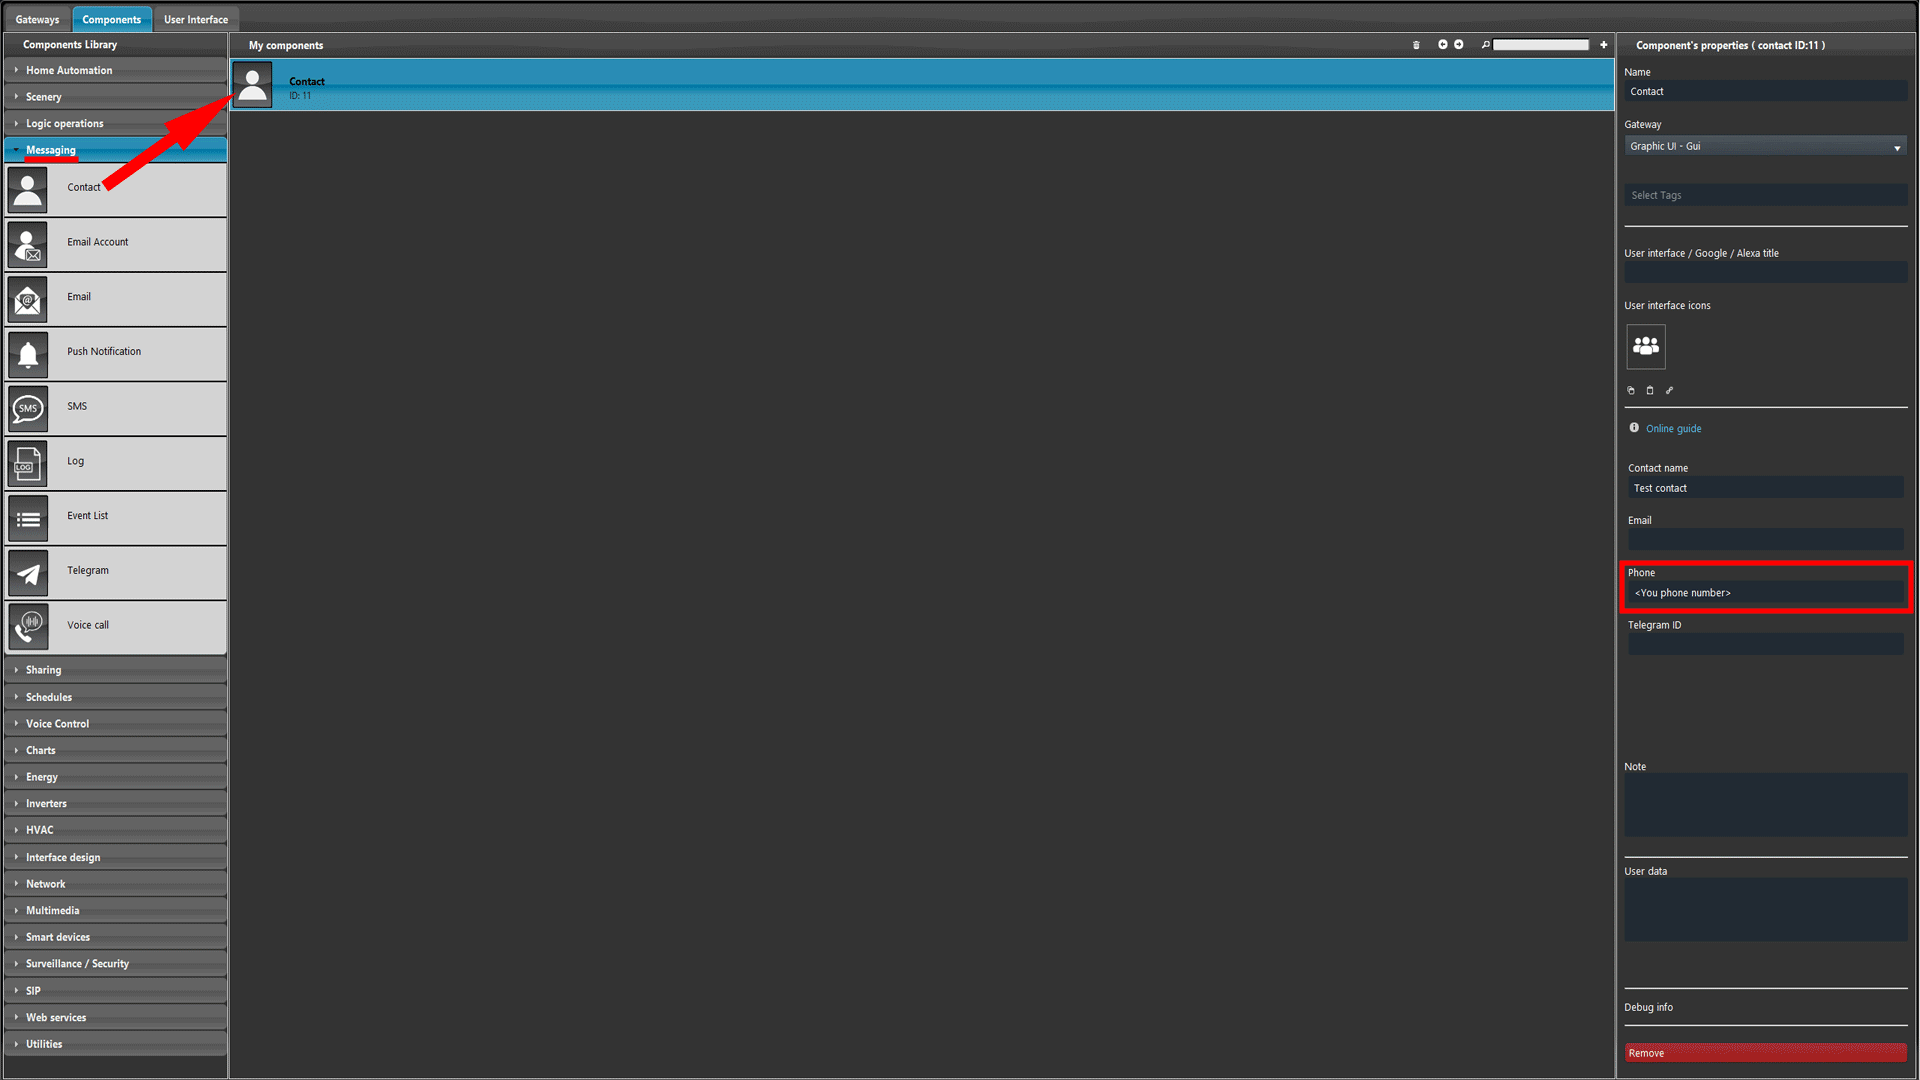
Access the Component section, then open the Messaging section from the Components library, and finally add a new Contact component set a phone number of the client that will receive the call.
Then add a new Voice call component and set it with the ClickSend gateway.
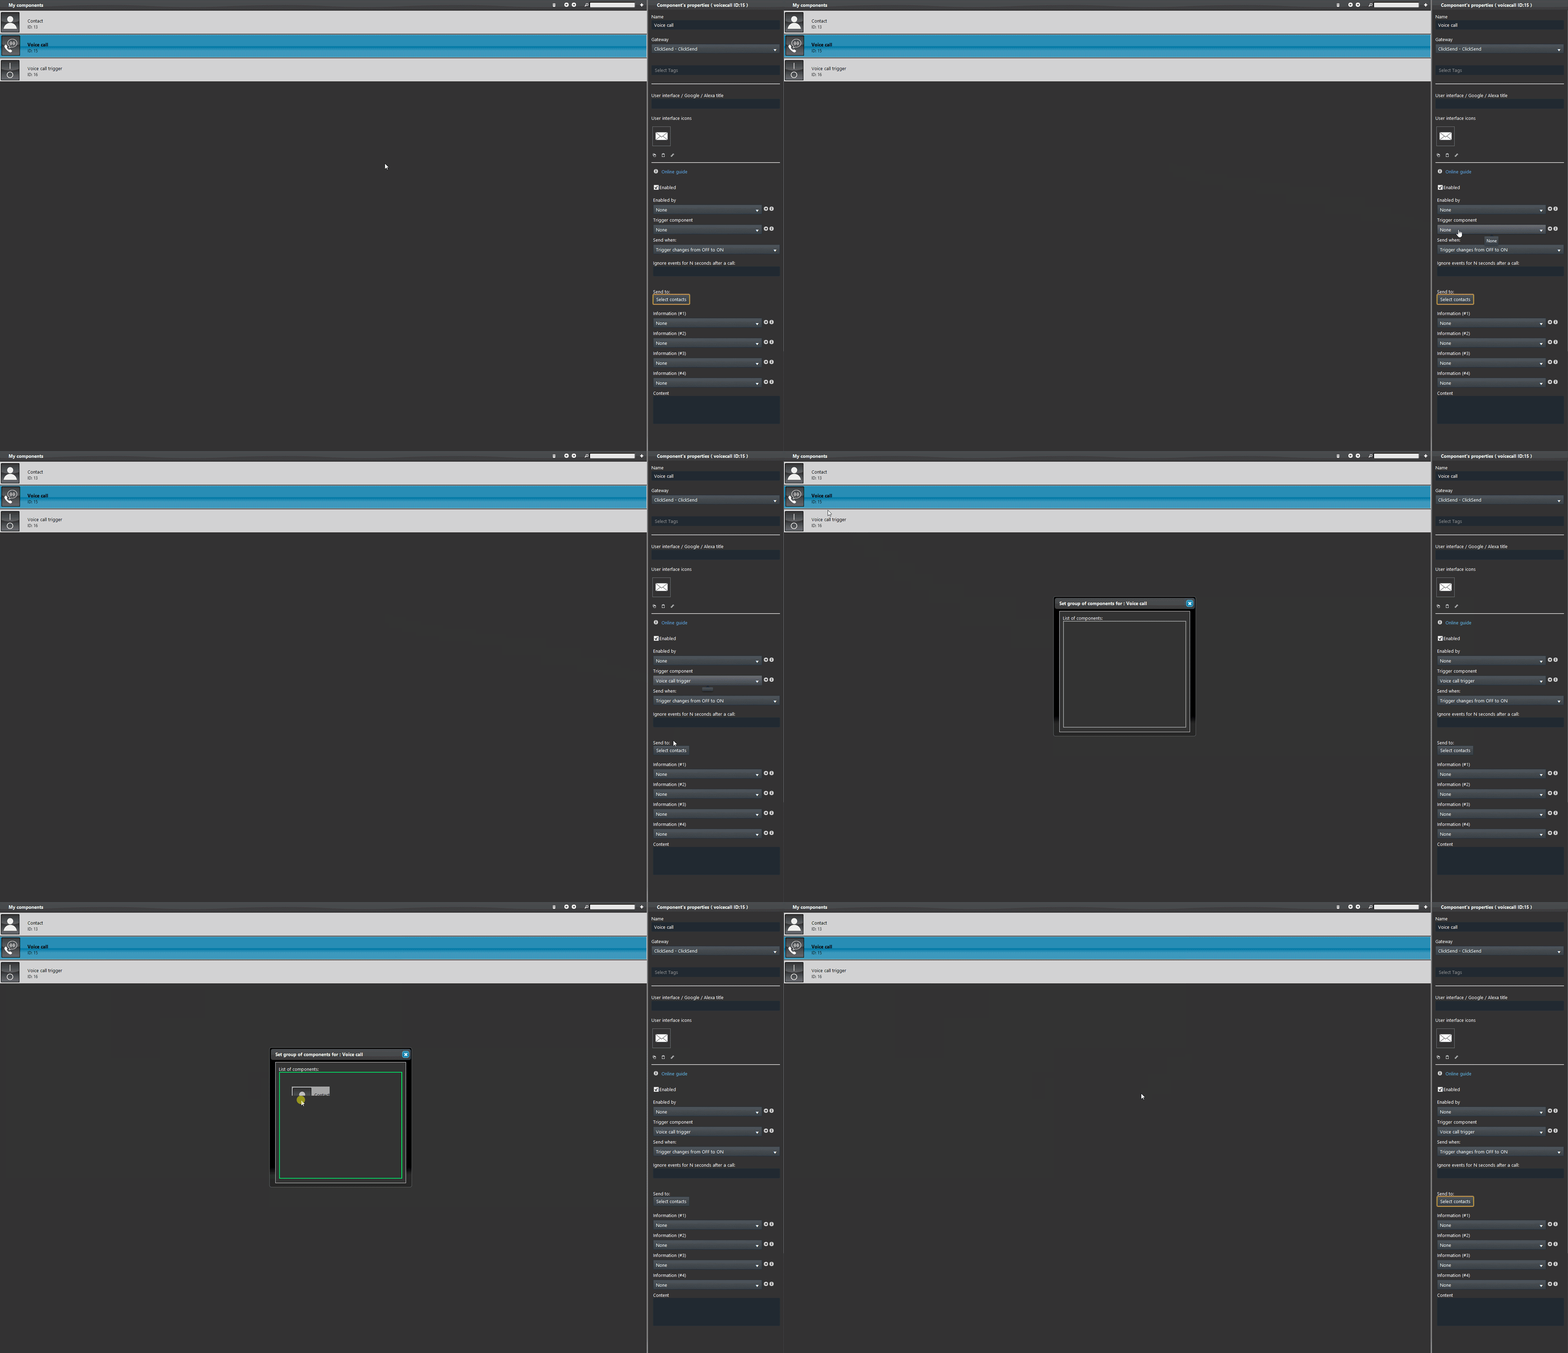
Set a component of your choice within the project that will trigger the event and, on its turn, trigger Voice call. And add the Contact into the contact list of the Voice call component.
1. Add the additional information into the Information parameters, 2. and complete the Content writing the message that will be red to the client that answer the phone call.
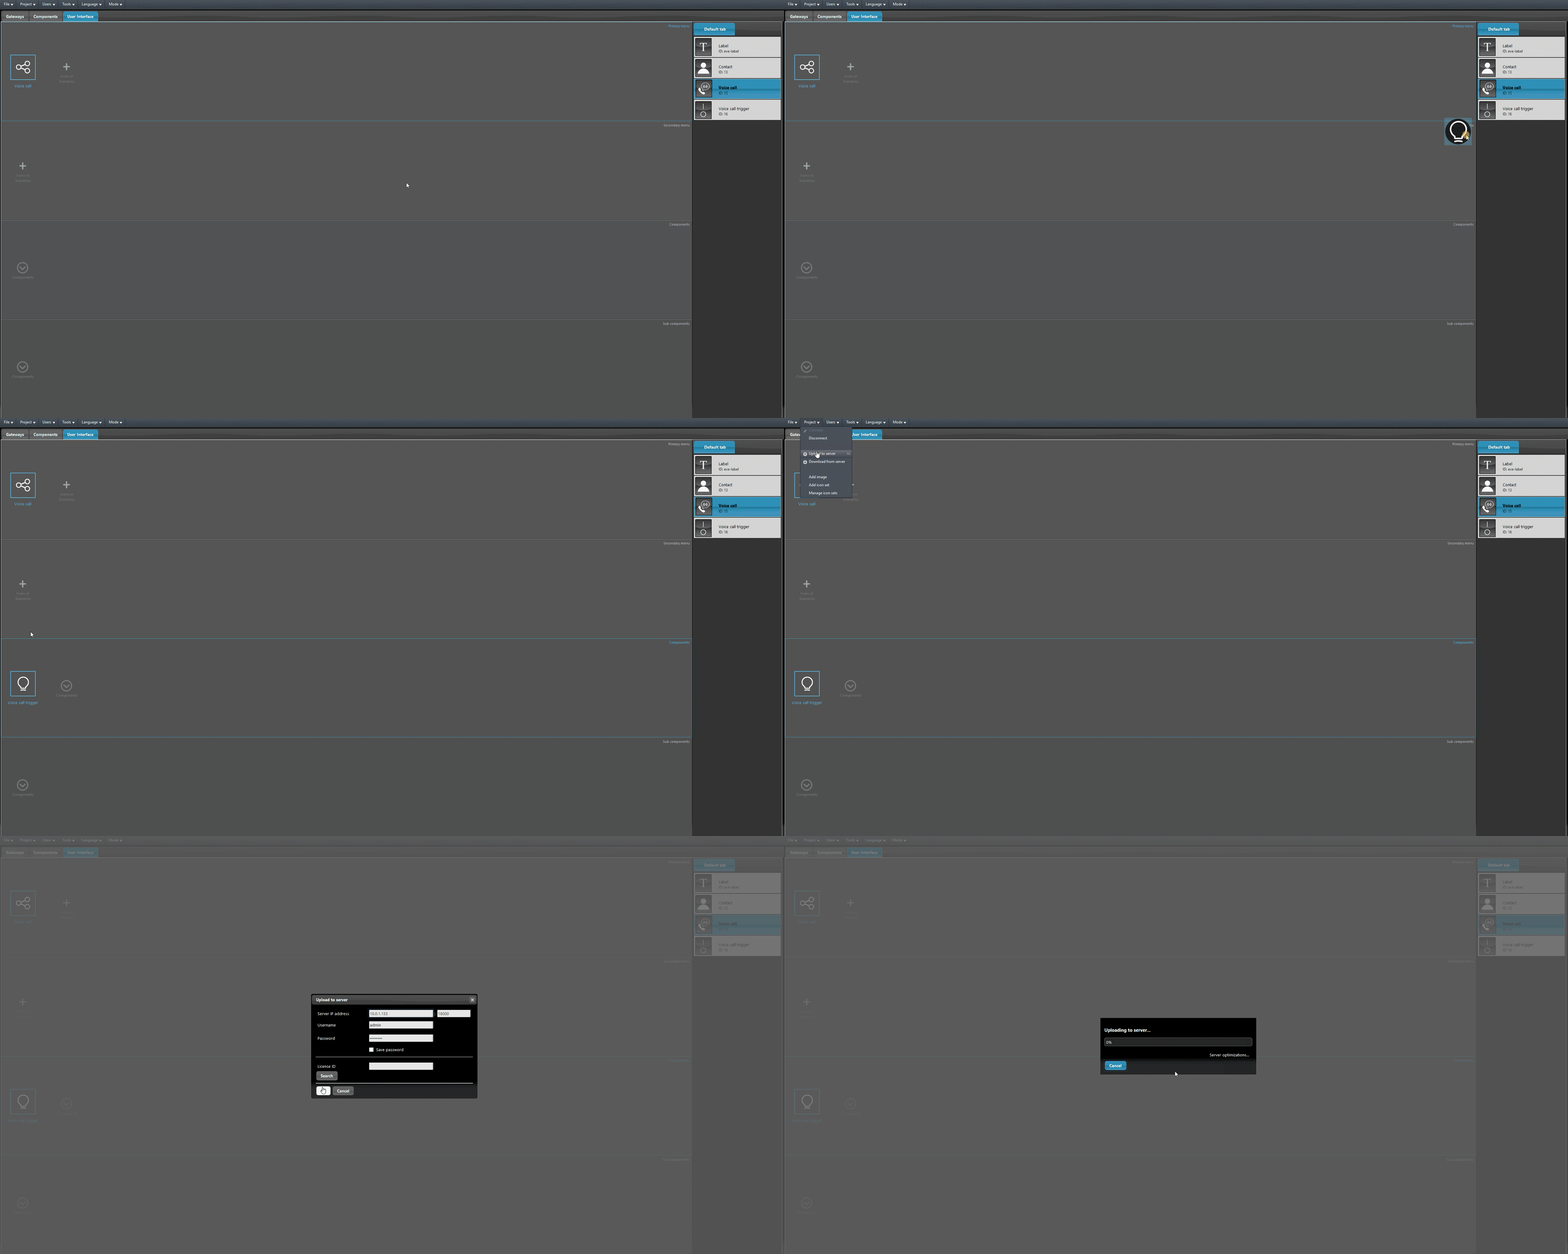
Access the User interface tab. Add the Voice call trigger within the interface and upload the project.

