ILEVIA’S INTERCOM INTEGRATION INTRODUCTION
INTRODUCTION
An intercom, short for “intercommunication system”, is like a personal hotline within a building. It lets people in different rooms or areas talk to each other instantly, without needing a phone line or yelling down the hall. This guide will introduce you to the SIP intercoms integration with the Ilevia server, going on depth into the components that make the integration works.
Components configuration
SIP CLIENT
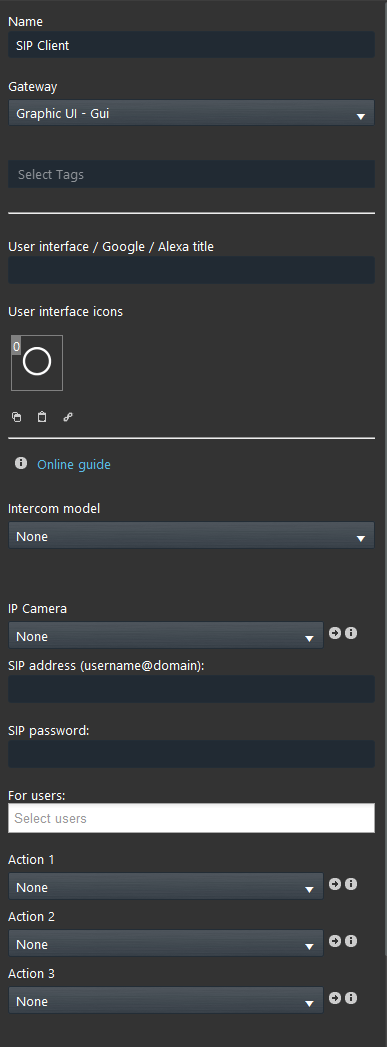
The SIP Client component is mandatory in order to set up the Intercom integration. The Ilevia’s intercom integration requires at least two SIP Clients component. The first one will be set up the App to make, subscribe and be able to receive the Calls, the second one will be set to make the Ilevia server to know who the server is within the intercom system.
Intercom model: Some of the intercoms require specific configuration such as: Videx and Vimar.
IP camera: In this parameter link the IP camera component that have been previously created within the project and will be shown once the doorbell is rang.
SIP address: Here is asked to enter the Username that is represented by the SIP user created within the Intercom web interface, and enter the IP address of the server as Domain.
SIP password: Here enter the SIP password that has been set within the Intercom web interface parameters.
For users: Here enter the project users that will filter who will be able to receive the call in the app.
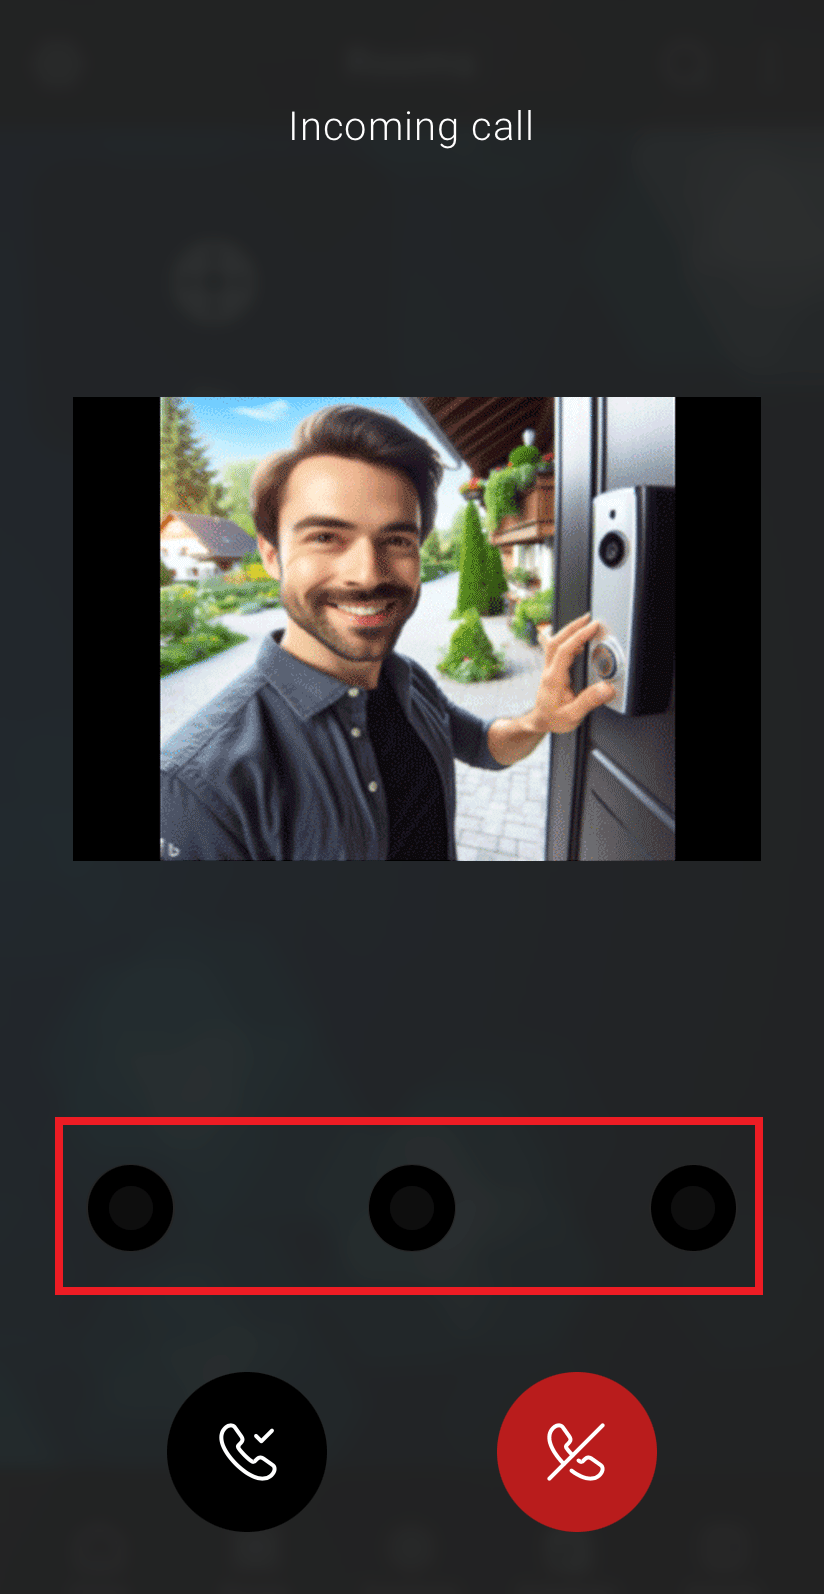
Action 1,2,3: In these parameters you can link up two three different Scenarios that will be available once you answer the call. Below there is shown an example of how the action parameter works.
Action parameter example
Once the call is accepted there will be shown three new icons. each one represents an different action parameter within the Ilevia Manager SIP Client parameter.
SIP Group
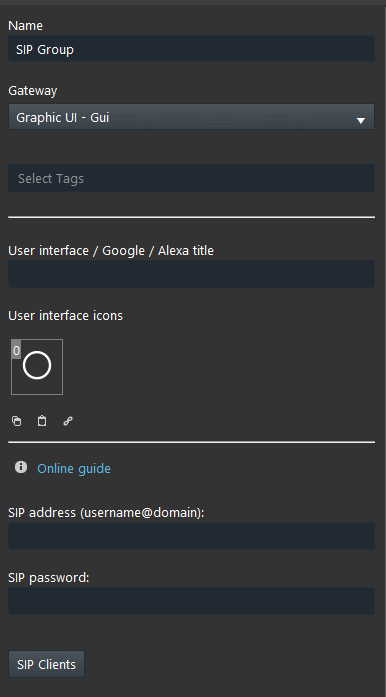
The SIP Group component contain the SIP ID that has been set up within the project. This will be set with the SIP User created within the intercoms configuration.
Component properties
SIP address: Here is asked to enter the Username that is represented by the SIP user created within the Intercom web interface, and enter the IP address of the server as Domain.
SIP Clients: In this list it is asked to add the SIP Client components that are allowed to receive the call.
How the intercom system integrates with the Ilevia’s system
The picture above represents how the SIP integration is structured with the Ilevia’s server. On the left the SIP intercom represented with a SIP Client component. On the right side of the image the Client A and B represents the Clients that will receive the call once the Doorbell is rang because they are in the same SIP Group. The Client C, also represented with a SIP Client, won’t receive the call because is not part of the same SIP group of the A and B.


