SATEL INTEGRA
INTRODUCTION
Satel is a popular Alarm unit brand that provide complete and easy to set up Alarm and Home automation solution. This guide shows how to import and setup a Satel Integra alarm unit with the Ilevia Home automation software.
Prerequisites
- The XML file exported from the Satel software;
- The IP address of the control panel or Ethernet module;
- The control panel installer code.
Alarm configuration importation
Open the Satel configuration software. And export the configuration as xml.
Make sure to have the latest Ilevia Manager version by downloading it the Ilevia website. Open Ilevia Manager software. Then head into the Security / Surveillance tab from the Component Library to open the Satel wizard’s window.
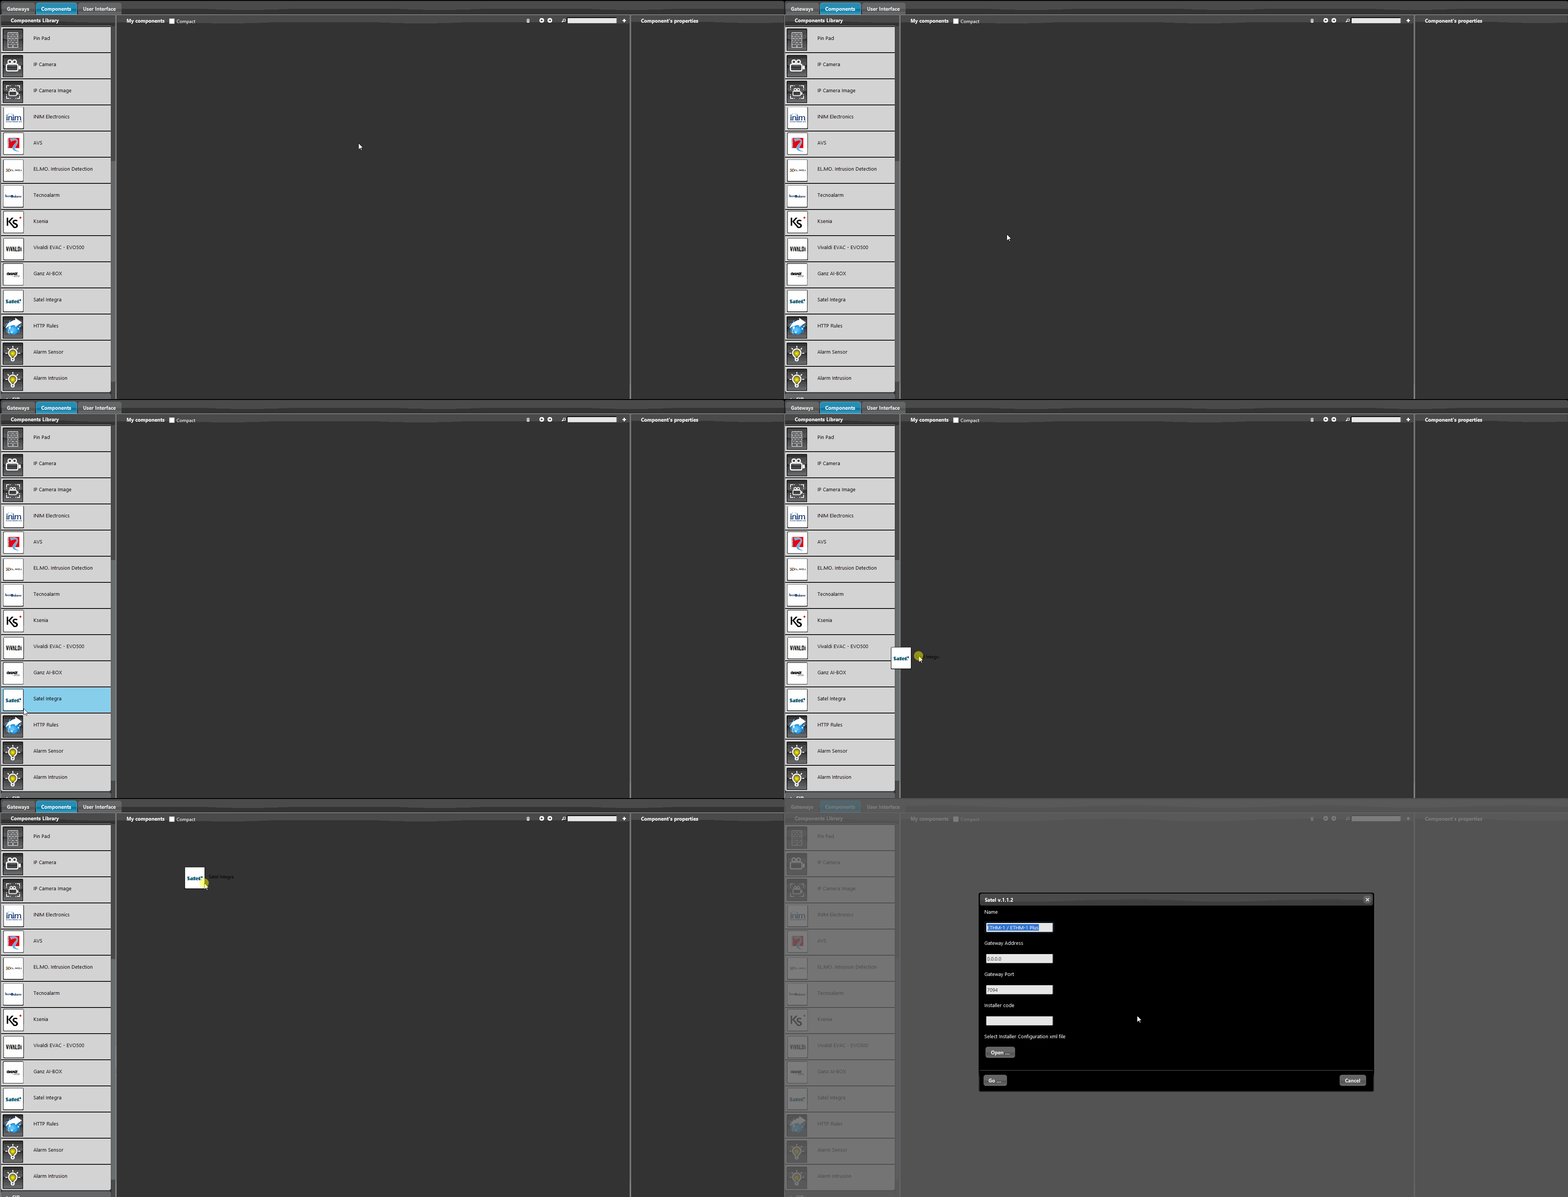
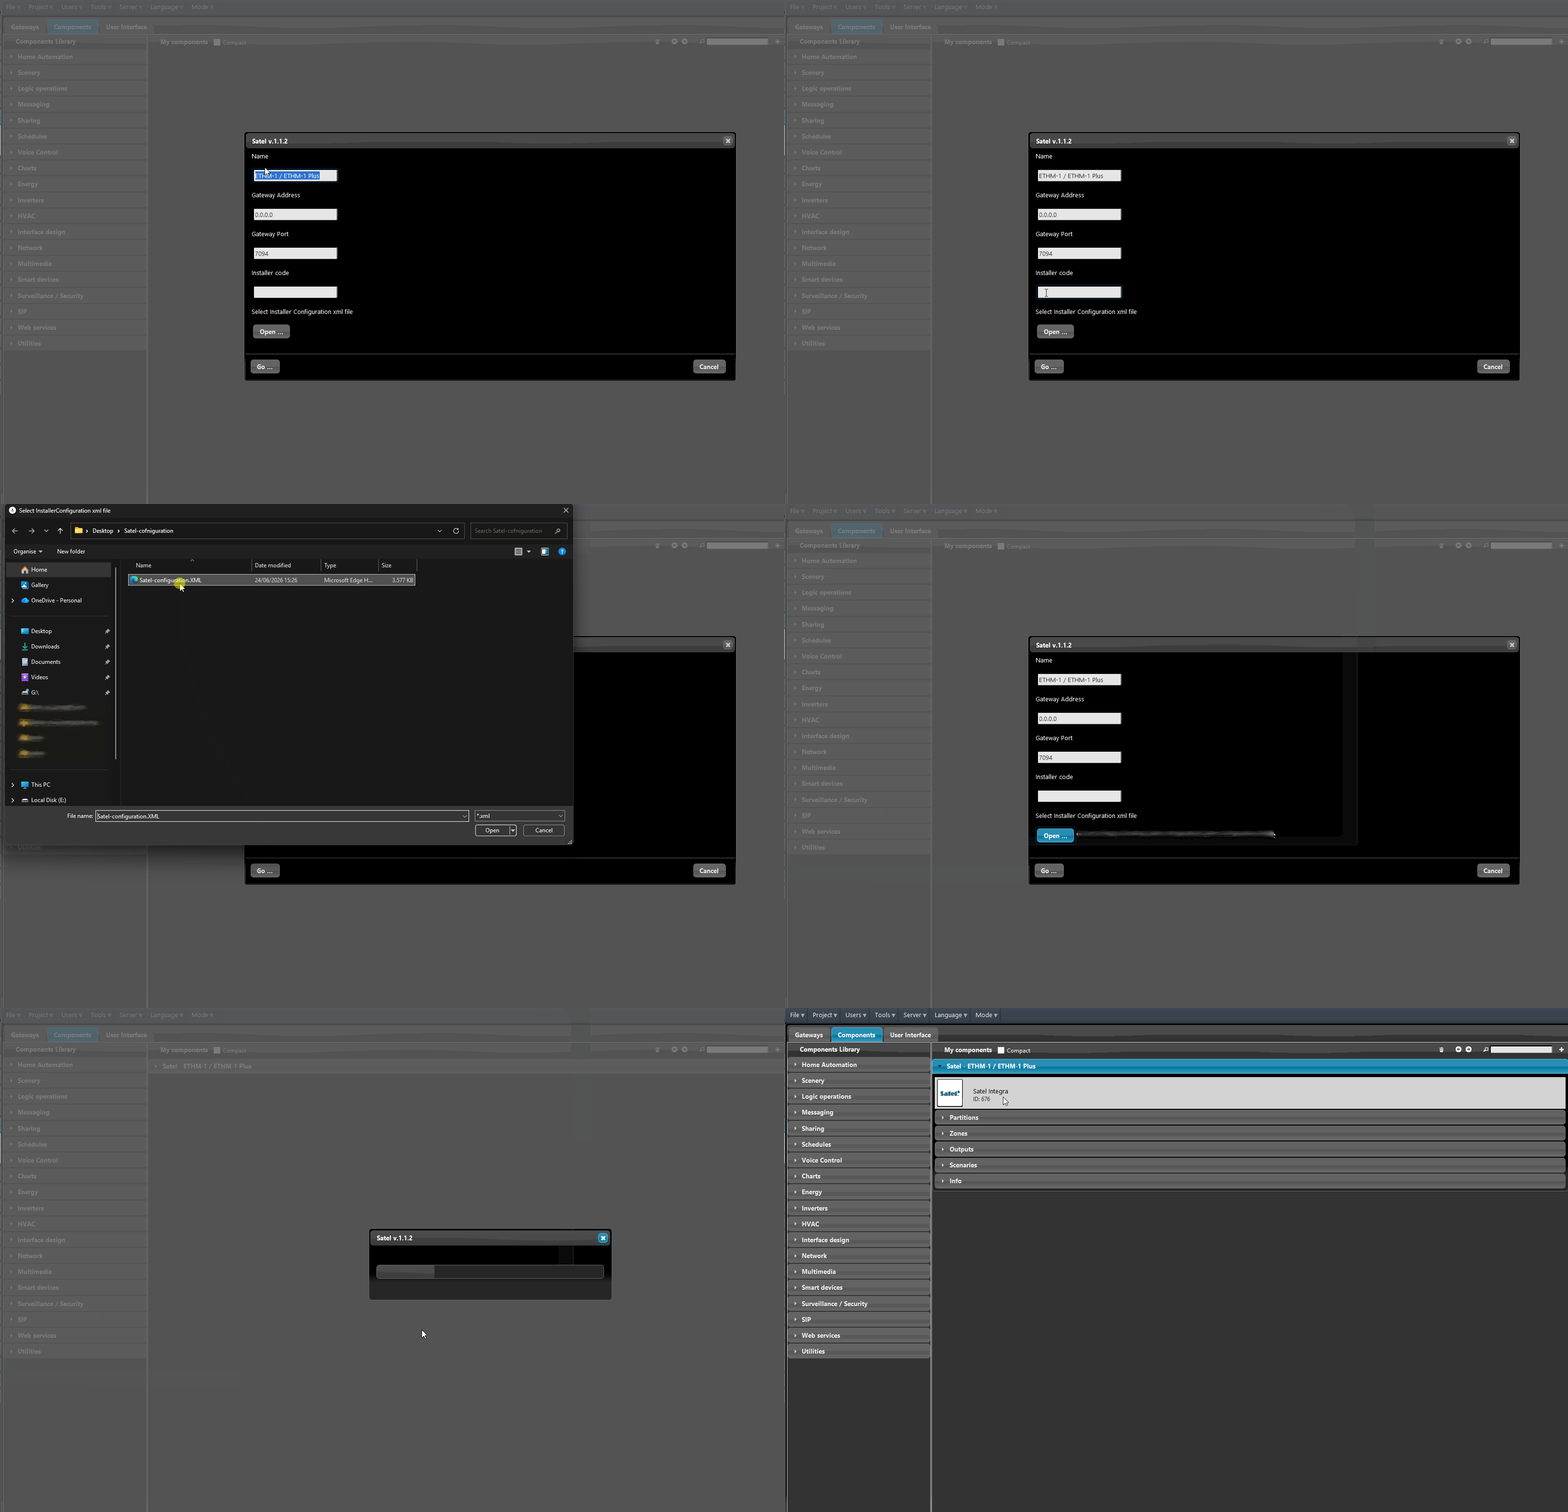
1. Add a name to your Satel gateway, 2. enter the IP address of the satel integra alarm unit. 3. Enter the TCP port of the Satel integra, 4. and finally enter the installer code set up within your Satel configuration. 5. Finally Click Go, that will start the configuration importation.
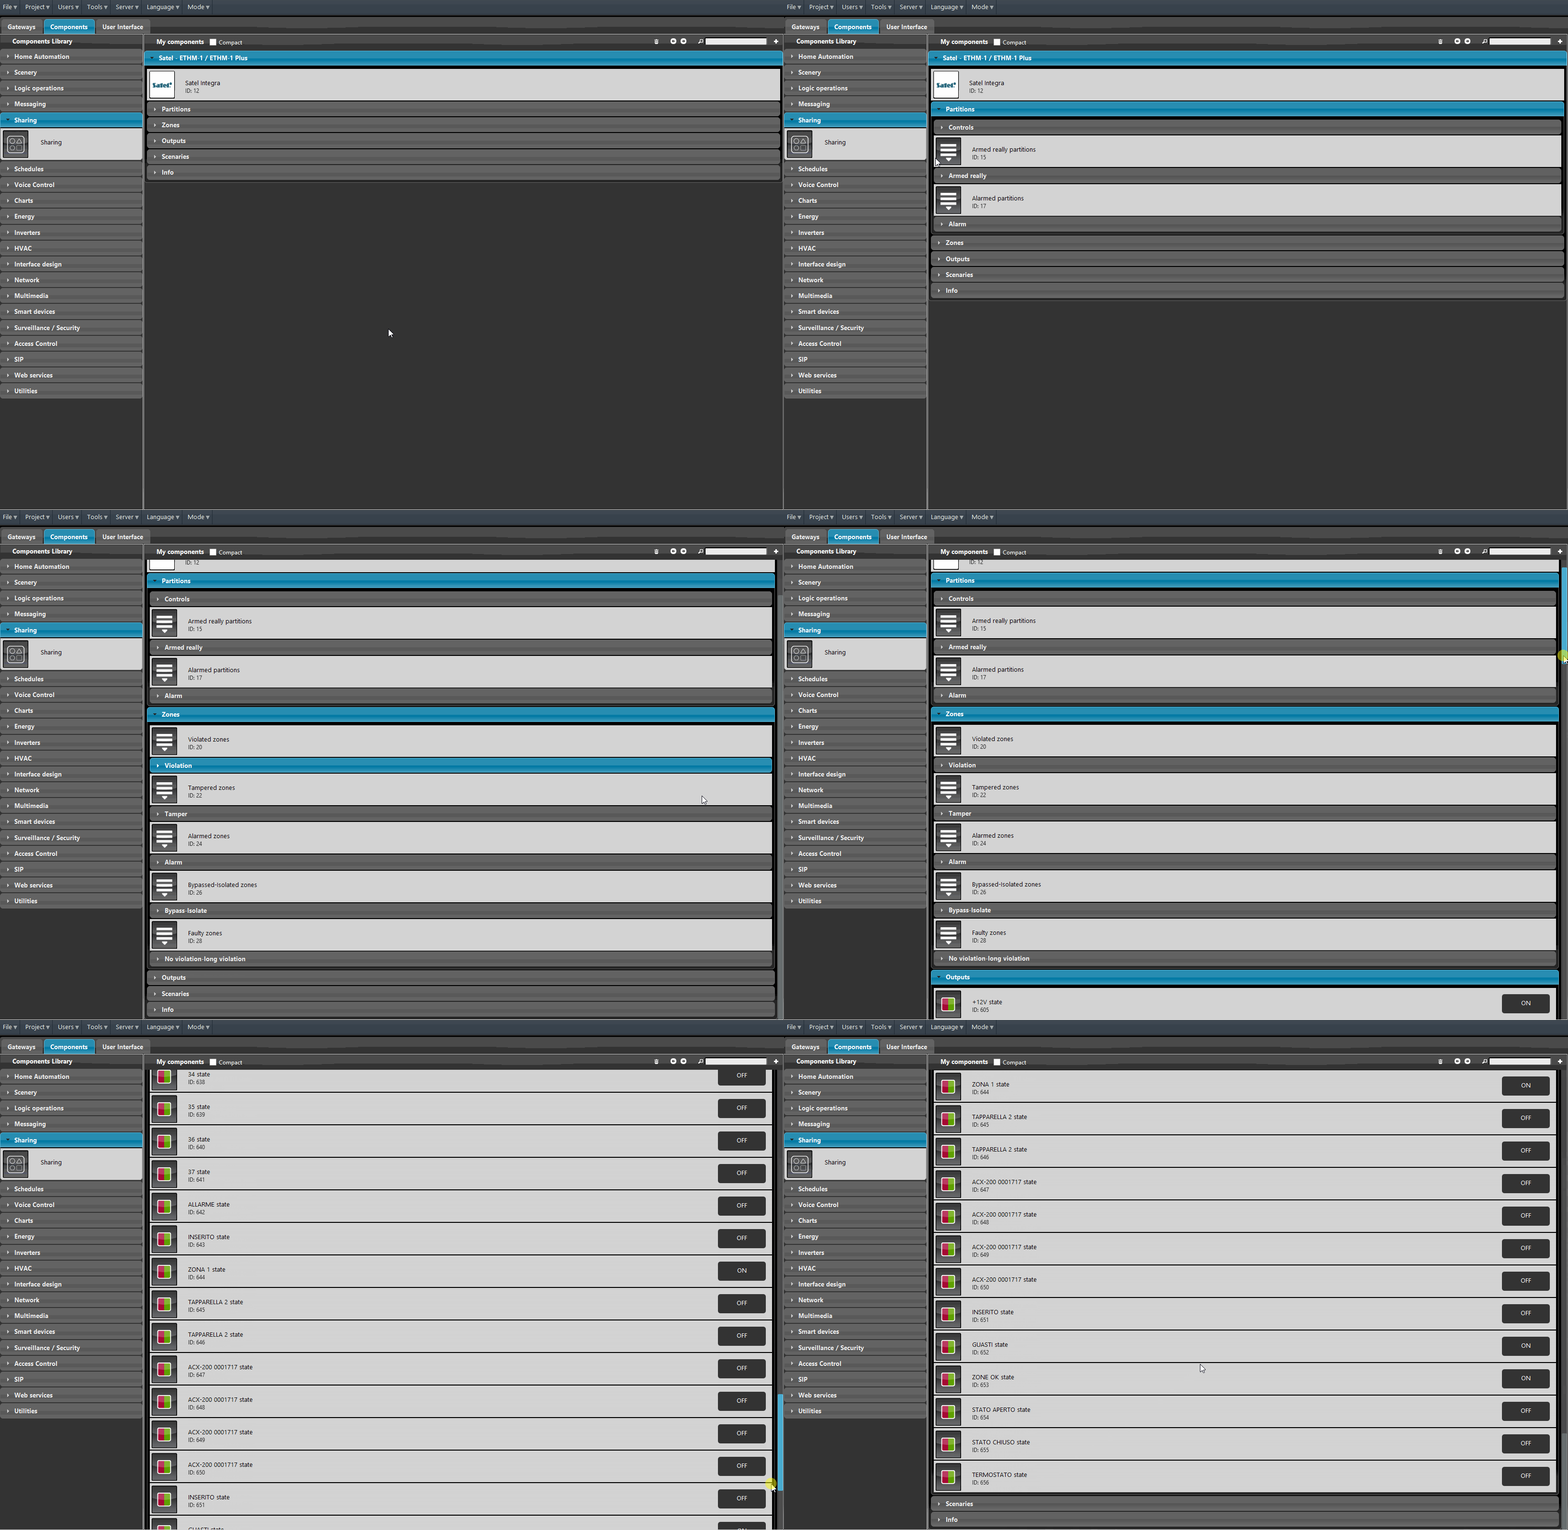
Once the configuration is imported within Ilevia Manager, you will be able to see all the components within software: Partition, Zones, Outputs and etc.
Satel Interface widget interaction and visualization within the Ilevia Control interface
To access the Satel Integra widget within Ilevia’s interface, you can choose to access it by the Home menu or from the Function menu, the Function menu allows you a faster access thanks to its way of creating categories based on the components added within the Ilevia Interface.
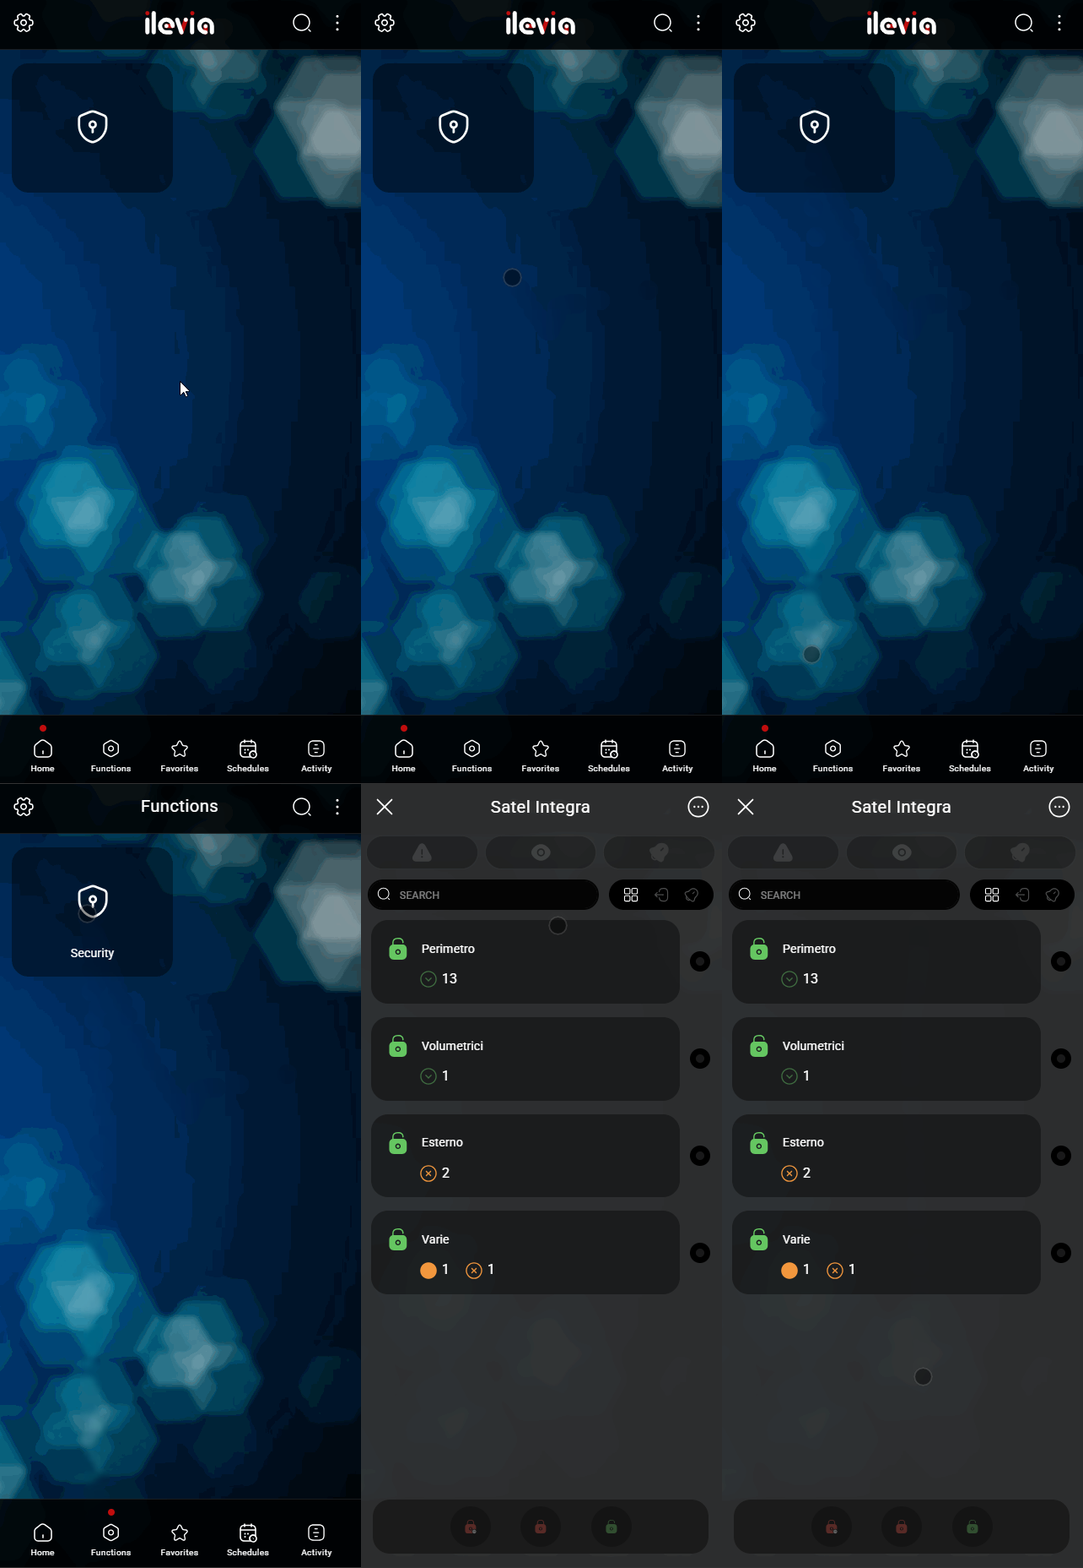
In the widget the user is able to manage the Arming and Disarming of the Partition, Including and Excluding each single Zones.
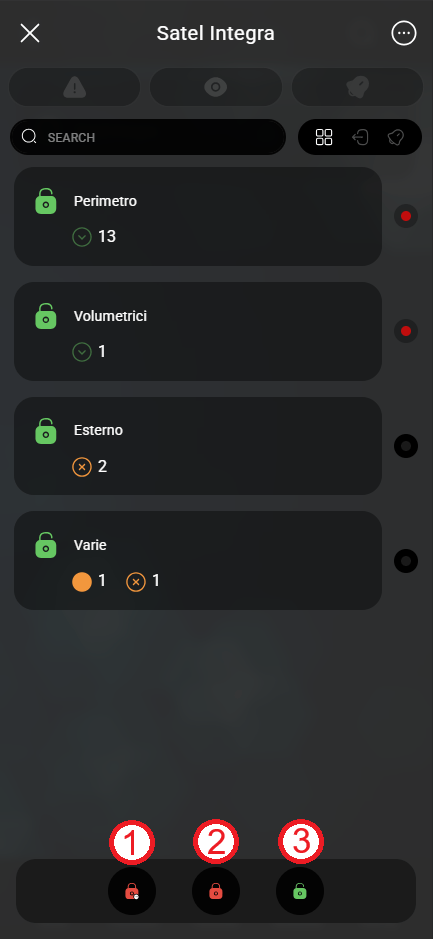
The main tab (Partition Tab) shows the status of each partition and also the status of the zone that’s part of that partition. On the lower part of the screen, there are three Icons, 1. This button allows to arm temporarily the selected partitions.2. This button allows to Arm the selected partition. 3. This button allows to Disarm the selected partitions.
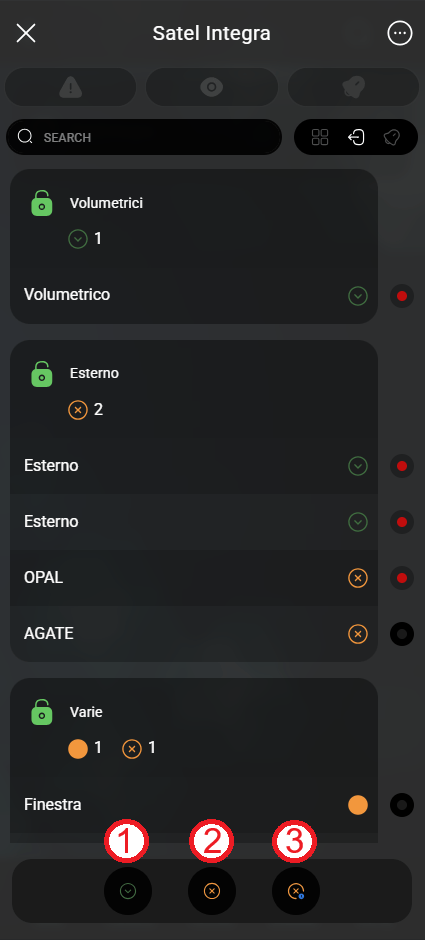
This tab represents the zone status of each partition present within the Satel Alarm unit. In this tab each zone can be selected Included / Excluded from the Alarm arming mode. Select the zone of interest, then choose what action you want to perform to the specific Zone / Zones selected from the Command pane below: 1. This button allows the user to include the selected zone / zones within the partition table. 2. This button allows the user to exclude the selected zone / zones within the partition table. 3. This button allows the user to set a time for the exclusion of the selected zone / zones within the partition table.
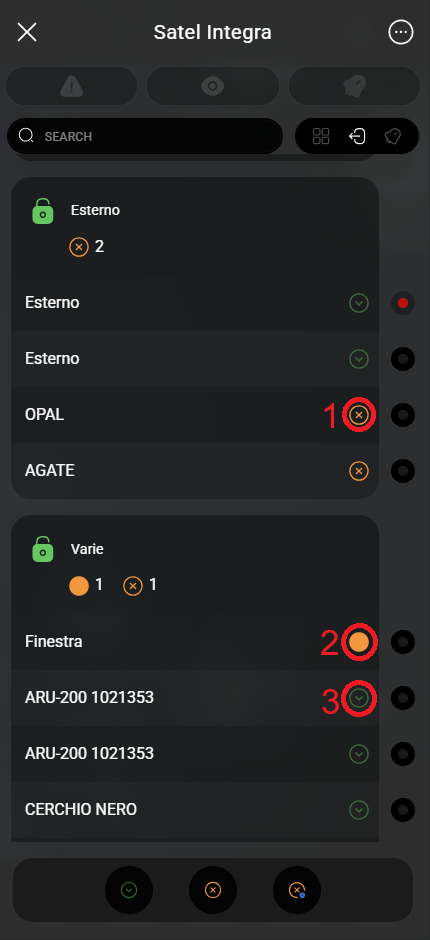
You can also check the status of the zones through the icons within the Satel integra widget within the Ilevia’s app. 1. This icon represents that the specific zone is in a warning condition, Ex: the windows is opened. 2. This icon represents that the specific zone has been excluded. 3. This icon represents that the specific zone is included within the alarm.
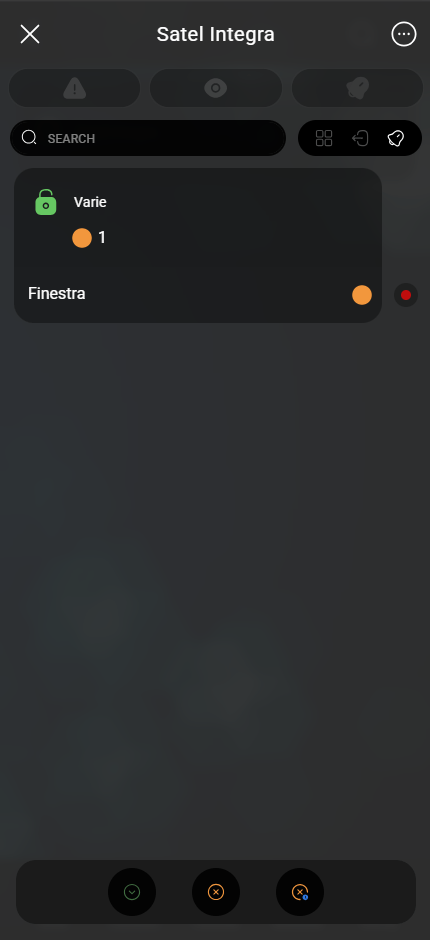
The Notification tab list all the zones in a warning status within the plant. You can also manage the zones present within the current tab (Include, Exclude and Exclude with time).
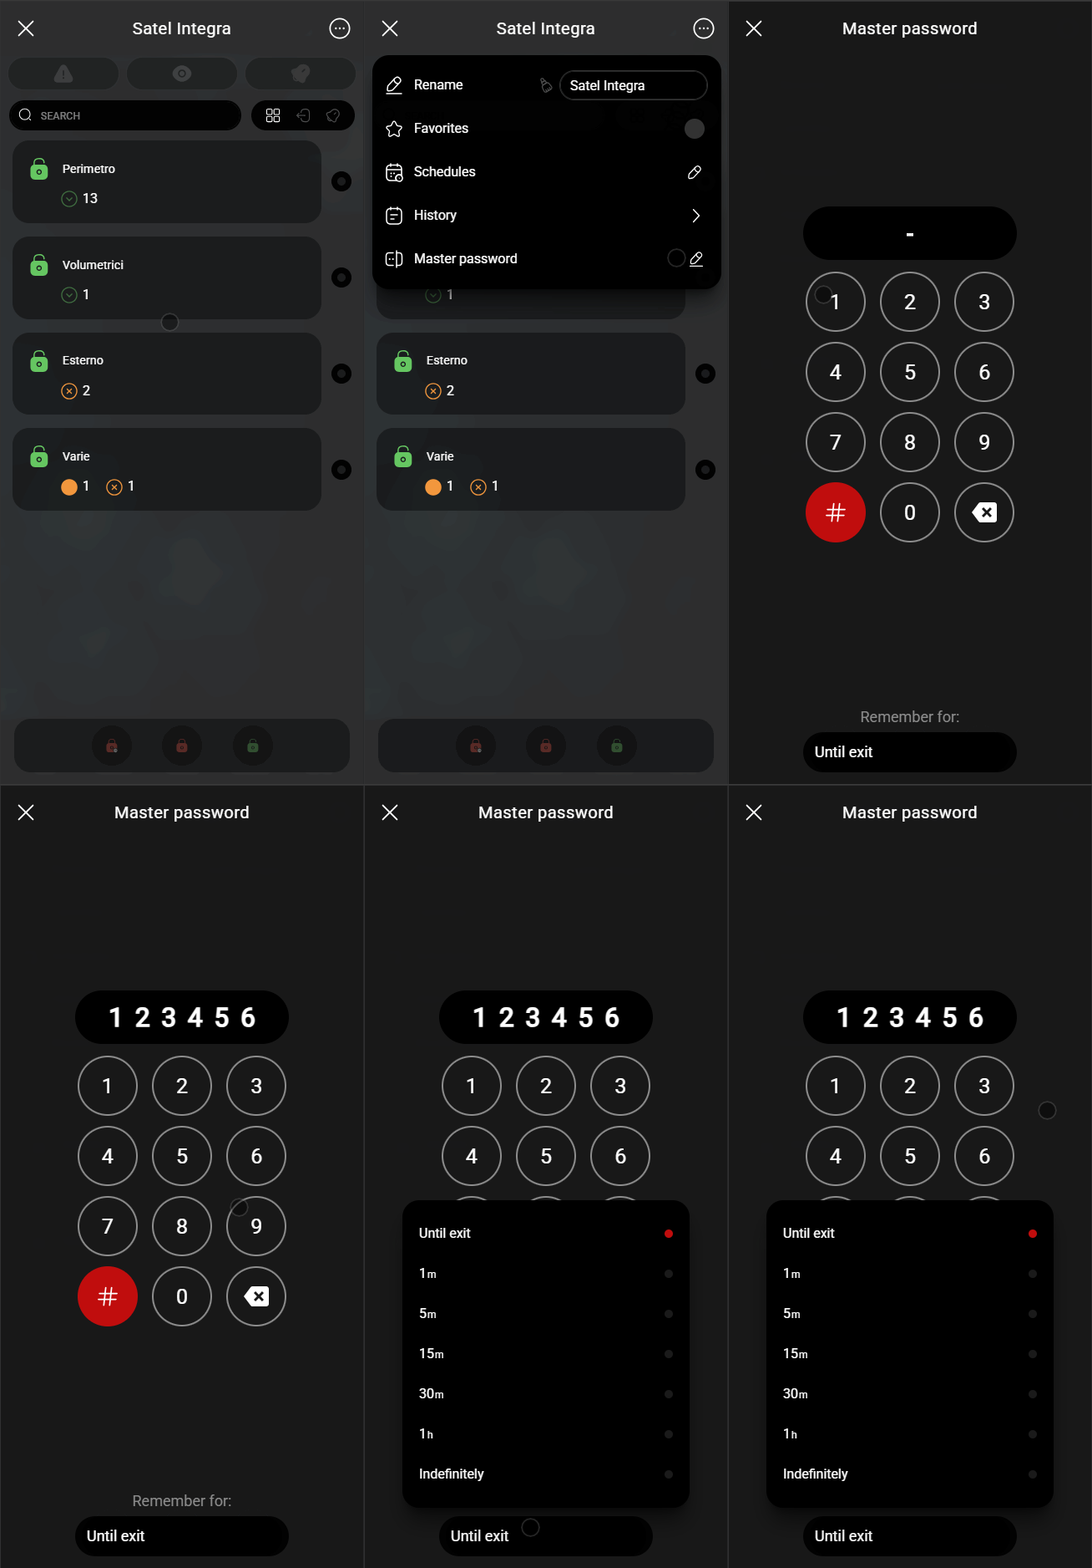
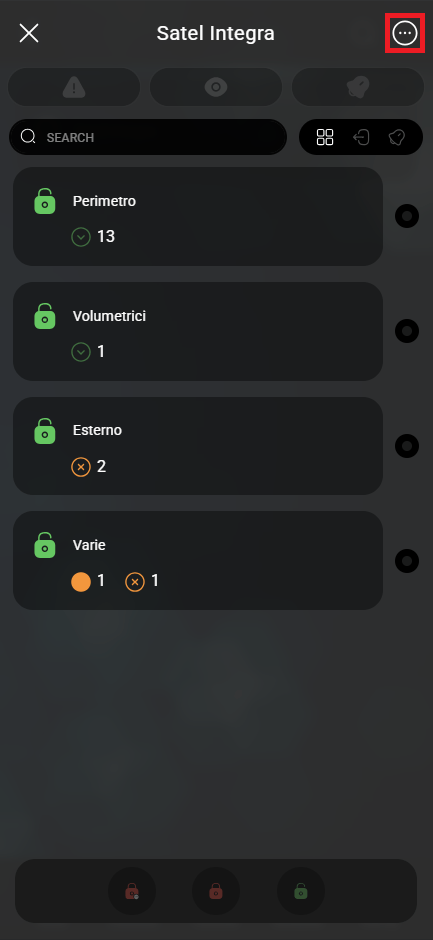
There is also the possibility to allows the Ilevia App user to avoid to enter the installer code each time you perform an action within the Satel Integra widget. Access the Detail  menu and tap on Master Password.
Type the Master code within the Num-pad shown on the screen. Then you can also select when the code will be asked next, from the Remind for drop down.