


ILEVIA X1 PLUS SERVER CLOUD CONNECTION SETUP
INTRODUCTION
This guide aims to explain how to activate and use the Ilevia Cloud connection for the Ilevia server. The Ilevia cloud allows the remote and local connection without applying any port forwarding to the router which the server is connected to.
SETUP PROCEDURE
Open your browser and type the local IP address of your server Ilevia.

Login inside the web interface of the Ilevia server.
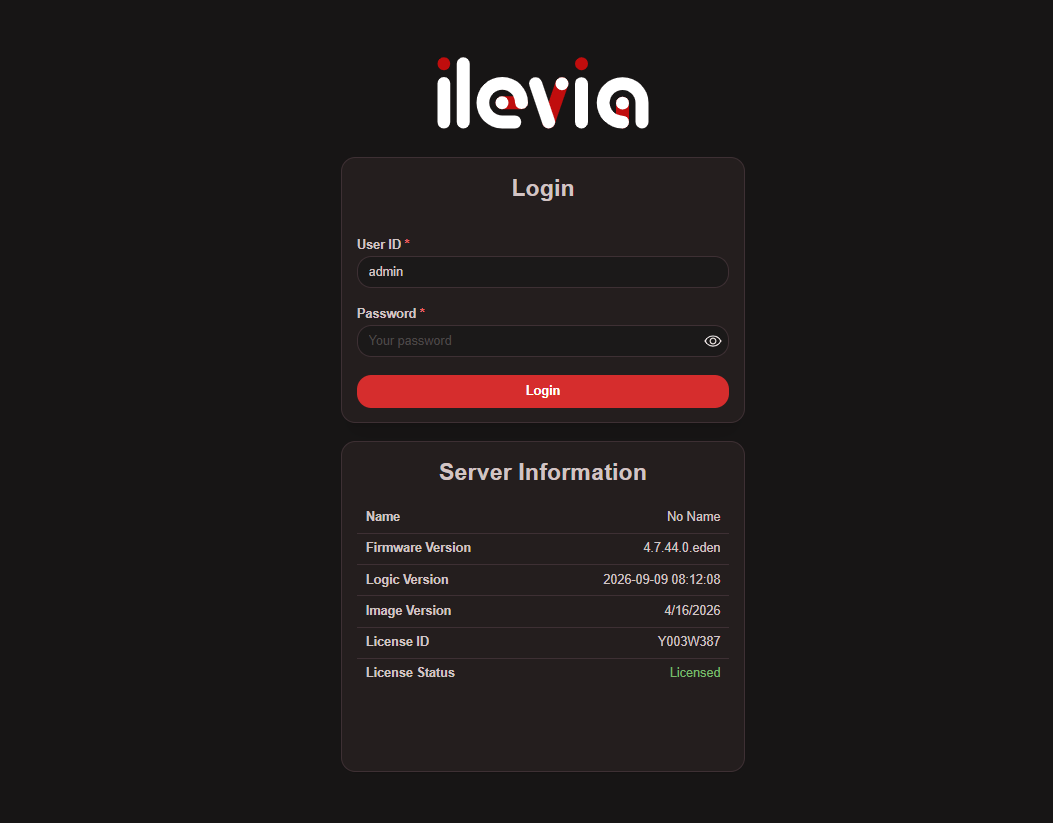
Access the Settings menu, then access the Cloud menu.
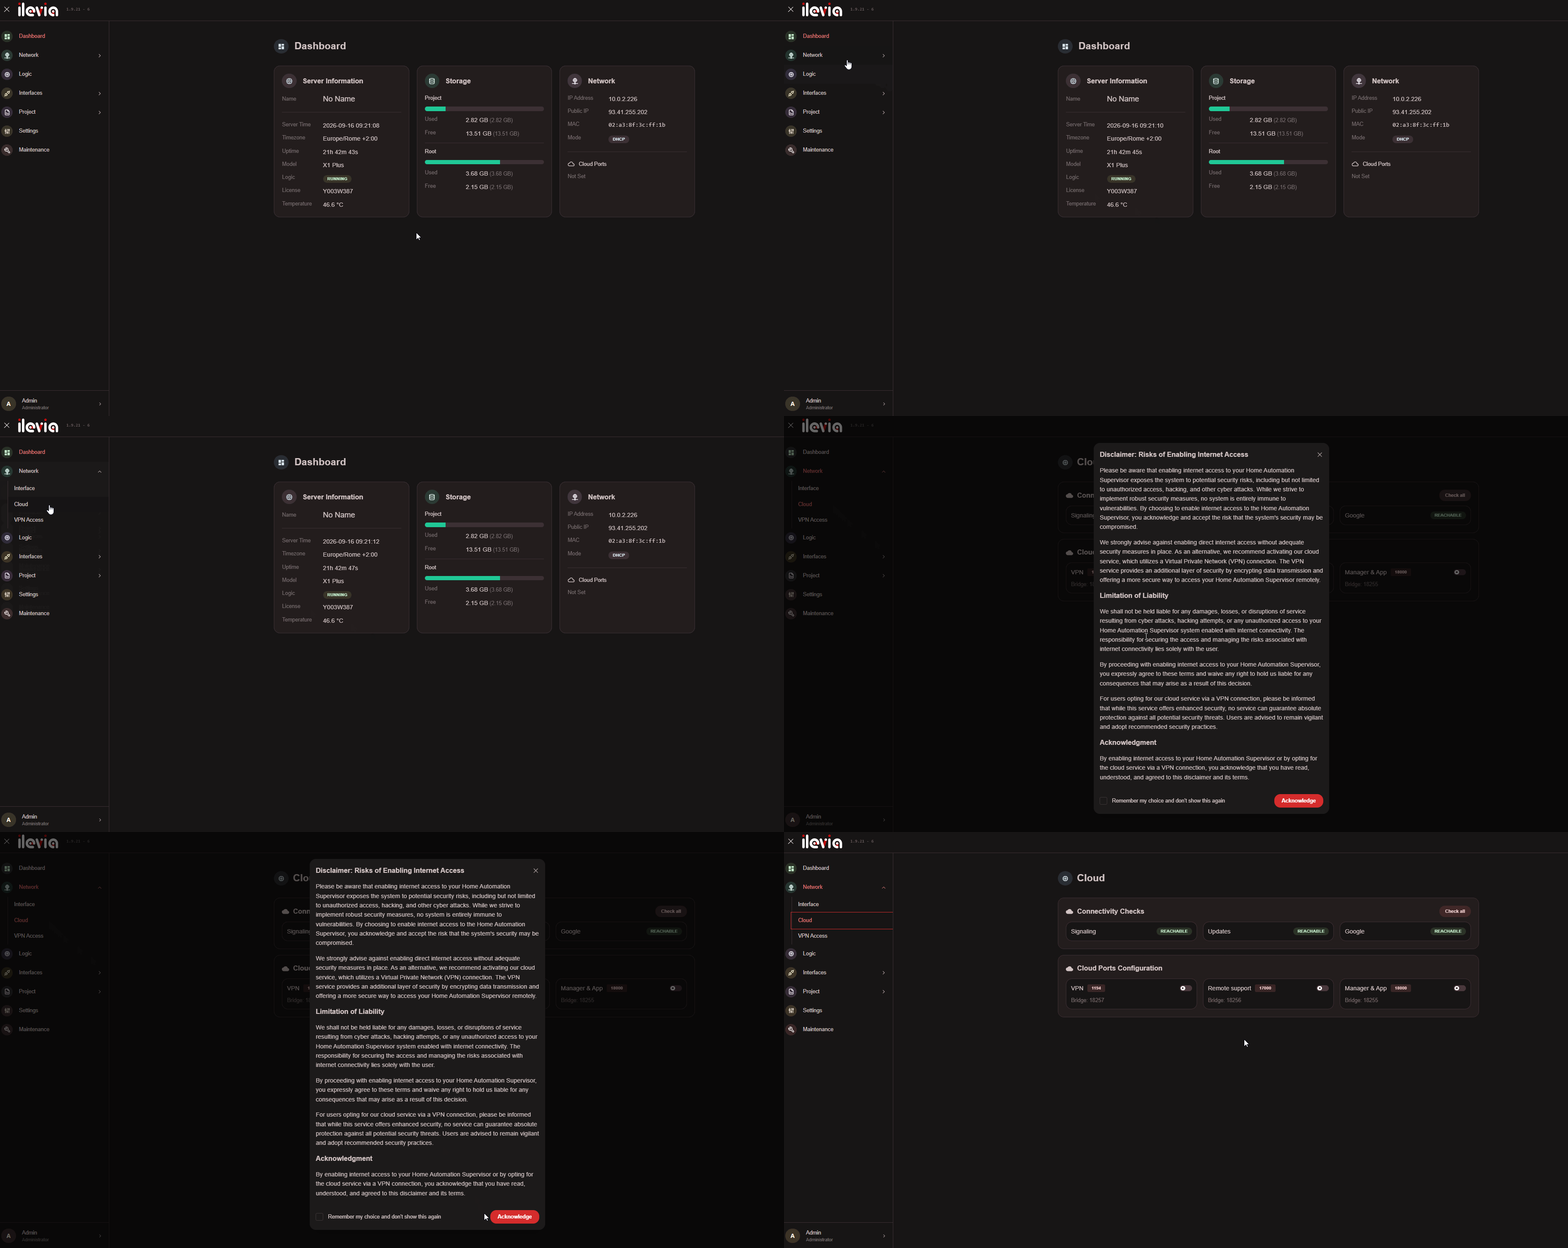
Step 4.1:
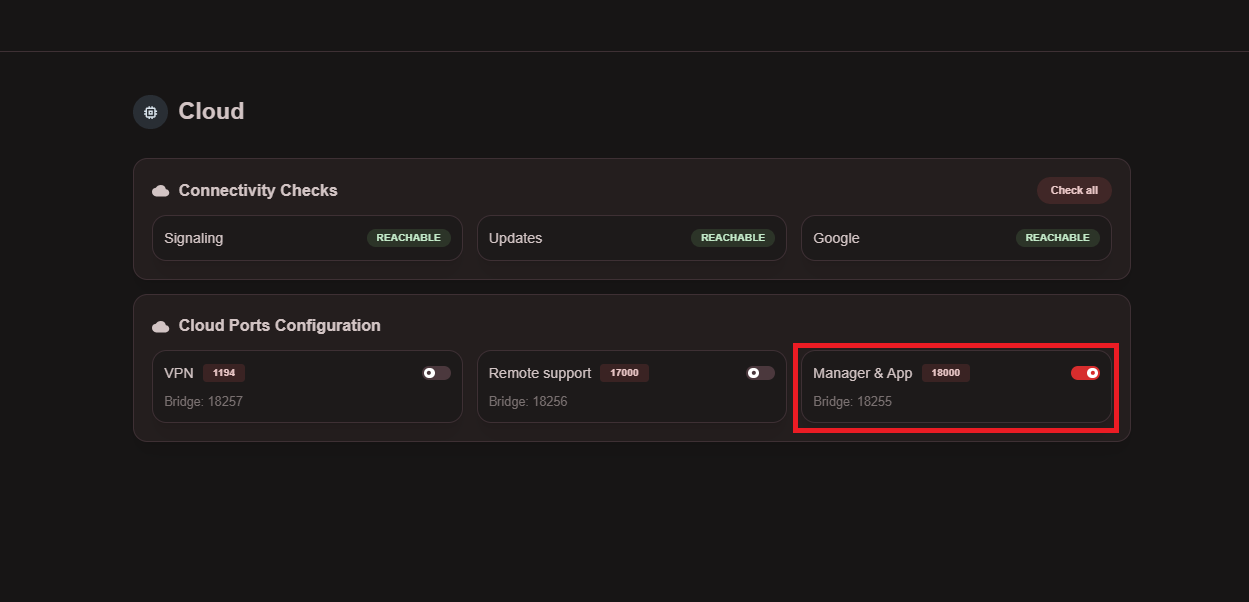
In order to be able to use the cloud feature it will be necessary to acknowledge the Disclaimer shown once entered in the Cloud menu. Within the Cloud menu there are 3 Checkboxes that are disabled as default. The first checkbox, if active, will enable the Ilevia Cloud connection service in the server. The second checkbox, if active, will enable the Ilevia Cloud port in case of technical support. The third checkbox determines whether the VPN connection is enabled or not.
CONCLUSION
It is necessary to know that once the Ilevia Cloud connection checkbox is enabled in the Ilevia server, the port, needs to be enabled by contacting the Ilevia’s technical support to its dedicated hotline (+39 0424 1660208) or by writing an email with the cloud port specified in the message at the following email address: supporto@ilevia.com.
Cloud connection with Ilevia Manager
Step 1.2:
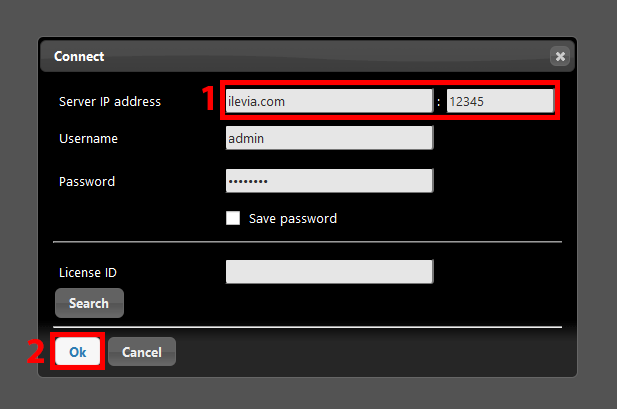
Open Ilevia Manager. Access the Project menu and click Connect.
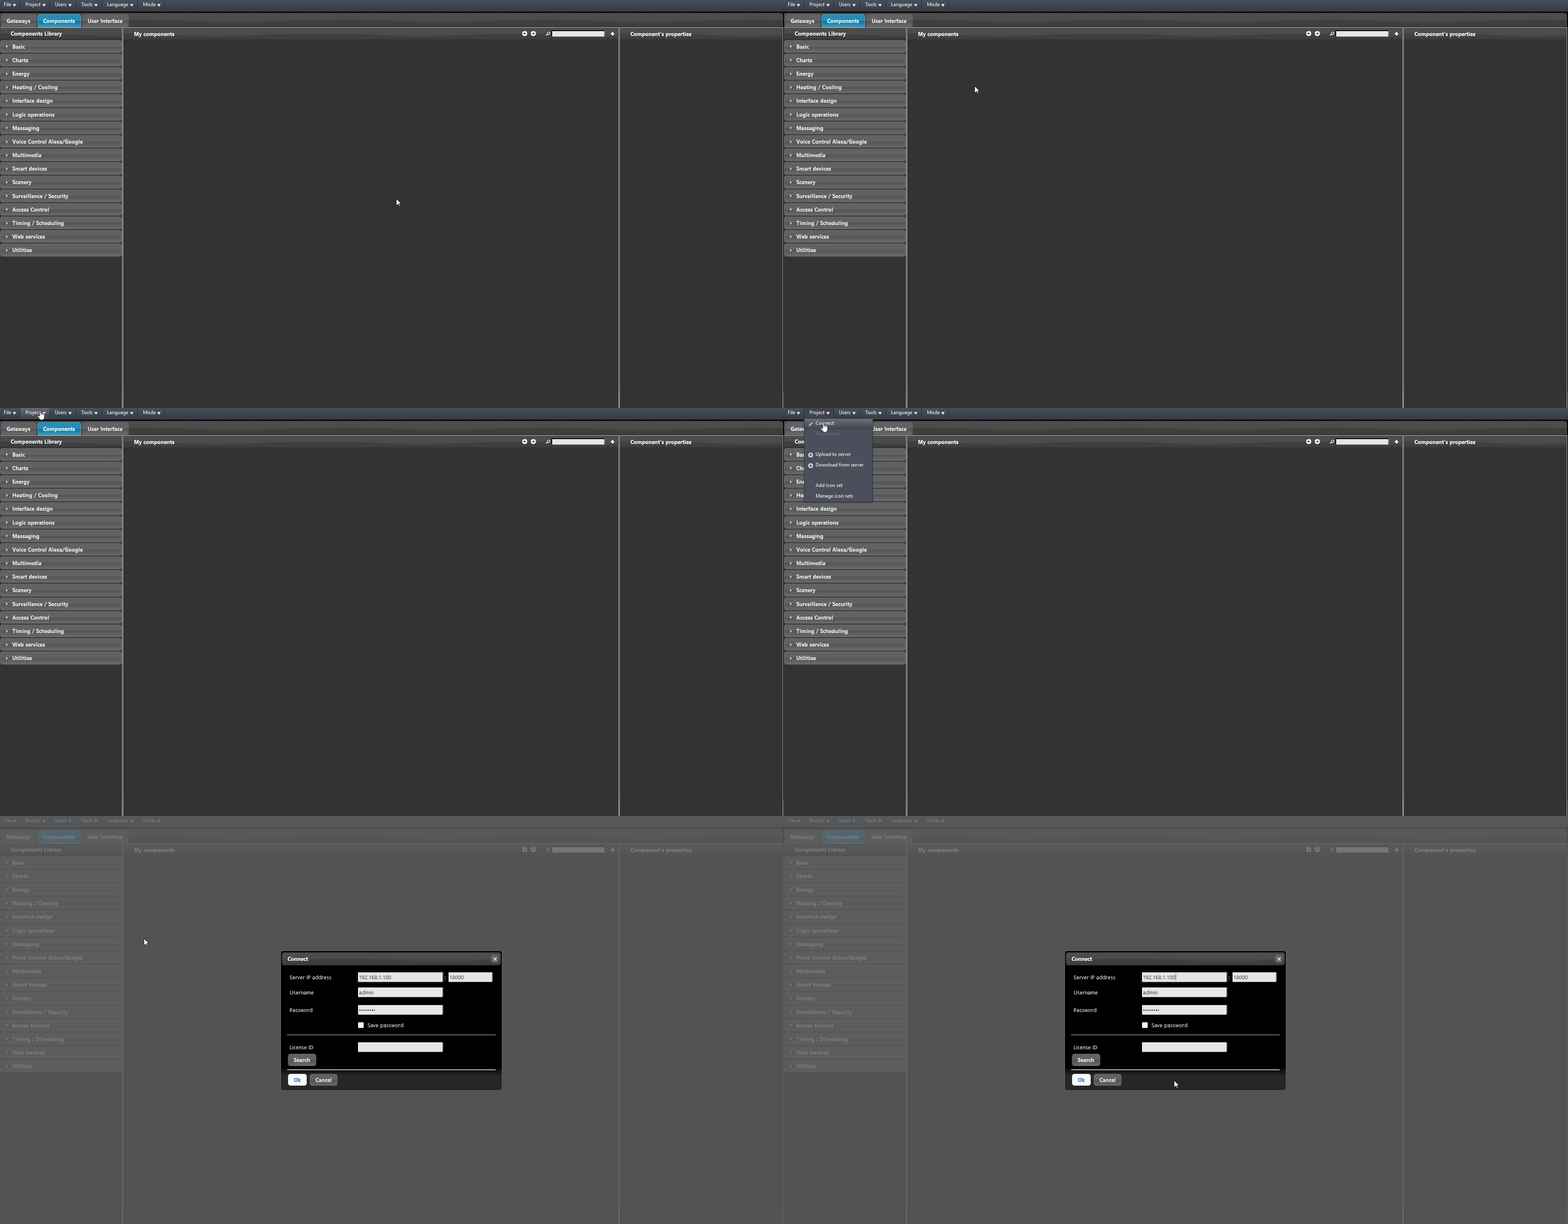
1. Switch the current server’s IP address with the following text: ilevia.com, on the Port text field insert the Cloud port. 2. Finally click OK.
CONCLUSION
By connecting to the server via cloud with Ilevia Manager you will be able to customize, upload and download the project remotely.