KSENIA
INTRODUCTION
Ksenia is a professional Italian security system built to protect homes and businesses with reliable intrusion detection and smart control features. When connected to Ilevia, that security becomes part of your everyday automation: arming, events, and alerts flow into a single interface, letting your home react intelligently to what the security system detects. The integration removes complexity and gives you smoother, faster control over both safety and comfort.
PREREQUISITES
- Update the Ksenia firmware if available;
- Enable the Ksenia IP interface;
- Activate the Ksenia integration protocol
KSENIA alarm unit configuration
Open your web browser and login into the Ksenias’s web configuration interface.
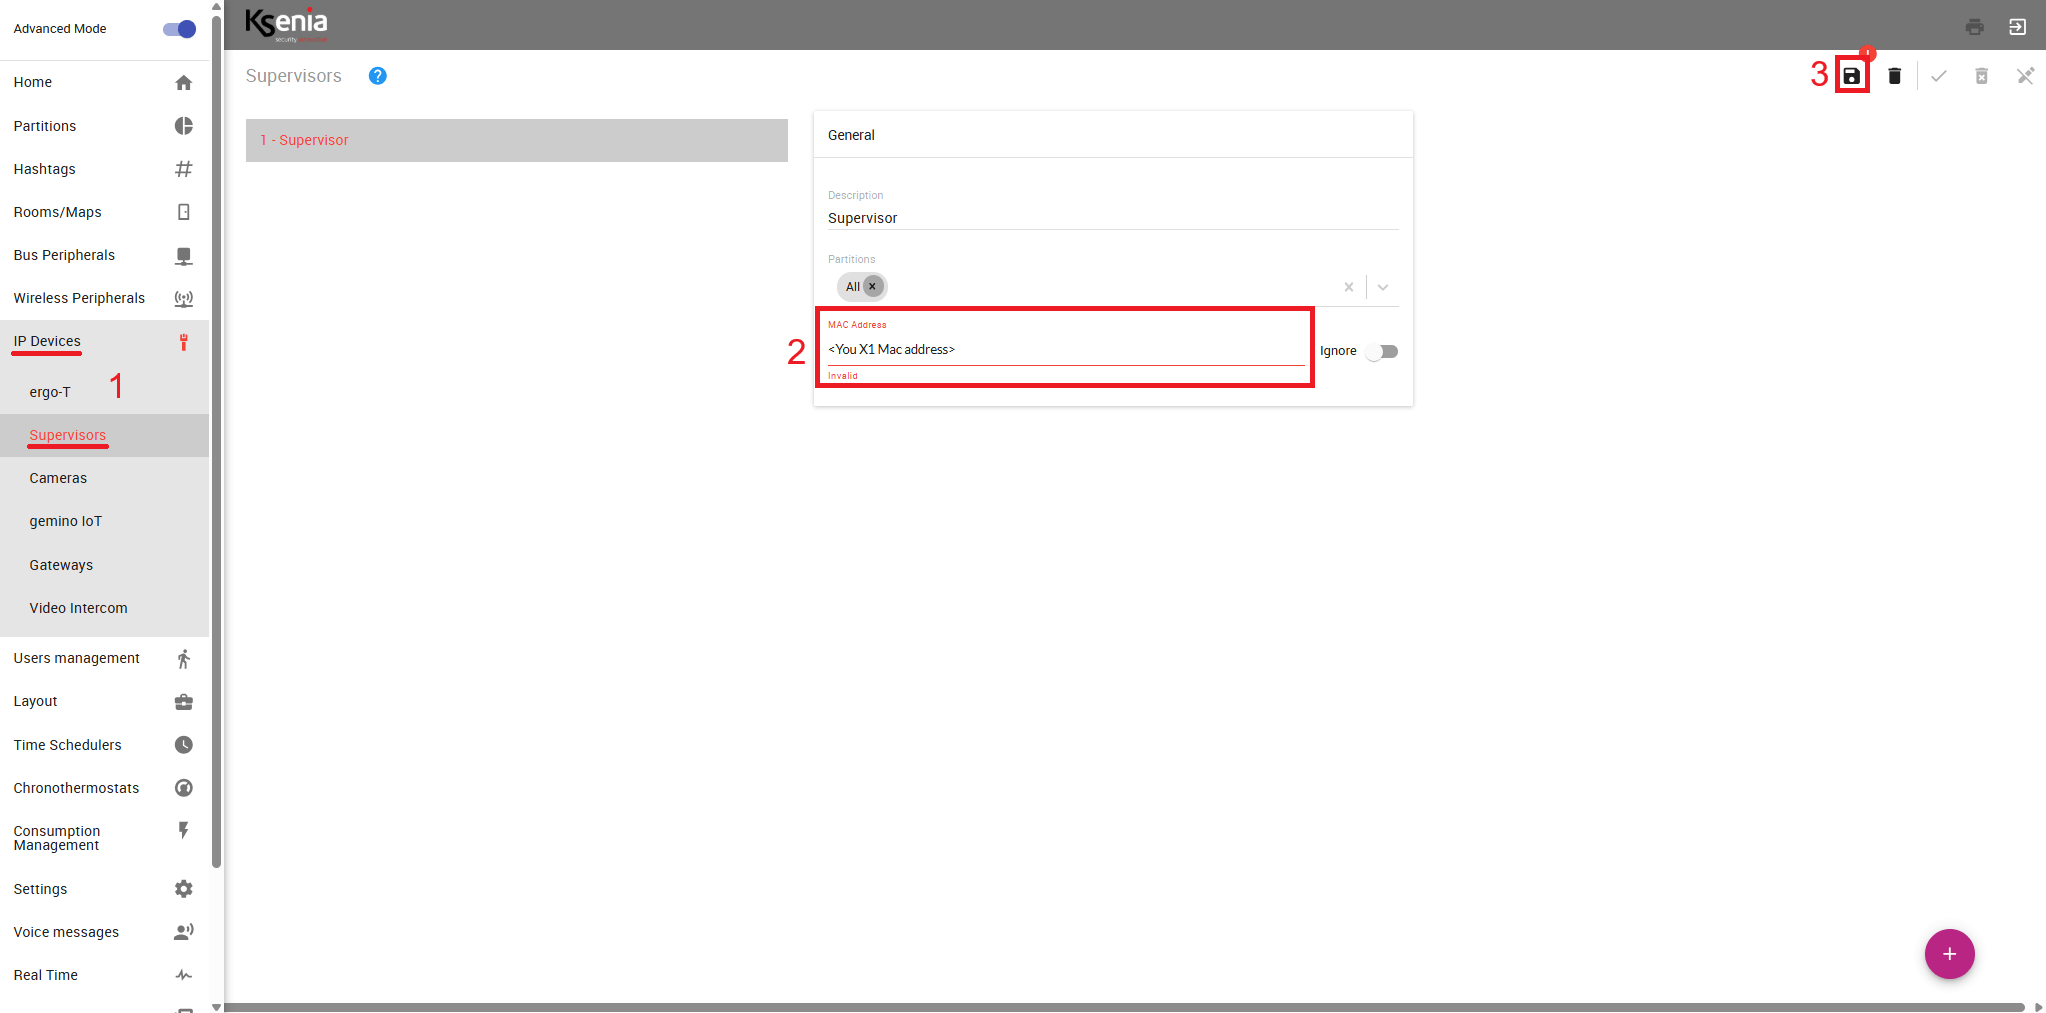
1. Access the IP Devices menu from the side bar, then click Supervisor.
2. Click on “Supervisor” then click on the pencil Icon on the top right of the screen that allow to access the edit mode of the current settings, finally add the MAC address of the X1 server.
3. Finally save the edits.
Note! To get the Mac address of the X1 server, please refer to the following guide.
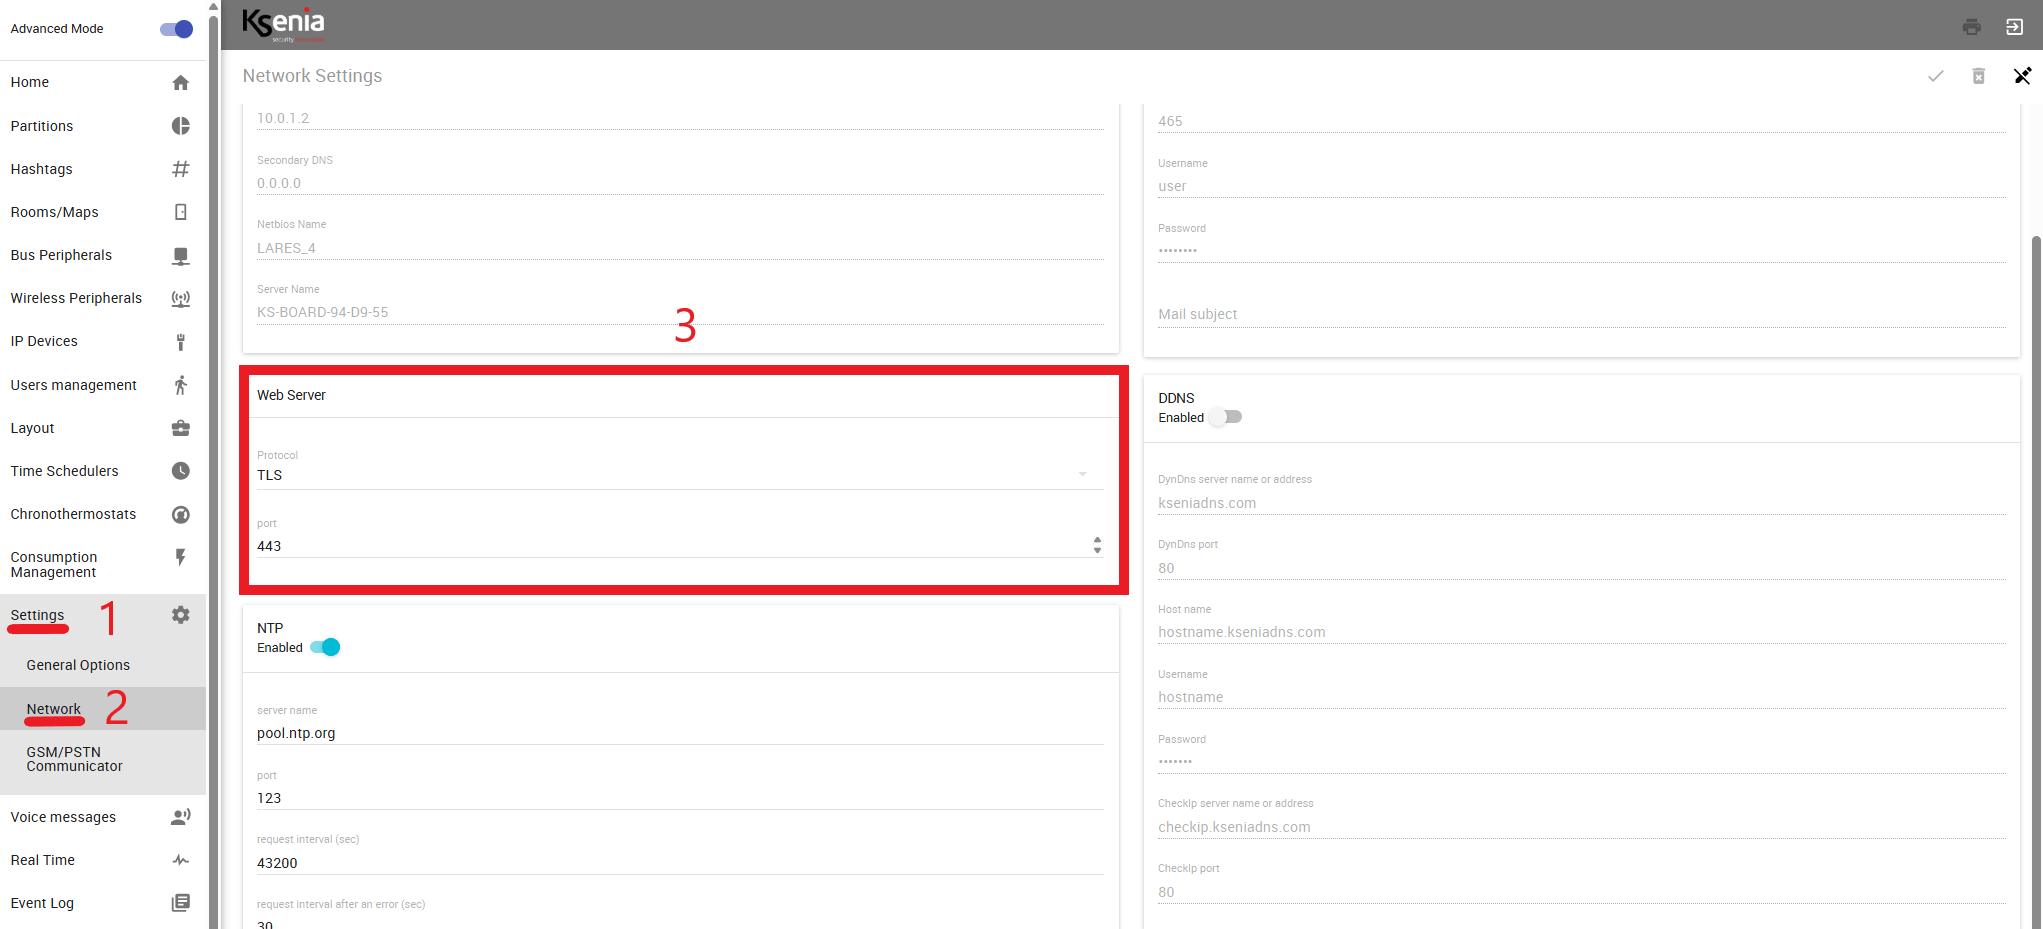
1. Access the Settings menu;
2. Then Network;
3. Access the edit mode and make sure that the Web server’s protocol is set to TLS.
Ilevia manager configuration
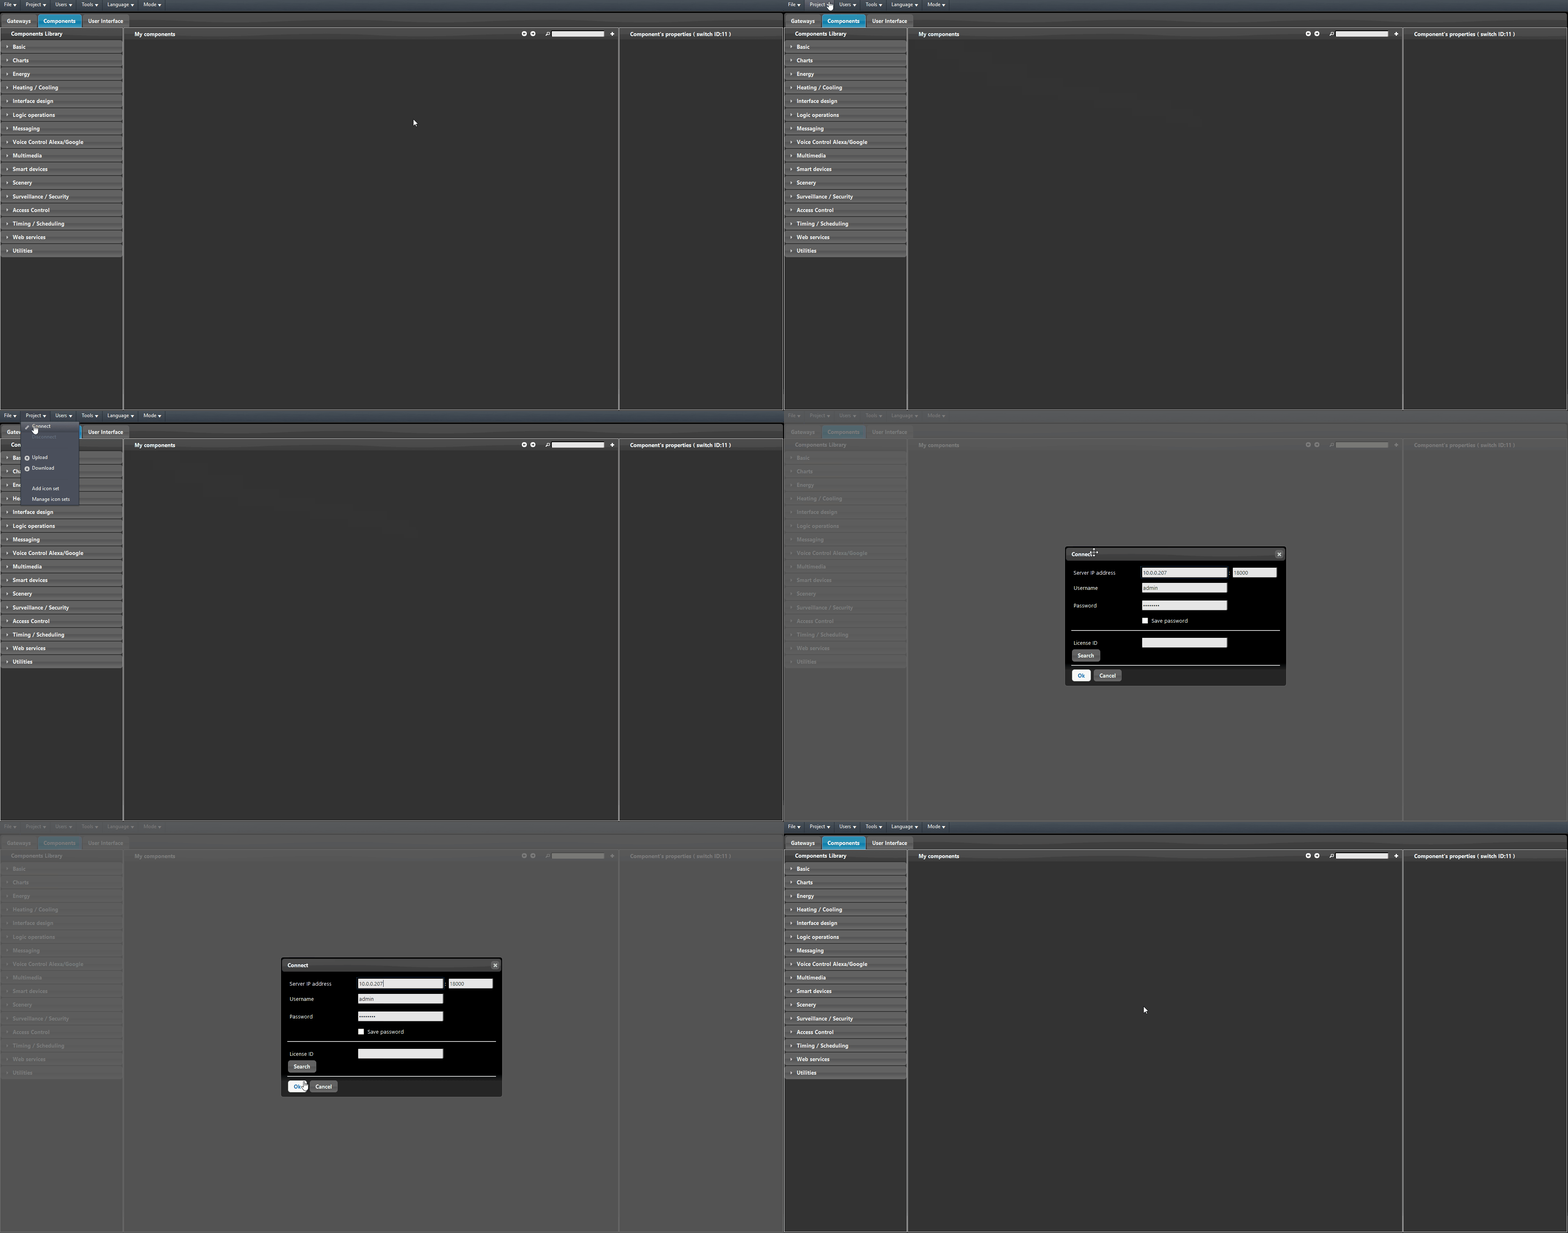
Make sure to have the latest Ilevia Manager version by downloading it the Ilevia website. Open Ilevia Manager software. Finally connect to the server.
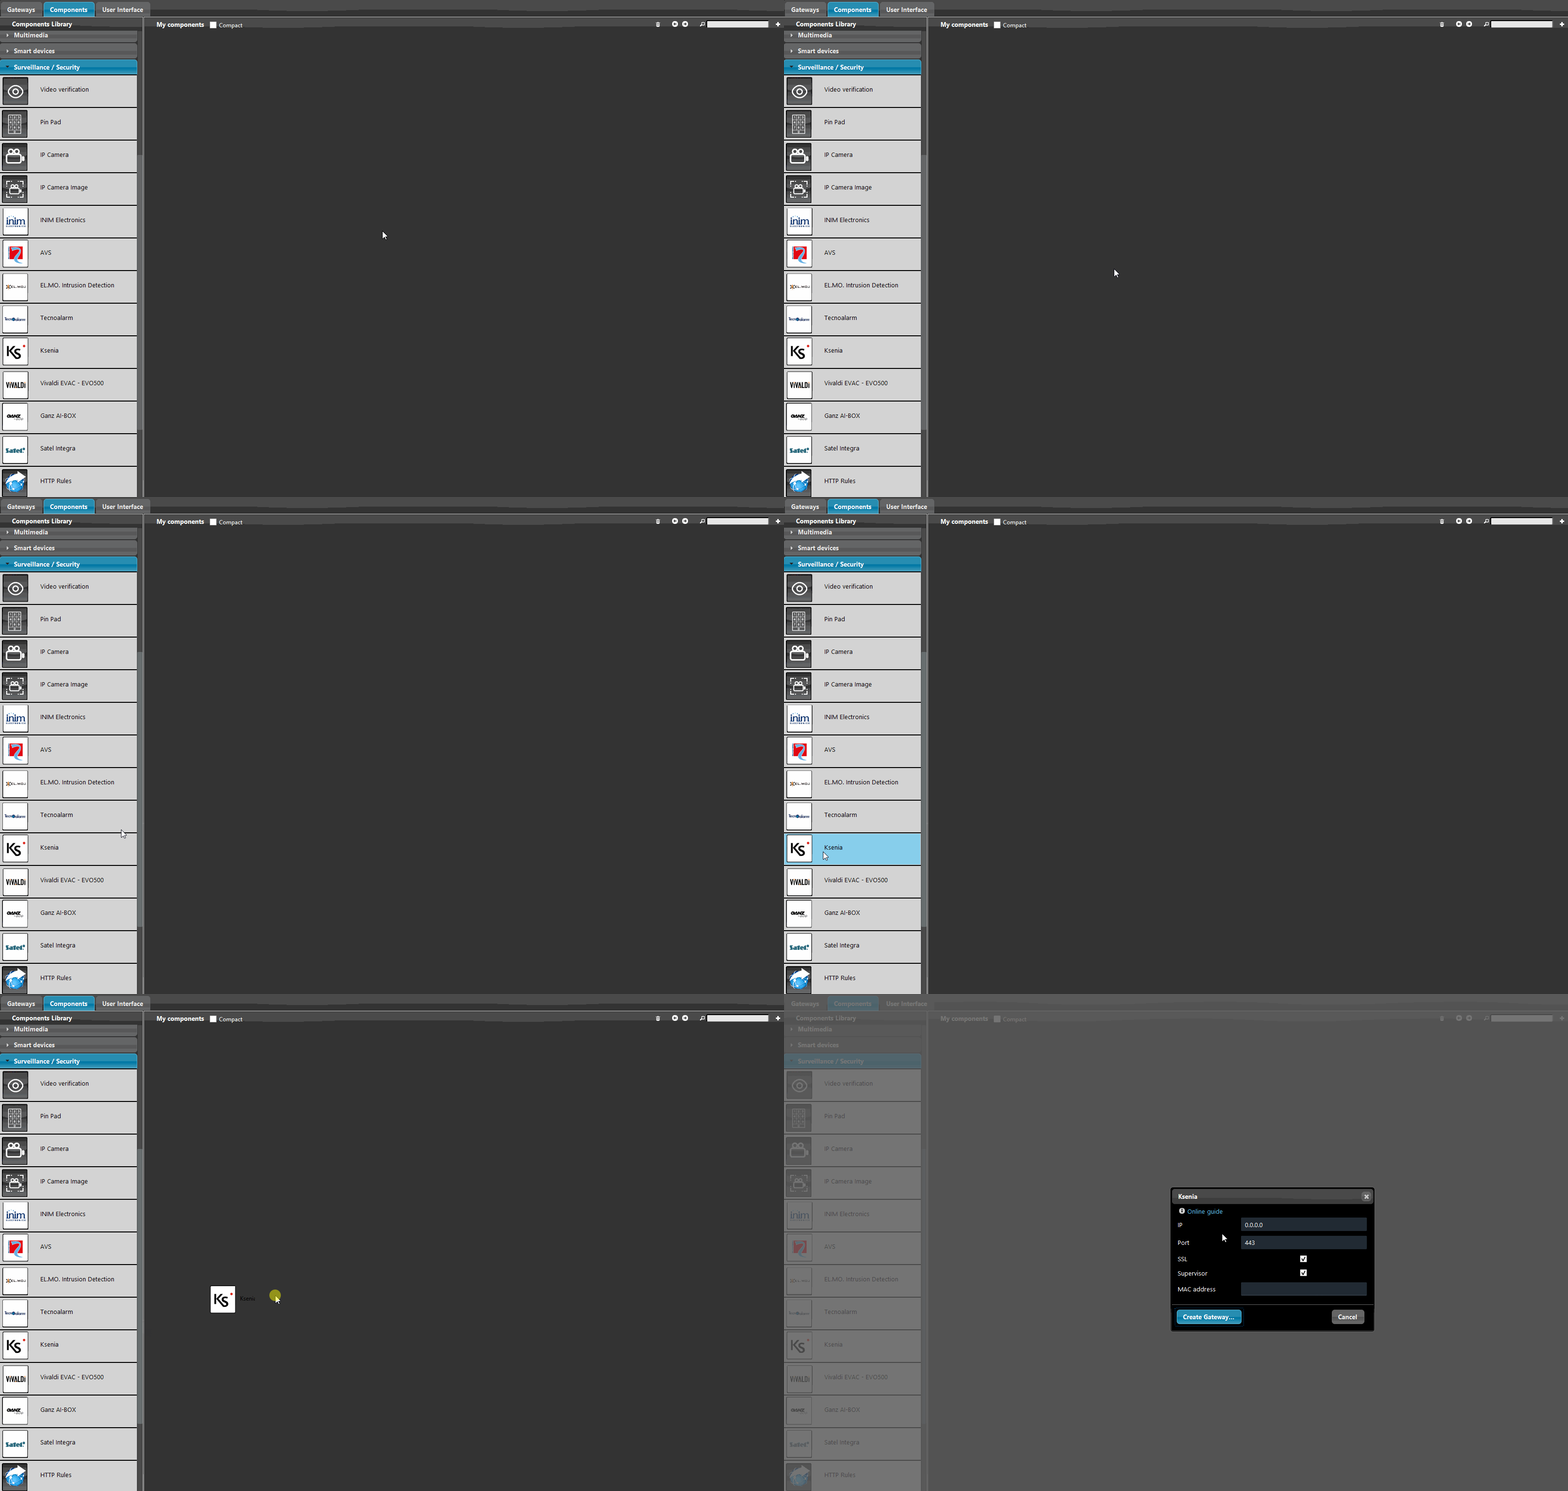
Open the Surveillance / Security tab within the Components library. Add a new Ksenia component.
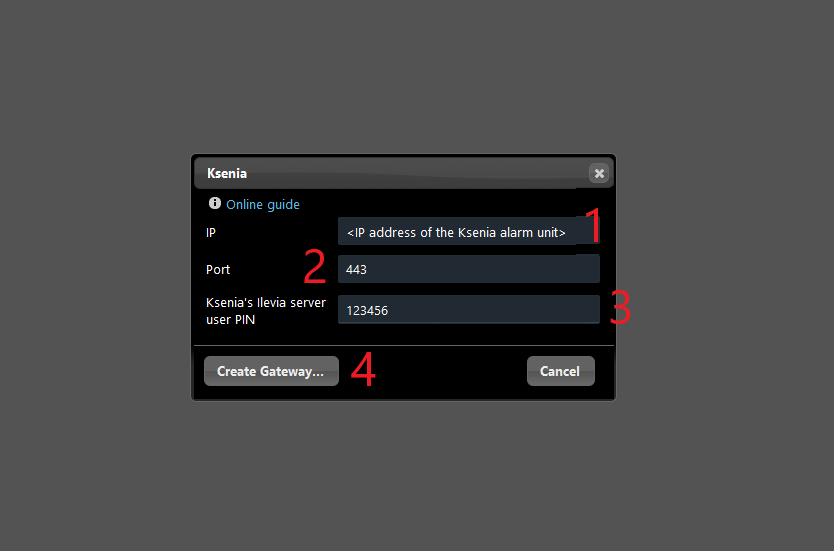
1. Add the IP address of the Ksenia alarm unit inside the Ilevia configuration software;
2. The port must be left as default, since the Ksenia alarm unit uses an HTTPS connection for data transfer;
3. Finally, click on Create Gateway.
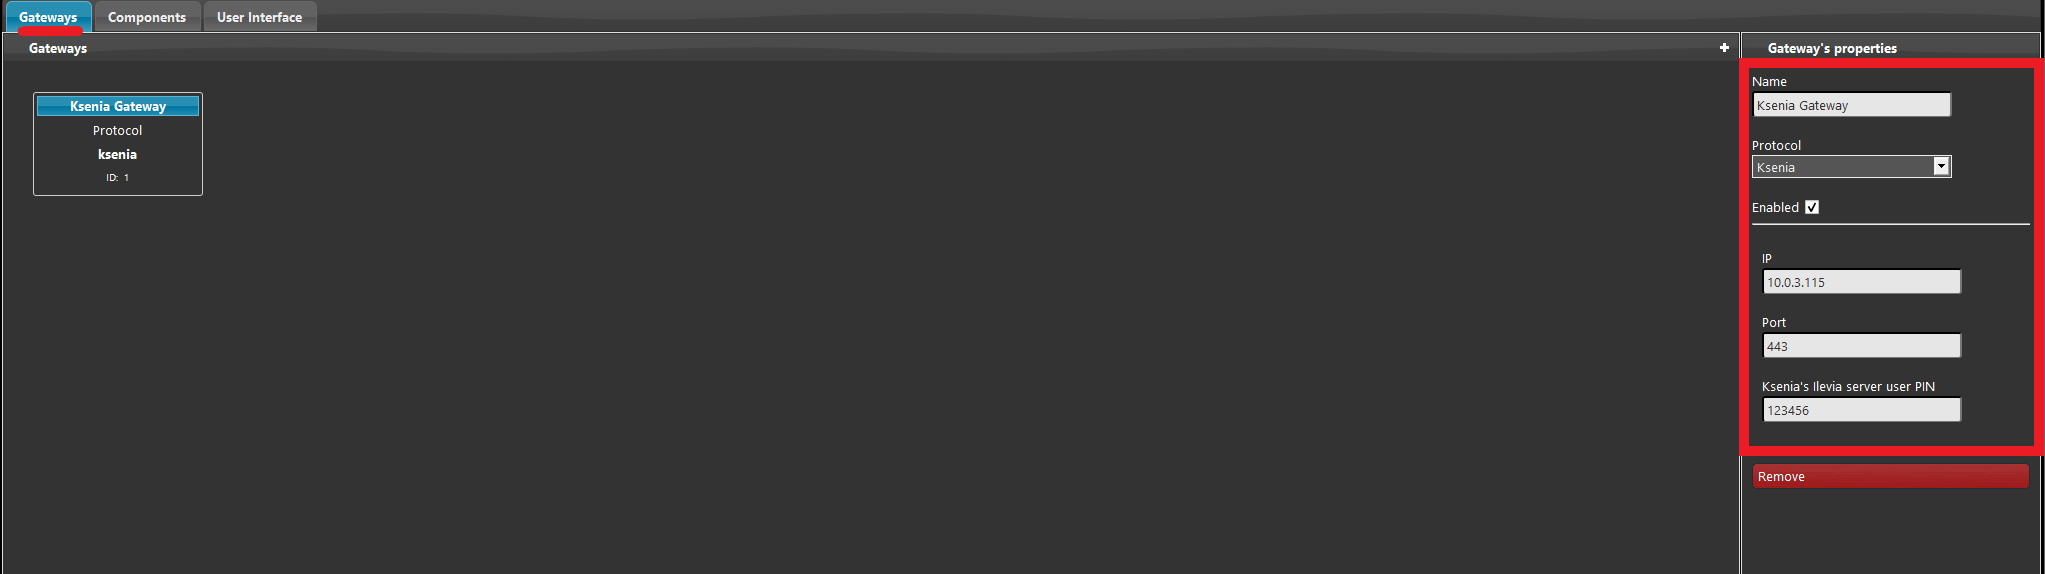
You can check the gateway properties by entering the Gateway tab within the Ilevia Manager.
The Ksenia components will be created automatically after the gateway creation.
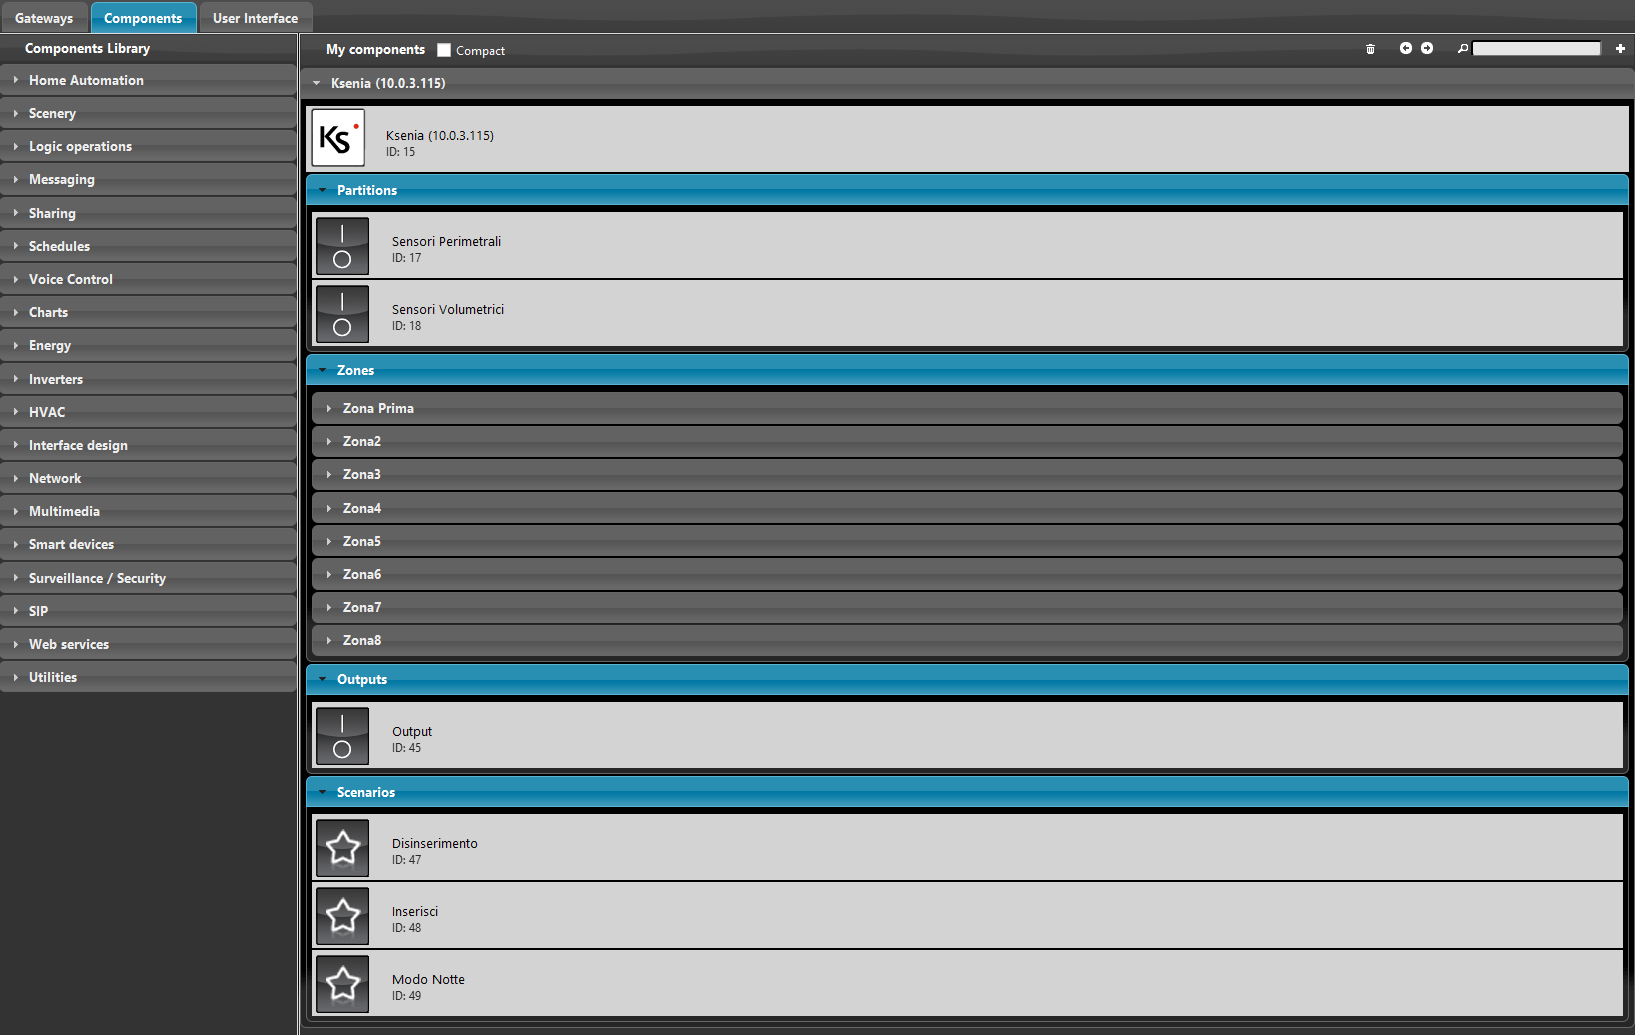
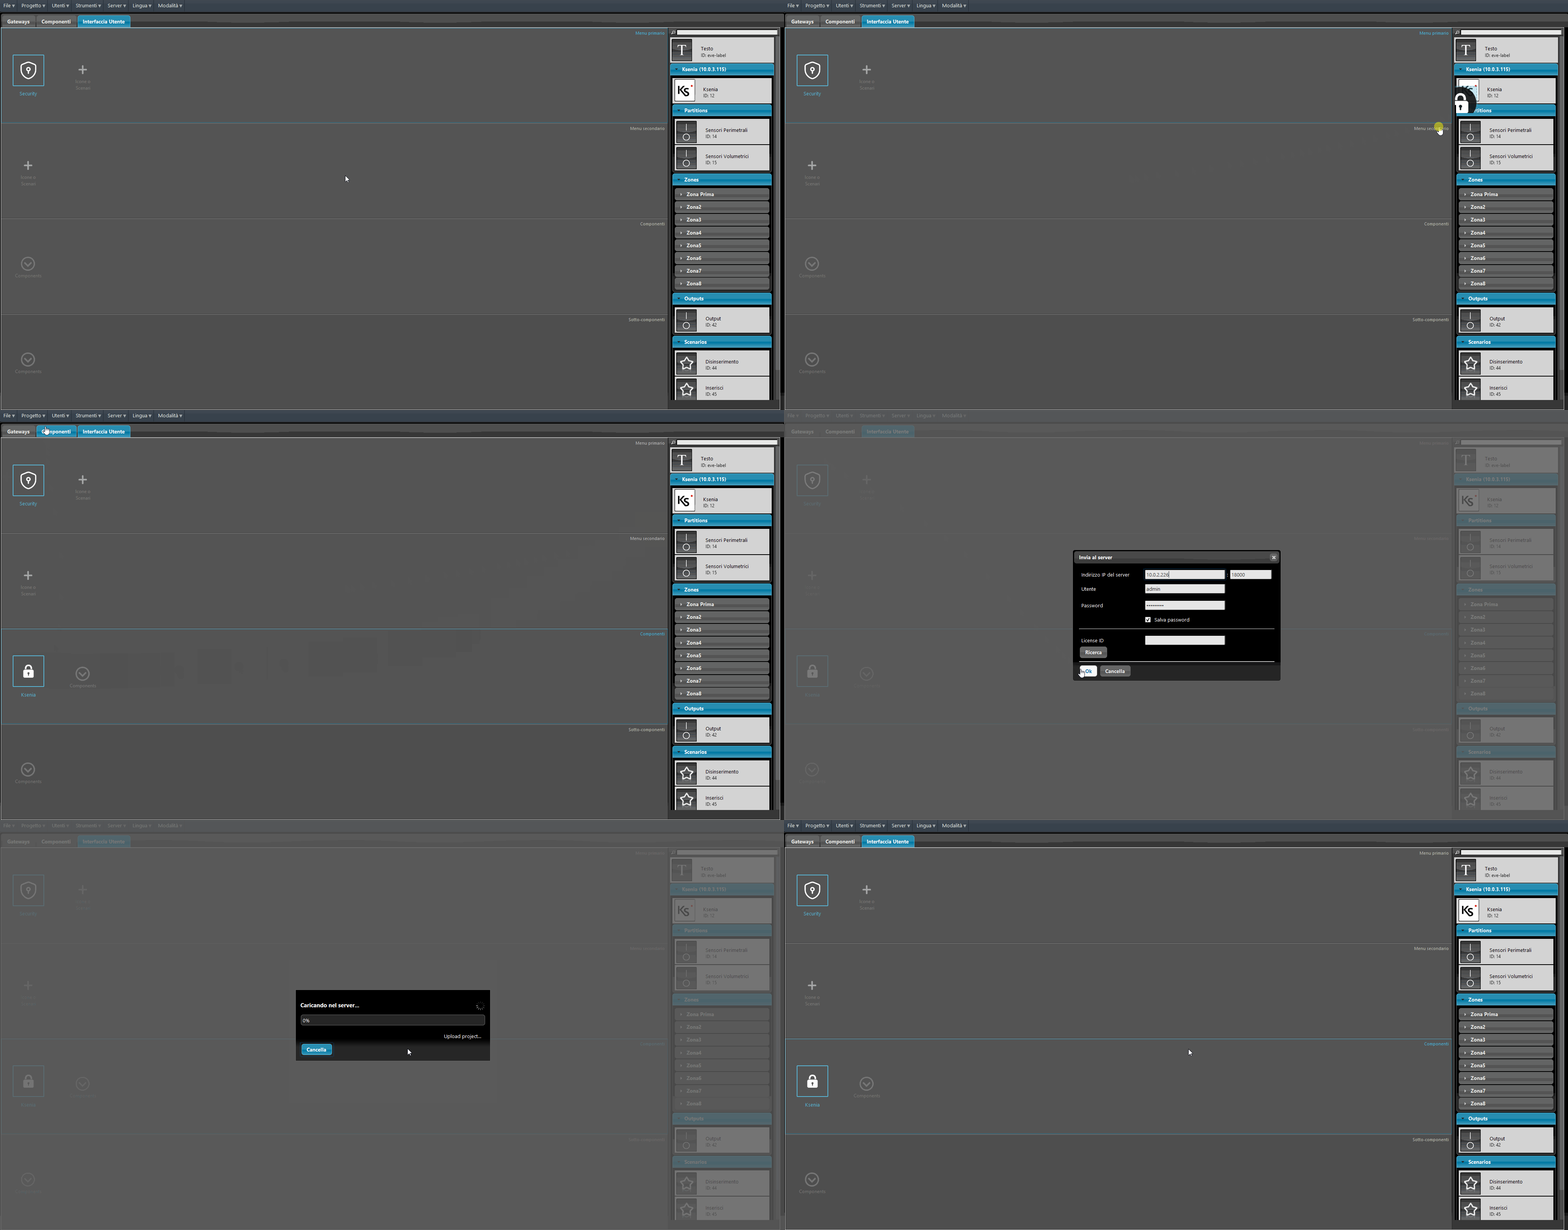
Add the Ksenia component within the user interface as shown on the picture below. Finally upload the project into the server.
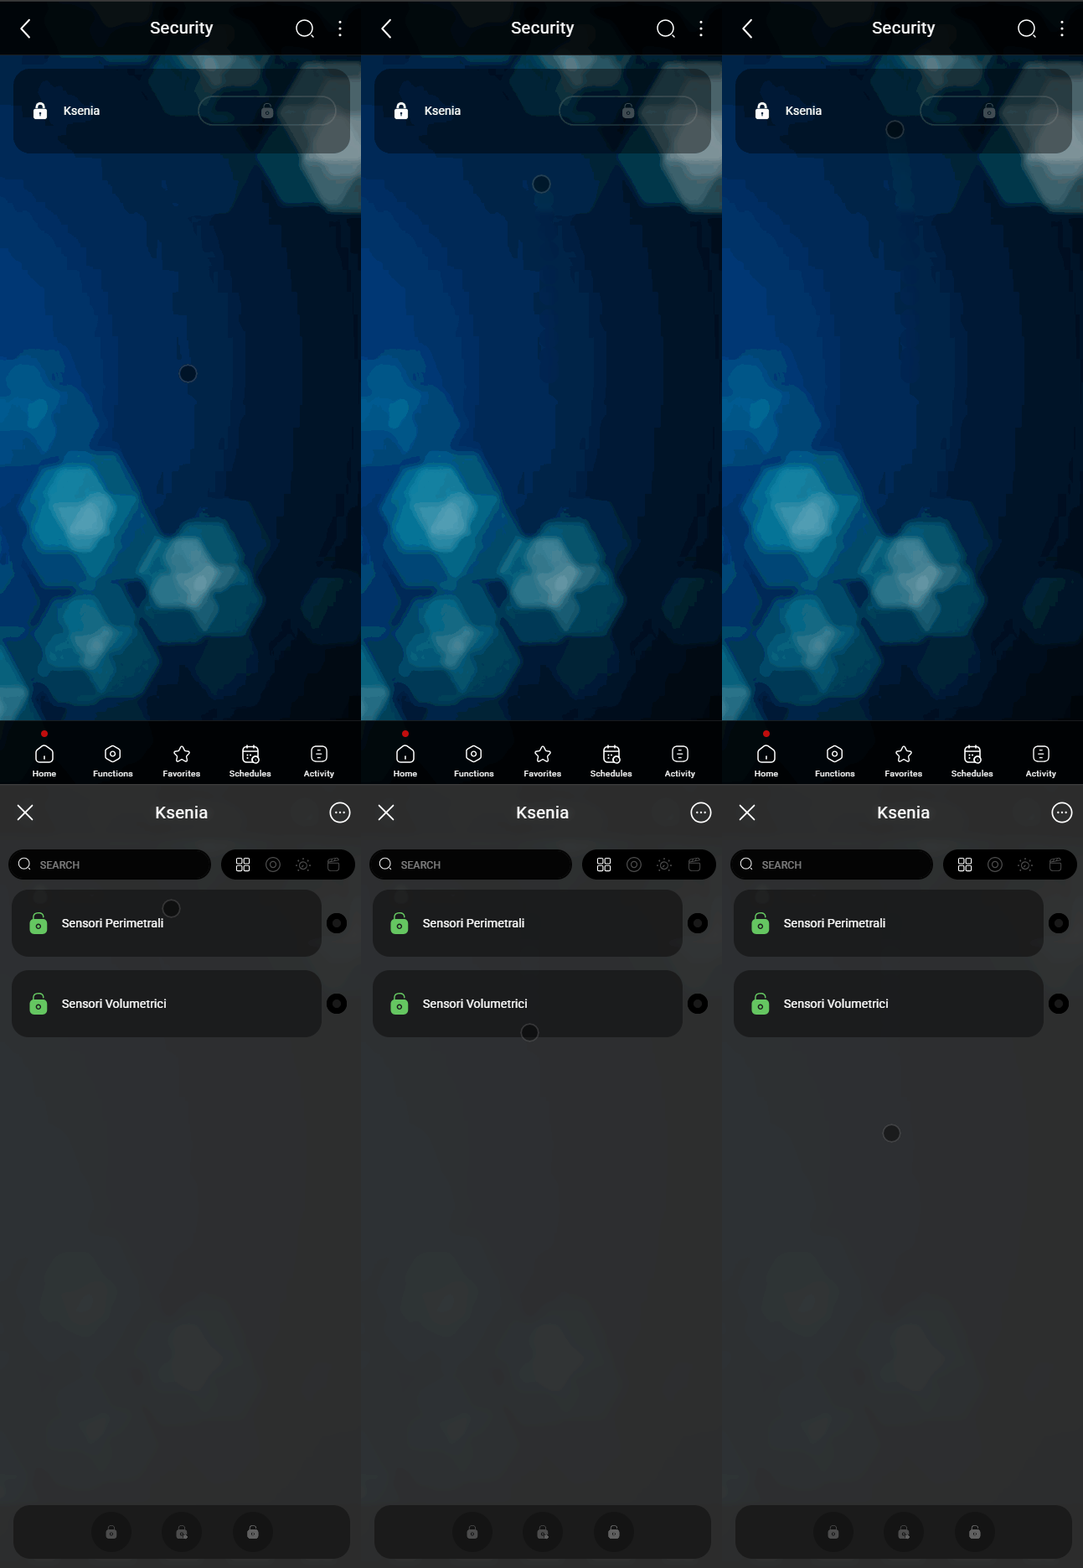
Access the Ksenia widget interface. There you will be able to manage all the configuration and commands available on the Ksenia configuration.
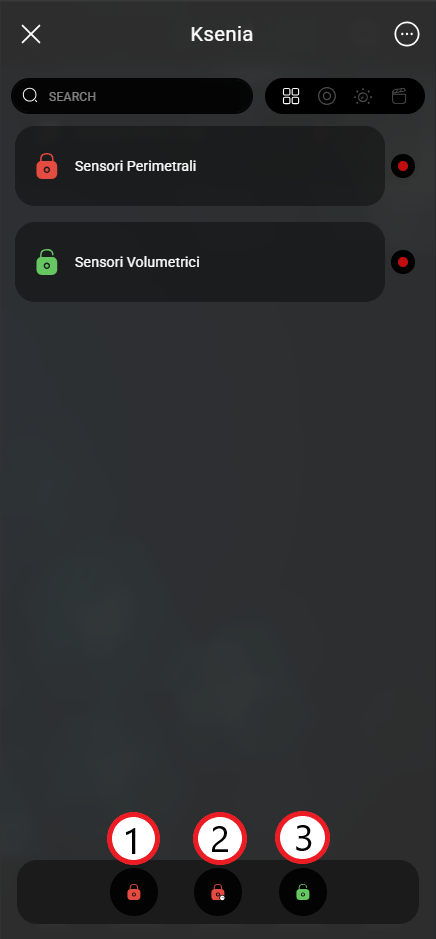
In here you will be able to manage the partition. By clicking the button nearby the partition to enable the partition managing commands:
1. This button will Arm the selected partition.
2. This button will Arm with timing the selected partition.
3. This button will Disarm all the selected armed partition.
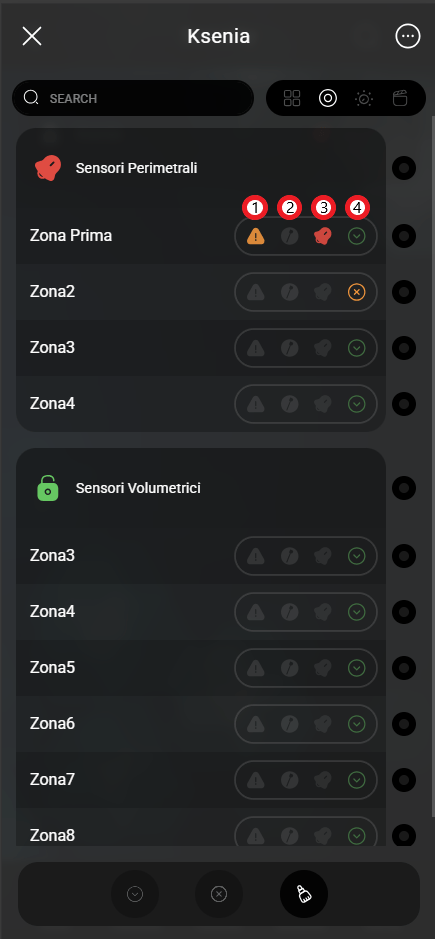
In this tab you can check the Zones of each partition. For each zone you can view its status. Inside the zone status panel, it is indicated whether the zone is:
1. Open or in Error;
2. In Tamper state;
3. In Alarm state;
4. Or whether the zone is Included or Excluded.
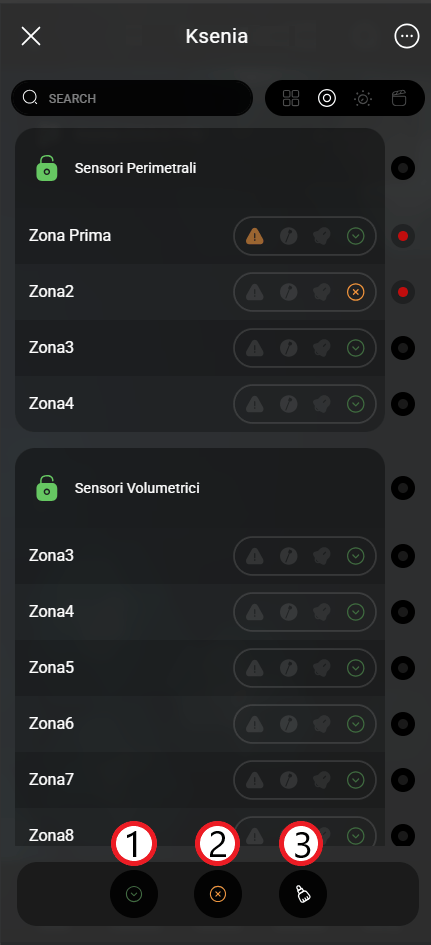
At the bottom of the screen there are three buttons:
1. This button includes the selected zones in the alarm;
2. This button excludes the selected zones from the alarm;
3. This button clears all warnings of the selected zones.
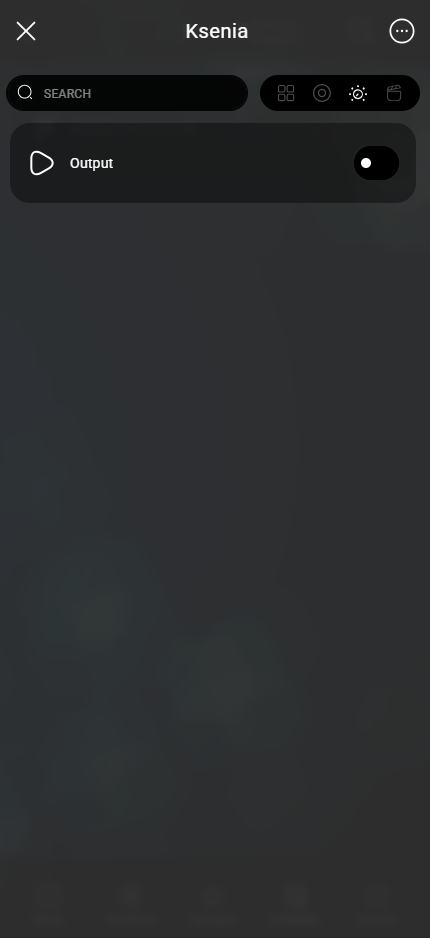
This is the output tab. This command, once activated, it will turn On/Off an output connected to the Ksenia central Unit.
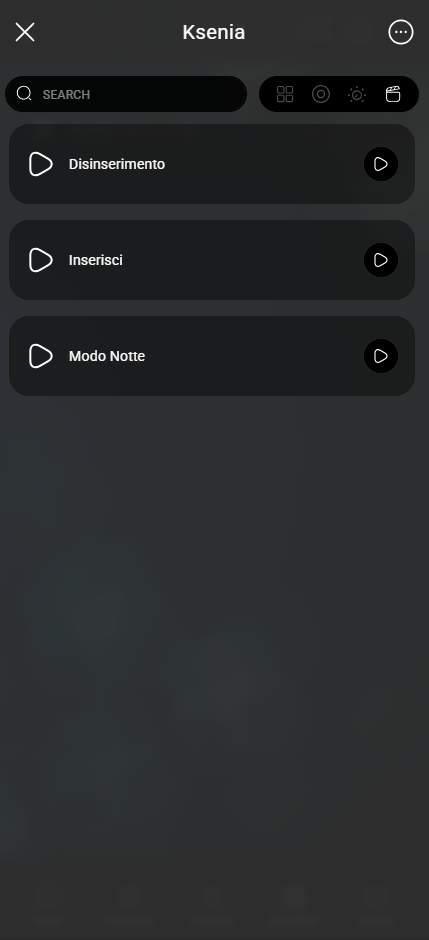
The Scenarios tab allows to trigger scenario’s already present within the Ksenia alarm unit configuration.
PIN OPTION
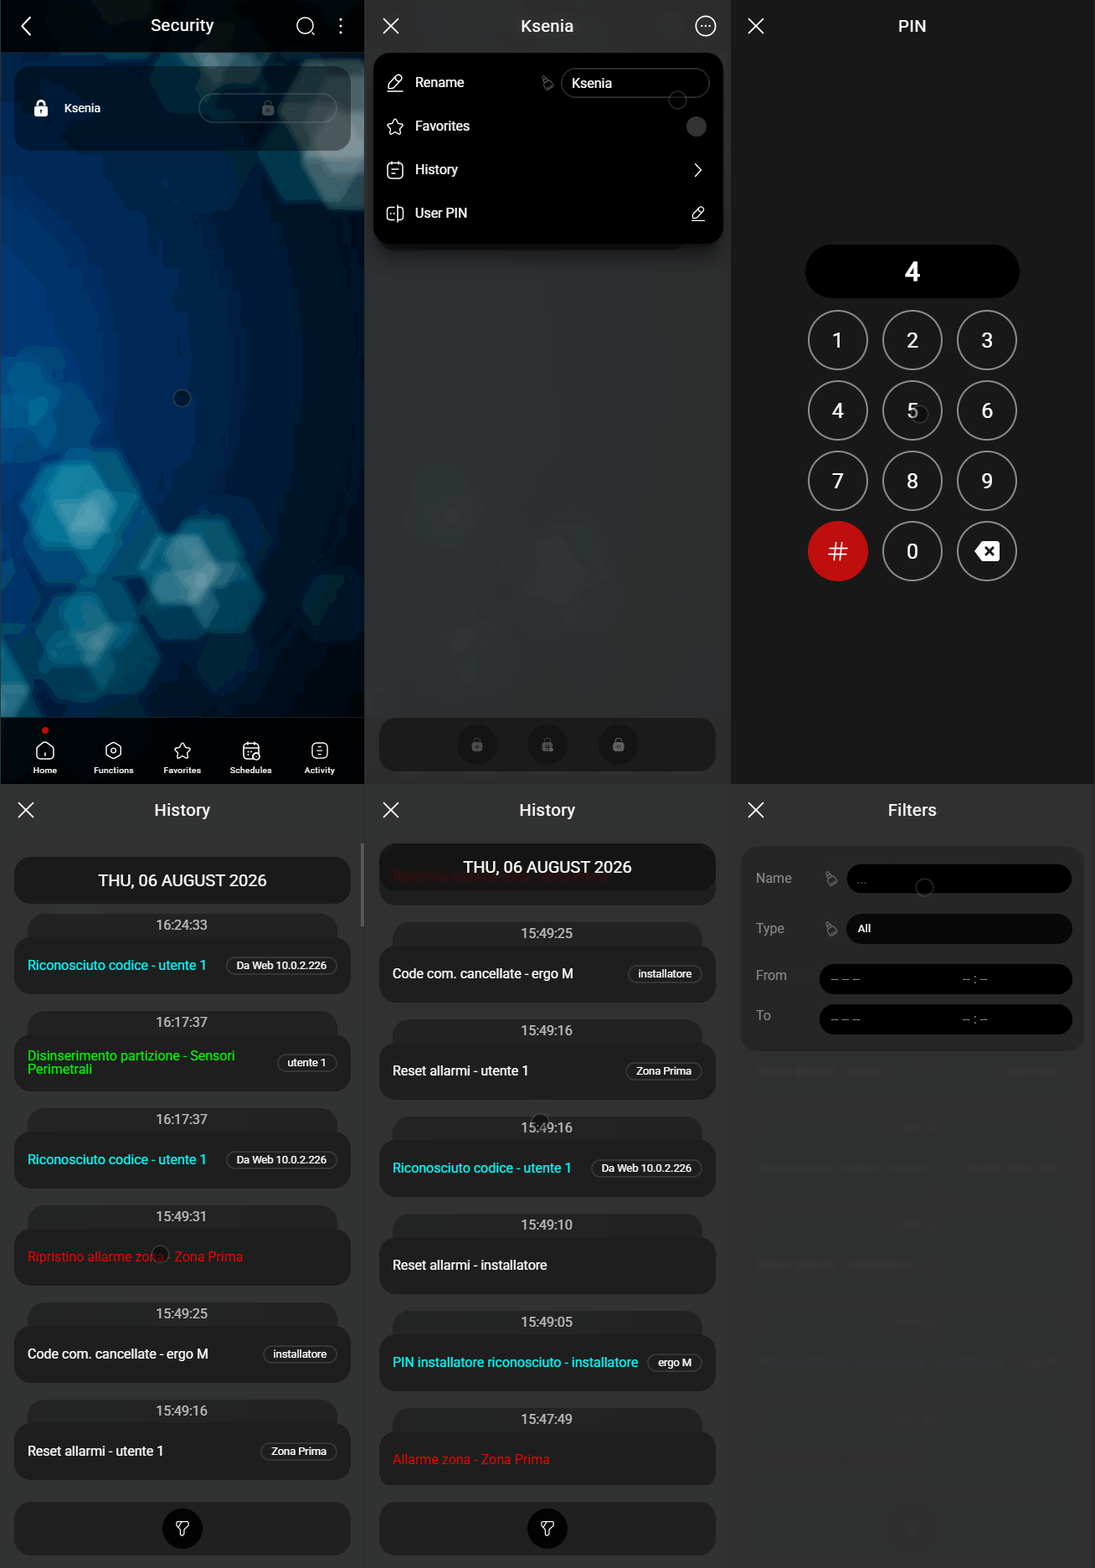
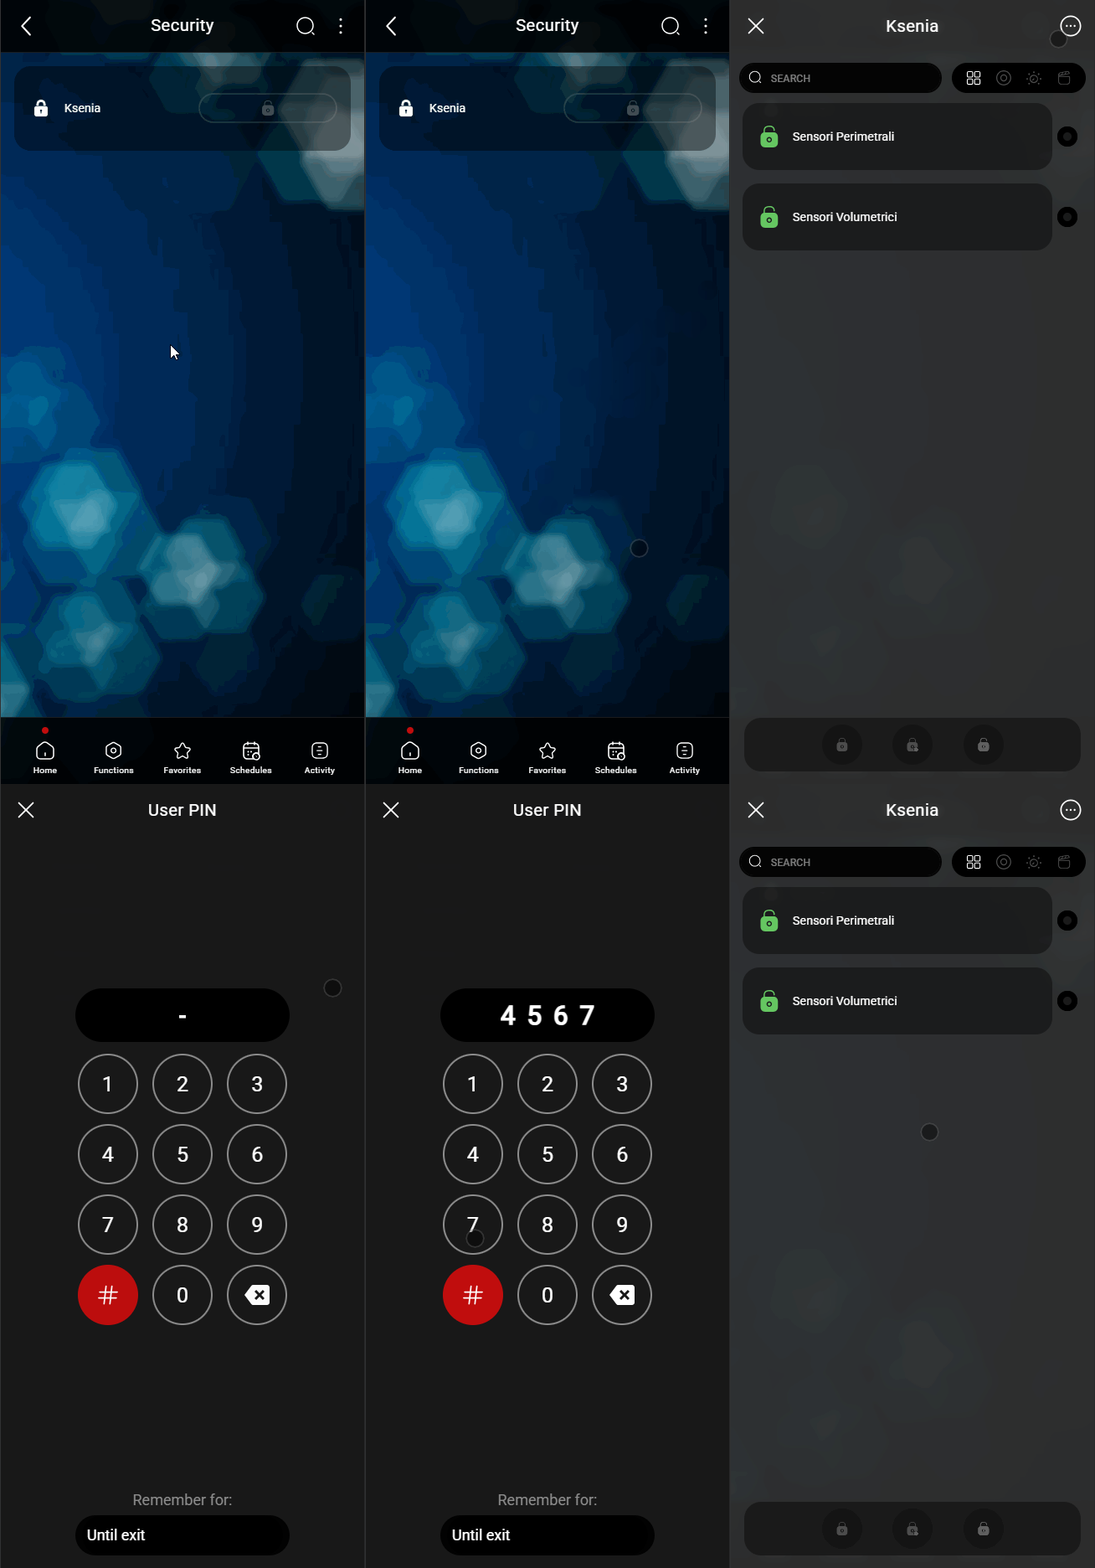
There is an option within the Ksenia’s widget within the Ilevia control app. This option allows to record the User PIN once to be able to not enter it again within the time you stay in the Ksenia widget.
The Ksenia widget in the Ilevia Control app allows you to temporarily save your User PIN. Once saved, you will not need to enter it again for the selected period while using the widget.
Open the detailed view of the Ksenia widget, then tap the three dots in the top-right corner of the screen.
Enter your User PIN and select how long it should be remembered from the “Remember for” drop-down menu. When the selected period expires, you will be asked to enter the PIN again.
HISTORY
The Ksenia widget includes a History menu that provides a record of all events and actions related to the Ksenia alarm system.
To access it, tap the three dots in the top-right corner of the widget, then select History. The screen displays a chronological list of all recorded events and actions.
You can also access the Filters menu to filter the logs displayed in the History menu by name and date range, making it easier to find specific events.