Week Timer and Week Timer Calendar
INTRODUCTION
In the EVE system you can create scheduled events throught the week timer and the week timer calendar components. This two component allow you to set any kind of scenario inside your home, for example turning on a light every day at specific time or set the temperature of your heating system during your working day at specific time.
When you insert in the project one week timer and one week timer calendar the user will be able to setup a week scheduling of any component in the user interface , with one week scheduling.
Sometime this is enough to let the user to schedule his devices but sometime we require more than one type of week, like work week and travel week to let the user to set different behaviour of his house based on his preferences.
To do more complex scheduling you can add a new week timer calendar, add any number of weeks scheduling and create a dropdown component to select which week to activate. For the new calendar you have to define also to which component it is referred to, for example you can have a swimming pool with it’s own weeks type based on the season or based on the external temperature and control only the setpoint of the water with a specific scheduling.
The user will select the active scheduling week using a drop down on the user interface or it can be change based on a logic for example when the outside temperature goes under a specific level the system can set the week “winter” to activate the expected behaviour.
USE CASES
-
I would like to start the irrigation 3 time a week at six in the morning.
-
I would like to turn off the external lights every day at six in the morning and turn them on at nine in the evening-
Week Timer
INTRODUCTION
The Week Timer is a component that allows you to set scheduling events. You can add as much week timers as you want for example to define the behaviour of your house during your working days or when you are on traveling, but this component can’t work alone, the Week Timer needs the component Week timer calendar to define which week to apply for a specific day.
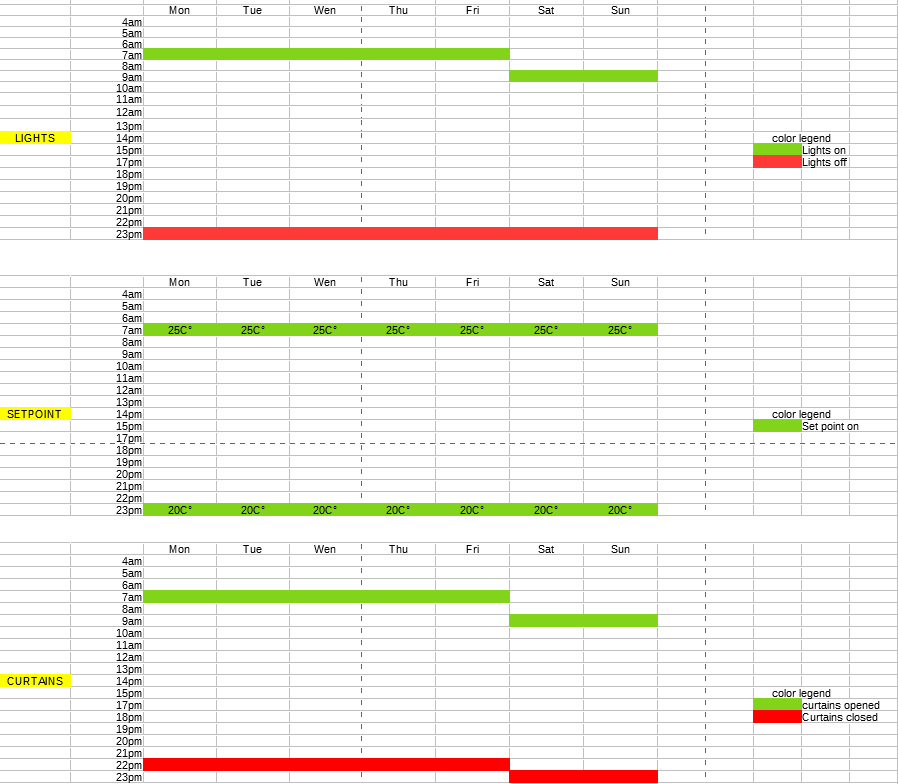
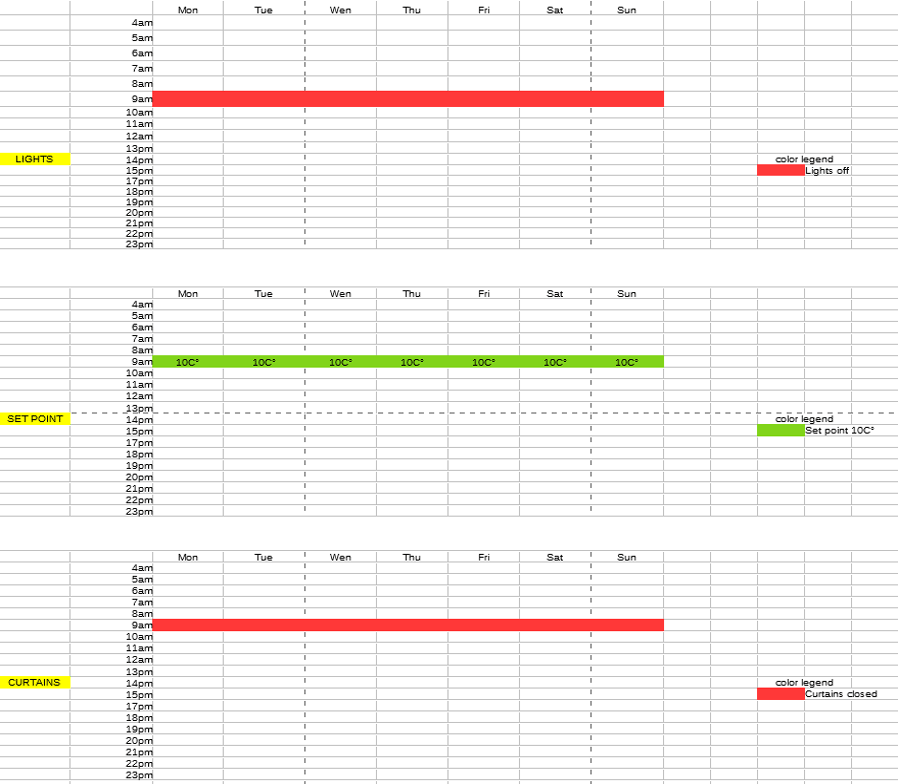
We can explain this kind of component with an example like this: Pretend to have two different type of weeks, the working week that rappresent your tipical week, and the Traveling week when you are absent from your house. As you can see the week timer called Working has some differences from the week timer Traveling.
In the following example in the WORKING week we set the behaviour of 3 devices: lights, setpoint, curtains, just click on the images to see the details.
We will explain later how to define the week events using the app EVE Remote Plus.
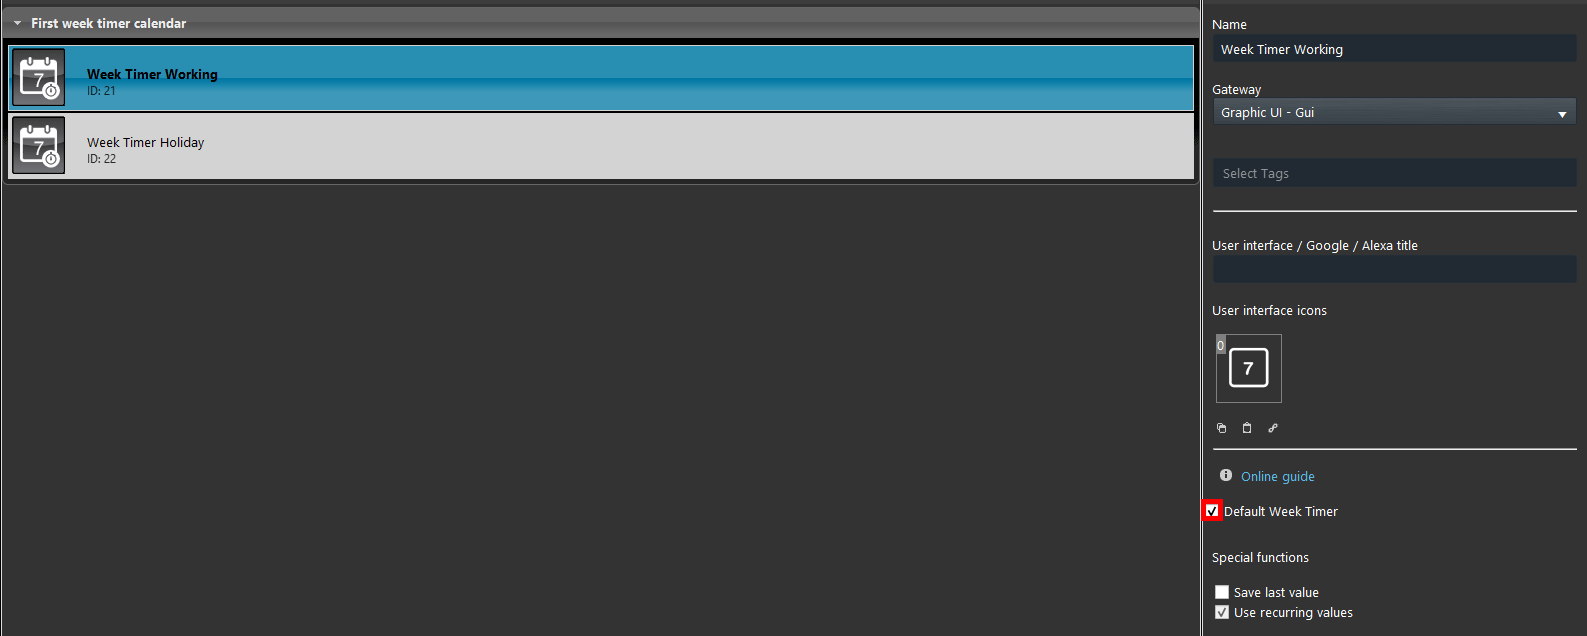
Once you add the Week Timer component inside the project make sure the first week timer has the “default Week timer” check box active.
Click here to get into details of the Week Timer component.
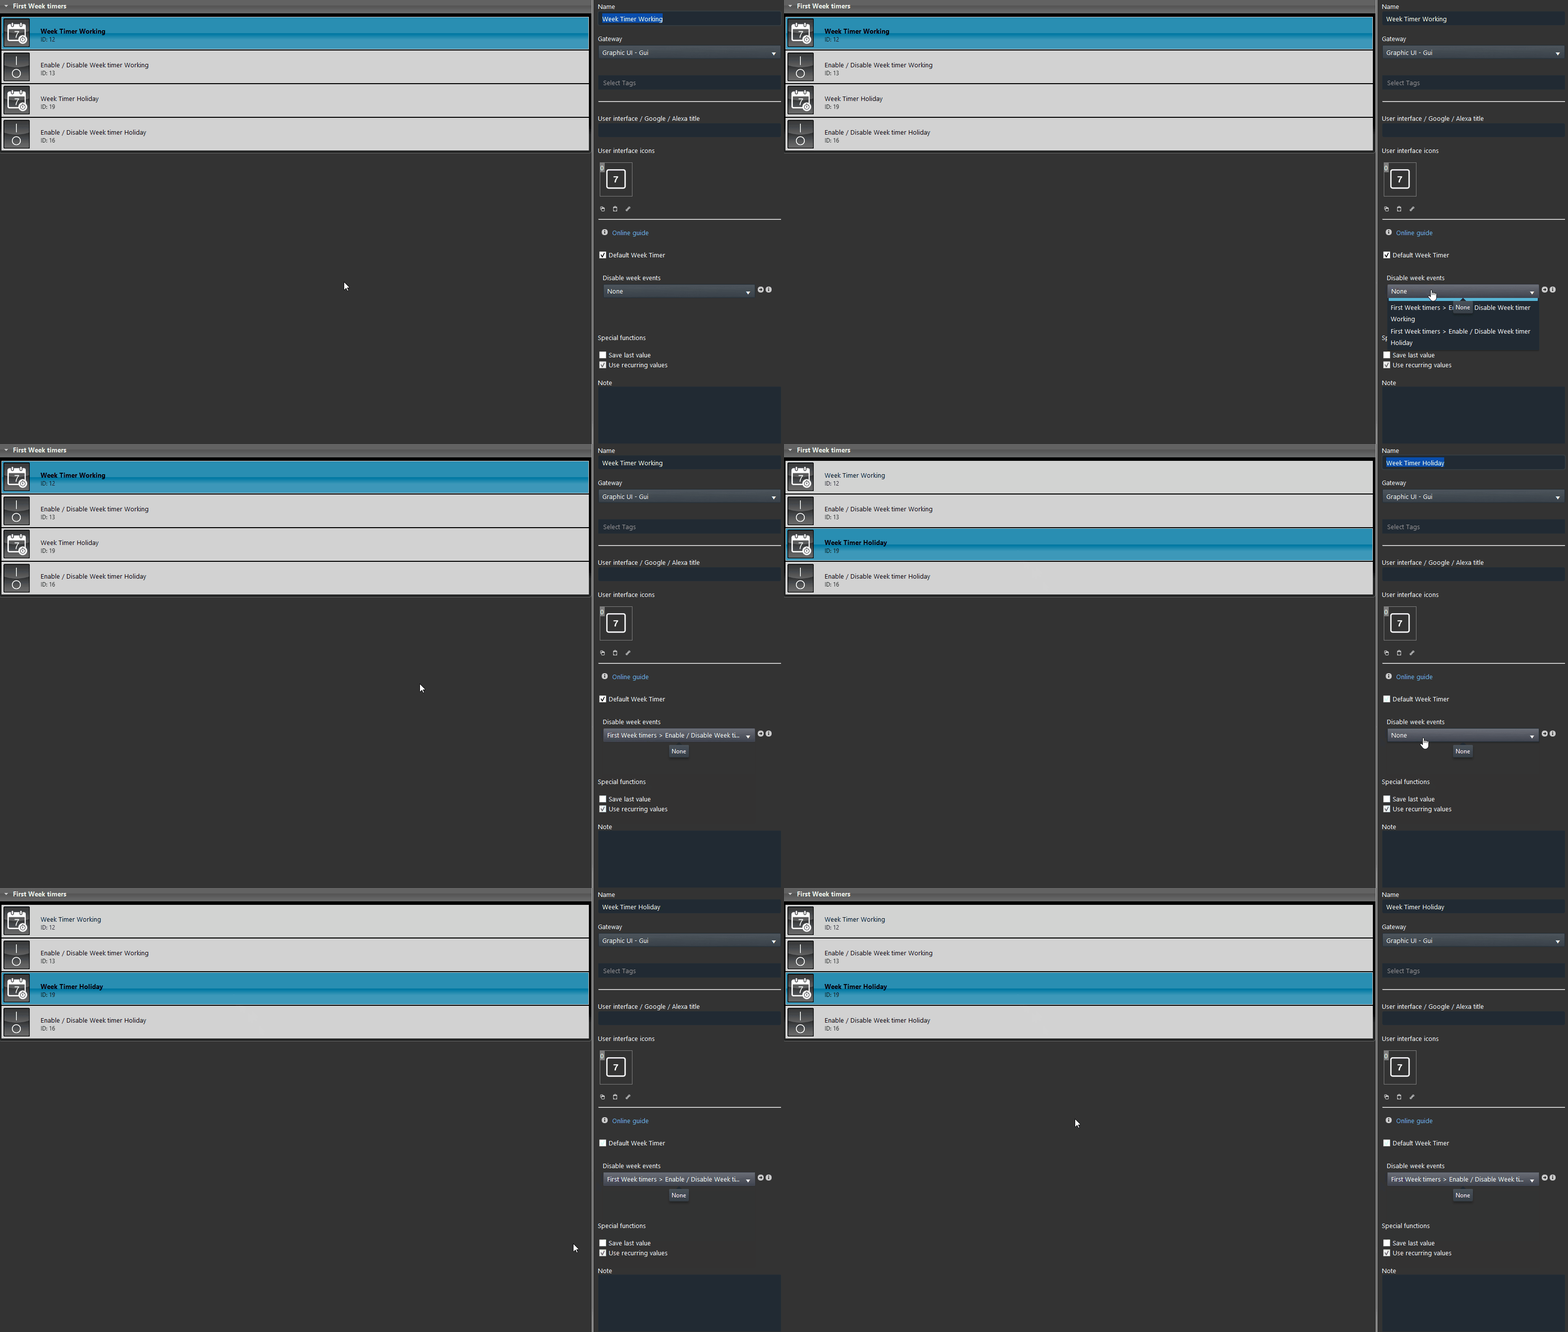
Disable week events
By adding a Switch, Color info, Text info, Lock components in the drop down list allows you to Enable / Disable the week events of the selected Week Timer. This means you could have multiple week timers in the project with the possibility to active or deactivate each one singularly.
Week Timer Calendar
INTRODUCTION
The Week Timer Calendar is a component that allows the user to choose which week Timer to use from the app EVE Remote Plus.
Step 1:
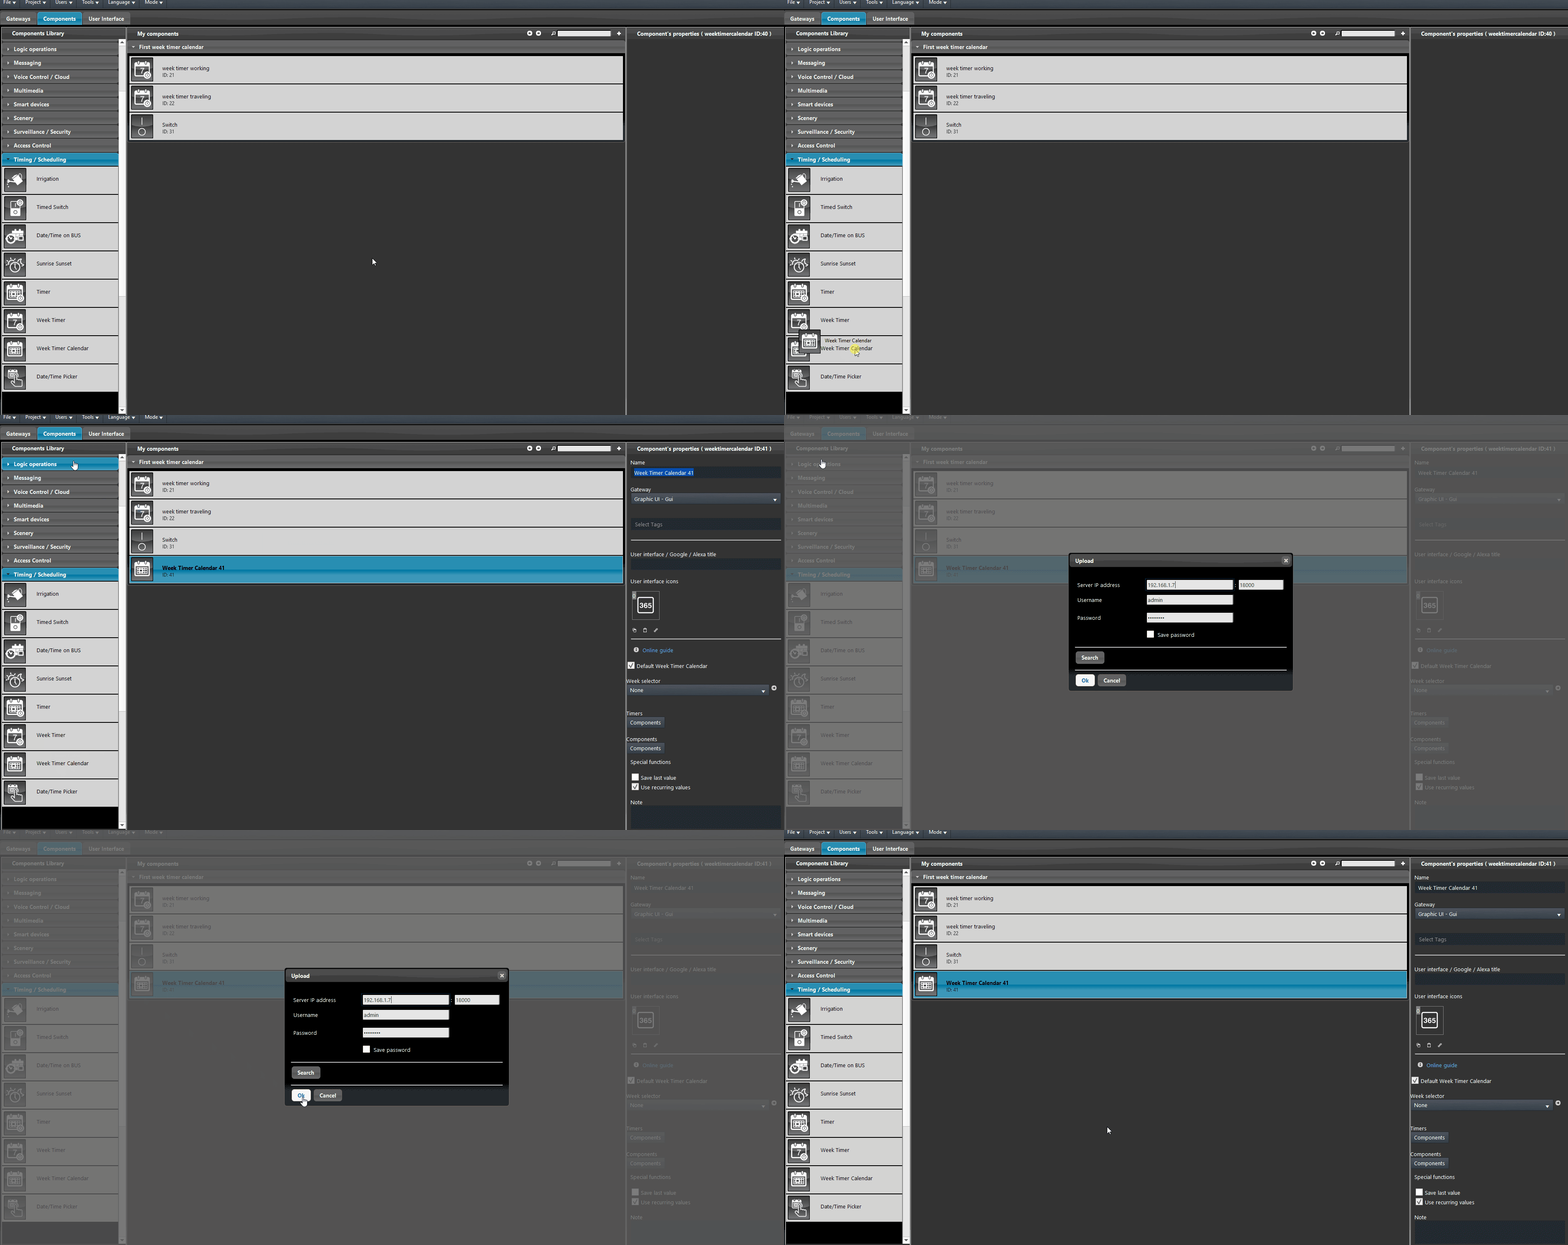
Add the first Week Timer Calendar into the project, then upload the project to the server. Once you add at least one Week Timer Calendar a new icon will apear inside the EVE Remote plus options Icon menu.
Click here to get into details of the Week Timer Calendar component.
TIMERS IN EVE REMOTE APP (classic view)
Step 2:
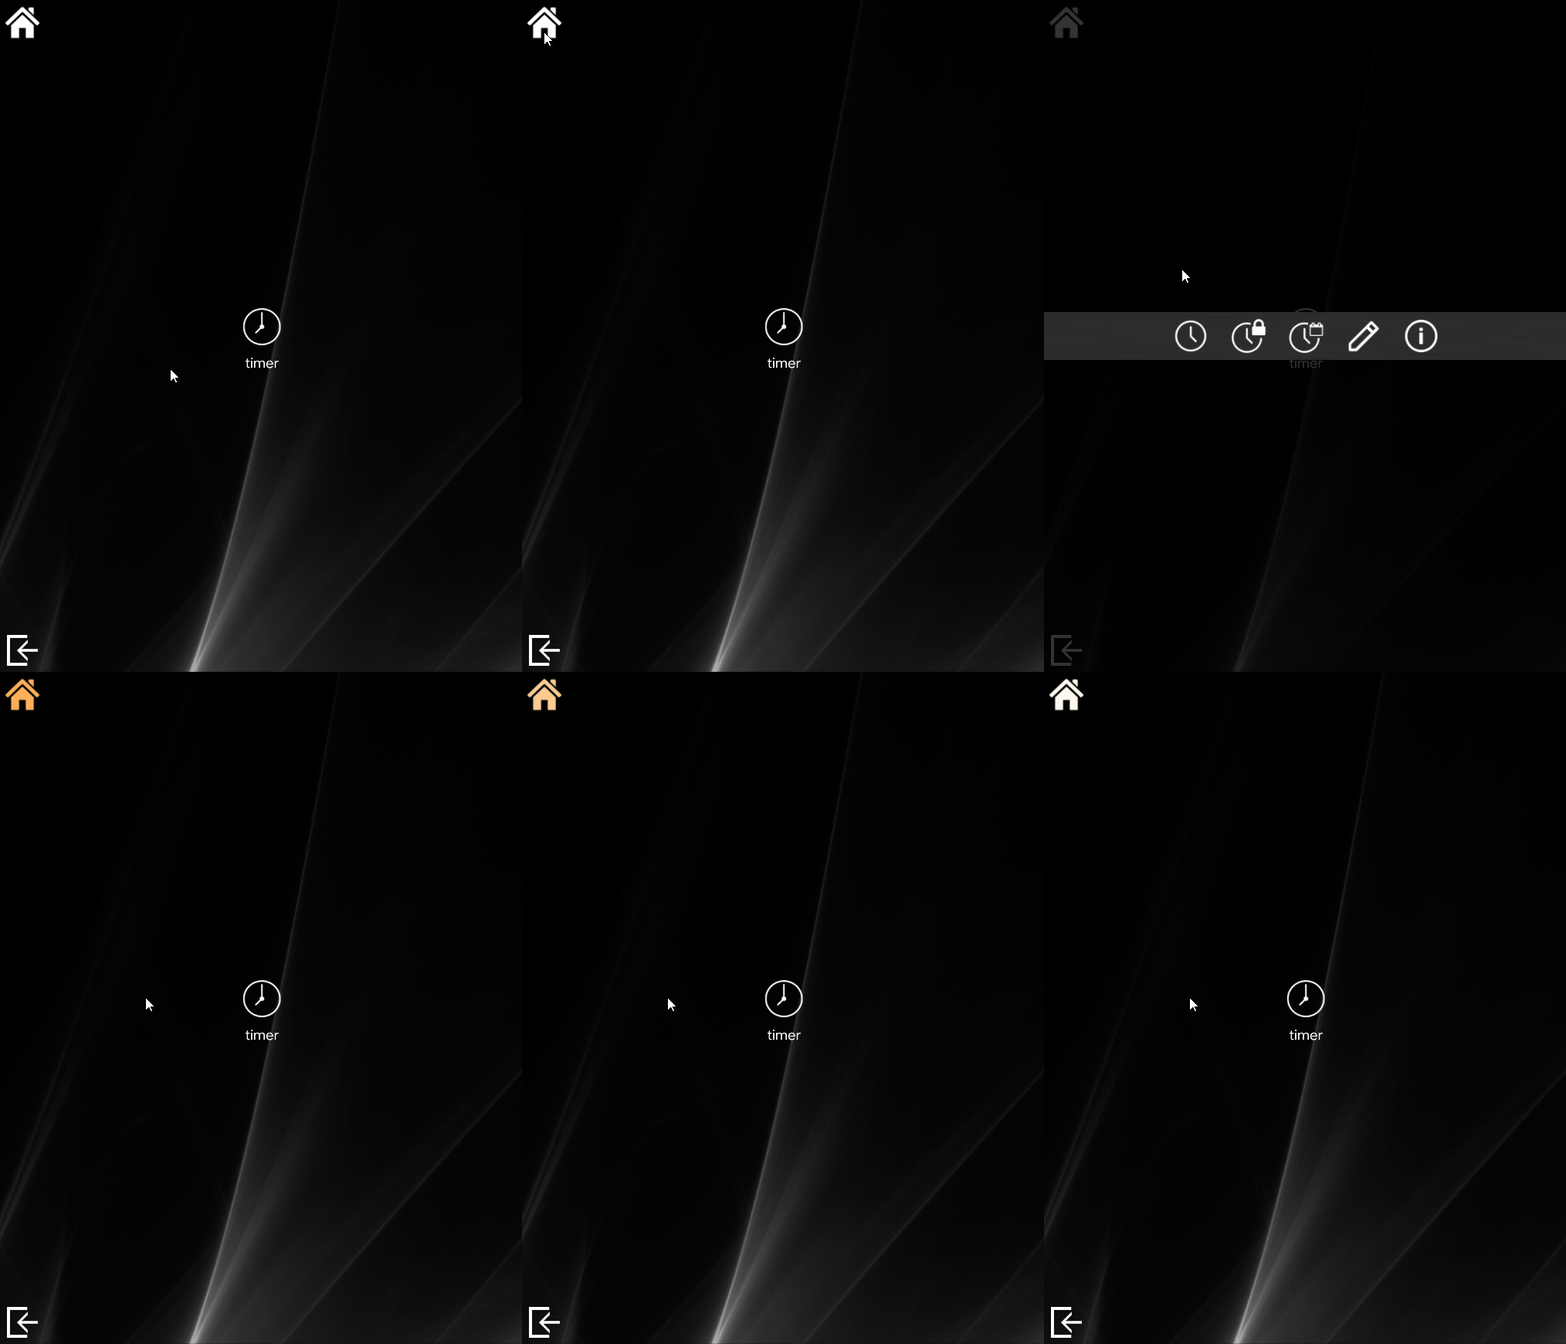
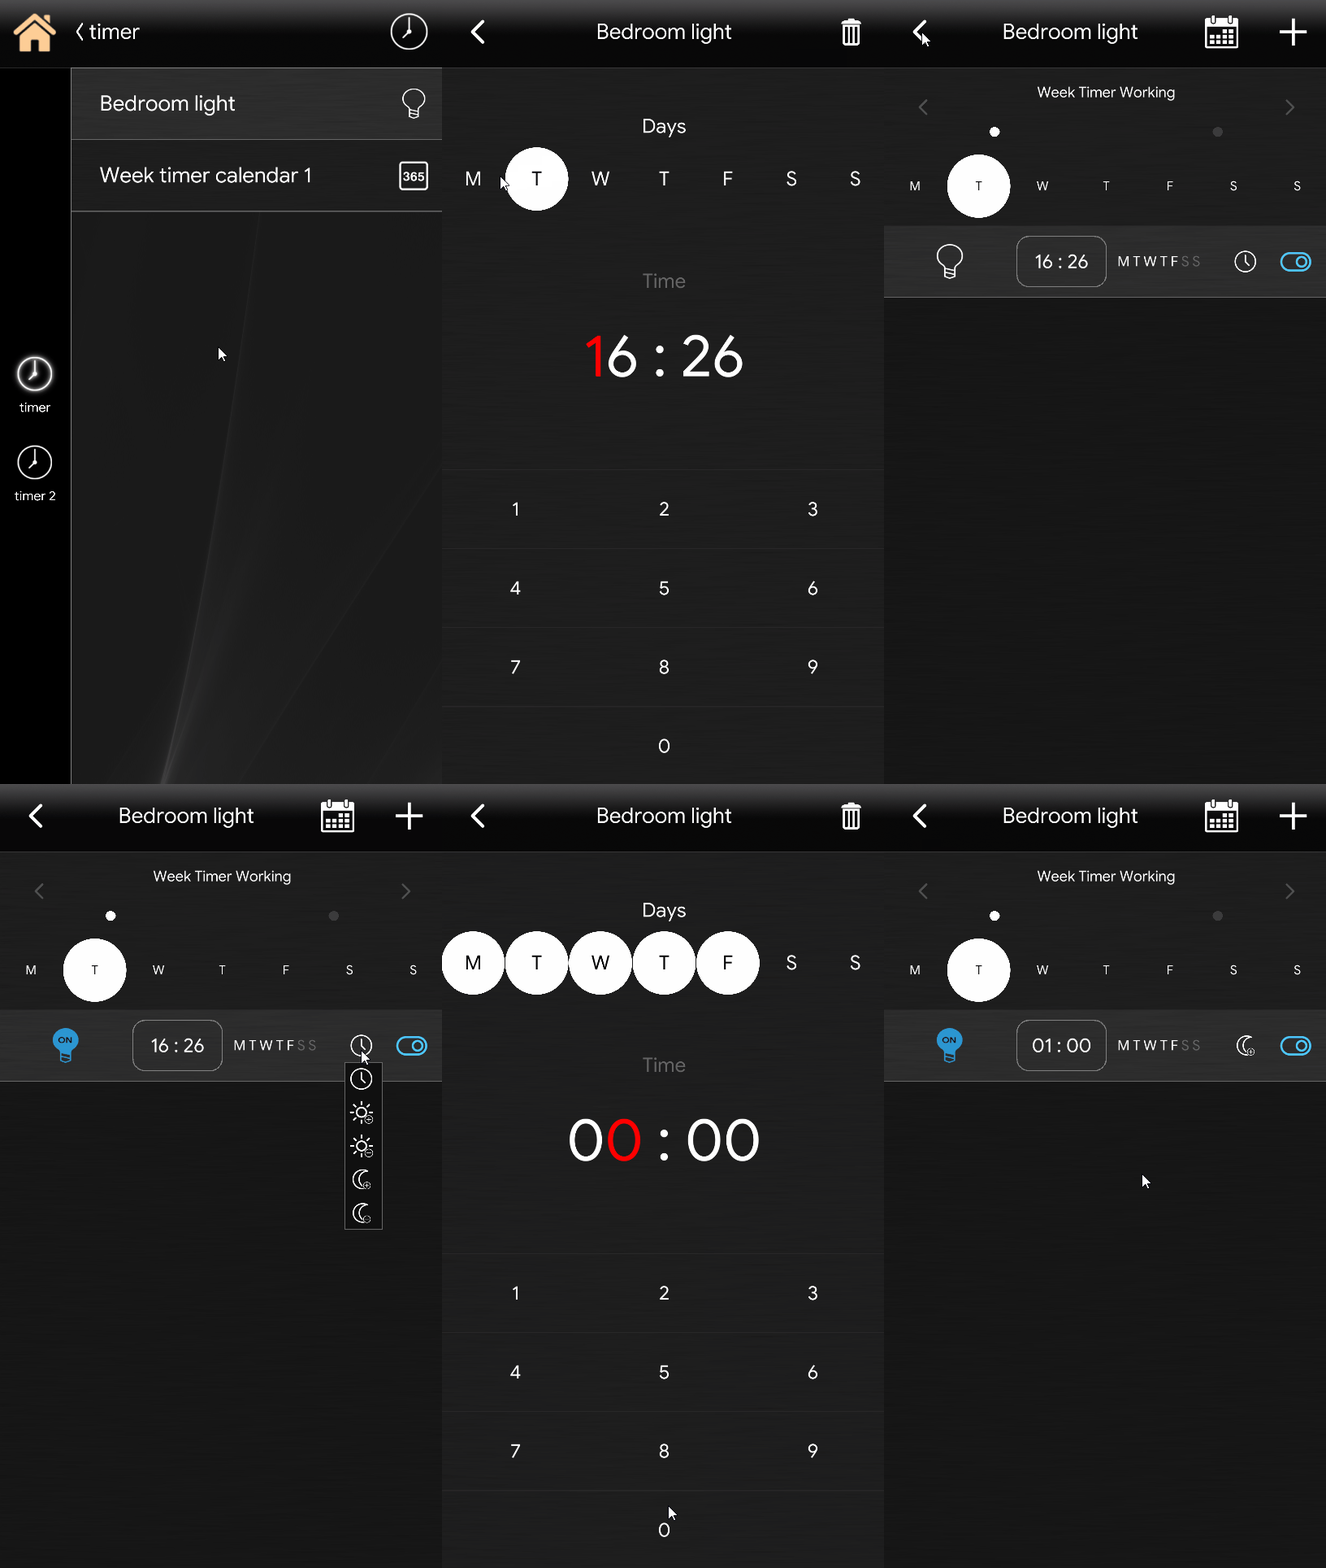
If you keep pressed the white Home icon on the top left, a new option menu will appear. In order to enter the scheduling mode, press the first icon on the left. Then it will start blincking in orange.
Here is how to schedule a component inside the Home automation App EVE Remote plus classic view.
First hold left mouse button for a few seconds until a menu pop up, then click the first clock Icon on the left
Step 3:
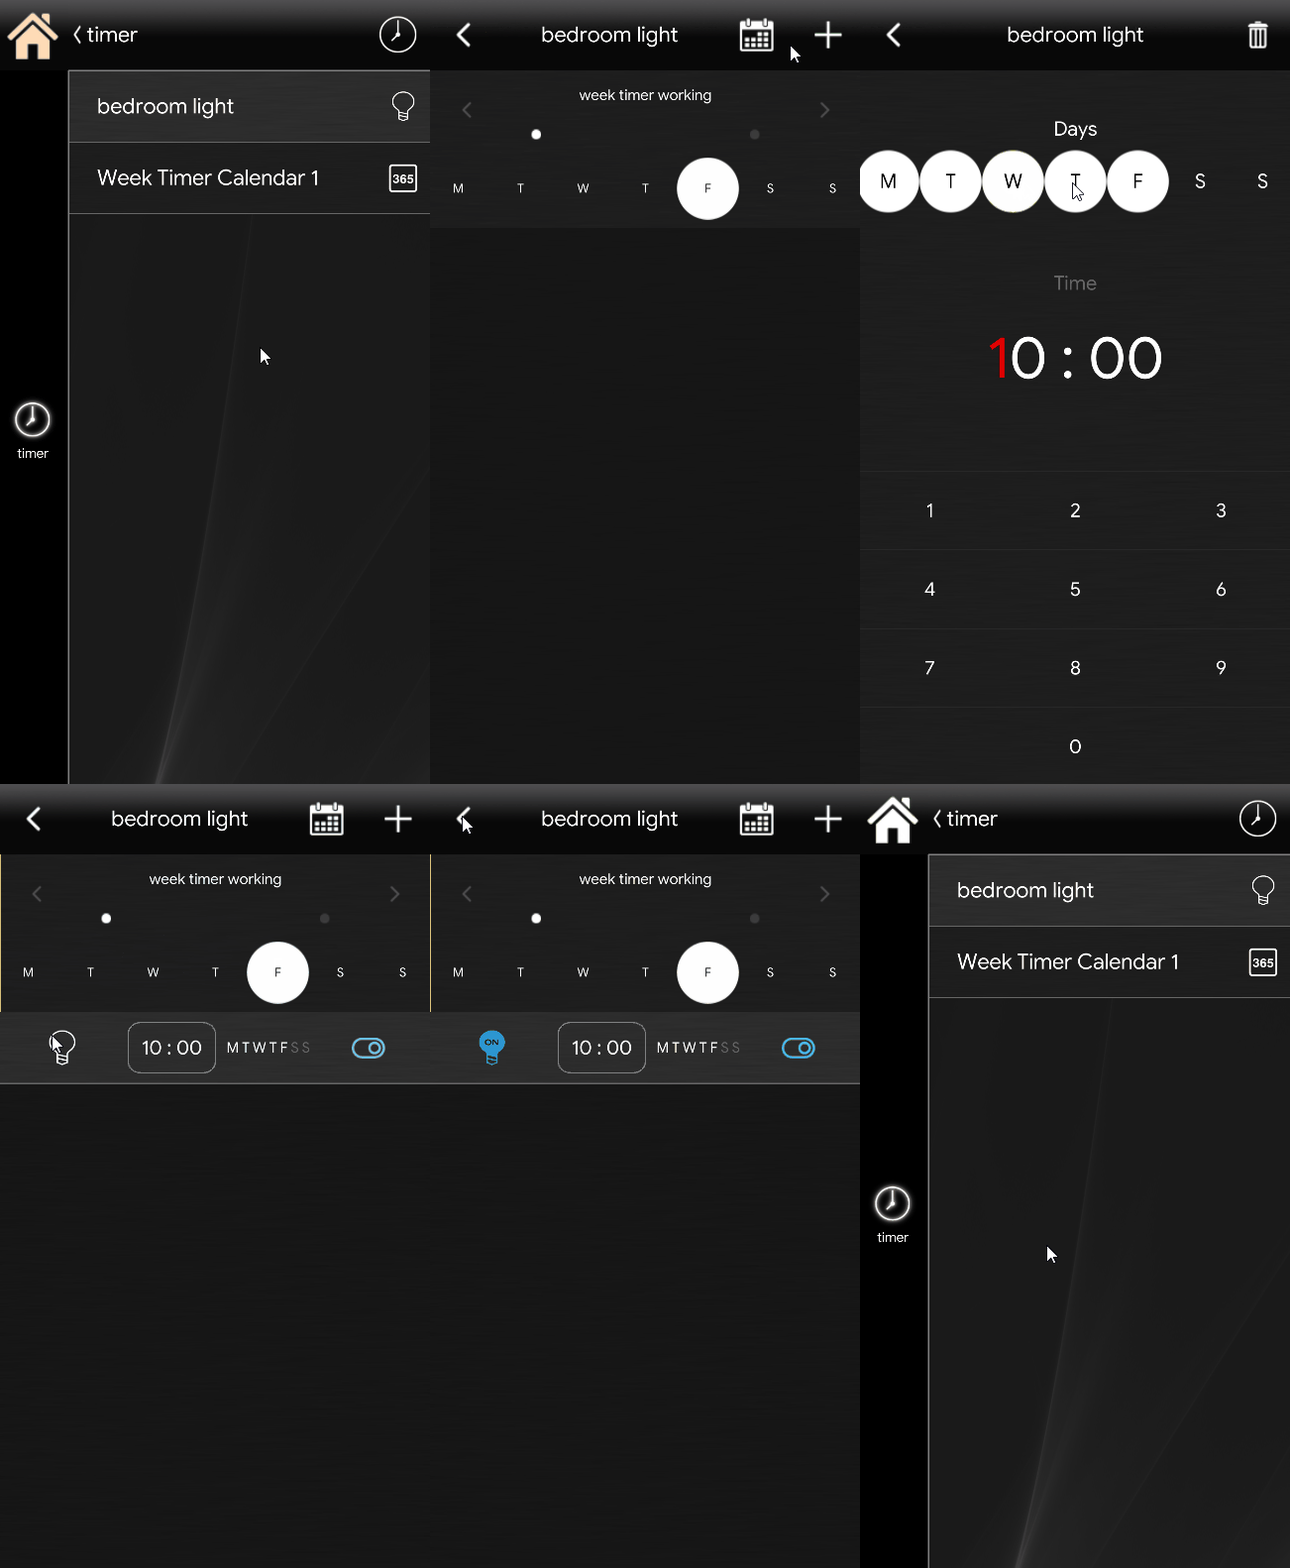
Now click the desired component and click the plus icon on the top right of the interface, then set a time and the days where this Week Timer will trigger the event, after that just click on the back arrow on the top left to confirm the settings for the component, after that the schedulation will require a specific component’s state, in our case the ligh turning on, so click on the component icon and choose the desired component value that will be set to the device once the schedulation triggers.
Step 4:
Now let’s see how to select the days where the second week timer will effect the schedulation. Open the Week Timer Calendar menu by clicking/tapping its icon, a calendar will appear. This will allow the user to select what days and which Week Timer will affect a specific day of the week.
Week selector
In case of a multiple Week timer structure, there is a way to switch between Week timers without necessarly selecting the days which a week timer is active.
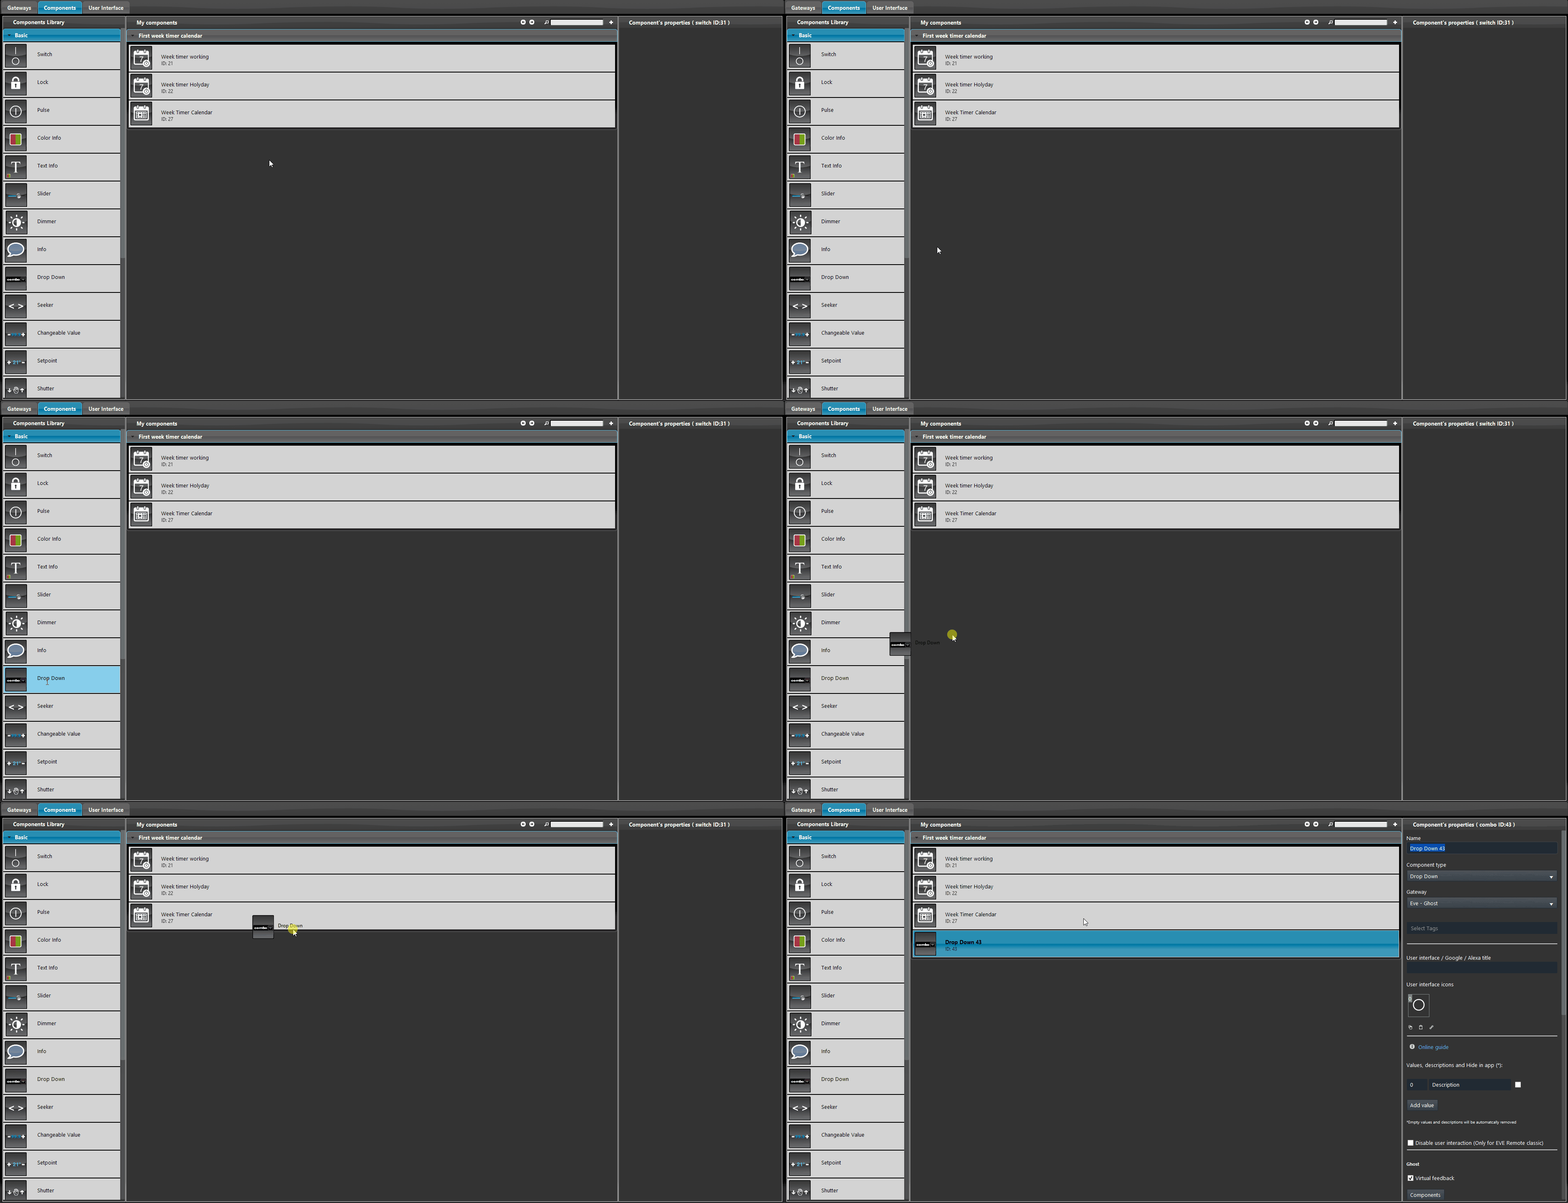
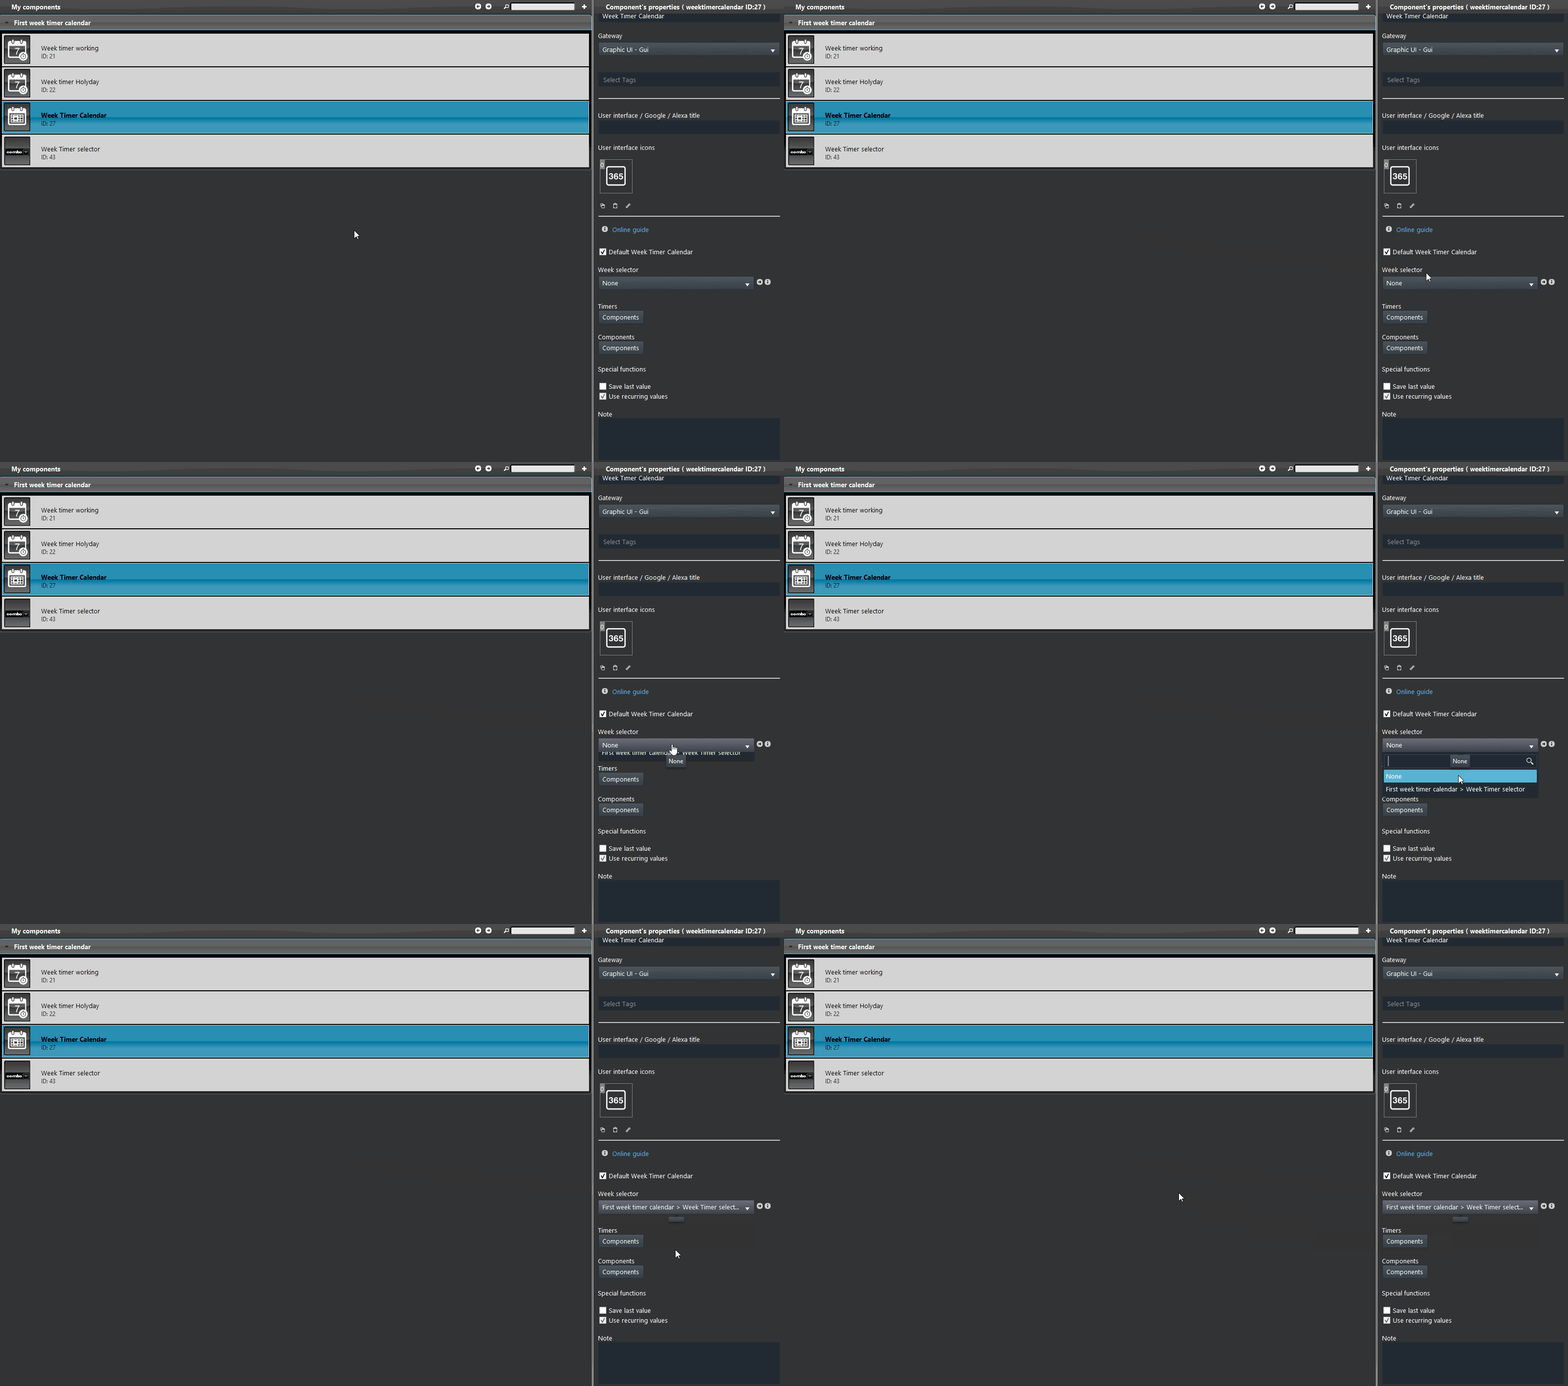
Add a new Drop down component in the “My components” area.
Now add the values that rappresent the Week timers present in the project within the Drop down component properties.
Now link the Drop down component to the Week Timer Calendar by selecting it from the drop down called Week selector within the Week Timer Calendar‘s component properties.
Get you free test here download and try it your self.
Why should i have two Week Timer Calendars in the same project?
Let’s say we have a different appartment controlled by the same EVE Server. You want this appartment to have its own schedulement, by adding another Week Timer Calendar. Now you will be able to set the appartment components with separate schedulements.
How can the user select the active week scheduling?
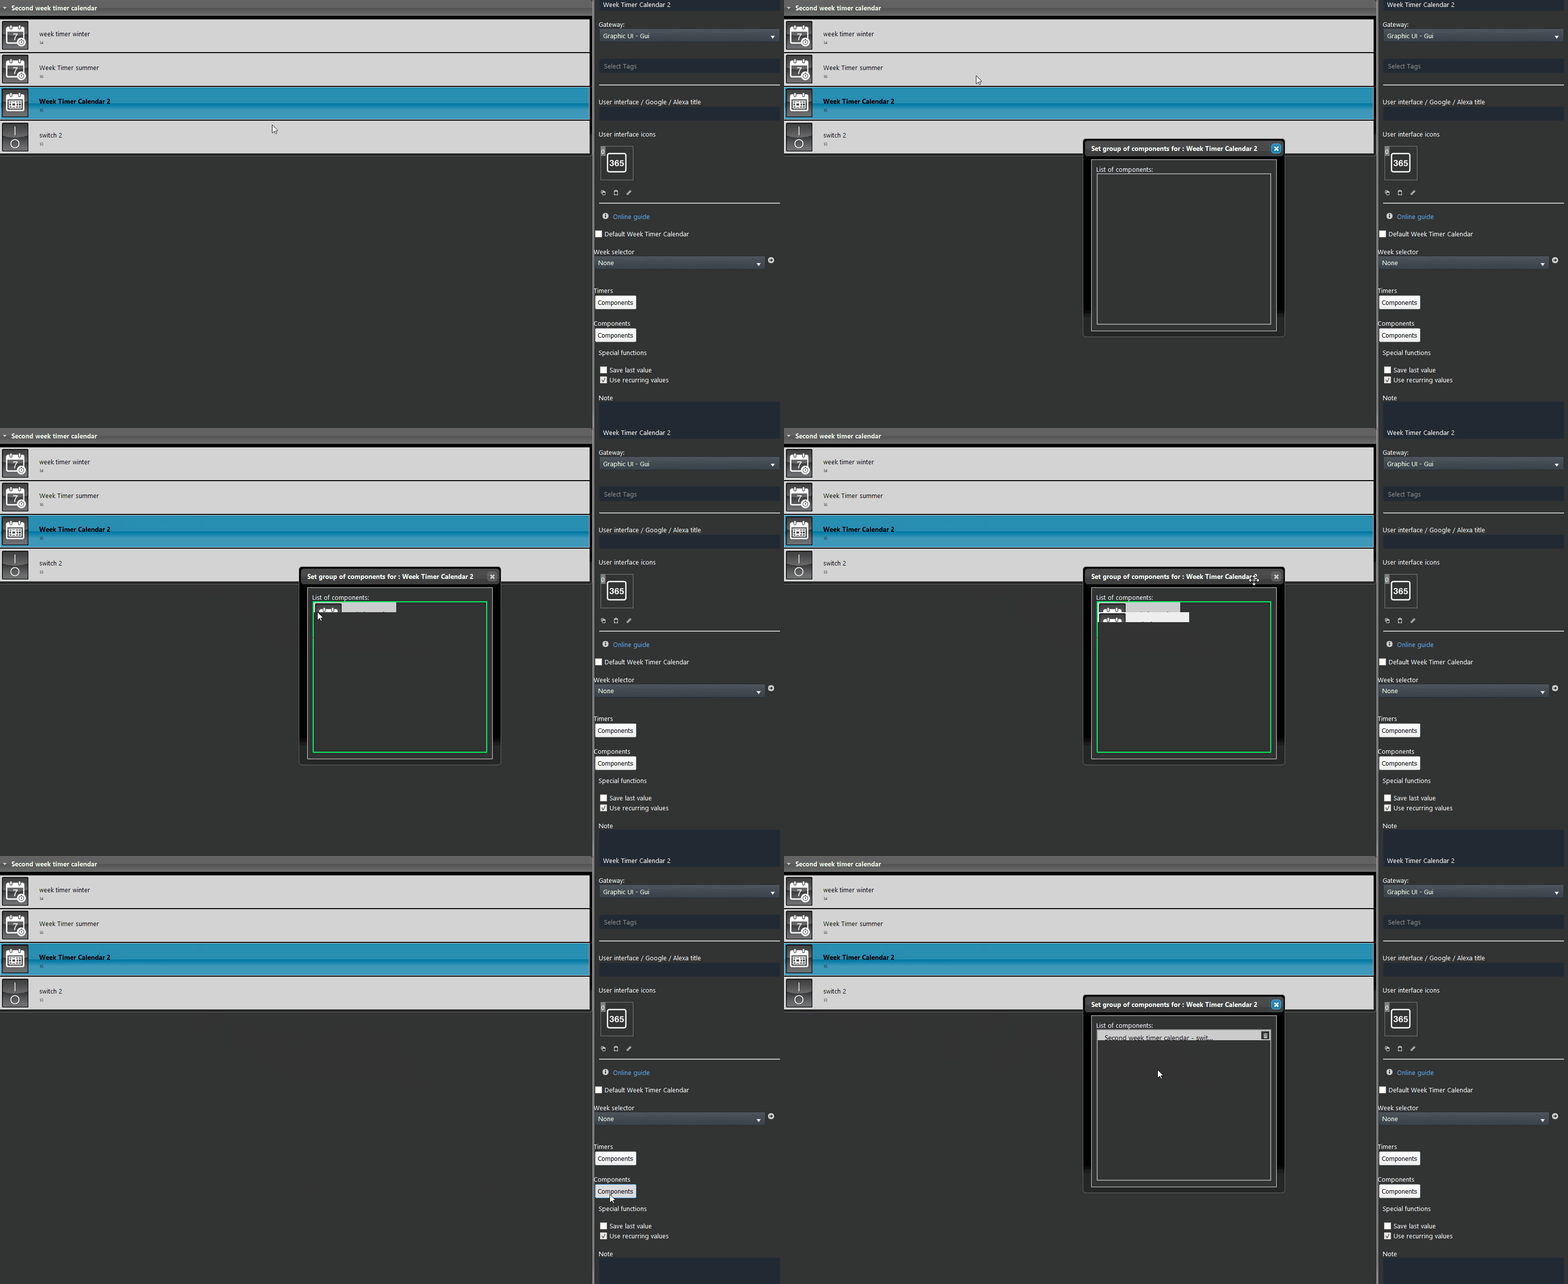
Add at least one new Week Timer, this will have to be put inside the menu “Timers” inside the Week Timer Calendar component’s properties. Do the same proccess for the components that you want to include in the second Week Timer Calendar insdie the project. Finally upload the project to your eve server.
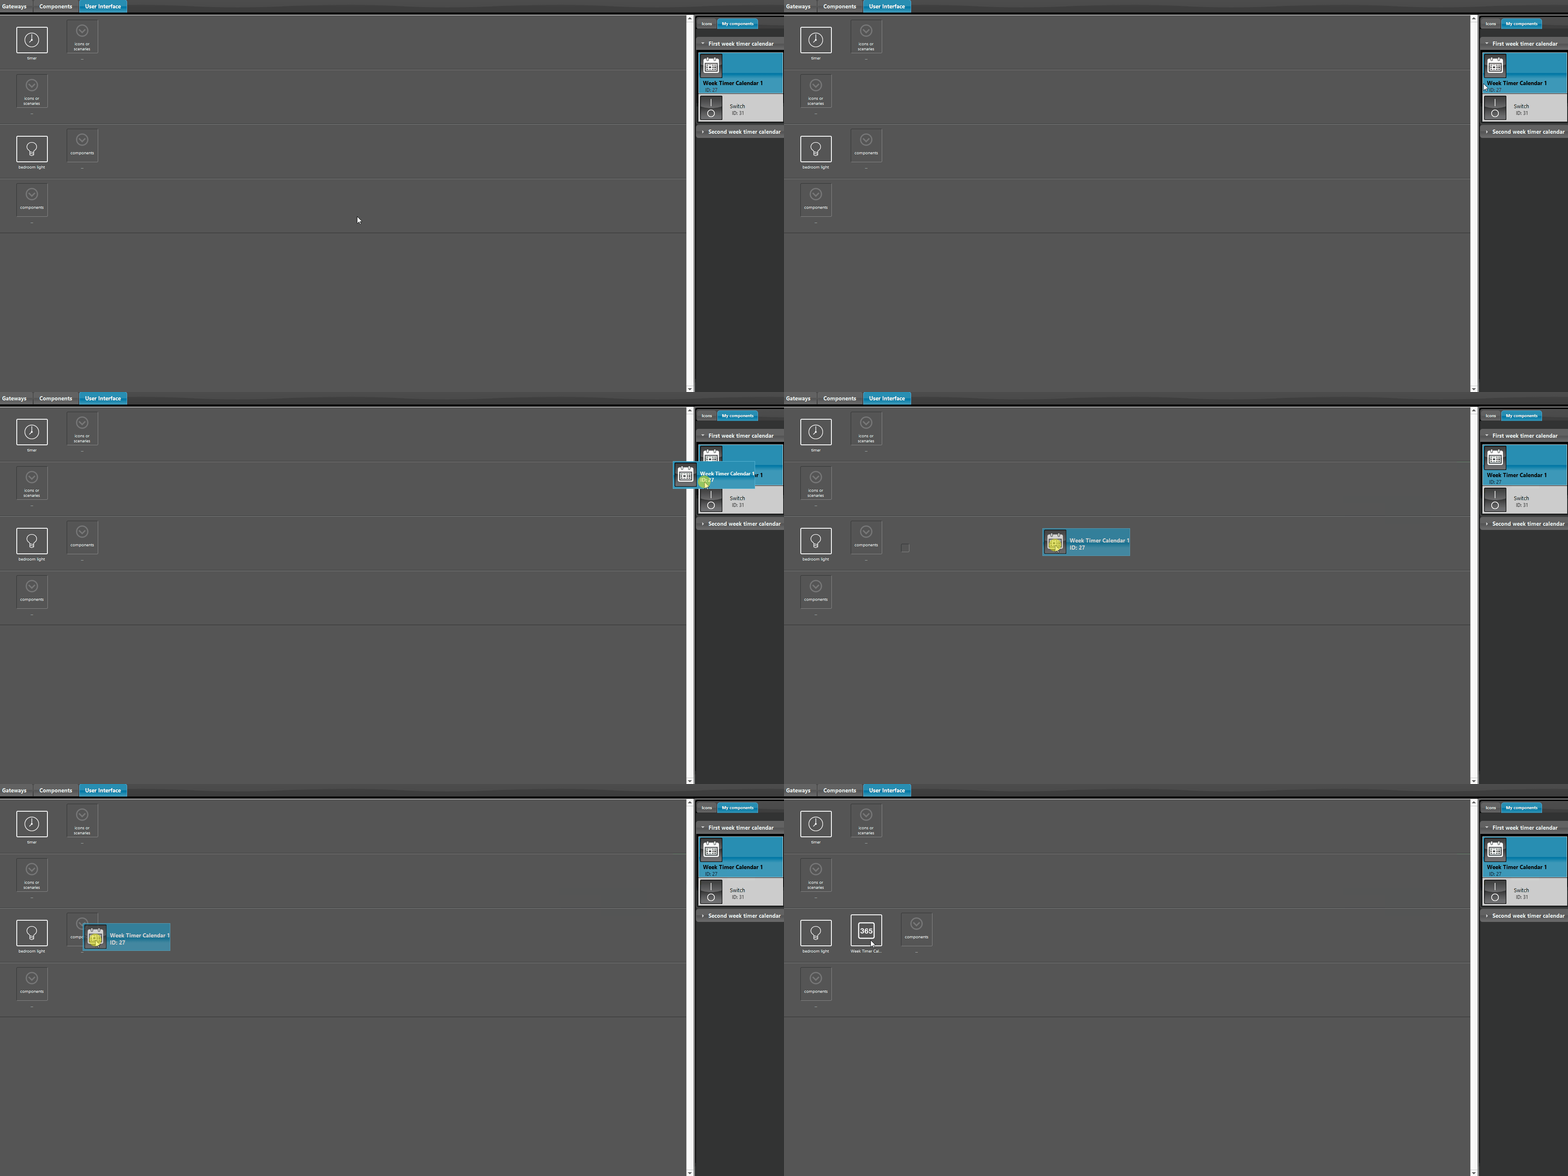
In order to allow the user to select the active week timer, you will need to add the Week Timer Calendar component inside the user interface.
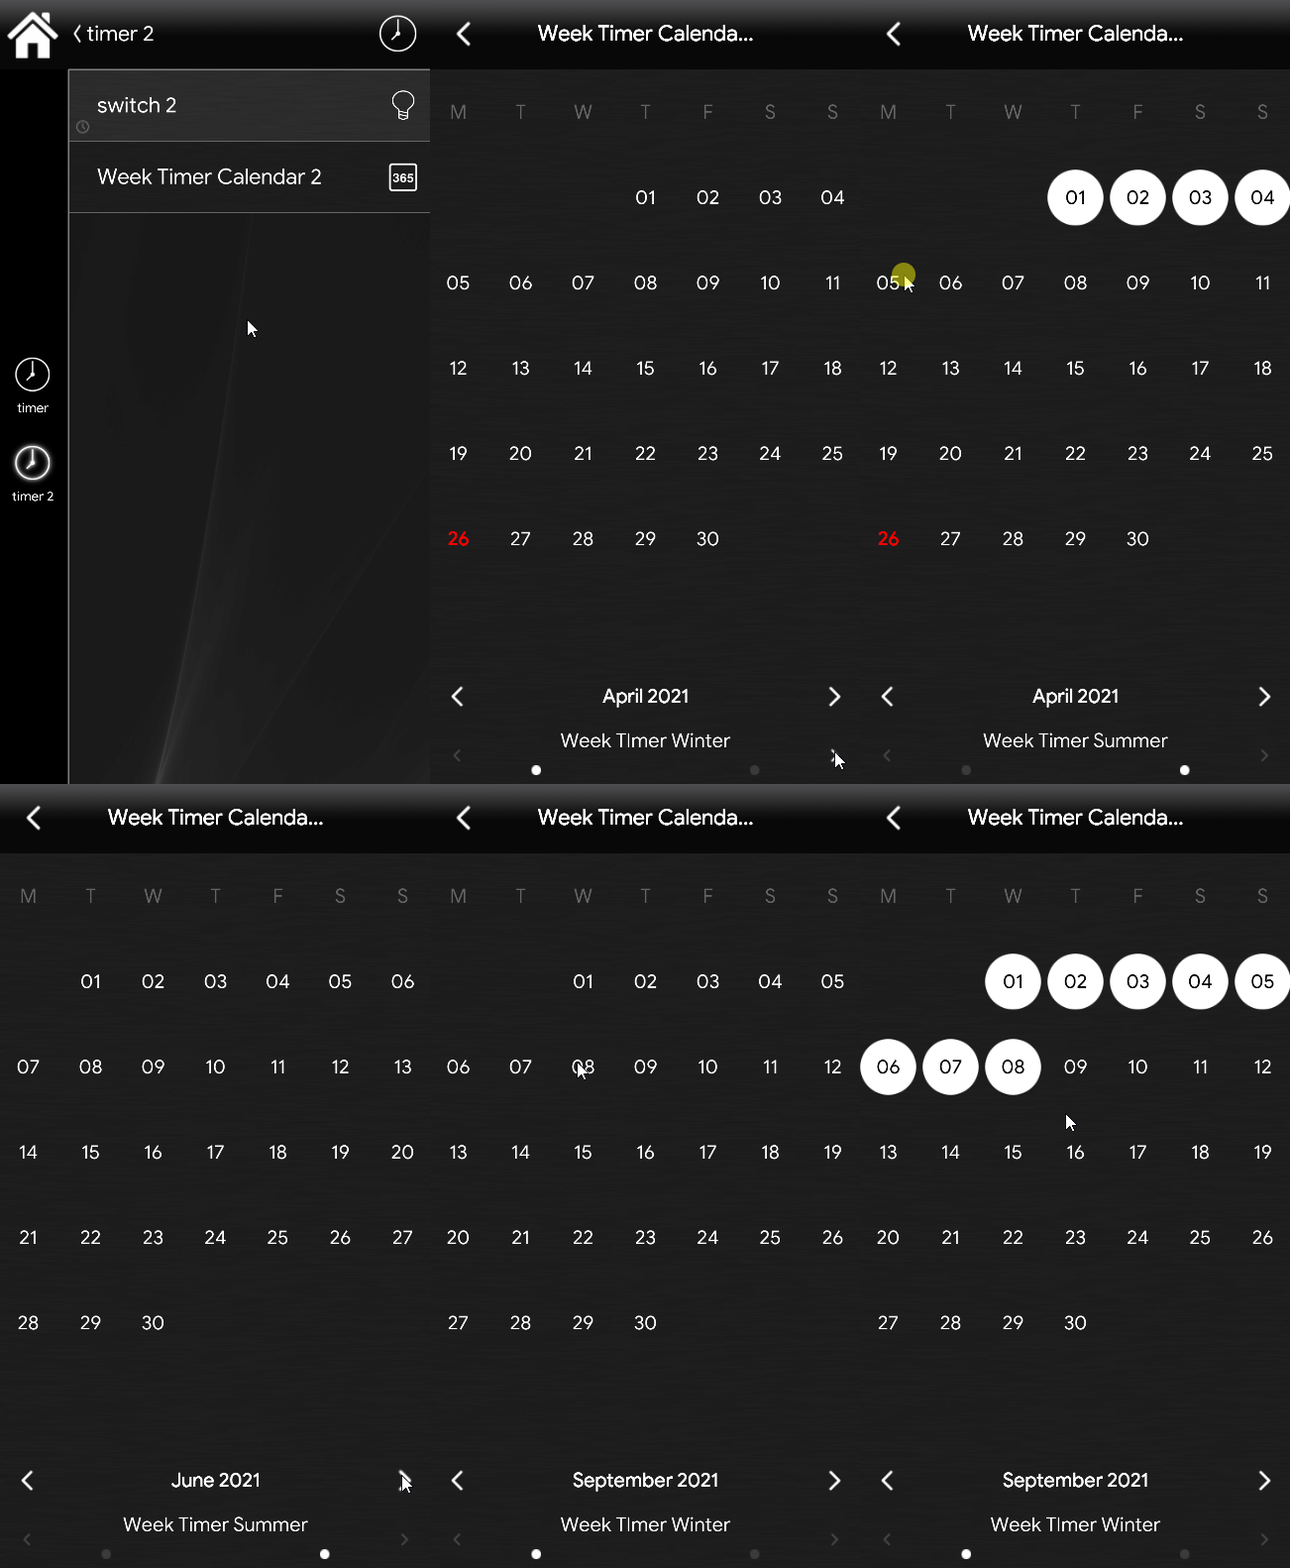
Head to the Week timer calendar components inside the user interface and click on its icon, a new screen will appear. Here you will be able to select each day the first and second Week Timer will effect the scheduled components. One the bottom of the screen you can see the Week Timer selector.
Note: If anything is selected in the upper calendar, the schedulement won’t be activated to any of the Week Timers added in the second Week Timer Calendar.
SUNSET SUNRISE WITH THE WEEK TIMER CALENDAR
By adding a sunset/sunrise component into the project, it will allow you to pospone or anticipate the execution of an event.
Step 1.1:
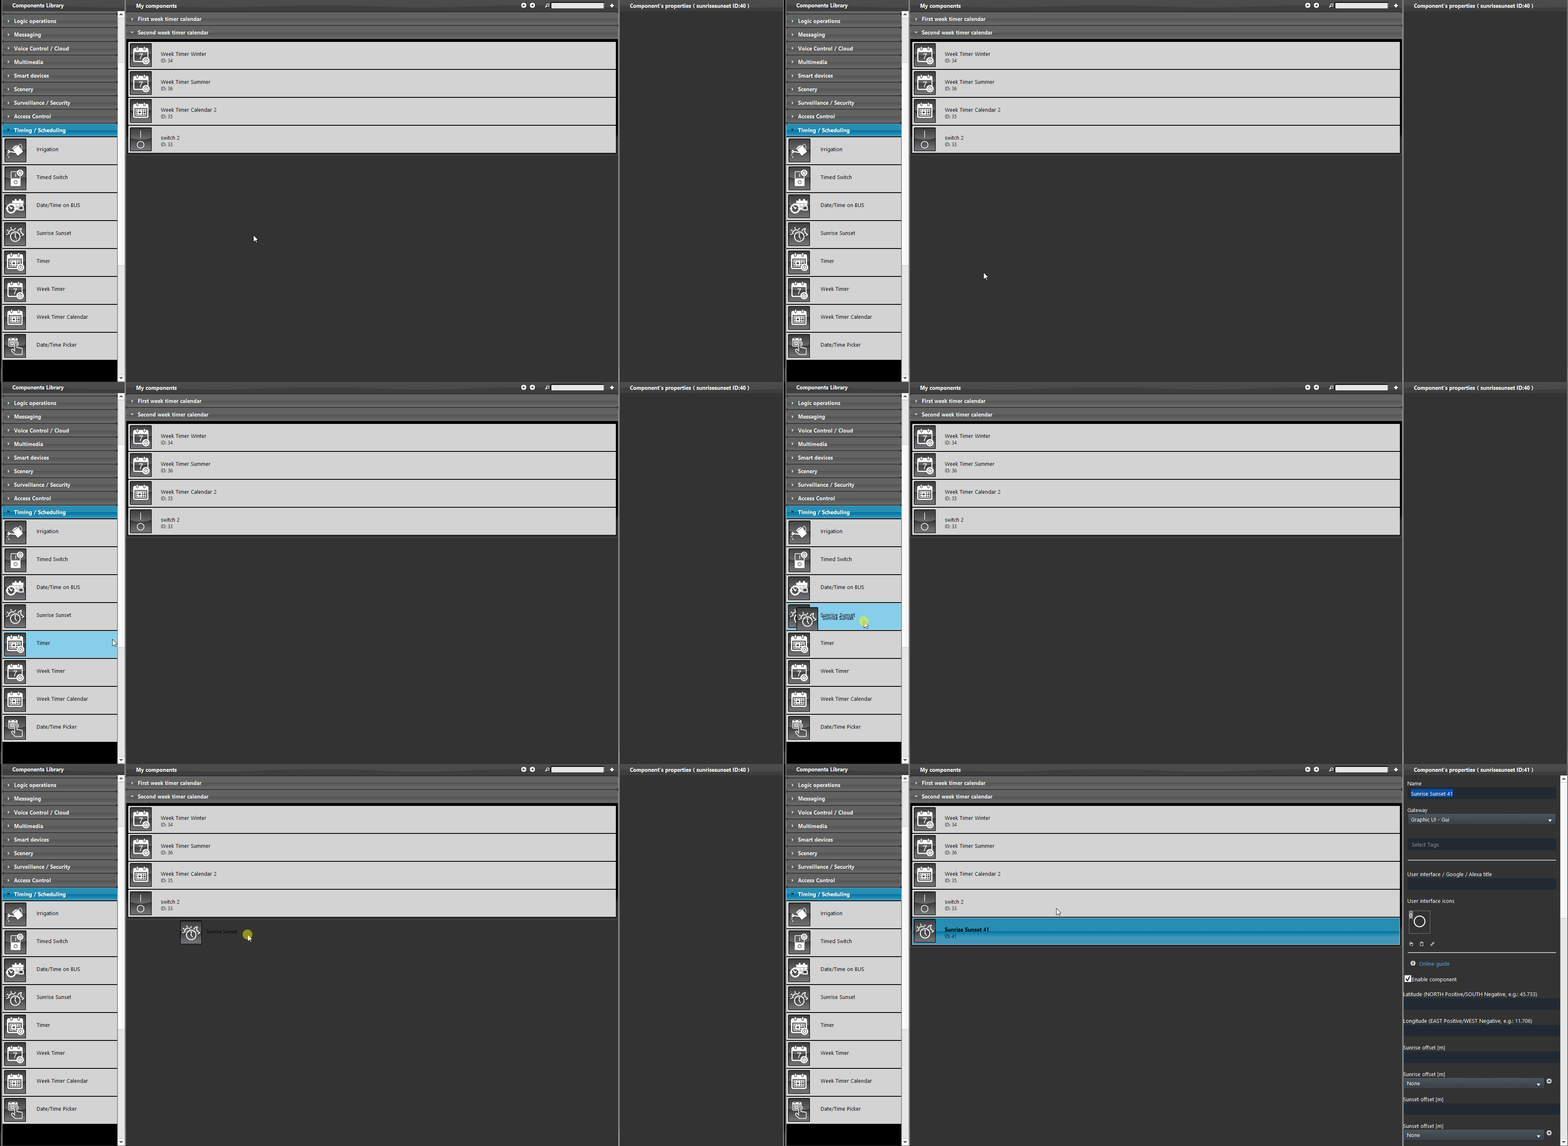
Add the sunset/sunrise component into the project.
Step 2.1:
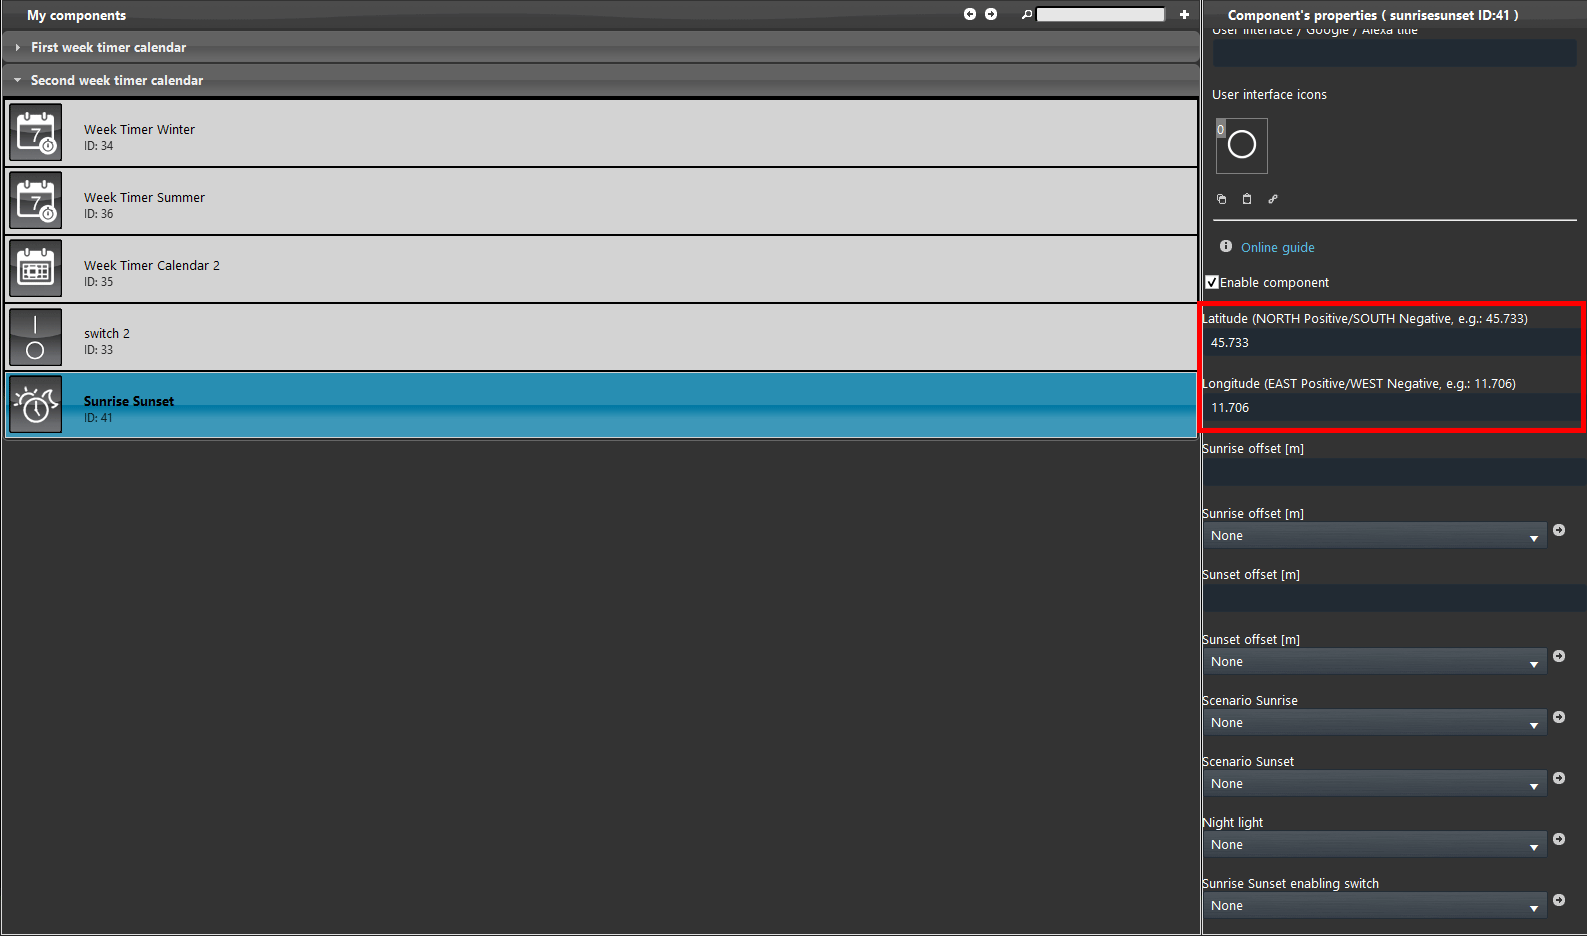
Set the latitude and longitude in the component,
you can easily find those information online.
step 3.1:
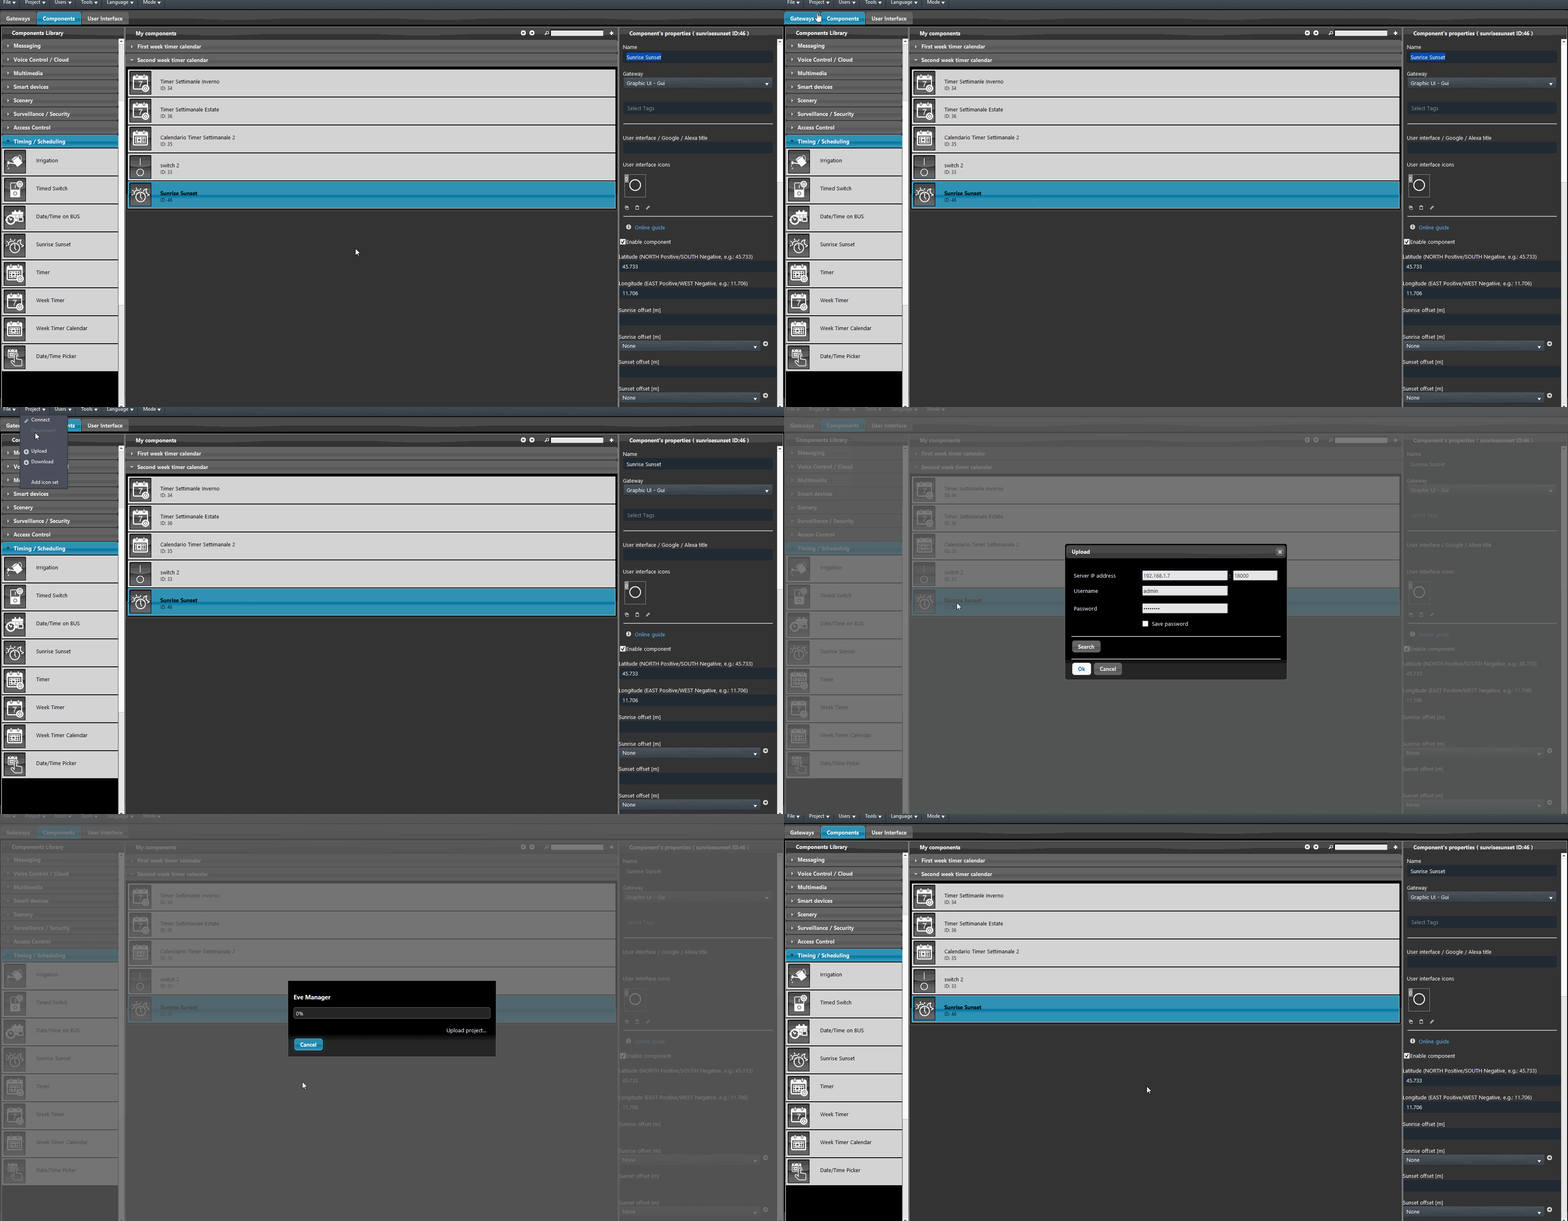
Upload the project into your serve and open the application Eve remote plus.
Step 4.1:
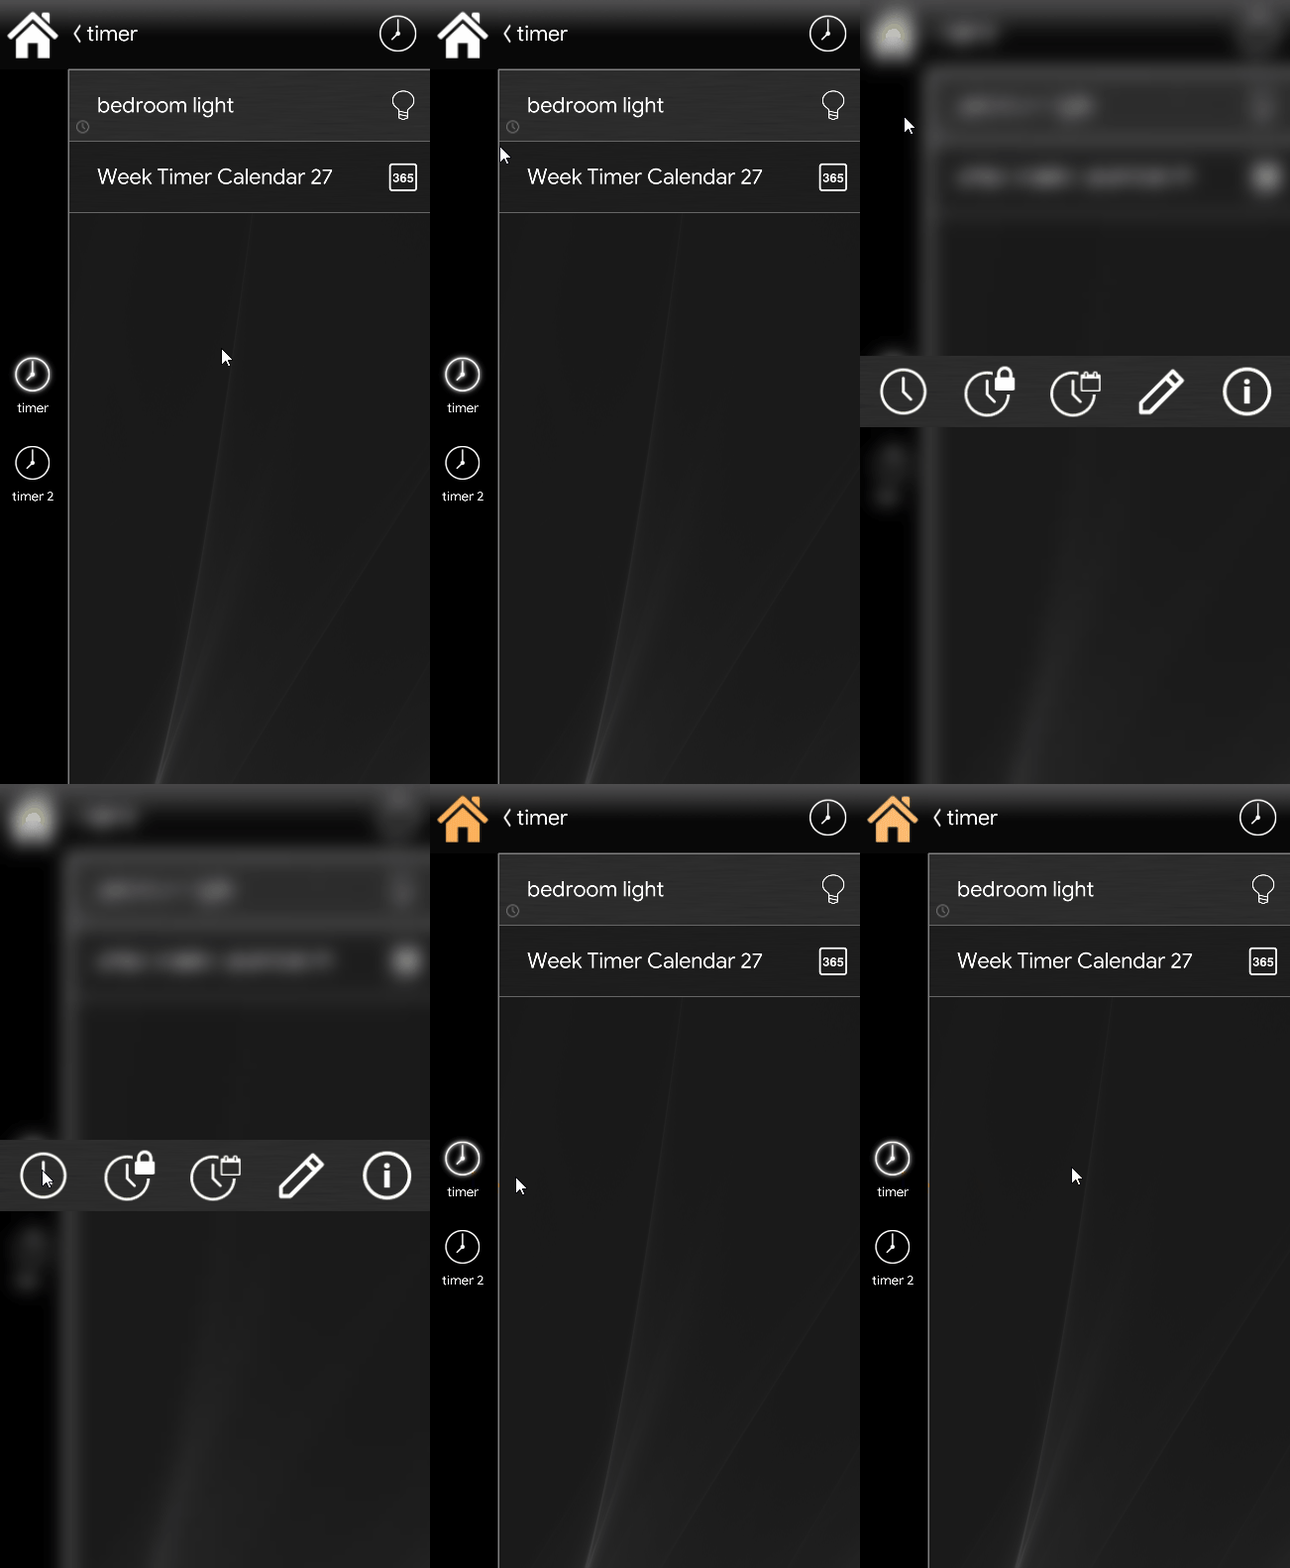
Inside your Eve remote plus account hold for a few secconds the house icon on the top left corner.
Then click the first timer icon, now you are in set mode.
1. Click on the desired object and press the plus icon on the top right.
2. Set the days and hour and then click on the back arrow on the top left.
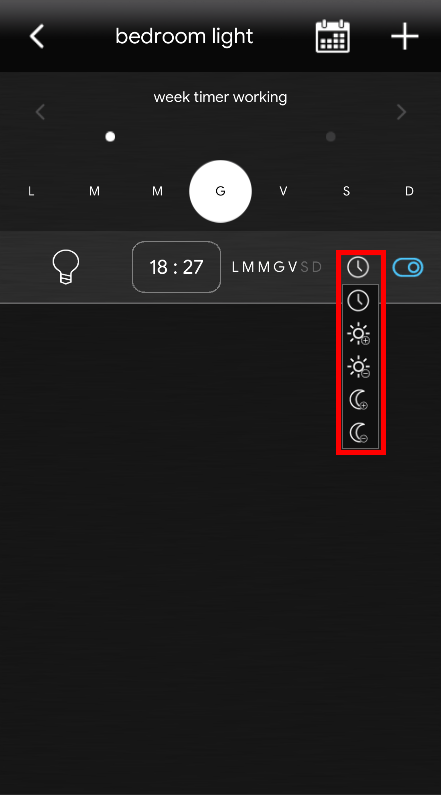
3. Click on the clock icon on the right after the day you have selected.
Note:
The first icon is the one that will add time to the sunrise offset, is the same for the other two icons for the sunset:
1. ![]() This is the sunrise icon that will add time to the sunrise event
This is the sunrise icon that will add time to the sunrise event
2. ![]() This is the sunrise icon that will anticipate the sunrise event
This is the sunrise icon that will anticipate the sunrise event
3. ![]() This is the sunset icon that will add time to the sunset event
This is the sunset icon that will add time to the sunset event
4. ![]() This is the sunset icon that will anticipate the sunset event
This is the sunset icon that will anticipate the sunset event
Visual result
Here is rappresented how is it possible to create a trigger Offset of a specific schedulation. This Offset, based on the option choosen before, allow to pospone or anticipate the trigger of an scheduled event. In this case we are setting a Offset of 1 hour compared to when the sun rise.


