 Go to
Go to
INTRODUCTION
This component has been developed in order to speed up the navigation when using EVE Remote Map app. In fact, it allows you to jump from a tab to another with a simple click on the Go to icon placed where you want within the map interface.
USE CASES
- You can use this component to link to another page within the project to speed up the process within the project itself.
COMPONENT’S PROPERTIES
Customizable component’s title and icon. Please refer to “Common properties” guide.
GUI
This component’s sample is made by using Graphic UI gateway.
Please refer to “Gateways / Protocols” chapter in order to get further info.
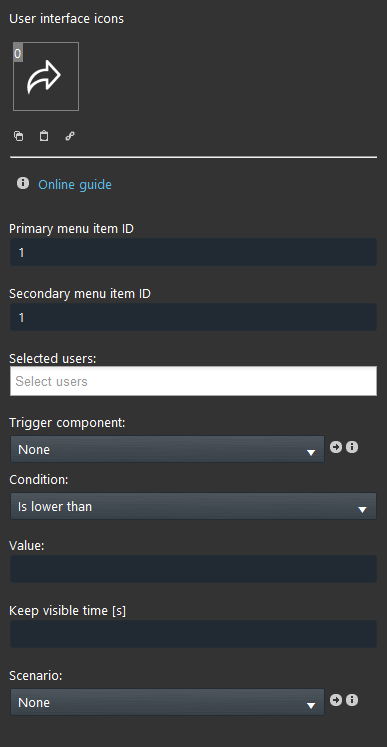
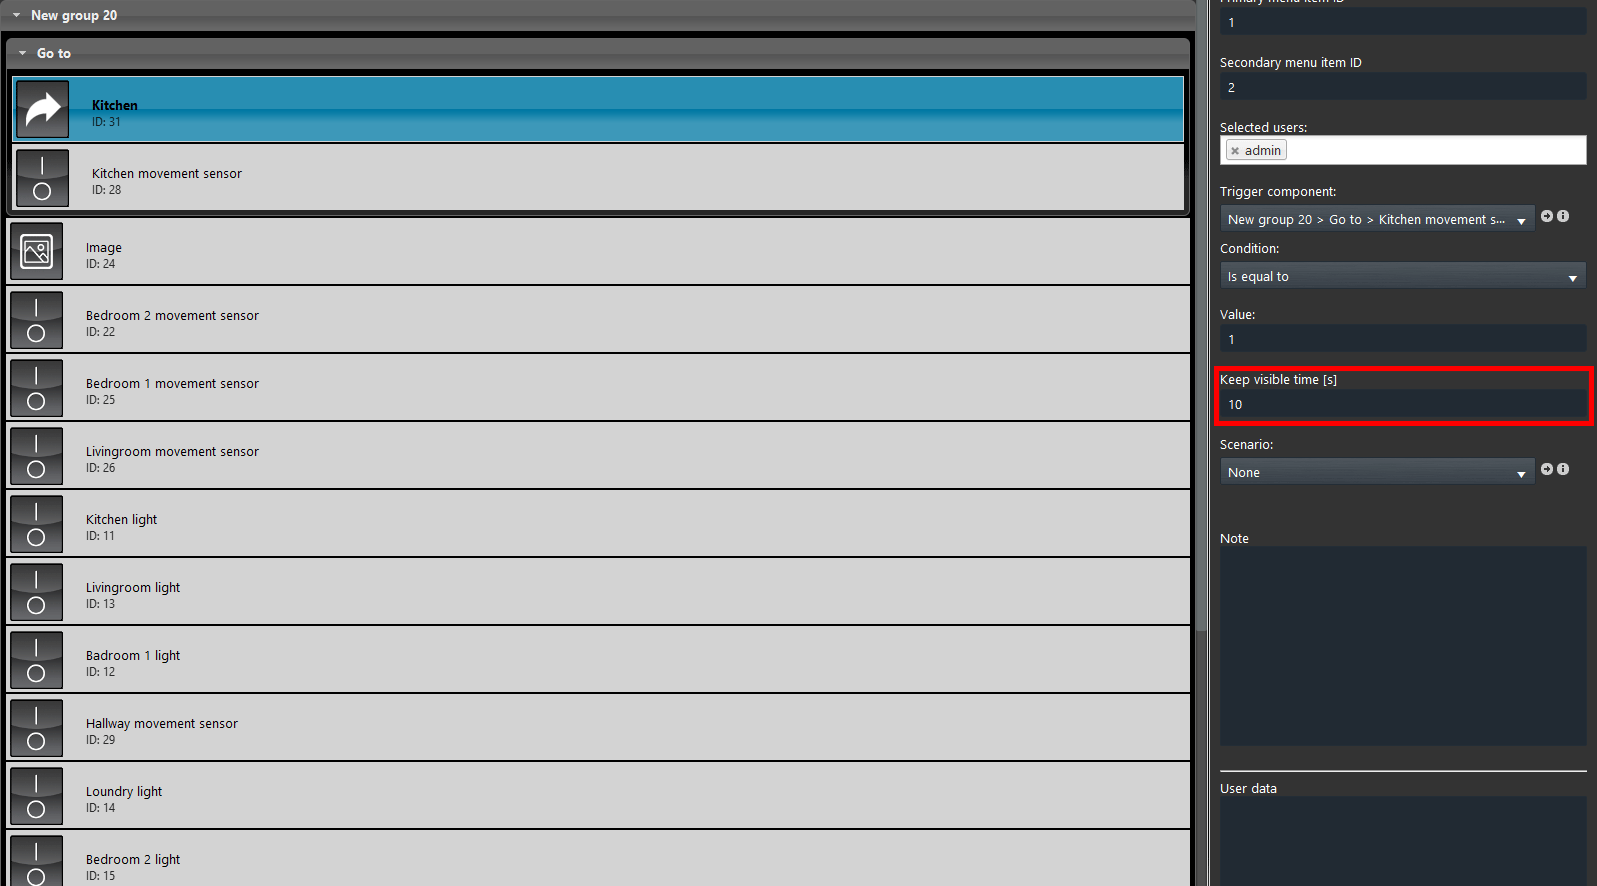
Primary menu item ID: Enter the desired coordinate of the primary menu;
Secondary menu item ID: Enter the desired coordinate of the secondary menu;
Selected users: Select the users that will have access to this component;
Trigger component: Select one of the following components: Switch, info, Color info, Text info, Dropdown, Changeable value, Setpoint, Shutter, Scenario or Pulse to trigger the event and change the relative state (0/1);
Condition: Let you choose the condition to enable the trigger, for example: If the value (textbox below) is lower than 0 “GO TO”;
Value: The value that the user can set to trigger an event;
Keep visible time [s]: How many seconds the window will remain visible;
A reminder before continuing:
- Download and Install EVE Logic plugin to enable plugins (link);
- After loading .eve project to the server, run EVE Remote app, log in and then wait a couple of minutes for logics activation.
 EVE Remote Plus
Three different view mode possibilities: “CLASSIC”, “MODAL” and “HIDDEN”. Learn more about the component’s view modes.
MAP VIEW MODE
 and
and  —> Go to the
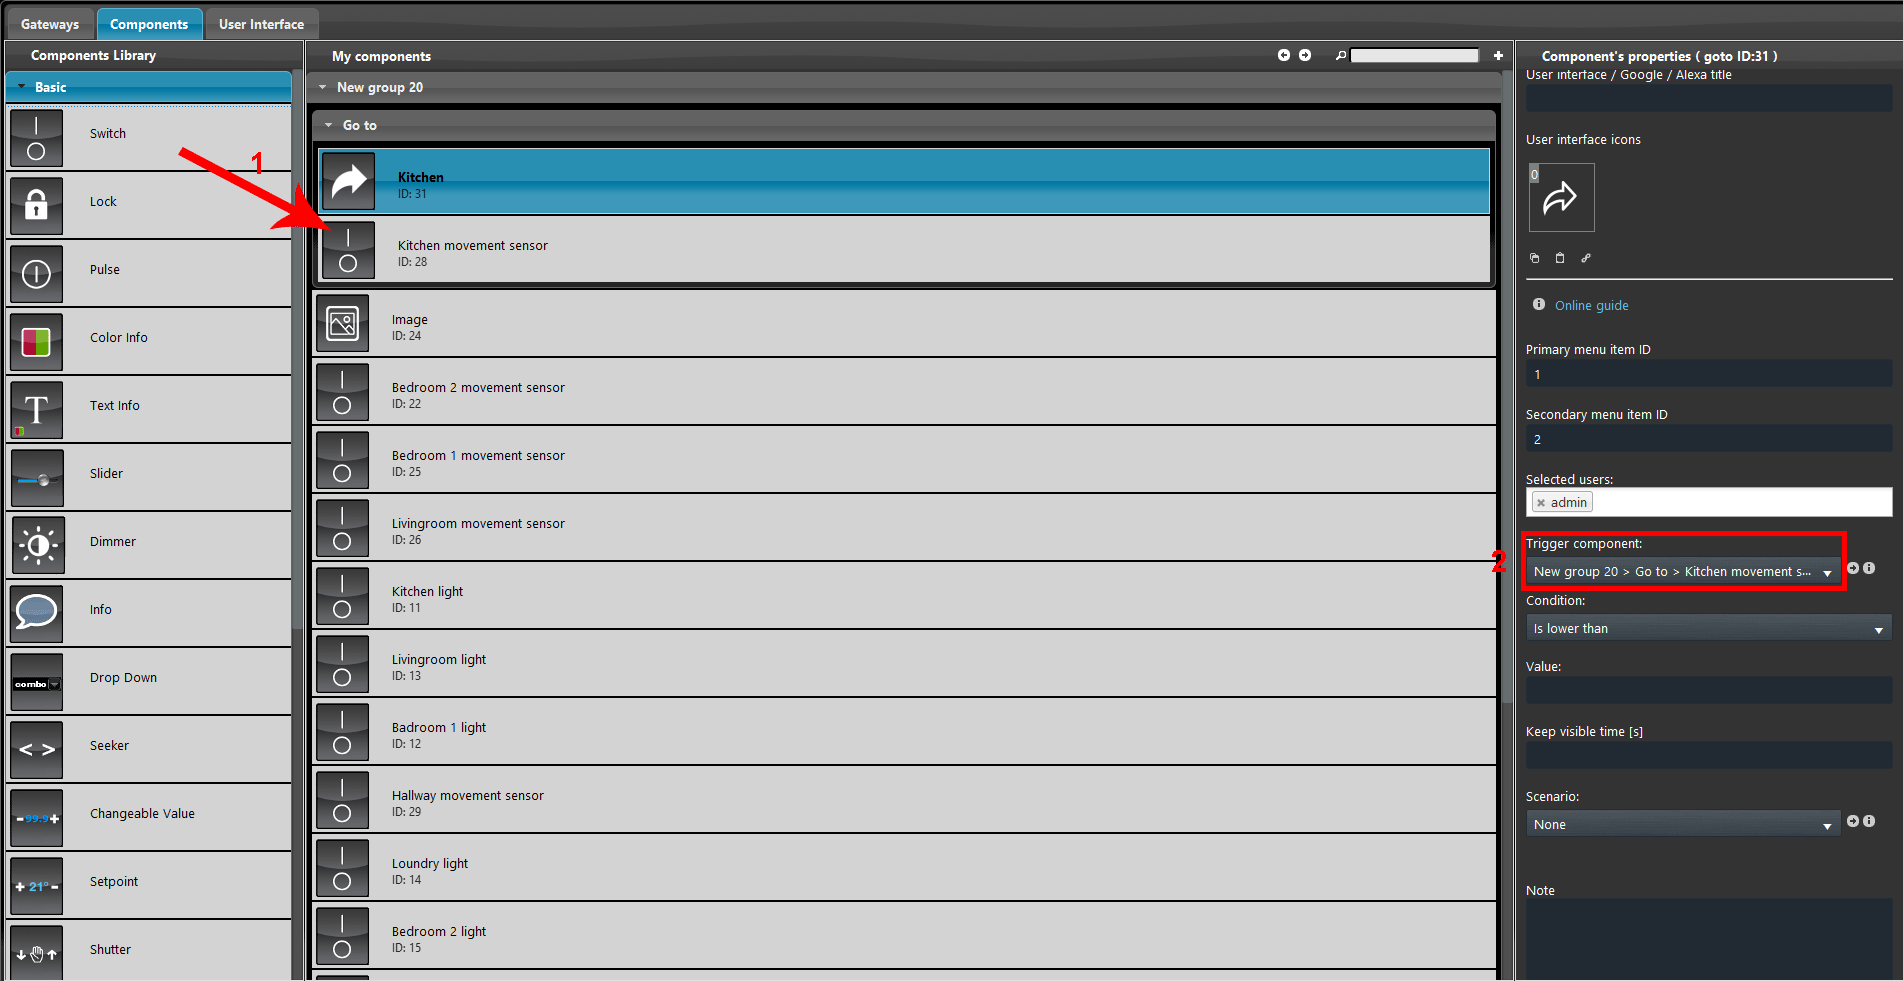
How to set a trigger component to the Go to component
Step 1:
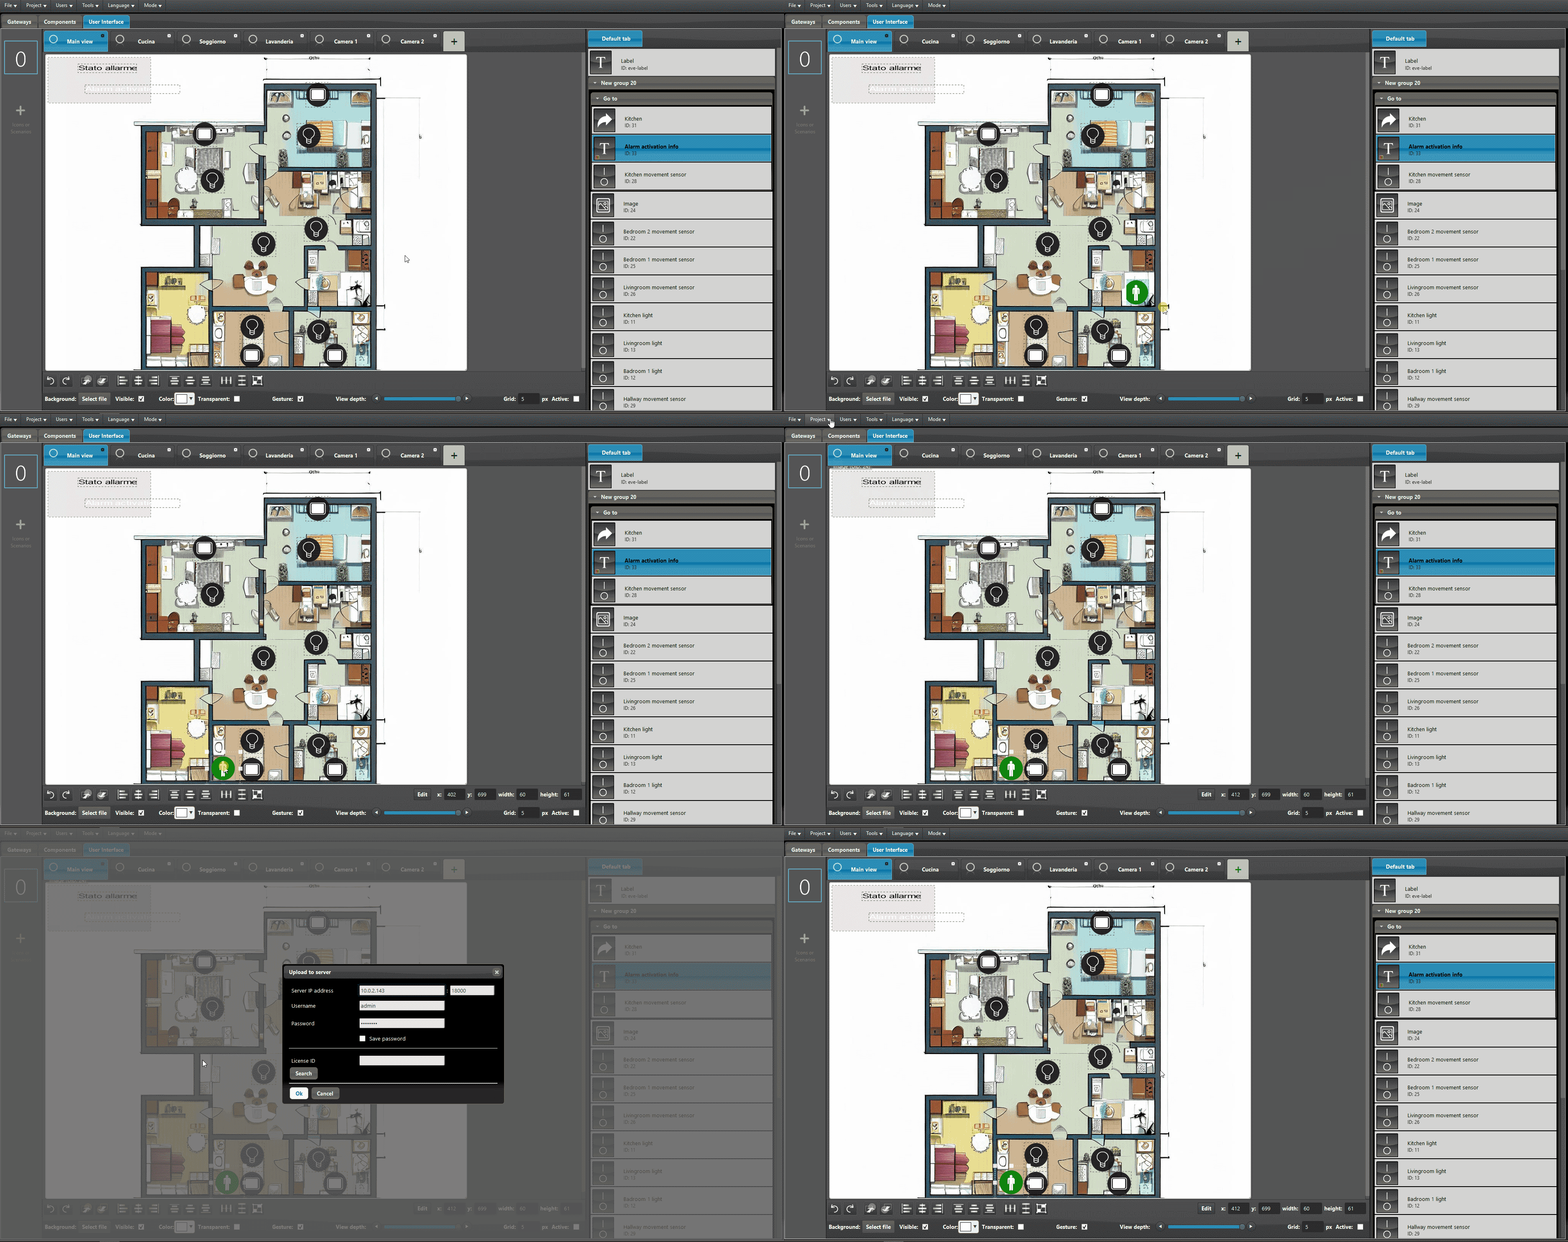
1. Add a new switch to simulate a movement sensor. 2. Then select it on the Trigger component drop down within the Go to component.
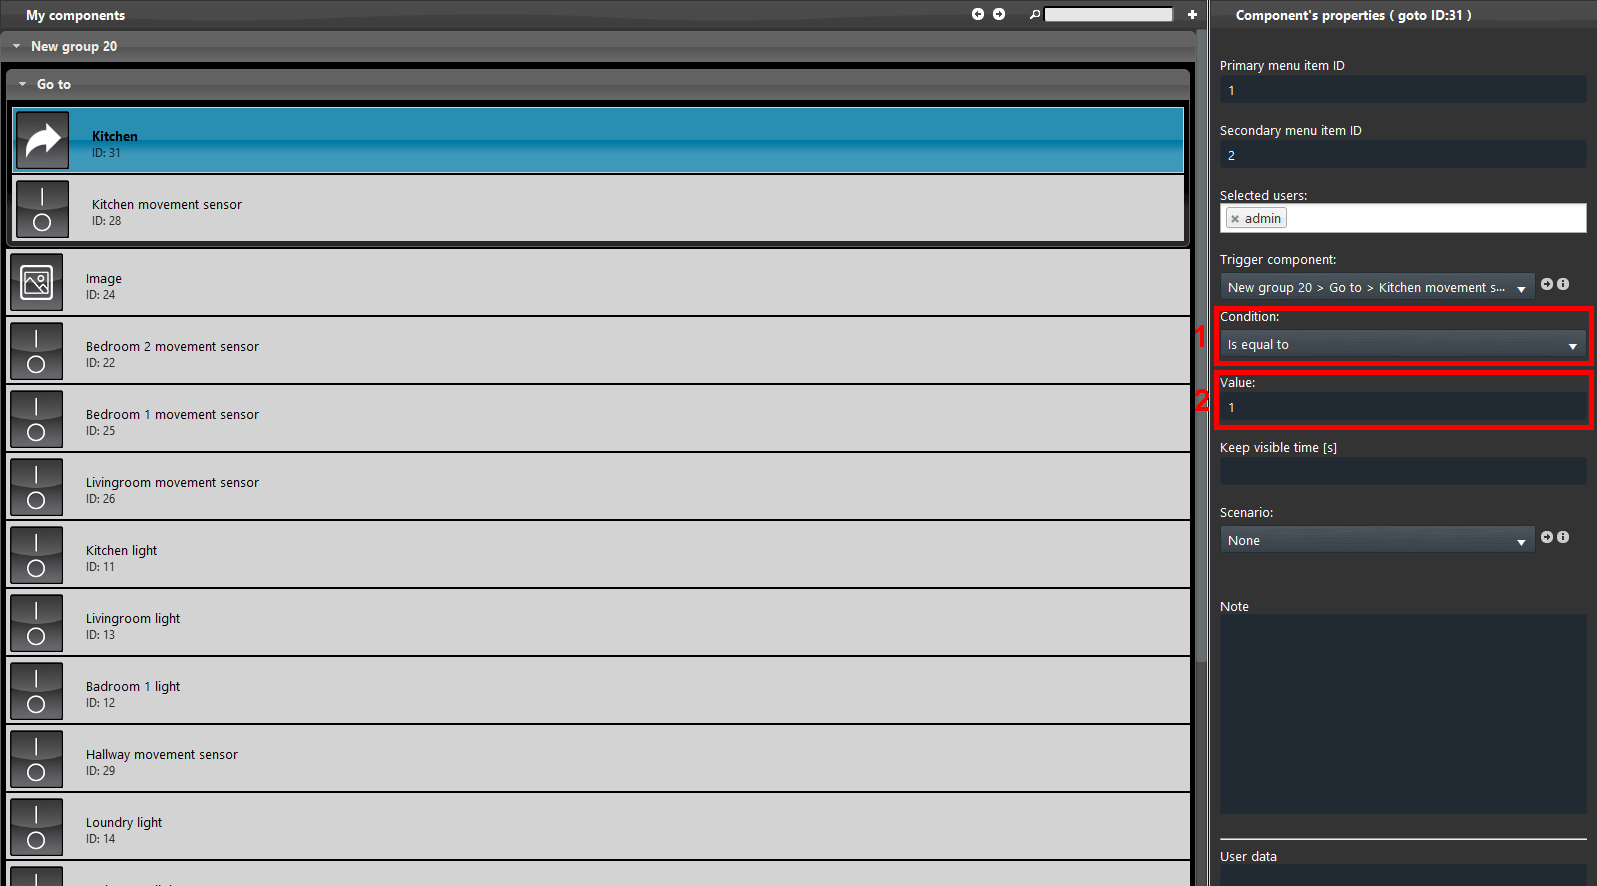
Set the condtion that specify when the Go to component should trigger. The conditions available are:
- Lower then
- Higher then
- Equals to
2. Set the Value that the trigger component will need to set to trigger the condition.
Now add the Keep visibile time, this parameter will specifiy how much time the page set with the ID coordinates will be visible.
Add the switch component in the User interface. This is necessary for the Go to component to be triggered. Finally upload the project into the server.
USER INTERFACE FINAL RESULT
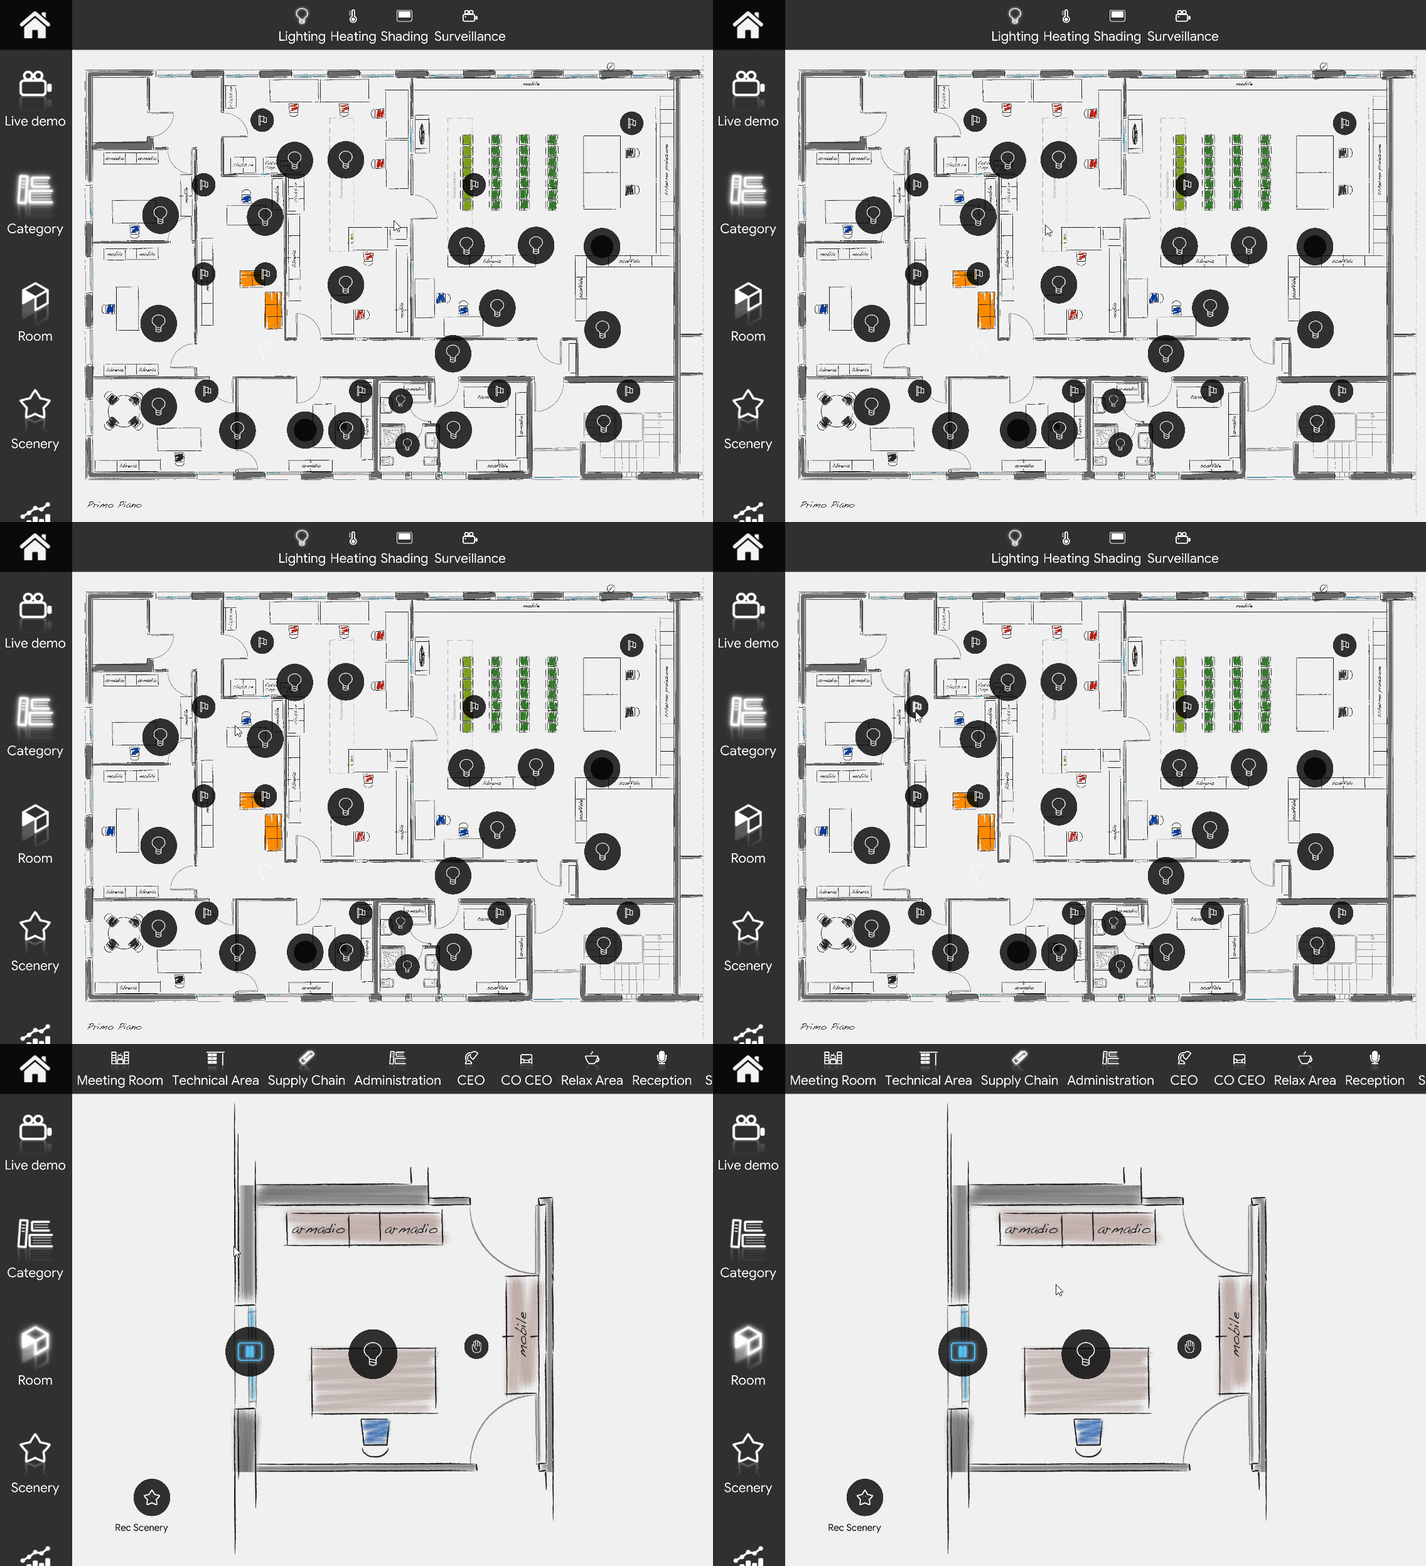
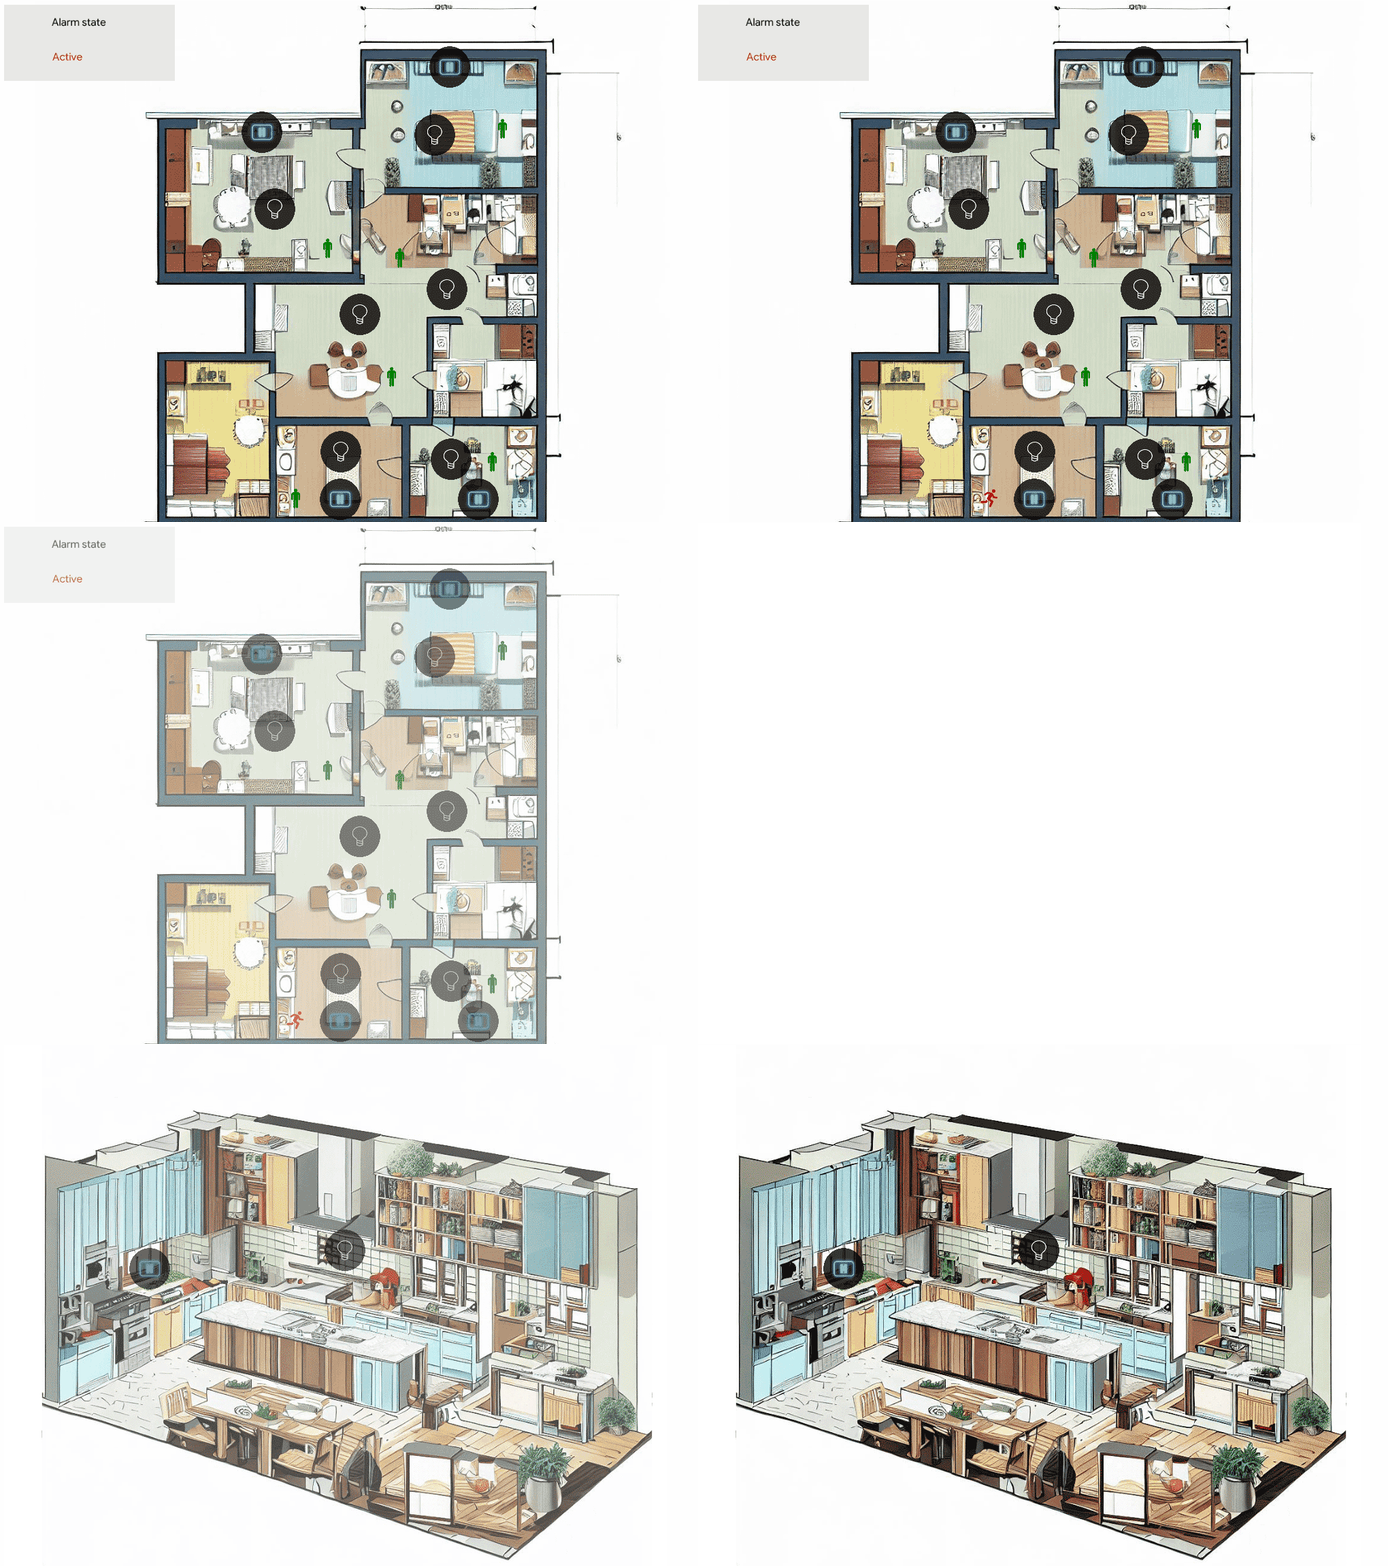
Here follows the final visuali result of the Go to component within the Map user interface. In this specific example you can see that when the Alarm is enabled, the motion sensor that we placed in the kitchen (center bottom of the image below), once the motion sensor triggers, the interface view is redirected automatically to the tab that has been set up in the Go to ID parameters.

