X1 SERVER VPN SETUP
INTRODUCTION
There are a wide variety of ways to connect to a specific device remotely: by forwarding the necessary port in the router, using a cloud connection, but connecting via VPN will always be the safest way to do so. That’s why with the Ilevia’s X1 server now it became a reality. WIth the latest version of the server you now have the chance to do it. In this guide it is shown how to setup and start using the VPN connection through the X1 server.
PLEASE NOTE
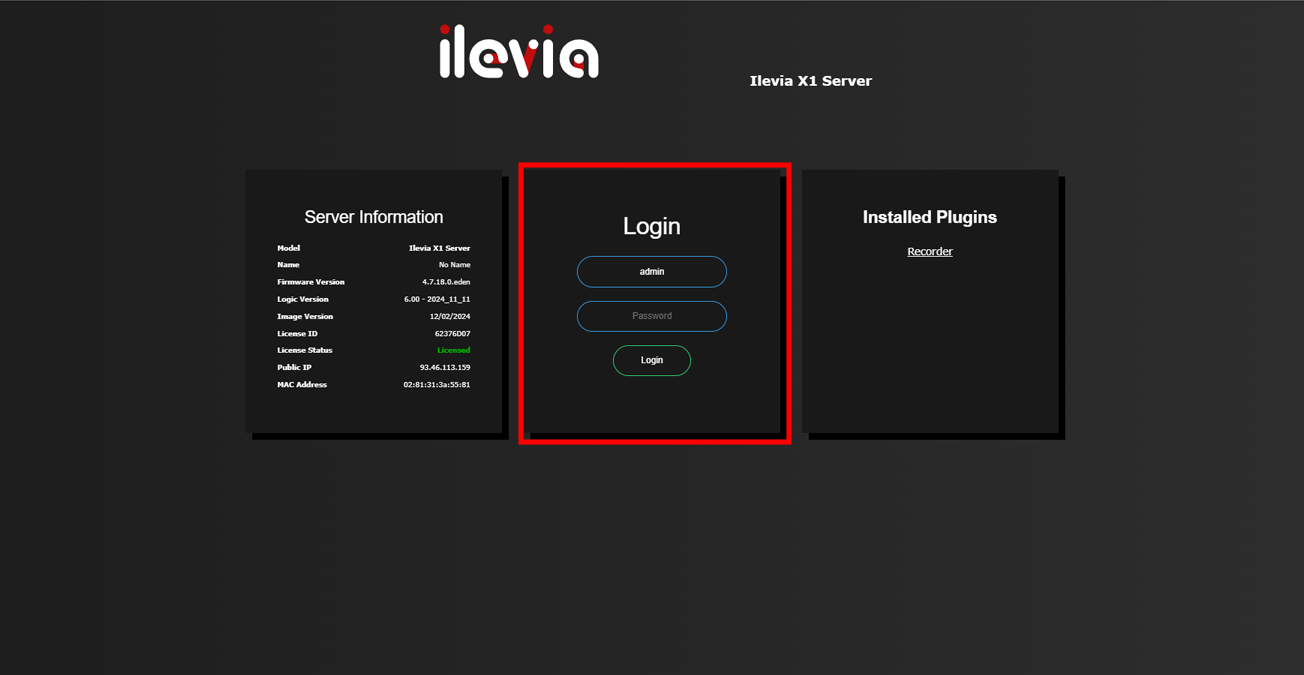
In order to be able to use the VPN connection with the Ilevia server, a specific version of the X1 server is required. This version can be easily checked from the web interface by entering the Ilevia’s server local IP address within the URL bar on the browser web. The minimum image version required is the following: Image Version – 26/11/2023.
If your server’s image version doesn’t match, don’t worry, you can still be able to get it by re-flashing the Ilevia server’s system image with the latest available. Please consult this Ilevia’s Technical support to get further information.
Reminder before continuing:
- Update the Logic module (link);
- After loading .eve project to the server, run EVE Remote app, log in and then wait a couple of minutes for logics activation.
Enabling the VPN service on the Ilevia server
Open your browser and type the local IP address of your server Ilevia.
Login inside the web interface of the Ilevia server.
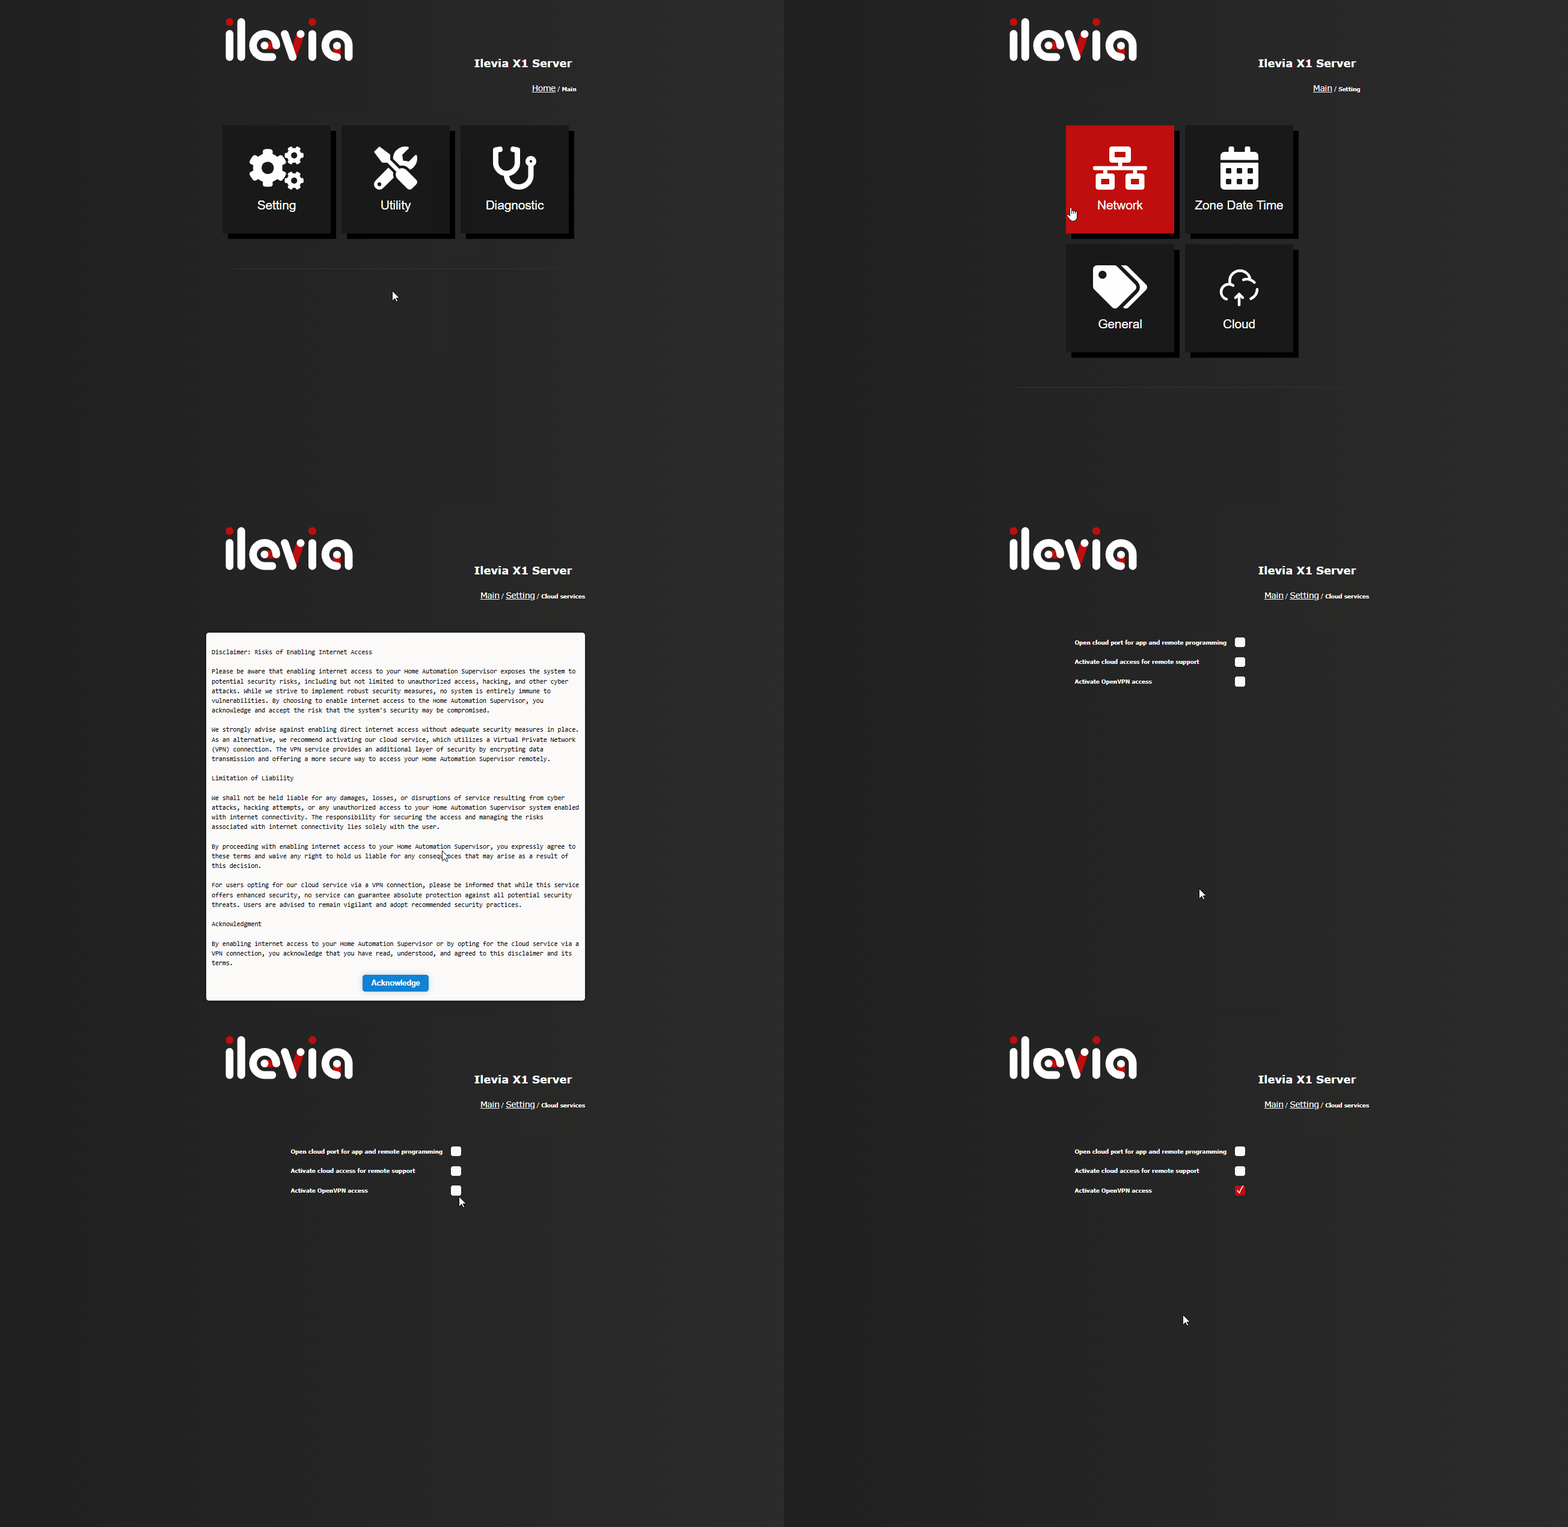
Access the Settings menu, then access the Cloud menu. Tick the checkbox Activate OpenVPN access.
X1 SERVER VPN SETUP
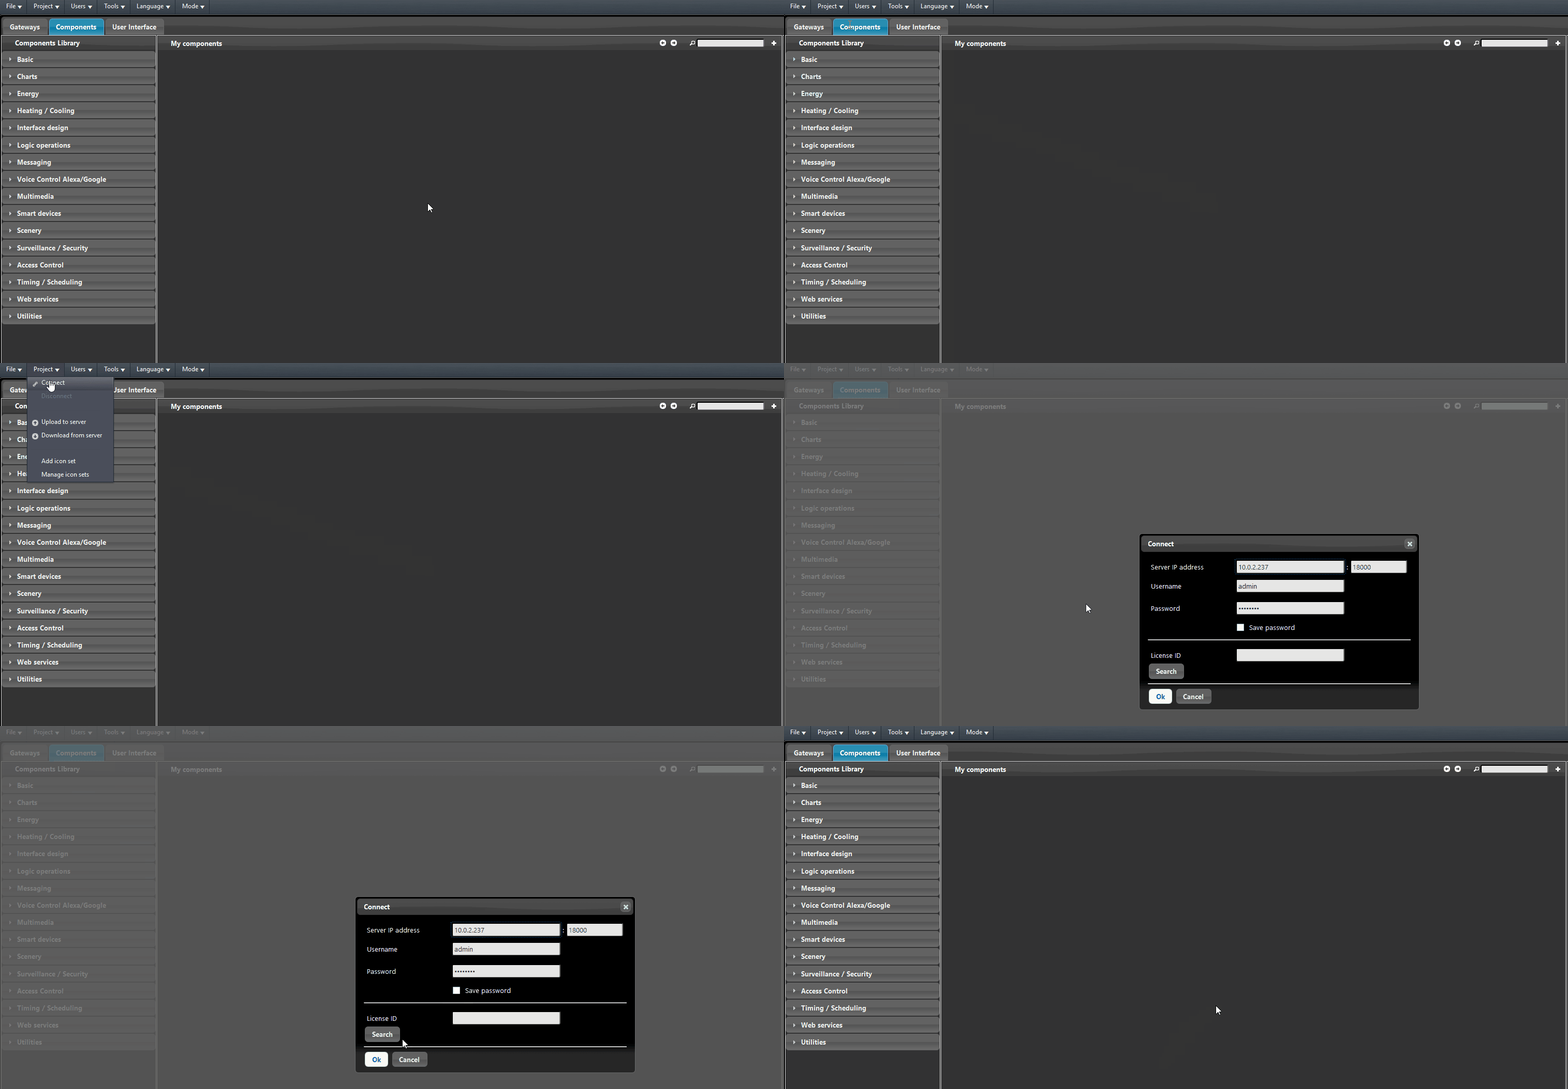
Open Ilevia Manager. Click the top menu called “Project” then click on connect and fill the parameters to be able to connect to your server.
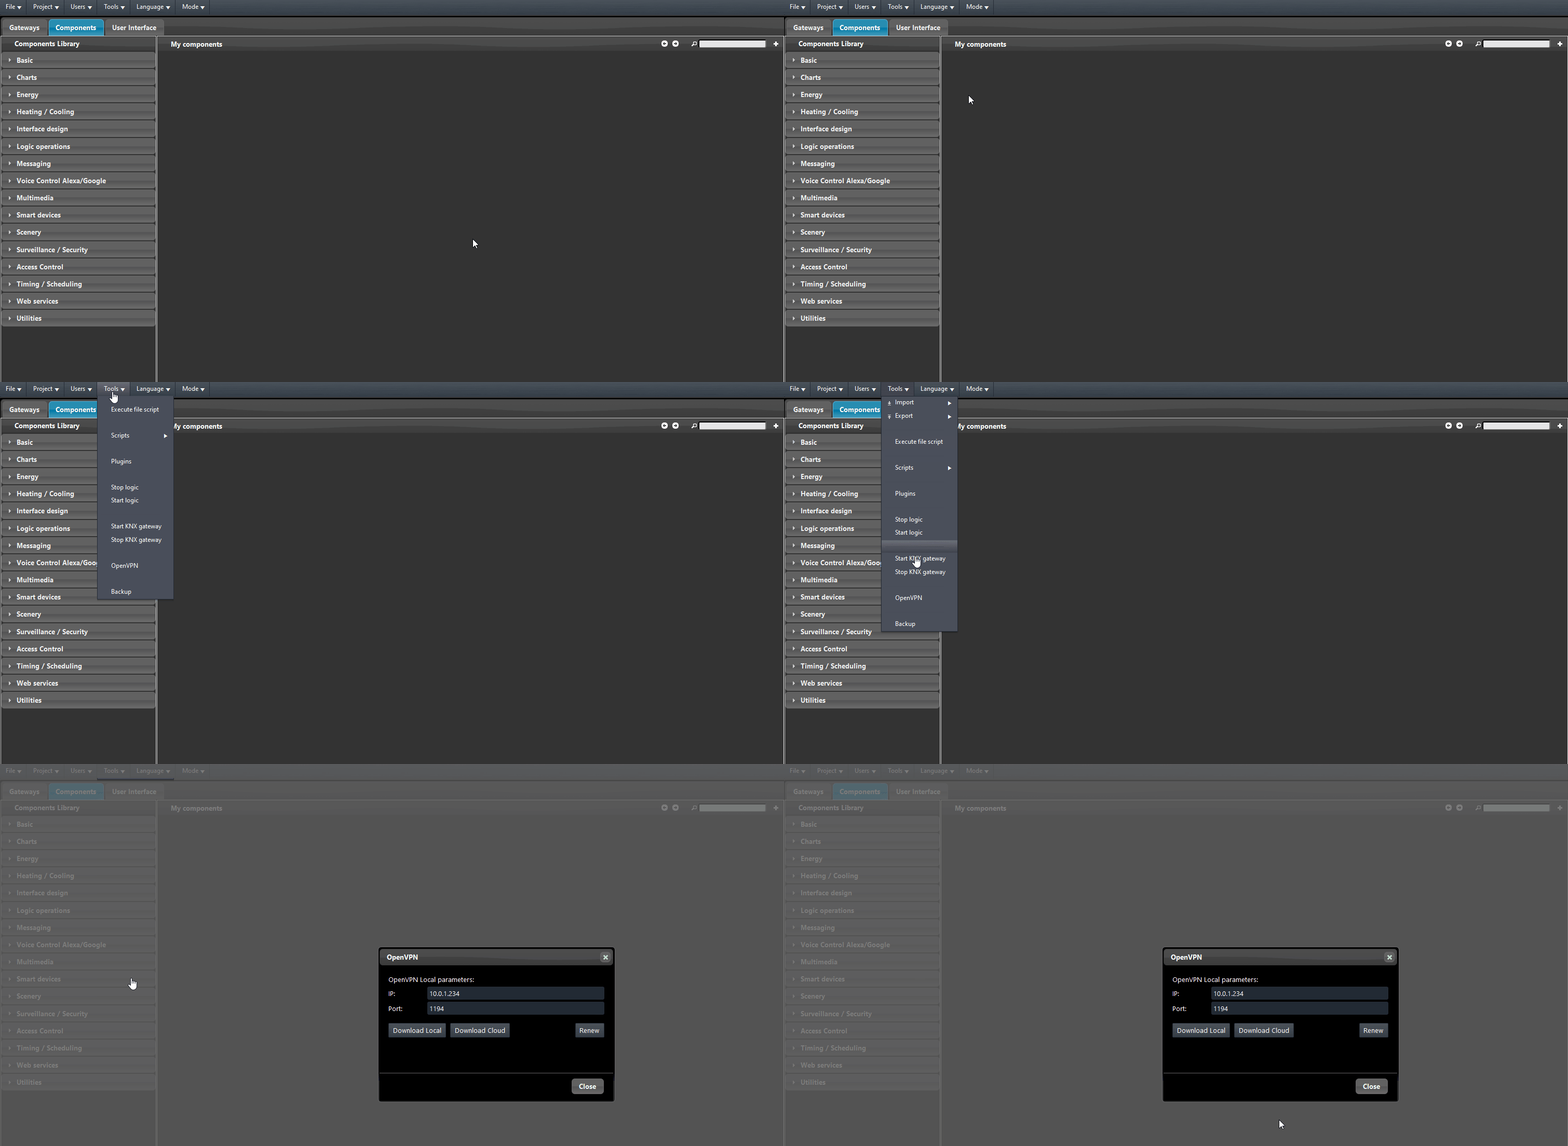
Once connected, head to the menu Tools and click on the button OpenVPN.
The VPN’s Ilevia Manager wizard is composed with the following items:
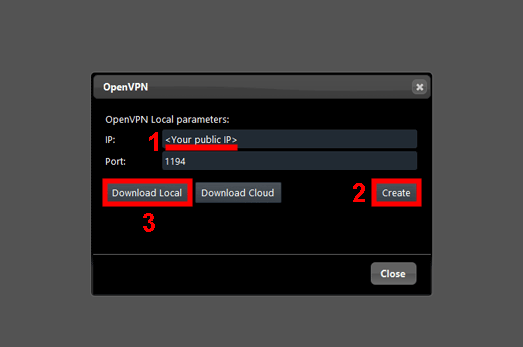
- IP and Port: These two parameters are filled with the current network configuration of the Ilevia server. The first parameter represent the current Ilevia server’s local IP. The second parameter represent the Network port that the Ilevia will use for the VPN connection.
- Download local: This button allows you to download the configuration file that will allow you to connect to your Ilevia server by applying a port forwarding of the port 1194 on your router.
- Download Cloud: This button allows you download the configuration file that allows you to connect to your ilevia server via Ilevia cloud VPN connection. Payment is required to enable this feature. For further information about this feature contact directly the Ilevia’s Technical support hotline at: (+39) 0424 1660208 or by email at: support@ilevia.com.
- Renew: This button will renew both the Local and Cloud VPN files.
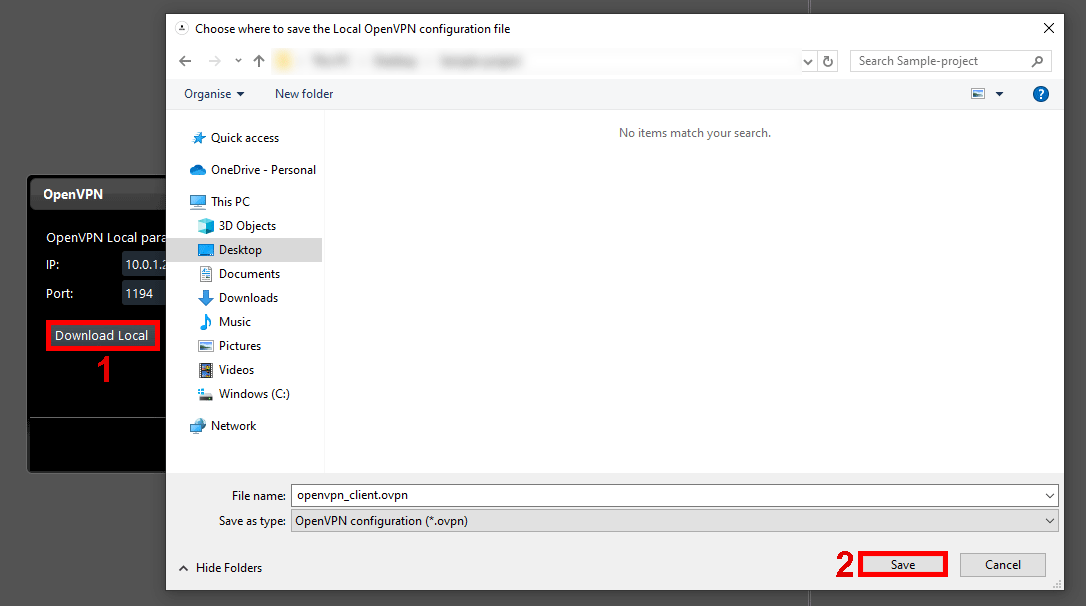
A new window will pop up. 1. Enter your current Public IP address. 2. Click the button Create to start the generation of the OpenVPN file. 3. Click “Download Local” and save the file in your local files. Once done the message “Download complete” will appear.
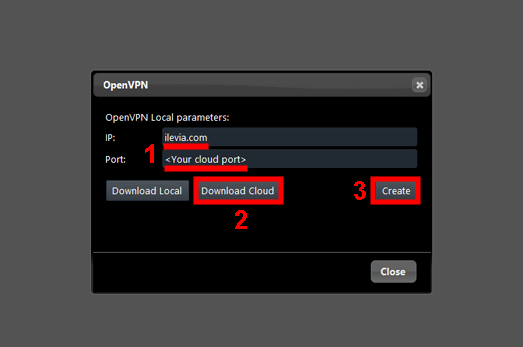
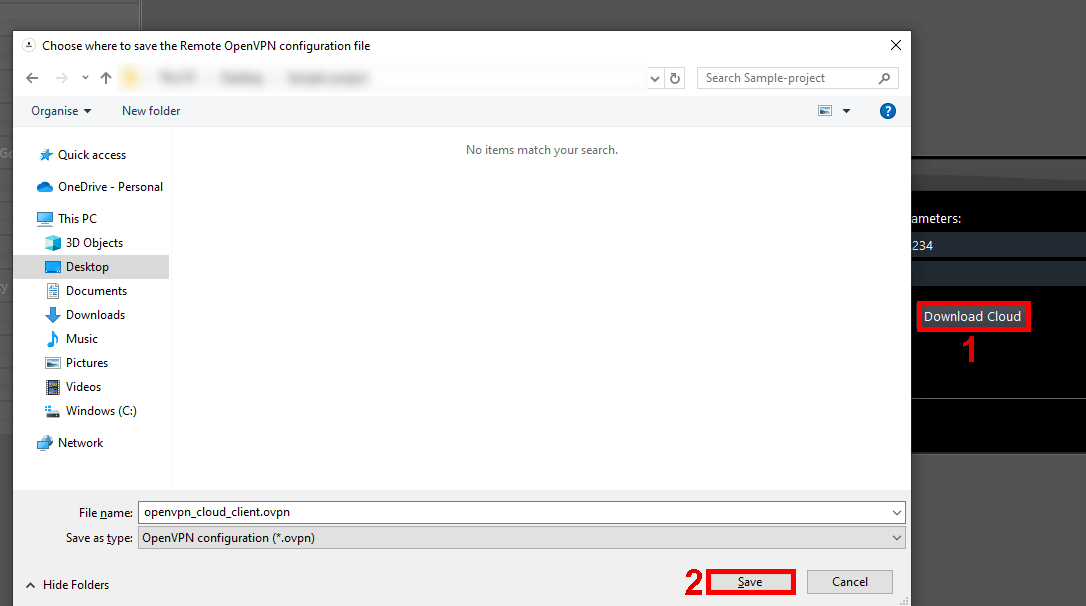
For the cloud file, you must enter Ilevia.com as IP address and your Ilevia Cloud port adding 2 digits to that. 2. Click Create to generate the file, 3. finally click Downoad cloud. Once done the message “Download complete” will appear
Example: If your Cloud port is 10000, the correct port to enter is 10002.
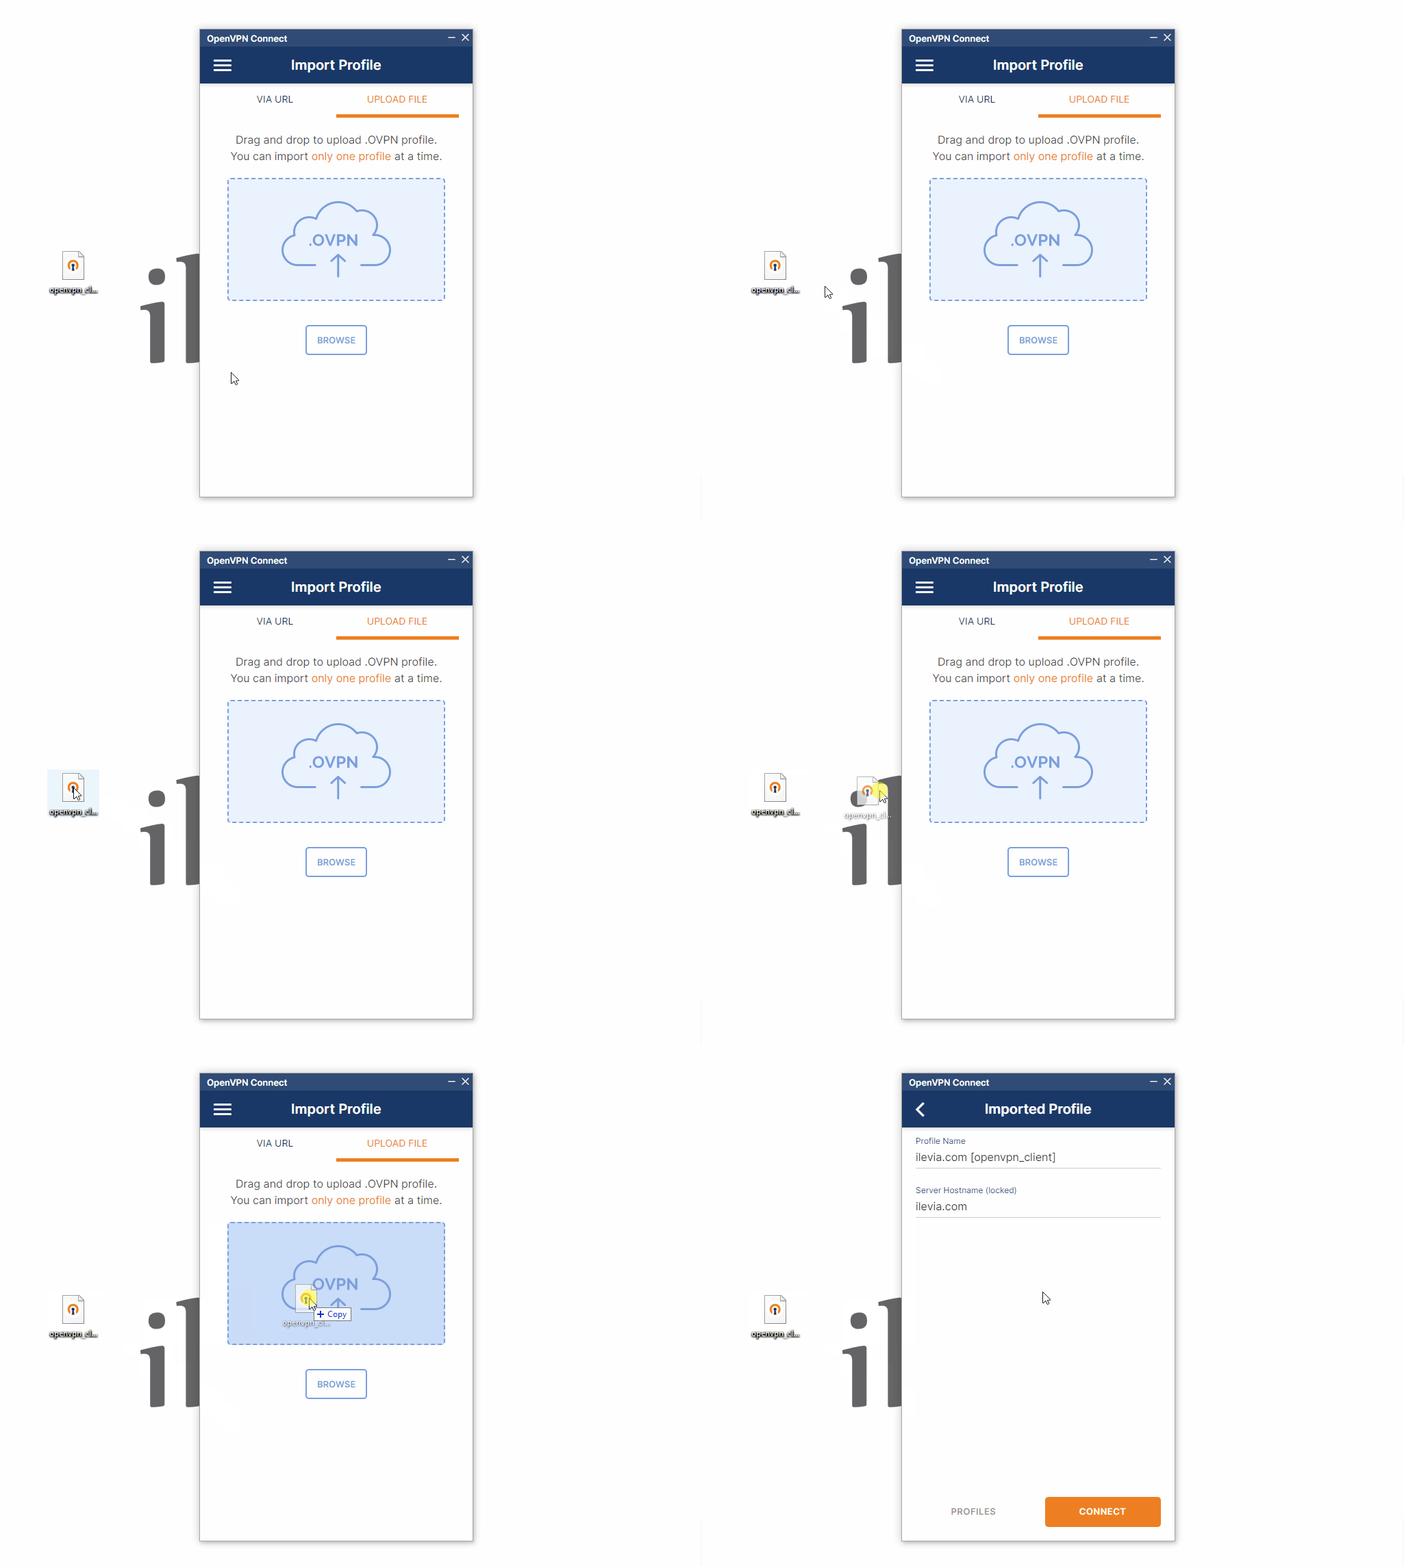
Now download the OpenVPN client from this link and install it in your device.
Open the OpenVPN client software. Click on Upload File. Then click Browse to open the file manager or drag and drop the OpenVPN file into the designed drop box.
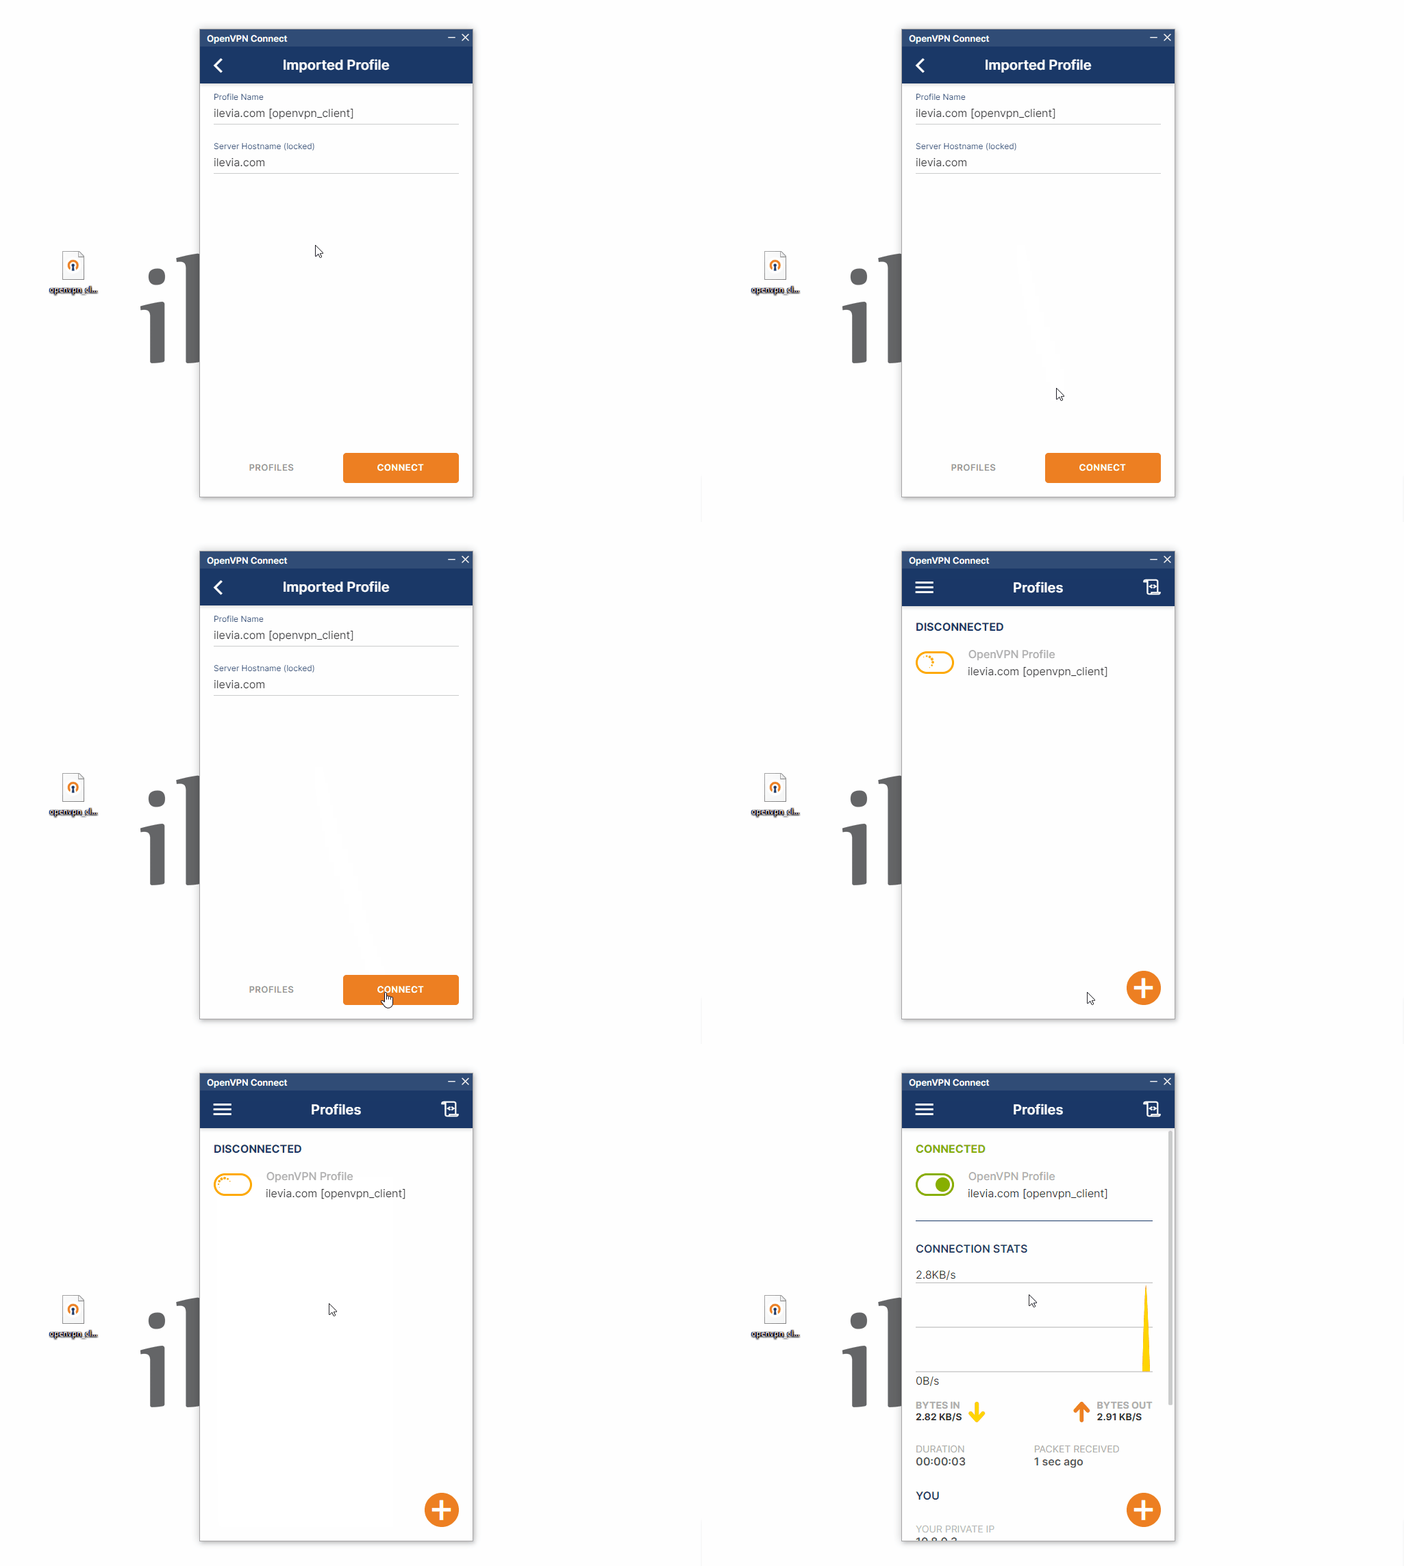
Click Connect to start the VPN connection procedure.
CONCLUSION
With the Ilevia’s X1 server VPN connection you will able to connect to the server without any port forwarding and use of a cloud service, plus, this will allows you to configure the Ilevia Manager project, to connect to your account of the Ilevia’s App EVE Remote Plus, program the KNX devices and connect to other devices that are connected on the same network the server is connected to.
Note: If you choose to use the free VPN connection (without the cloud), it is required to open the port 1194 for it to work.
OPEN VPN FILE RENEWAL
In case of necessity it is possible to re-create the Open VPN file from Ilevia Manager.
Open Ilevia Manager and connect to the Ilevia server.
Head to the Tools menu and click on Open VPN.
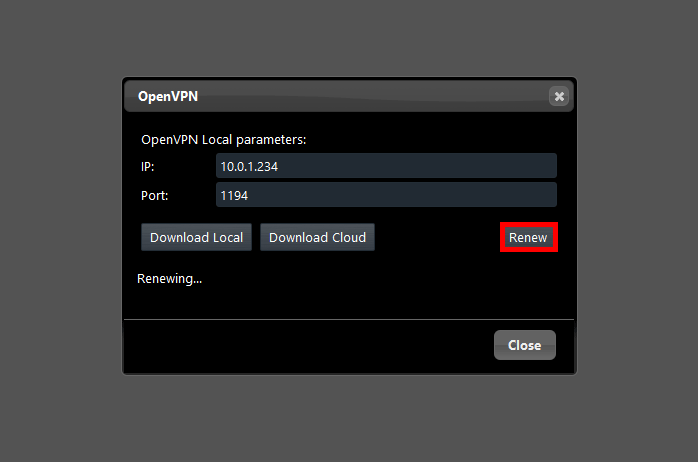
A new window will be shown. By clicking the option Renew, this will initialize the procedure of Open VPN file renewal.
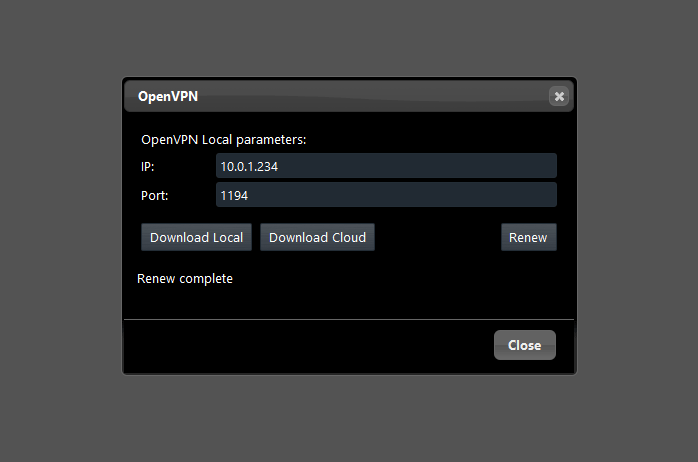
Once the renewal procedure is completed of the file a new message will be shown: “Renew completed“.
Now it will be necessary to download the Open VPN file again. Click on Download and save the file within your local file as explained in the Step 4 in this guide.


