SHELLY I3 MQTT CONFIGURATION
INTRODUCTION
This device from shelly allow to control up to three inputs at the same time, in this guide will be explaned how make it work with MQTT protocol within EVE Manager.
USE CASES
- The user wants to set up 3 different switches connected to the shelly i3 in order to use them with KNX actuators.
Step 1:
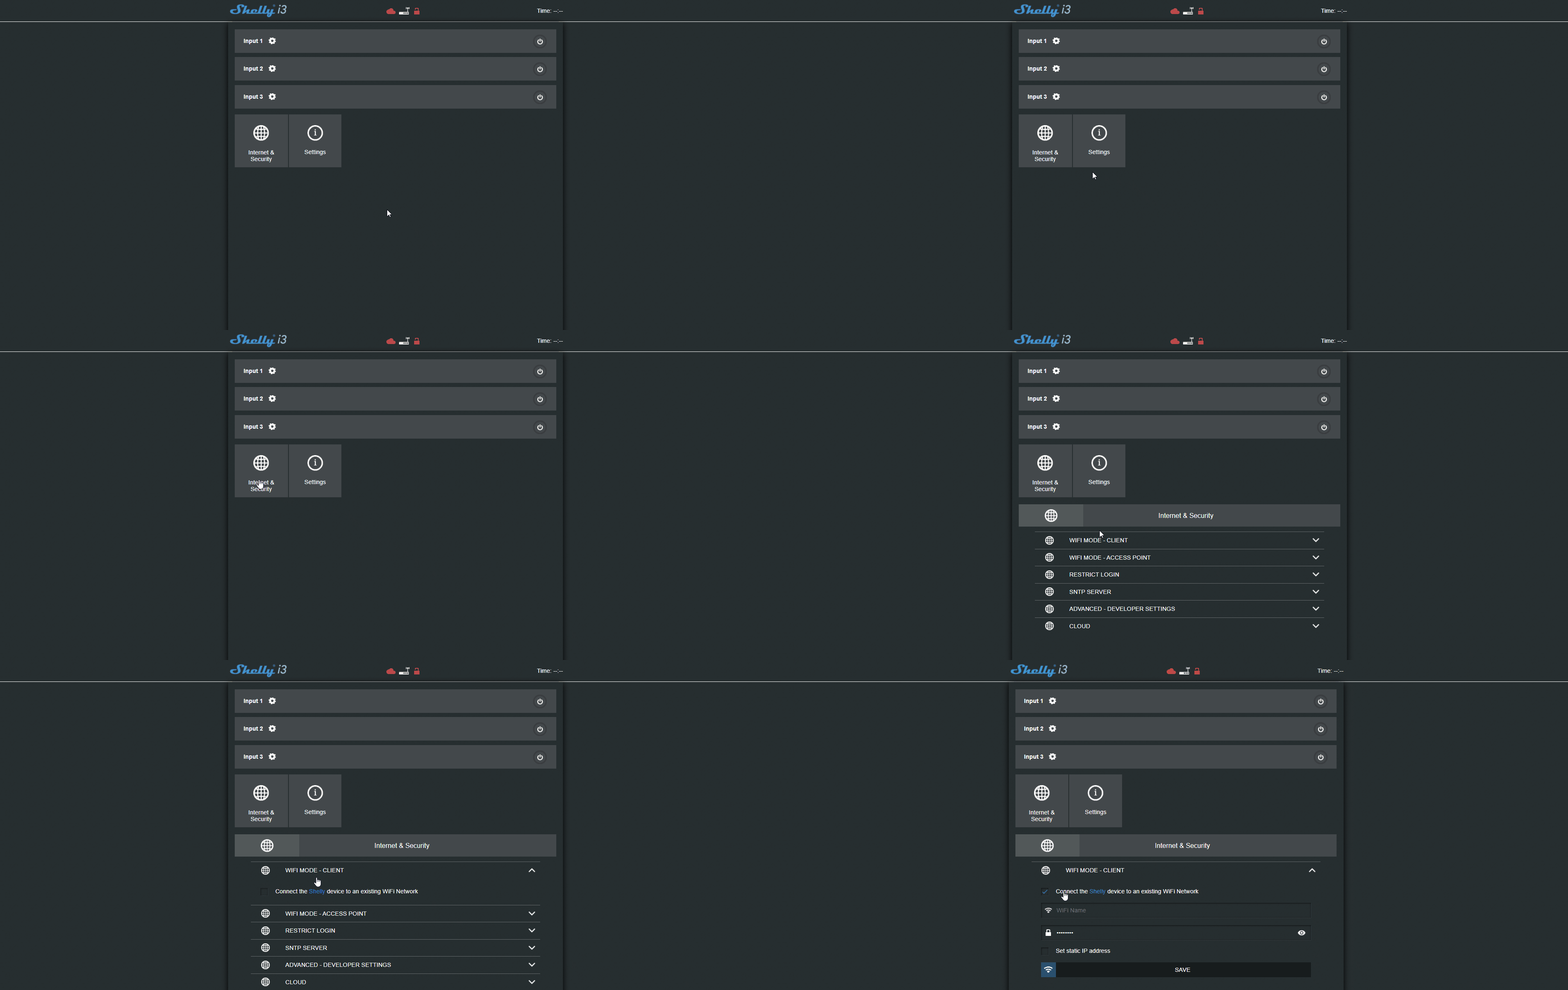
First power on the Shelly device, connect to the shelly I3’s wifi network. Then open your web browser and type the default IP address (192.168.33.1) in order to enter its web interface.
Step 2:
In order to connect the shelly device inside your local network, head to the “Internet security setting” menu and open the first tab called “Wifi mode client“.
Step 3:
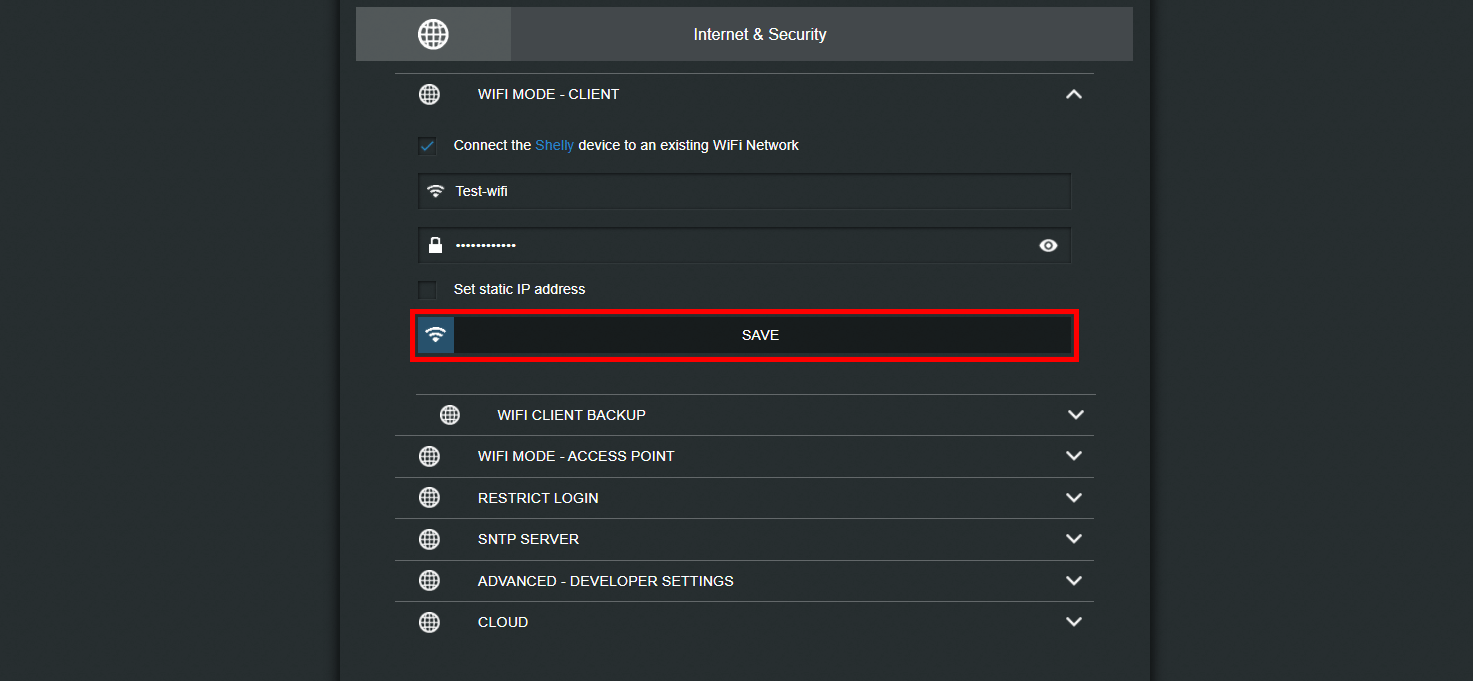
Now insert your wifi’s credentials and hit Save. Once your did, the shelly device will try to connect into the network you have set in shelly web interface.
Step 4:
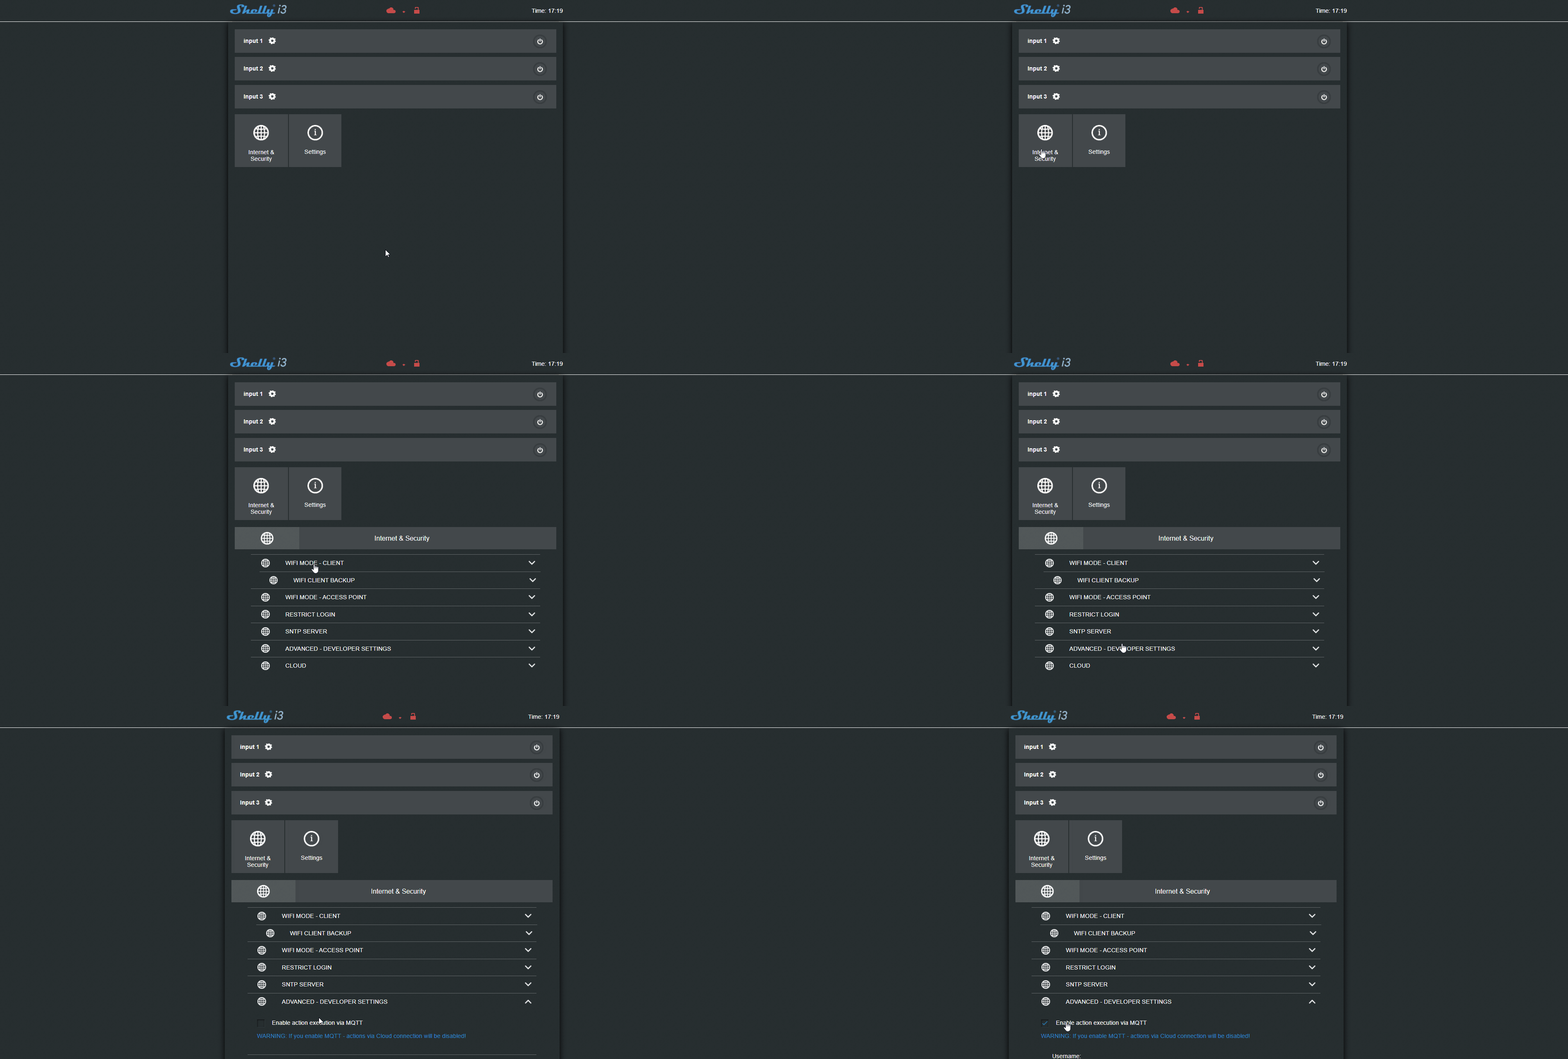
Reconnect into the shelly web interface once the shelly device is connected inside your local network, then enter the “Internet and security settings” menu and open the “Advanced developer setting” tab, finally check the box “Enable action execution via MQTT“.
Step 5:
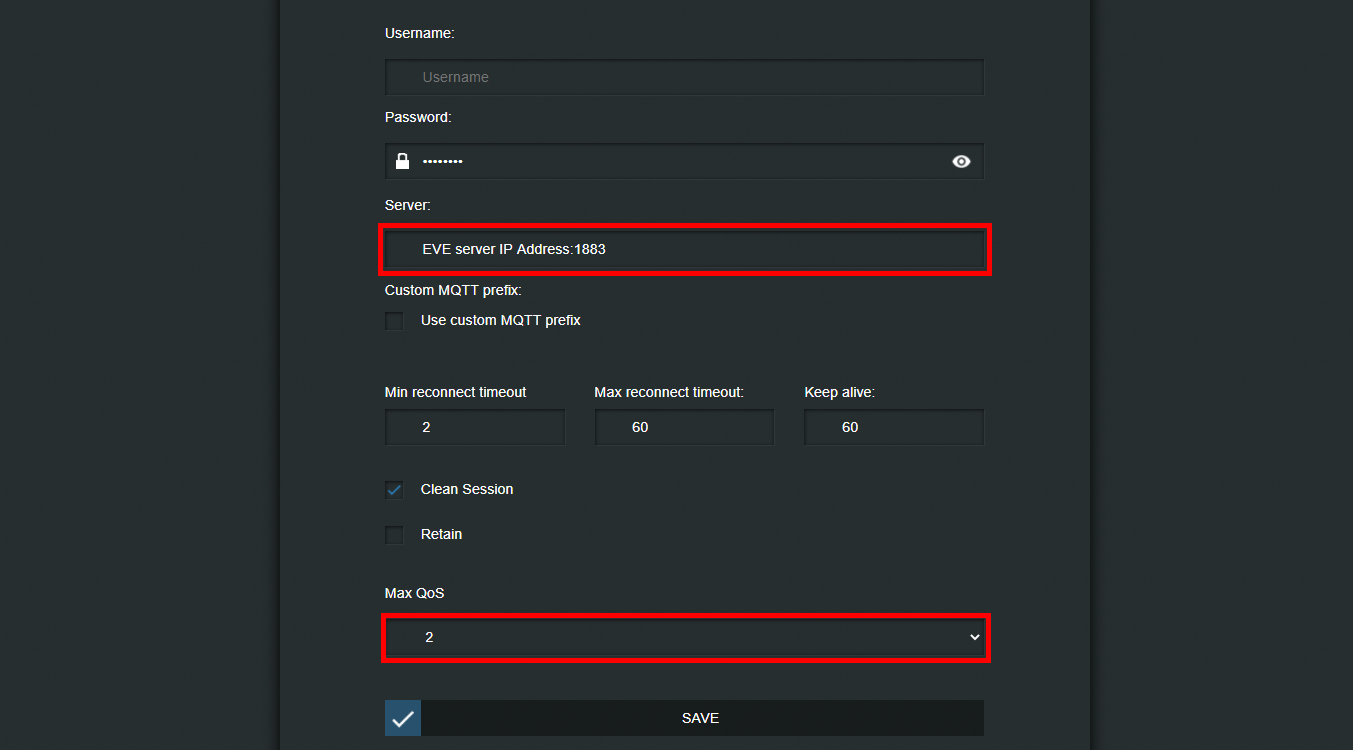
Now that we have enabled the “Advanced developer settings“, it is time to set the MQTT settings in order to allow the Shelly device to exchange data with the EVE server.
Set the server IP address by entering the EVE server’s IP, then set the QoS to 2 finally hit save.
NOTE:
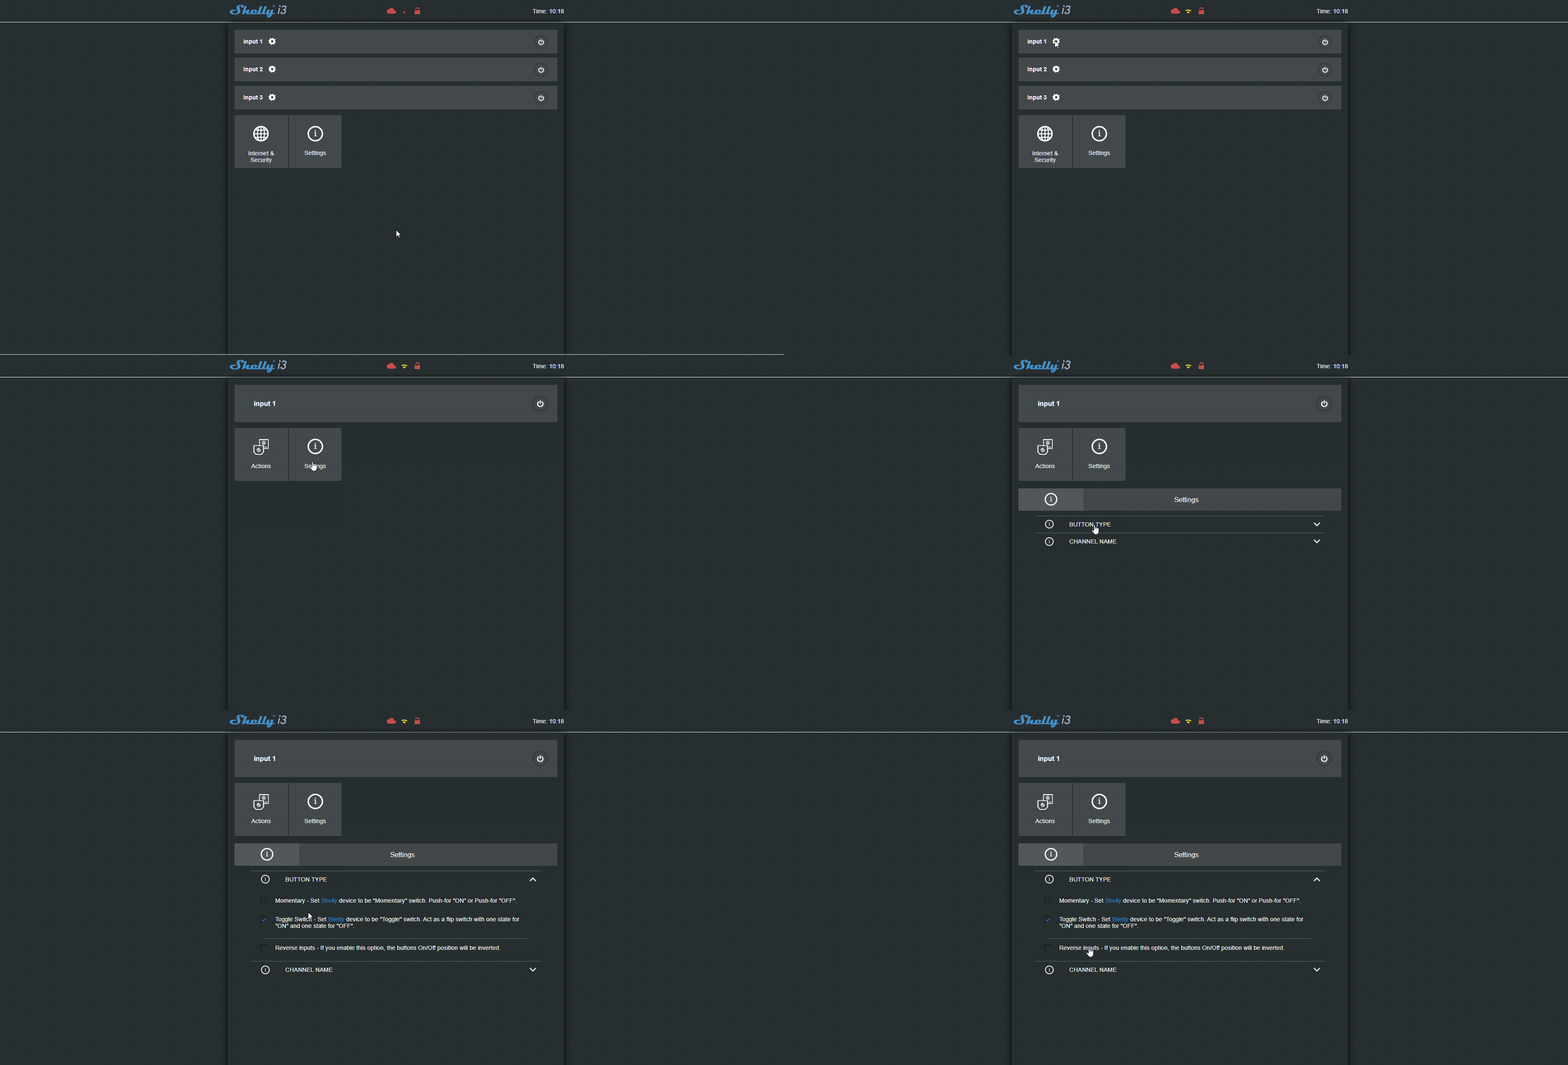
For this demo we have set the Shelly i3 in toggle mode for test purposes, to change this setting head to the input channel settings by clicking the gear Icon next to the channel number, then click on the “Setting” menu finally open the “Button type” tab, there you will be able to select the type of button that better suite your configuration.
Topic configuration
Step 6:
Open EVE Manager and create a new MQTT gateway inside the Gateway tab as explaned in this guide.
Step 7:
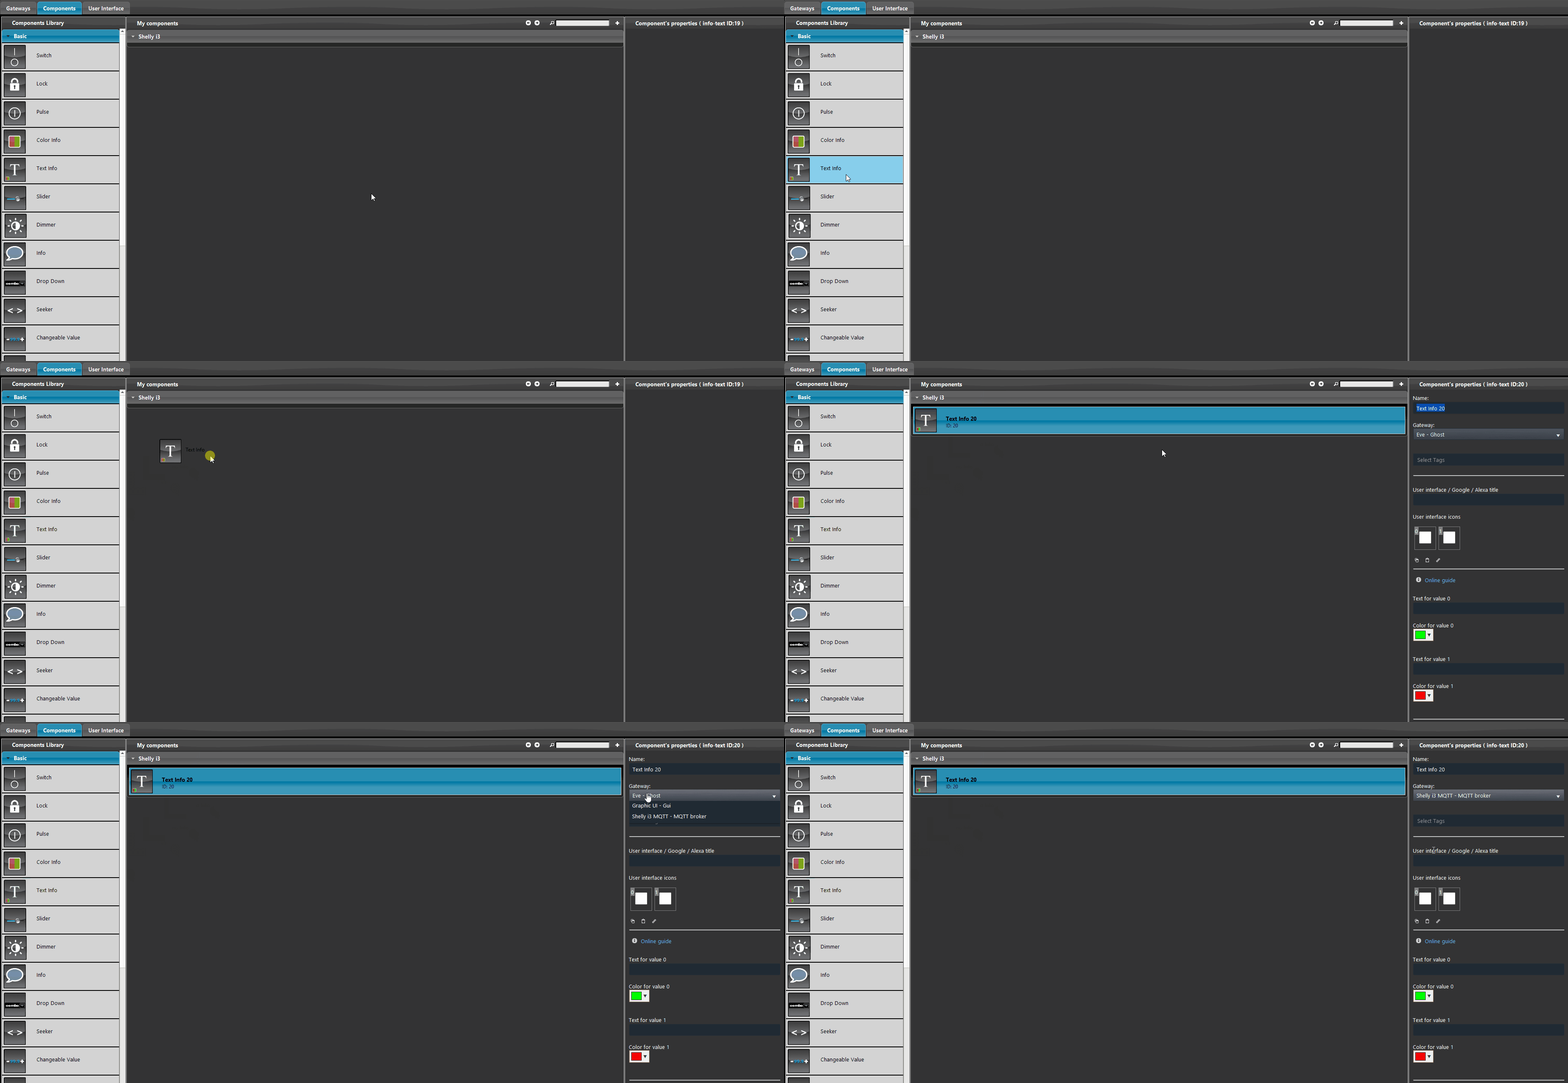
Now it is time to add the components inside the project, head to “My components” section and add up to 3 different components that follow: Info, Textinfo, Colorinfo and Switch component, that you can find inside the Basic tab on the left section inside EVE Manger. After adding the components, change their gateway setting by selecting the MQTT gateway created earlier from the protocol drop down inside the component’s properties. In our case we will focus on L1.
! Inside the Text info it is mandatory to insert two words in the state configuration of the component in order to display the state inside the User interface.
Step 8:
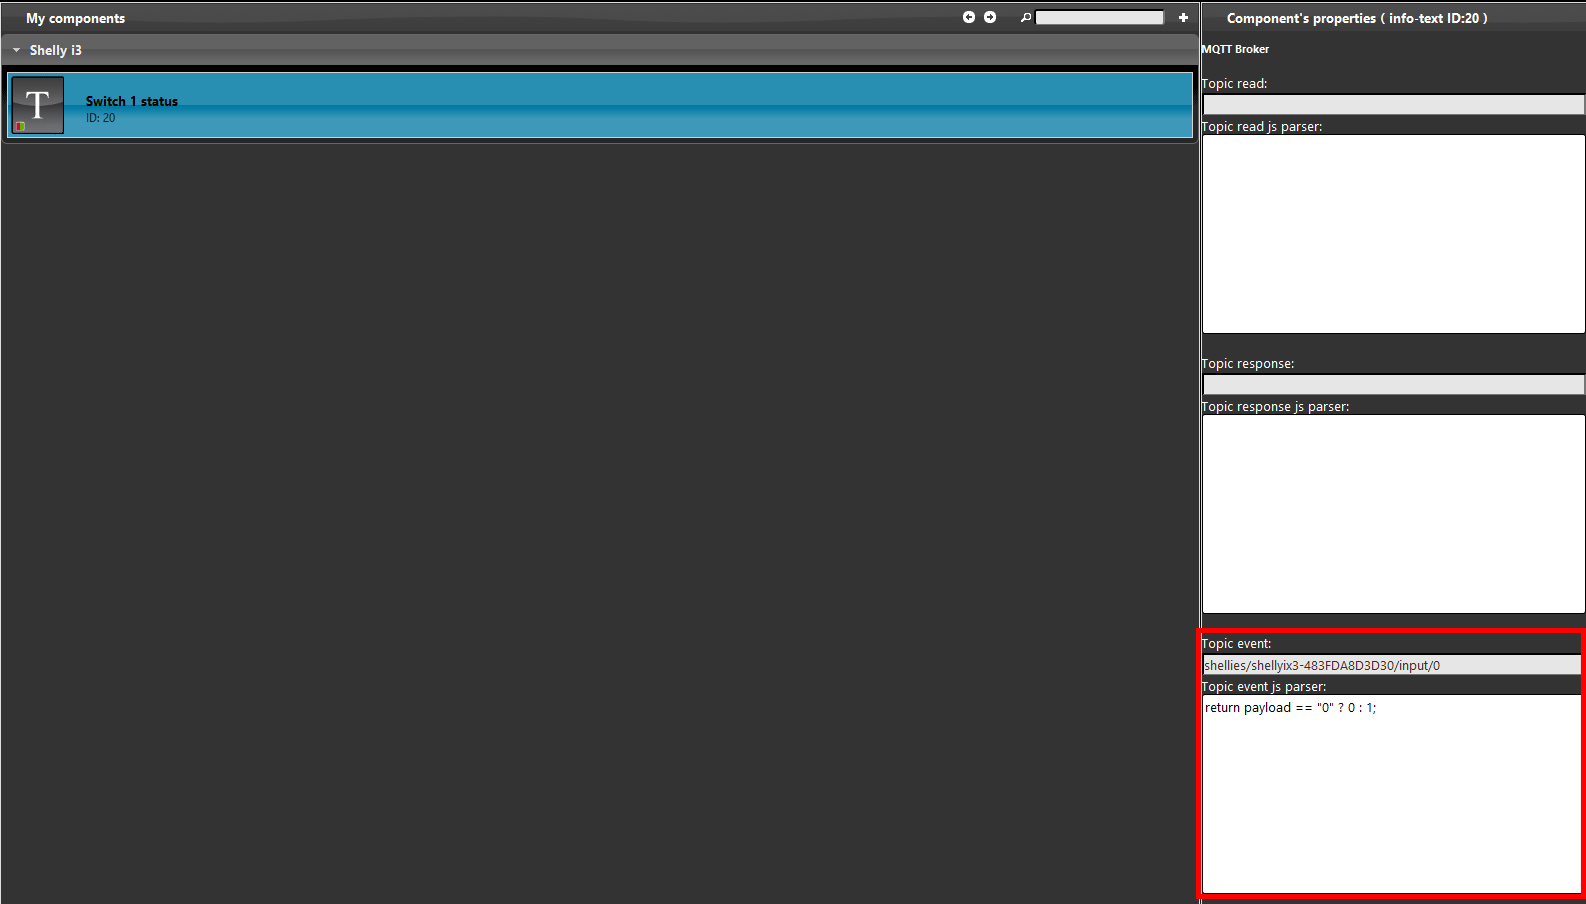
The configuration of the topics is divided by the number of the input channels, infact as mentioned at the start of this guide, you will be able to set up to 3 different swithes, which each of them will have its indipendent function. We will start from the topic “Event“, the topic will have set the input channel “0” that corrispond to the input channel 1 of the shelly i3. The script rappresented below will catch the status coming form the shelly device.
By clicking this link you will be able to consult the topic configuration.
USER INTERFACE VISUAL RESULT
Step 9:
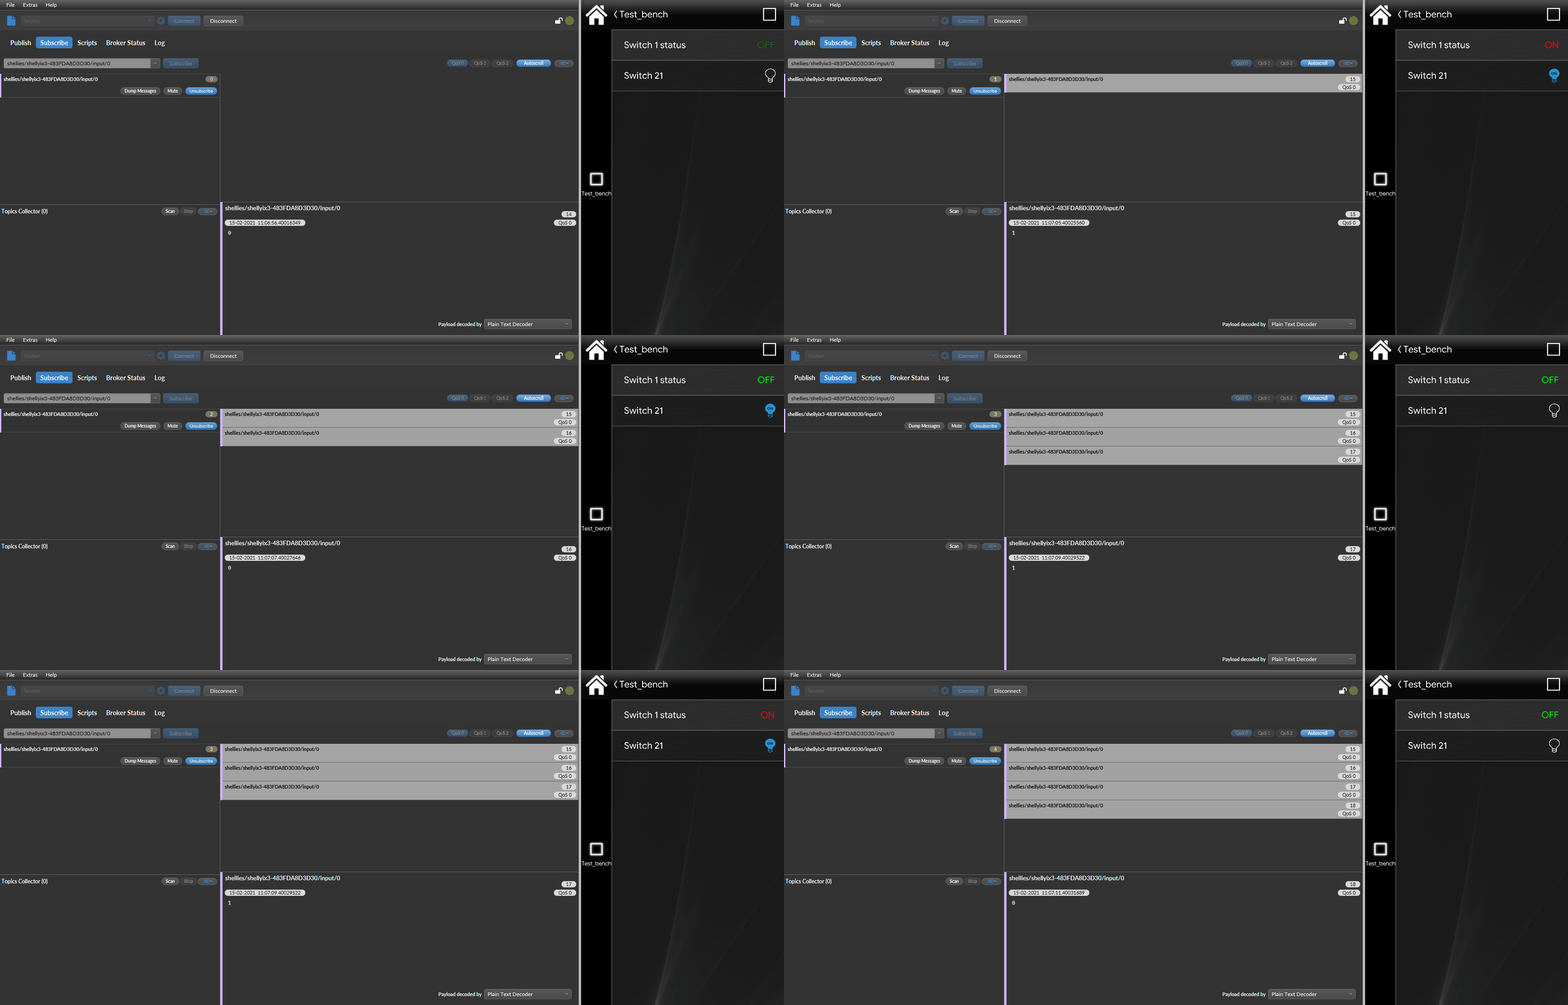
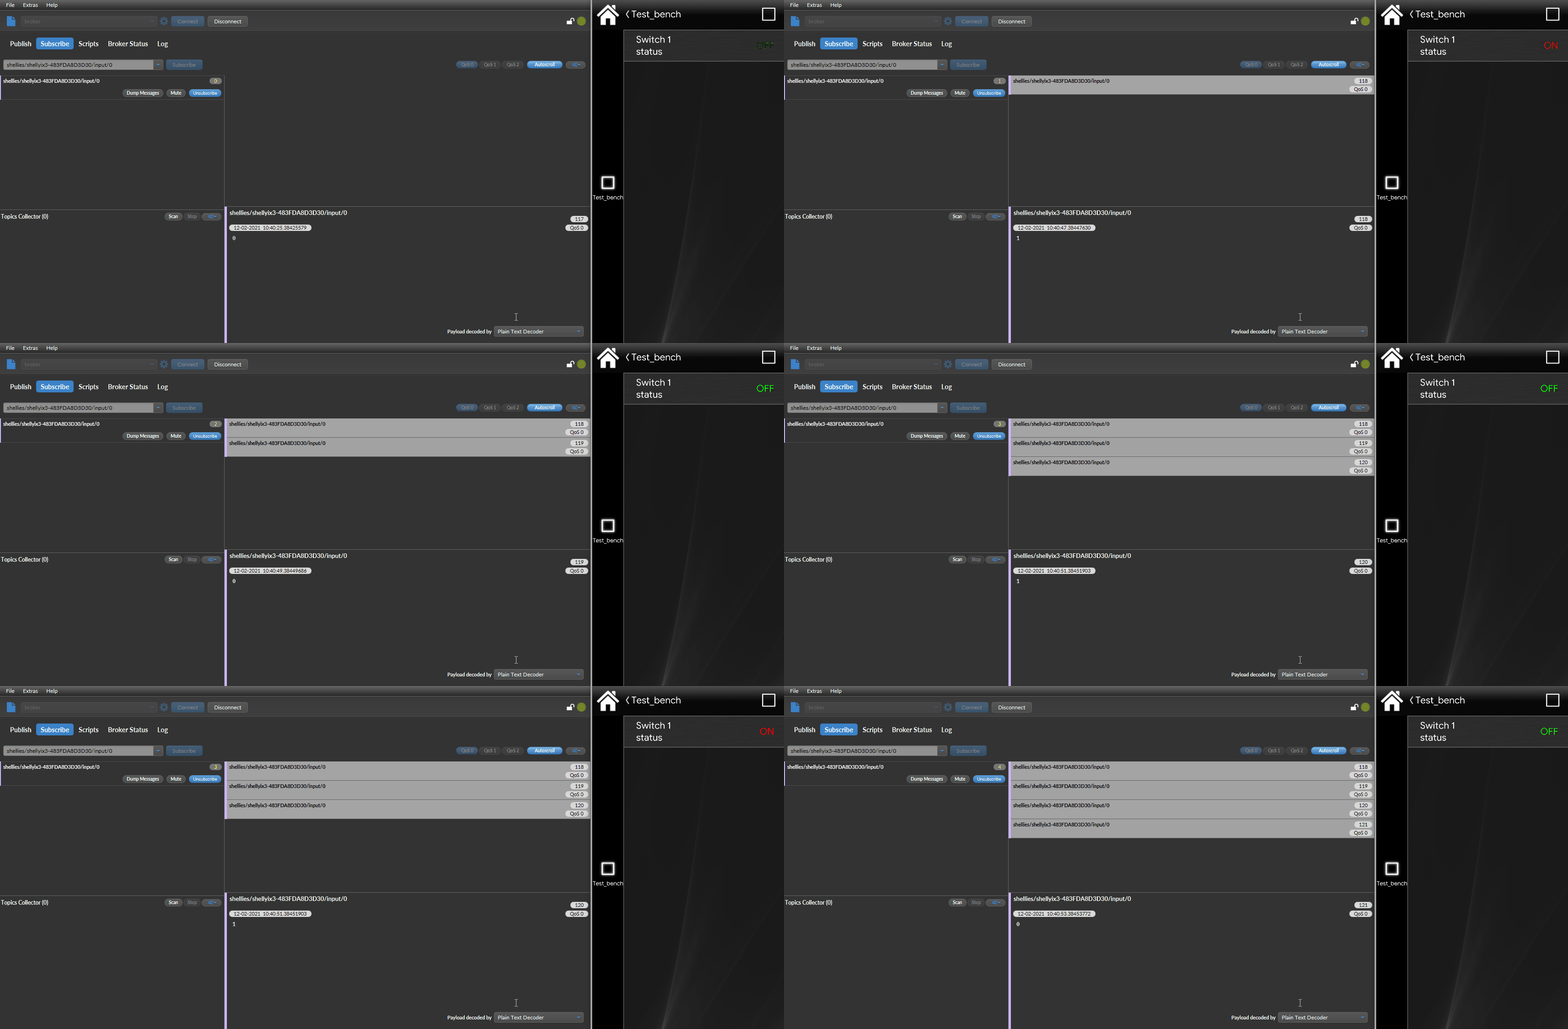
This is how the components will look like inside the Home automation app EVE Remote Plus. As you can see from the picture below, when the toggle switch is pressed the shelly i3 sends a message through the topic, this message contains the current value of the switch that will match to the changing state of the Text info inside the User interface.
How to configure a KNX switch in order to make it works with shelly i3
In this section of the guide will be explained how to set up the shelly device to interact with a KNX switch.
Step 1.1:
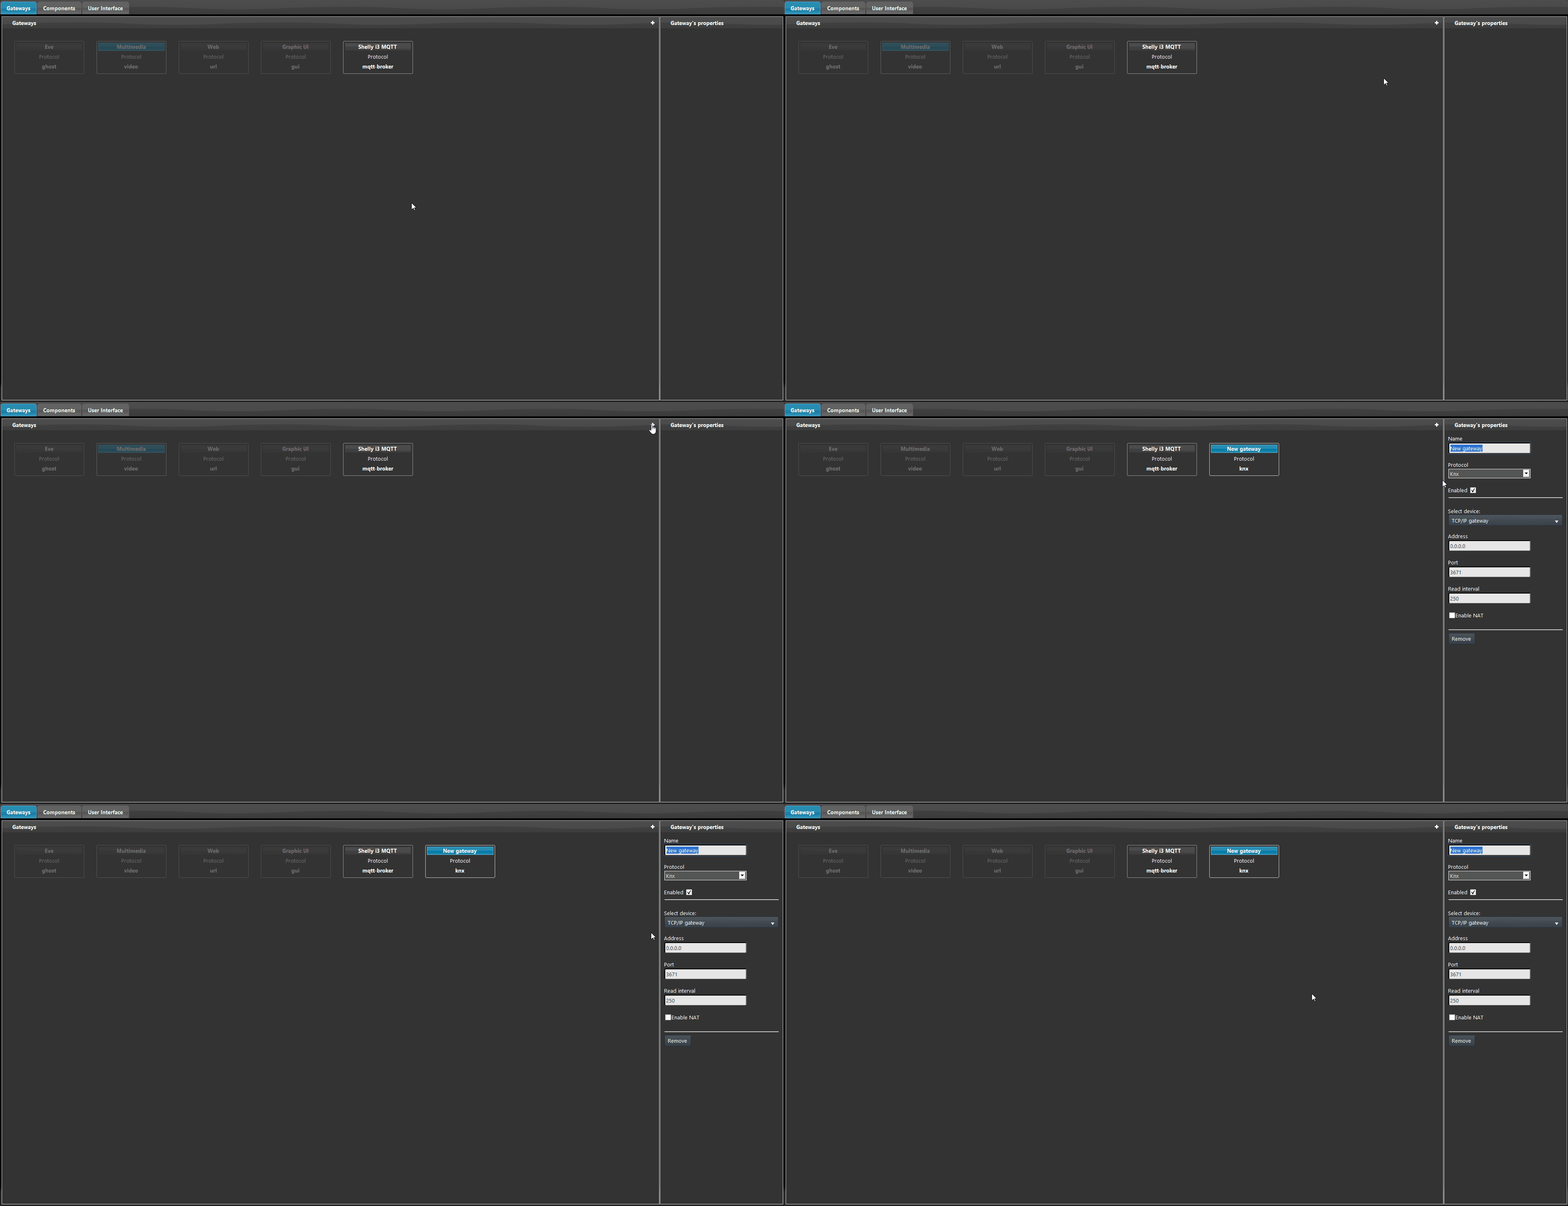
Create a new gateway inside the Gateway tab inside the Home automation software EVE Manager Pro.
Step 2.1:
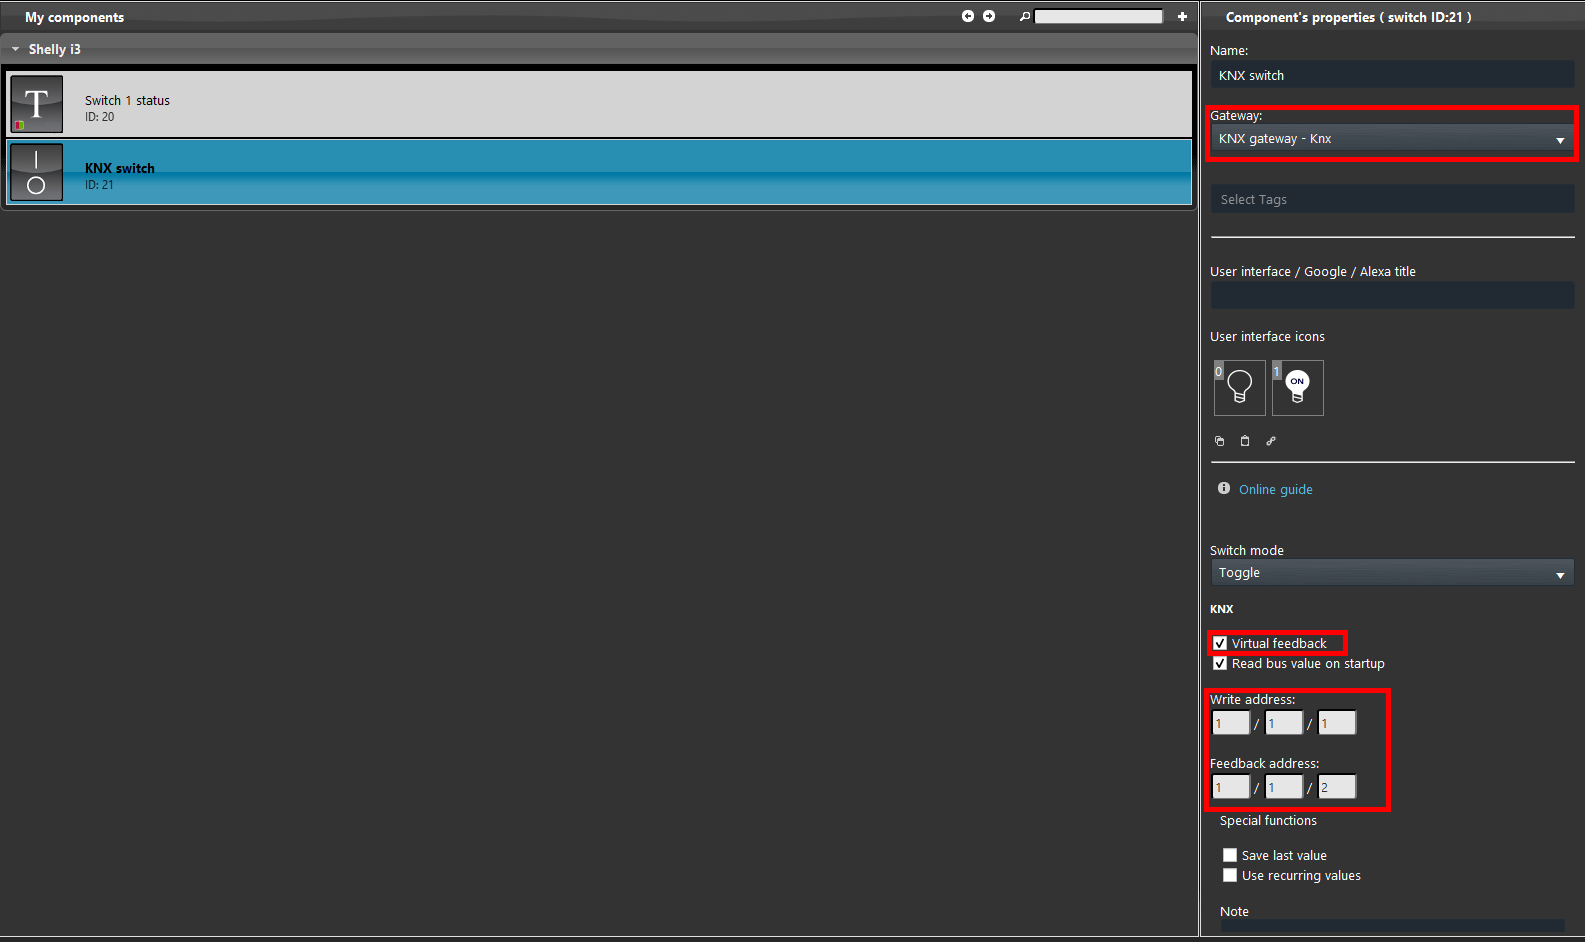
Now add a switch component and chage its gatewa to the KNX we create earlier. Then set the write and feedback address and check the box virtual Feedback.
Step 3.1:
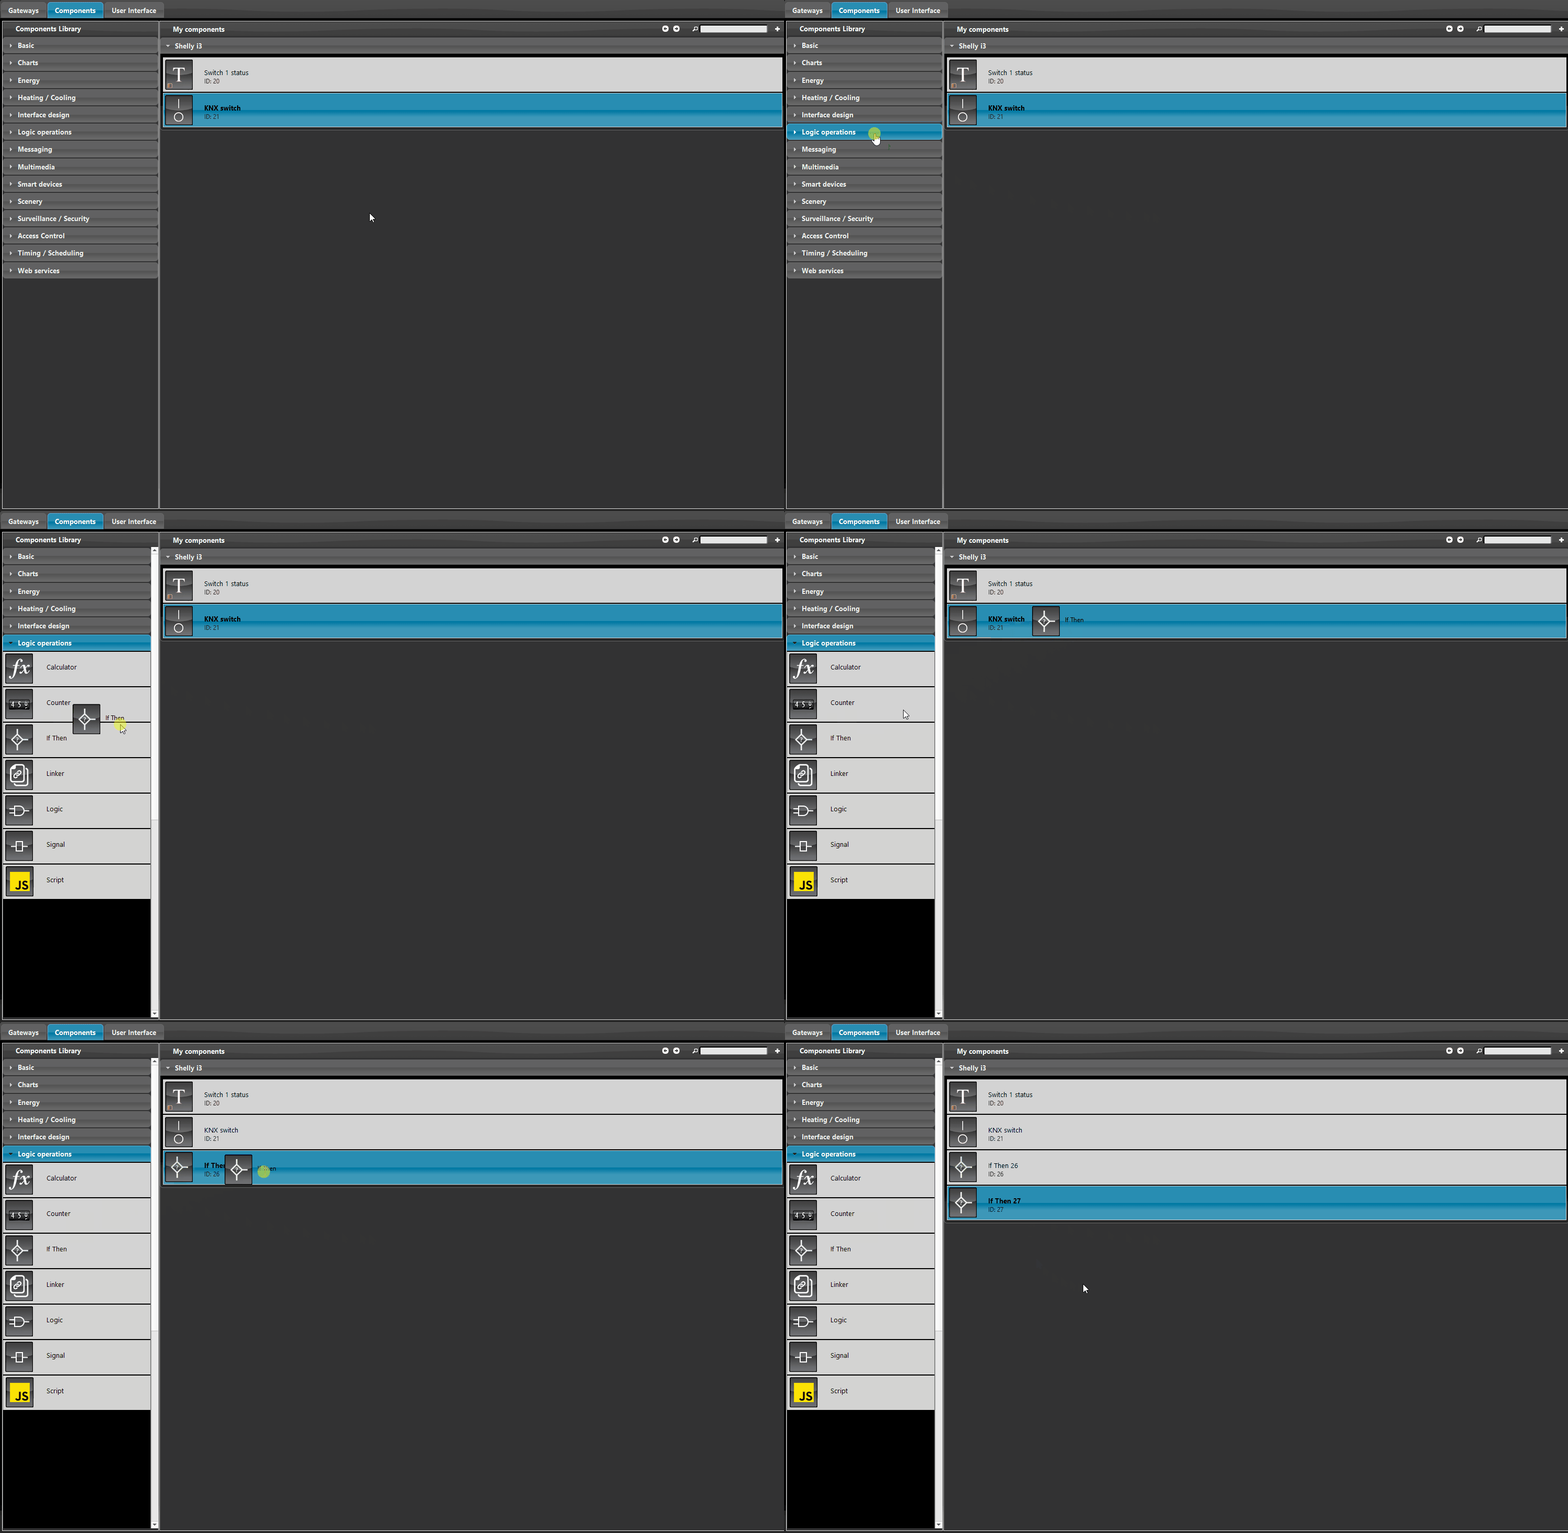
In order to set the status and update it each time we press the wall button, we must set two type of logic operations. Add two If then components by drag and dropping them from the logic operation tab inside the “My components” tab.
Step 4.1:
Now lets set up the If Then components, the if then are going to be set as follow:
IF THEN #1
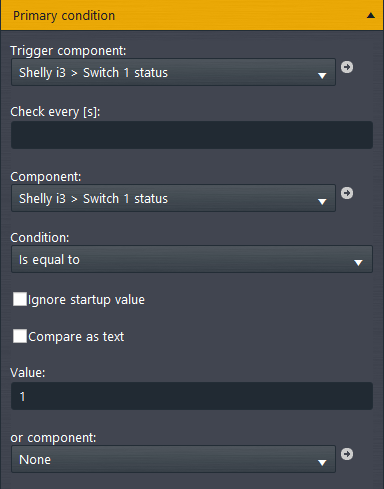
This logic function will get the status from the switch 1 status component and if the value of this components is equal to 0 it will change the state of the KNX switch, else will tell the switch to set its status to On.
Primary condition: Set as Trigger the component that receive the status coming from the shelly i3 in this case the Text info do the same for the component drop drown, select the condition “equal to” then type as value 1.
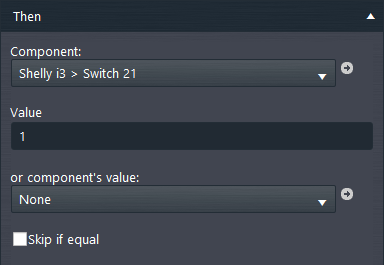
Then: Select as component the switch you have set up with the KNX gateway, this will set the KNX switch status to 0 each time the shelly status hit that state.
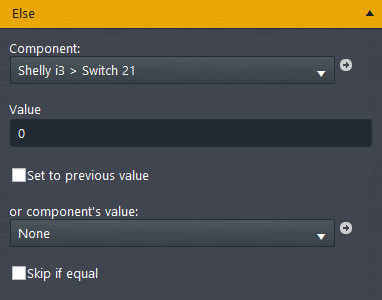
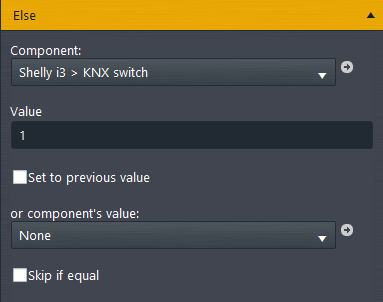
Else: Select the KNX switch as component, this will be affected from the first condition if it ends being false, if the value results 0.
IF THEN #2
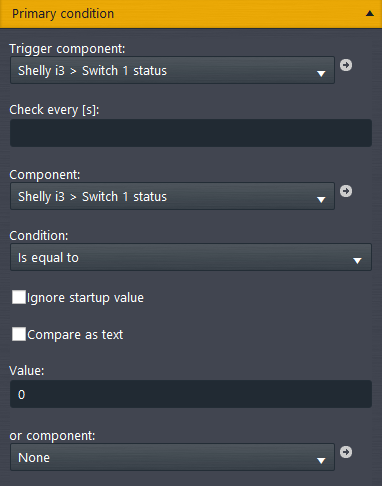
This logic function will get the status from the switch 1 status component and if the value of this components is equal to 0 it will change the state of the KNX switch, else will tell the switch to set its status to Off.
Primary condition: Set as Trigger the component that receive the status coming from the shelly i3 in this case the Text info do the same for the component drop drown, select the condition “equal to” then type as value 1.
Then: Inside the “component” drop down make sure you have the KNX switch selected, then type 1 on the Value text field , this will set the status 1 to the KNX switch.
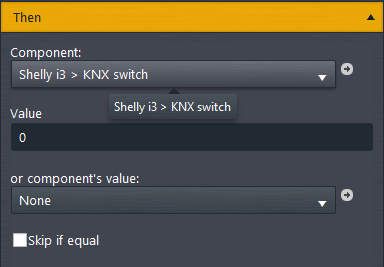
Else: Select the KNX switch as component that will be affected from the primary condition if the value we have set is not equal to 1.
USER INTERFACE VISUAL RESULT
This the visual result of the configuration of the two logic operations.
By toggling the switch On and Off the KNX switch will change its state at the same time.
