SHELLY DOOR WINDOWS DEVICE INTEGRATION WITH MQTT PROTOCOL WITHIN THE ILEVIA SYSTEM
INTRODUCTION
This device from shelly is made to be applyed to doors and widowns to return theirs status, if its open, close, tilted to a specific position in “°”, report the room temperature, the brightness of the room, the device’s battery level and report if the door/window vibrate.
Web interface configurations
Step 1:
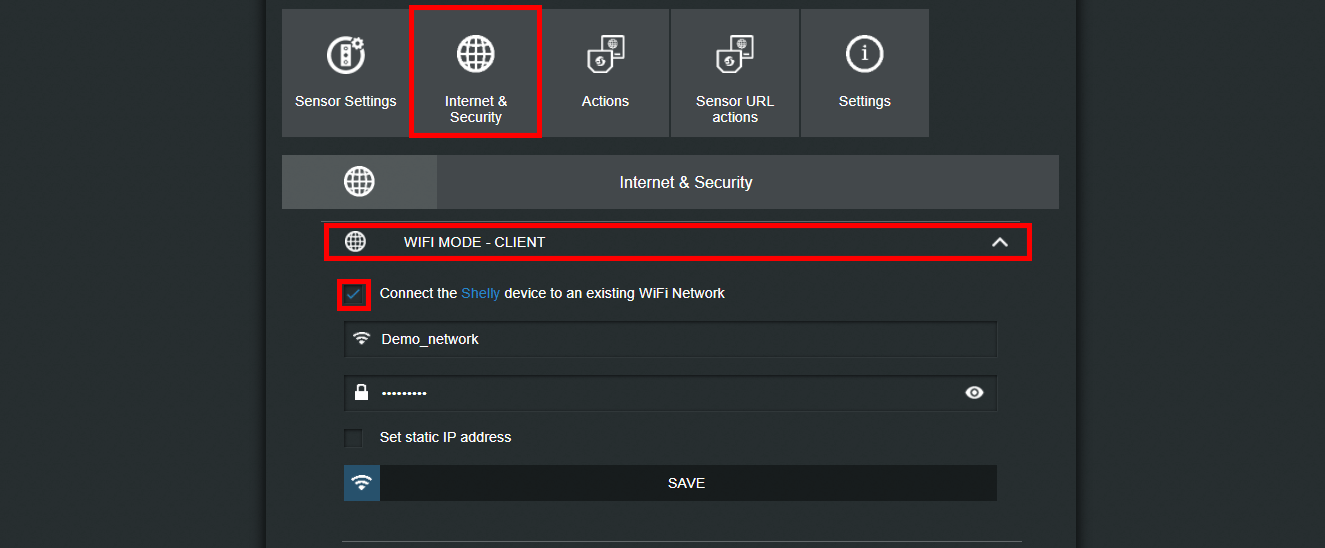
First connect into the shelly door window 2’s wifi network, once connected type the default shelly’s web interface IP: 192.168.33.1, on the URL text field on your web browser.
Step 2:
Head to the Internet and security settings menu then open the section wifi client mode and check the box: Connect the Shelly device to an existing WiFi Network, to be able to pair the shelly device with your wifi network.
Step 3:
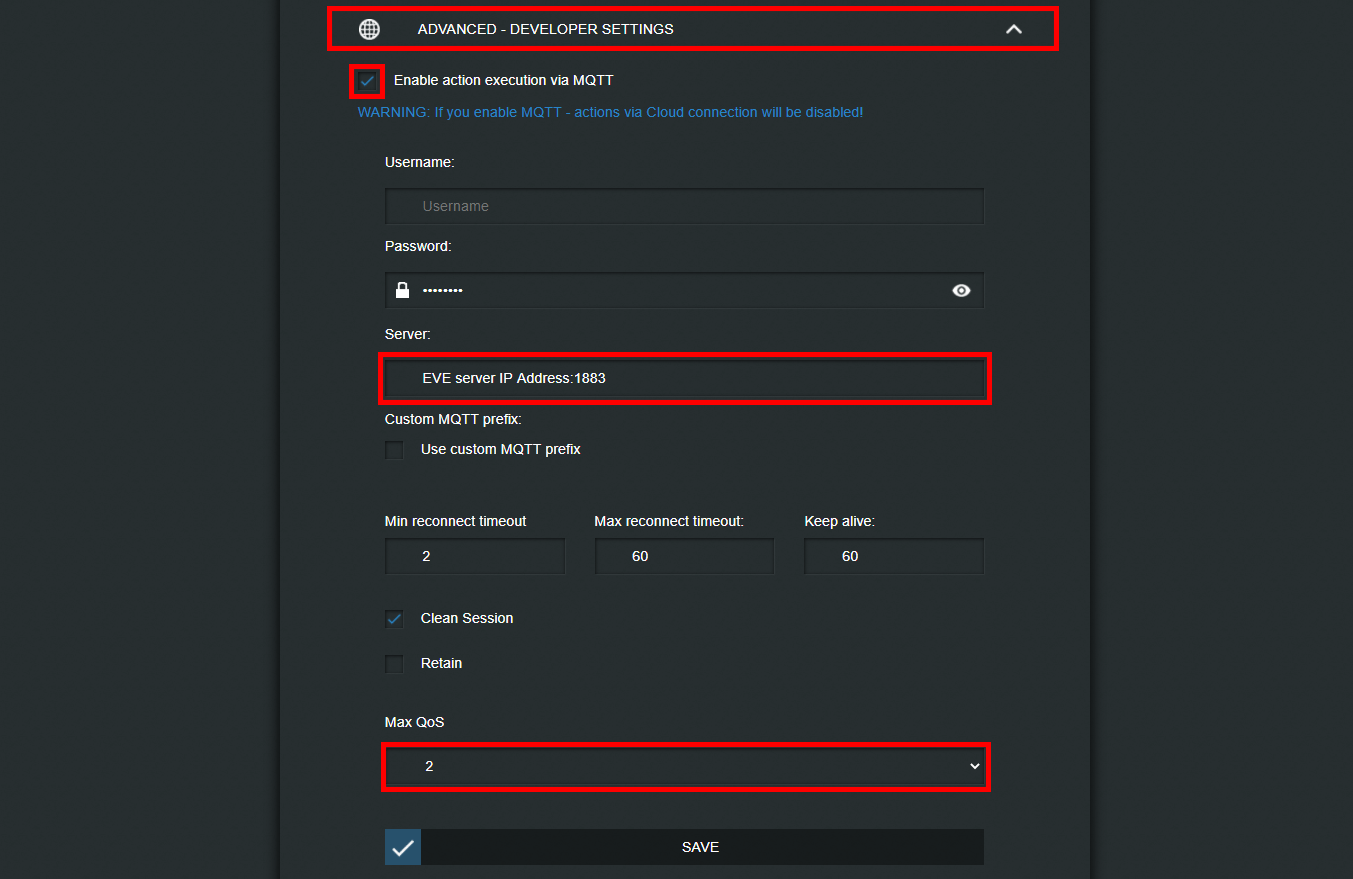
The next will be enabling the MQTT protocol inside the shelly device, inside the Internet security settings menu open the Advanced developer settings and anable the check box: Enable action execution via MQTT.
Then insert the IP address of your EVE server inside the field text Address on the MQTT settings, then set the Qos to 2, finally hit save to apply the settings.
Topics confiugration
Click on the topic you want to see its configuration:
TOPIC'S CONFIGURATION INDEX
– shellies/shellydw2-<deviceiD>/sensor/state: This topic will return the door/window current state;
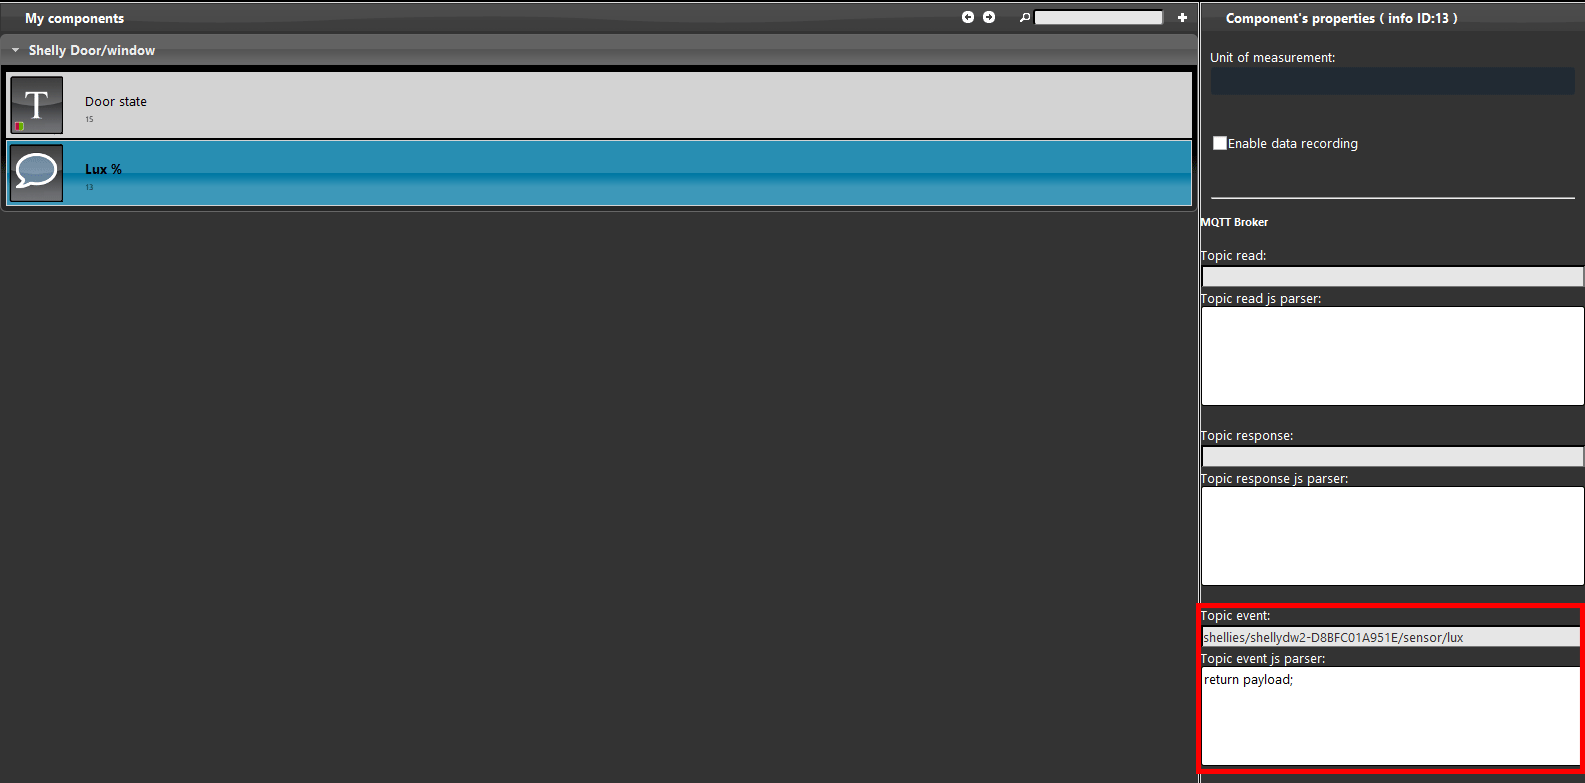
– shellies/shellydw2-<deviceiD>/sensor/lux: This topic will retrun the level of brightness of the room where the shelly device is, in lux;
– shellies/shellydw2-<deviceiD>/sensor/battery: This topic will return the level battery of the shelly device;
– shellies/shellydw2-<deviceiD>/sensor/tilt: This topic will return the window’s tilt in “°” from 0 to 180;
– shellies/shellydw2-<deviceiD>/sensor/temperature: This topic will return the Room temperature which the shelly device has been placed in.
– shellies/shellydw2-<deviceiD>/sensor/vibration: This topic will return 0 when no vibration is detected or 1 if vibration detected;
Step 4:
Open EVE Manager Pro and create a new project, create a new MQTT gateway, here a guide that explain how to set up the new gateway.
Step 5:
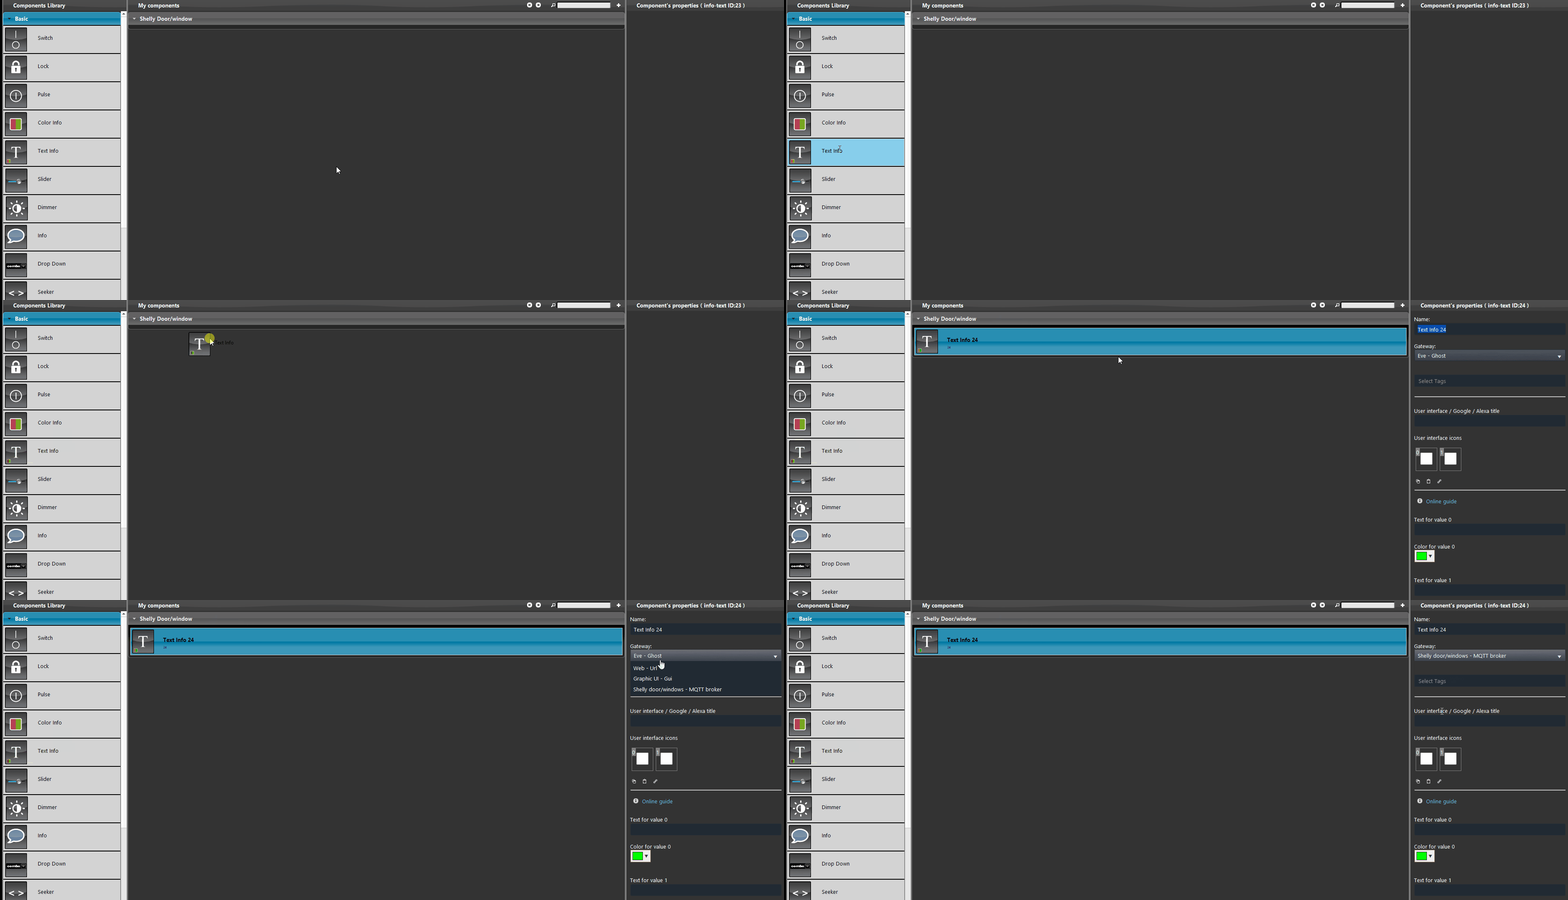
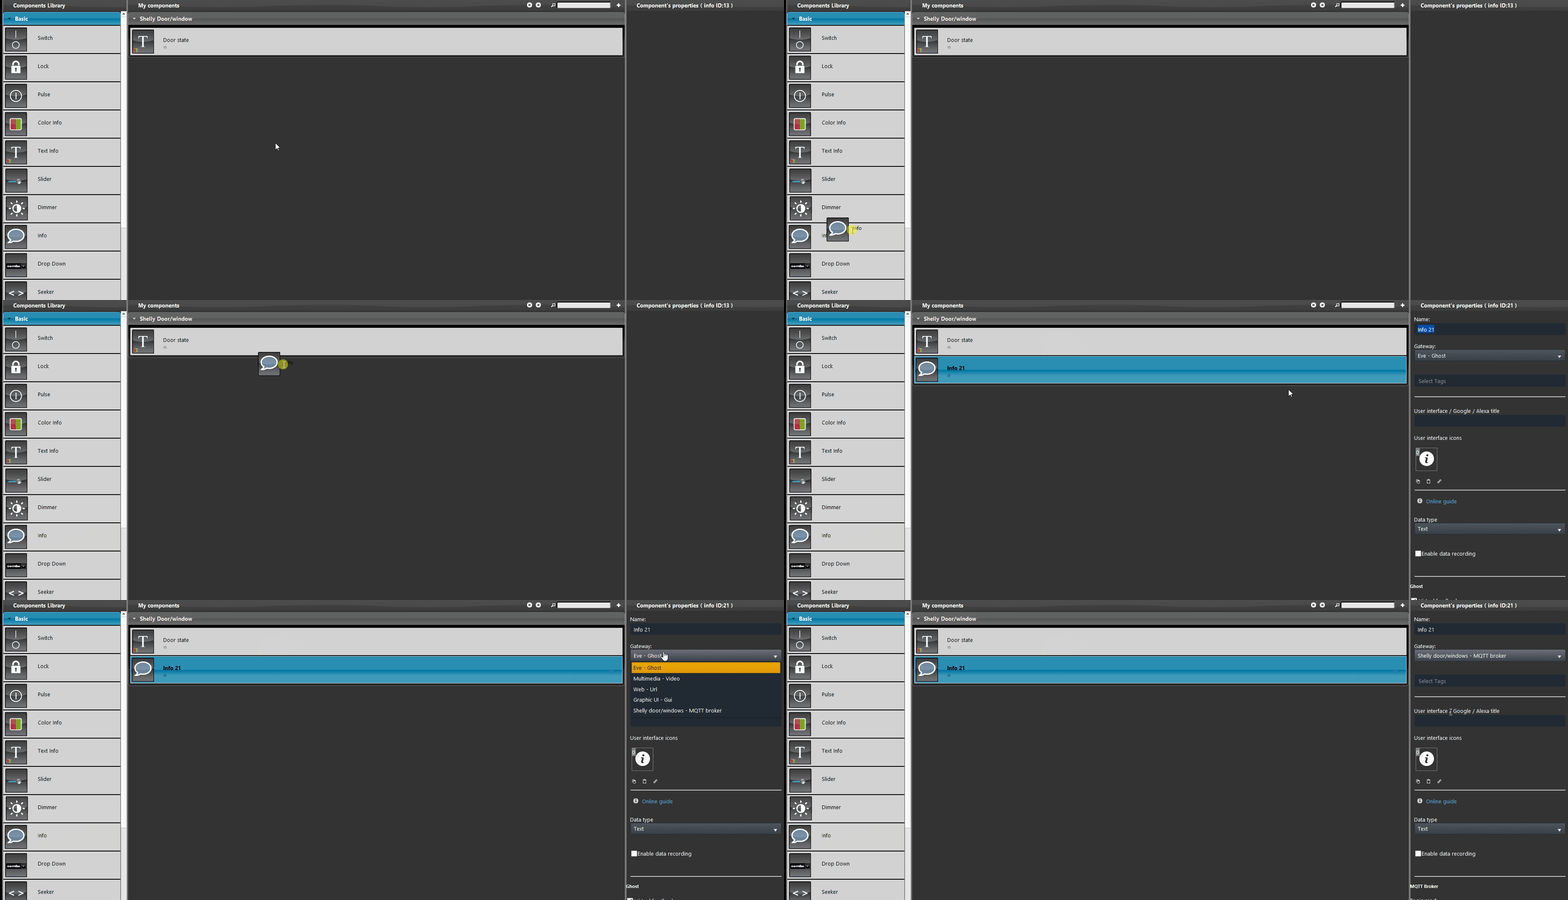
Drug and drop a Text info component inside the Components section and set its gateway to the one we have created earlier with the MQTT protocol.
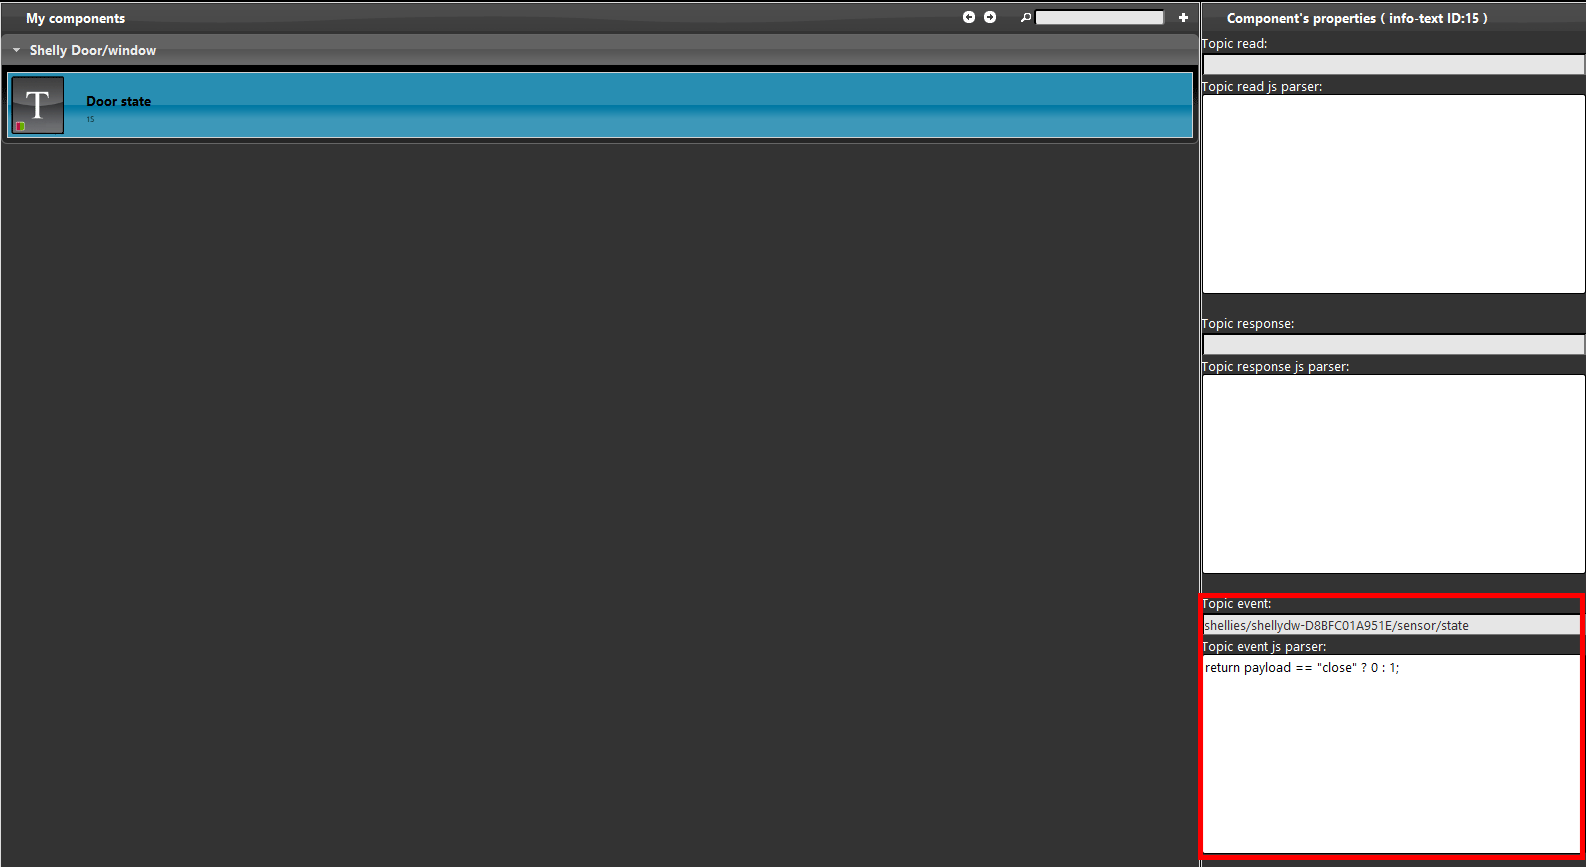
Topic: shellies/shellydw-<deviceID>/sensor/state
Now lets set up the component. The topic that will be set to retreive the status of the device is the topic Event.
By clicking this link you will be able to consult the topic configuration.
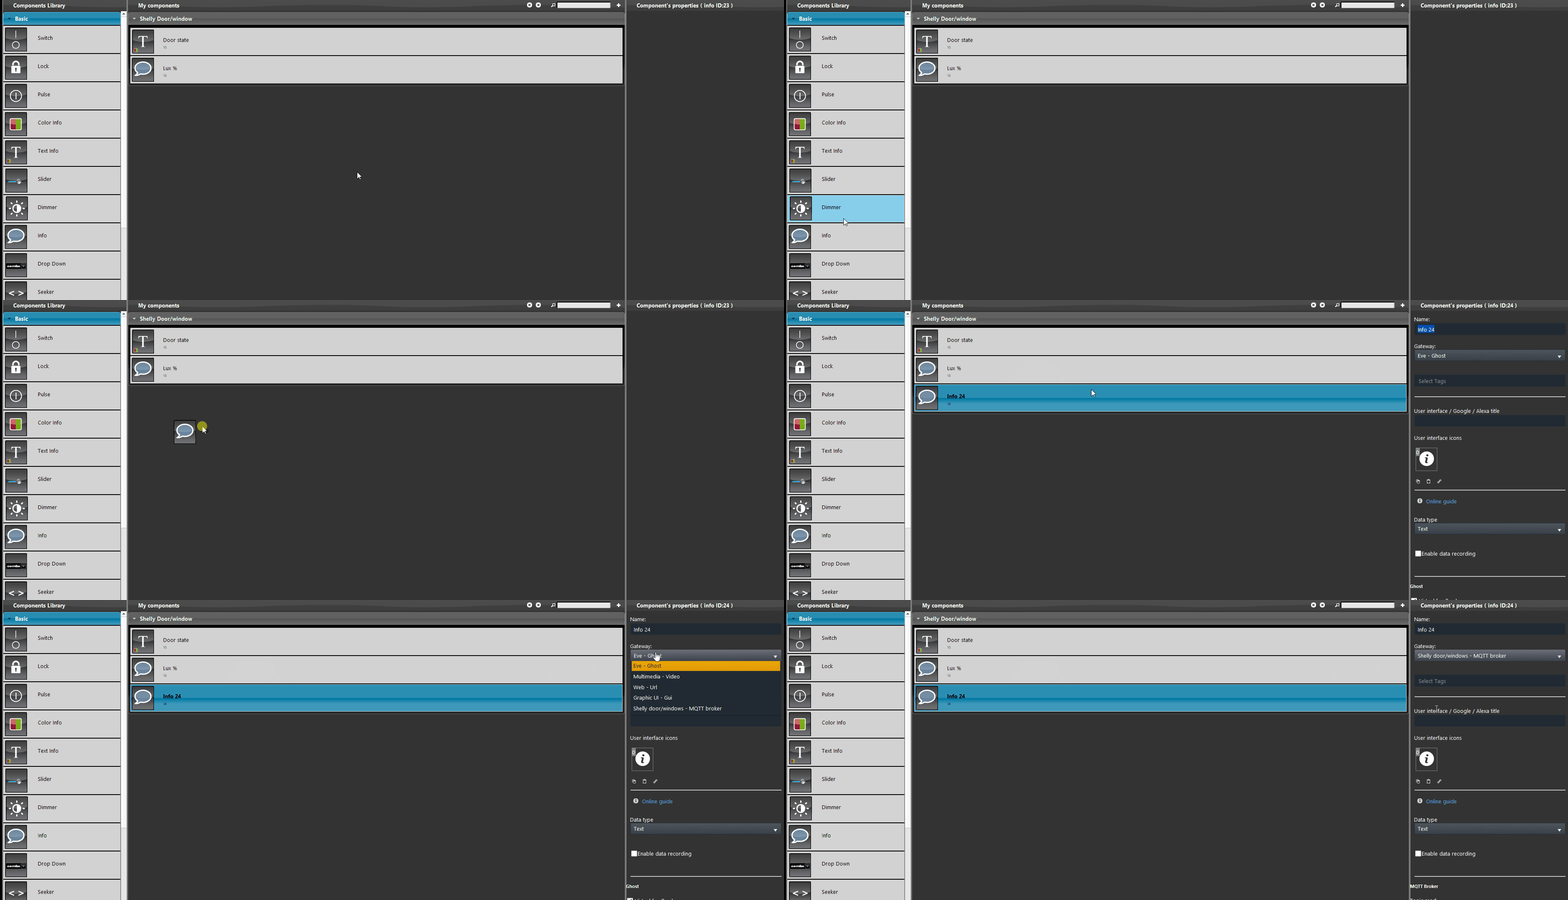
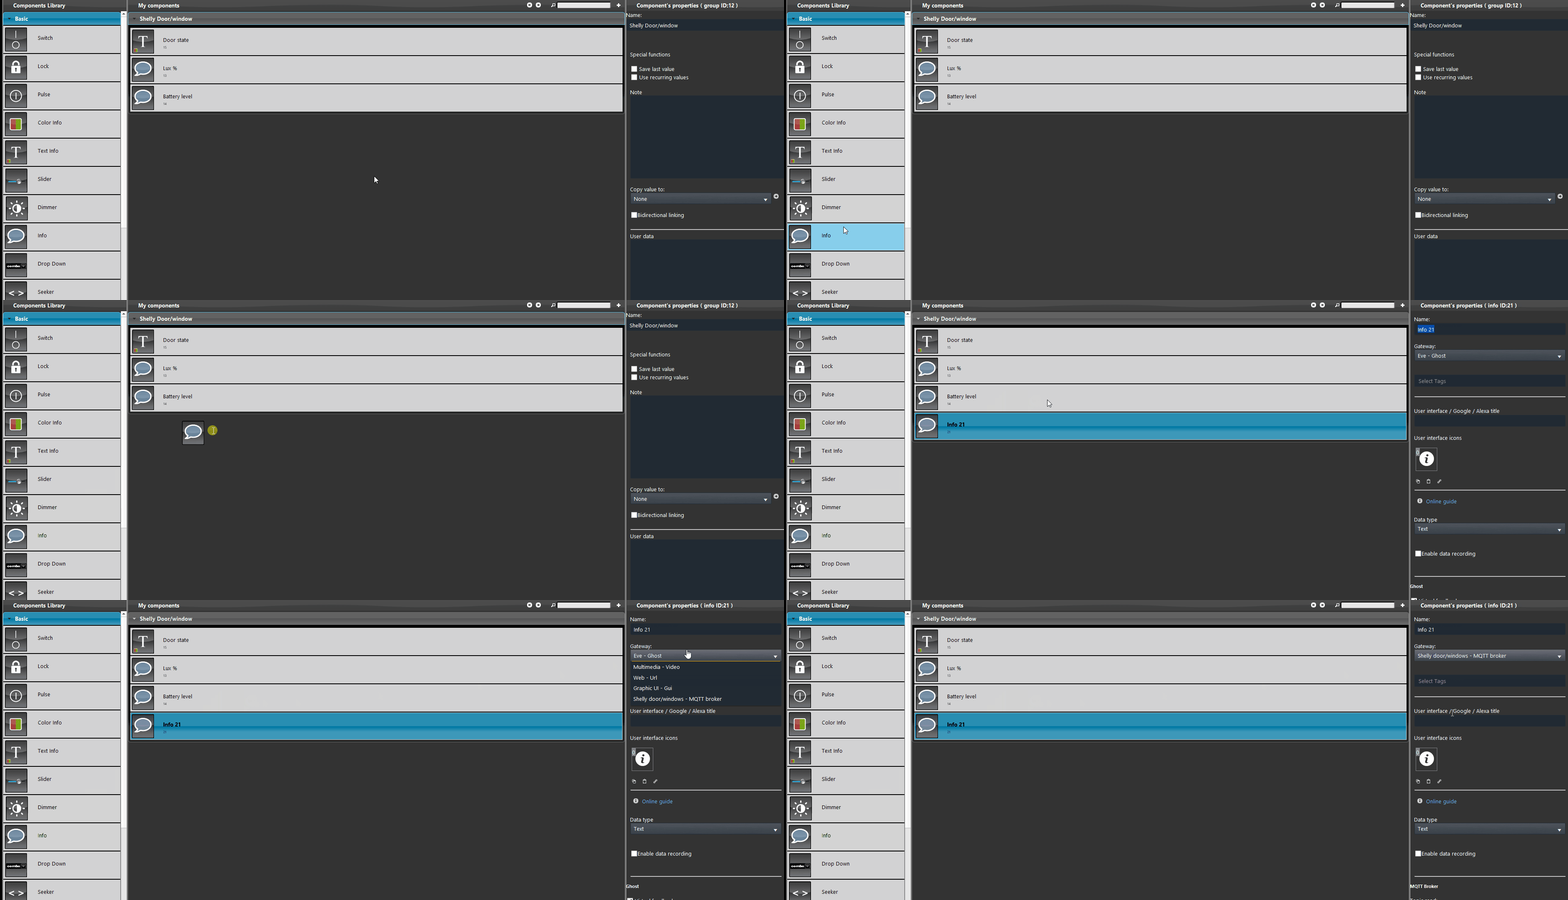
To get the lux percentage from the shelly device, add a new Info component inside the component section in EVE Manager Pro and set its gateway to the MQTT one created earlier.
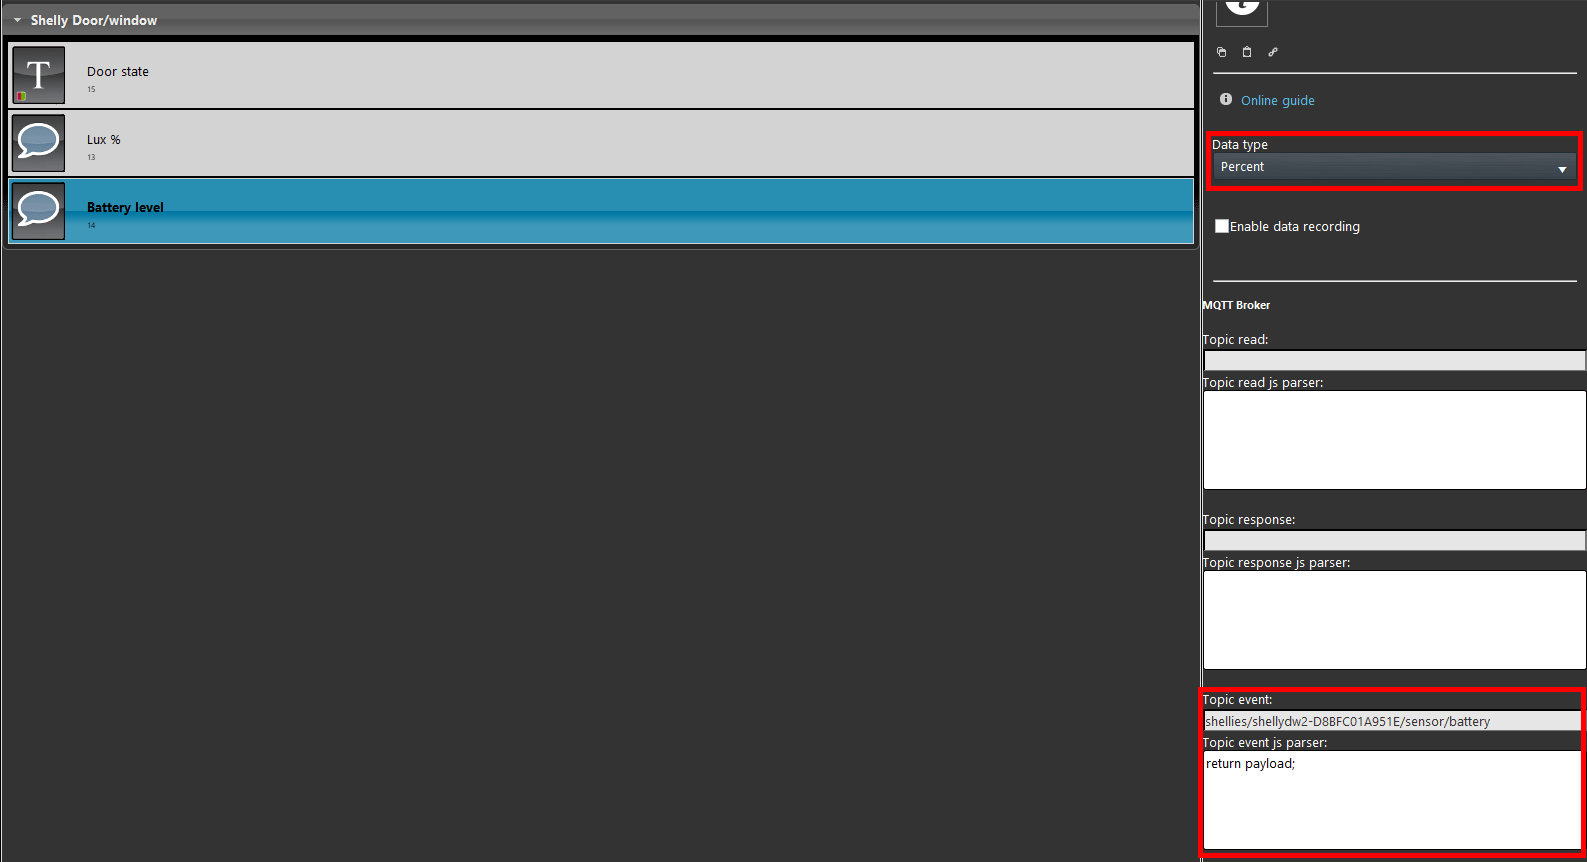
Now lets set up the Info component that will return the battery level value coming from the shelly device.
So add a new Info component inside the project and set its gateway to the MQTT one.
Topic: shellies/shellydw2-<deviceiD>/sensor/battery
Lets set up the topic that will return the battery level of the shelly device. In order to display the value as a percentage select “percentage” as mesurement unit from the data type’s drop down menu inside the info component properties.
By clicking this link you will be able to consult the topic configuration.
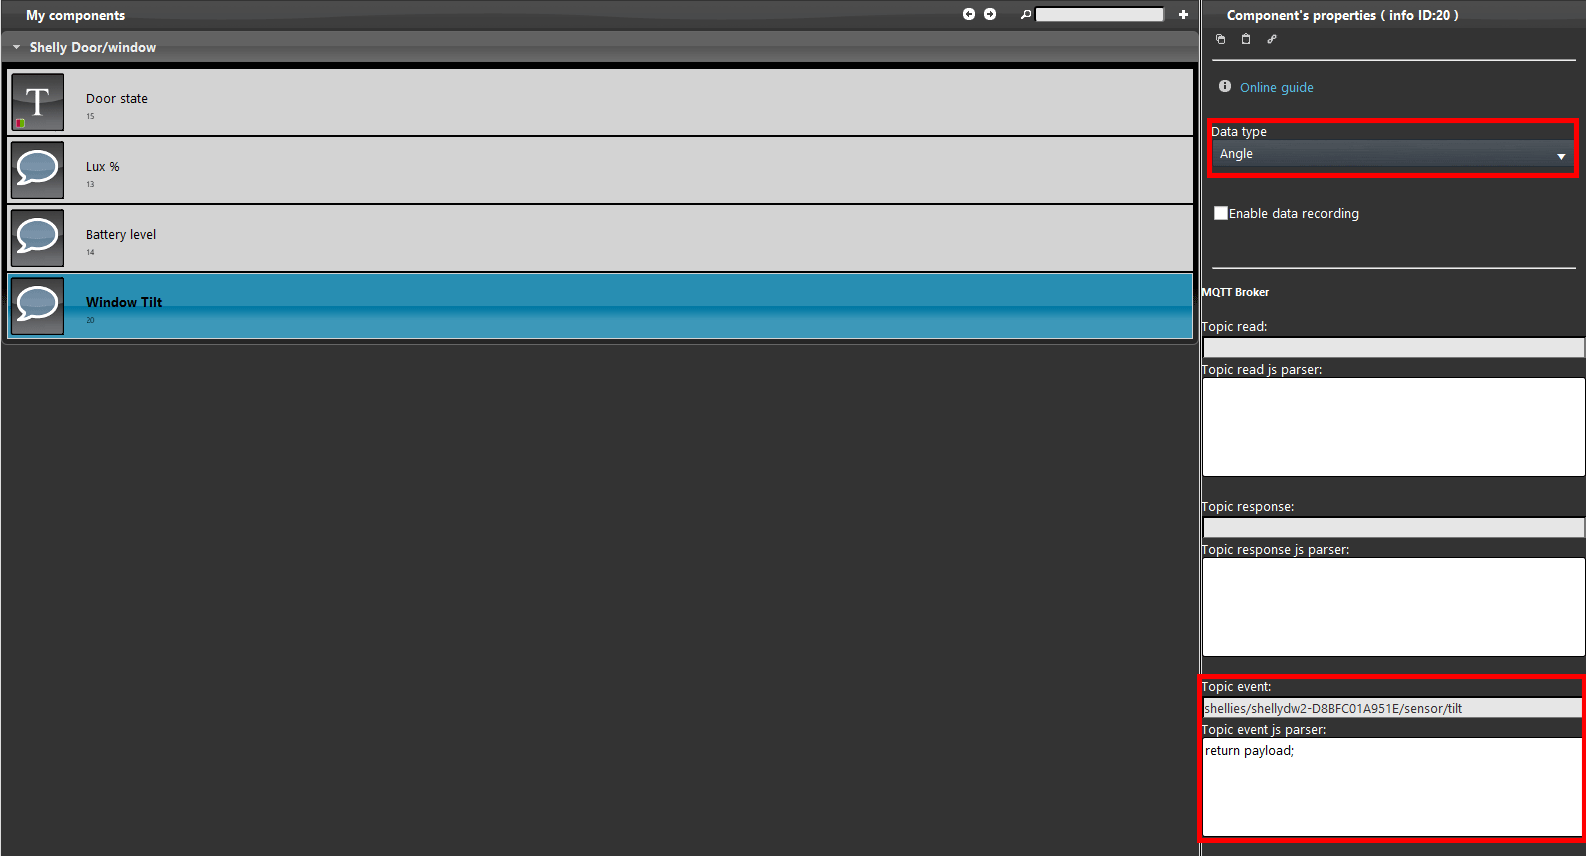
Lets set up the component that will return the tilting value coming from the shelly device. Add a new Info component inside your project and set it up with the MQTT protocol by selecting it from the gateway menu on top of the component’s properties.
Topic: shellies/shellydw2-<deviceiD>/sensor/tilt
Now lets set up the topic that will retrieve the value pubblished from the shelly device. This value will be returned as a integer value, in order to display it as a “°” you need to select the right meurement unit from the data type drop down inside the info component properties.
By clicking this link you will be able to consult the topic configuration.
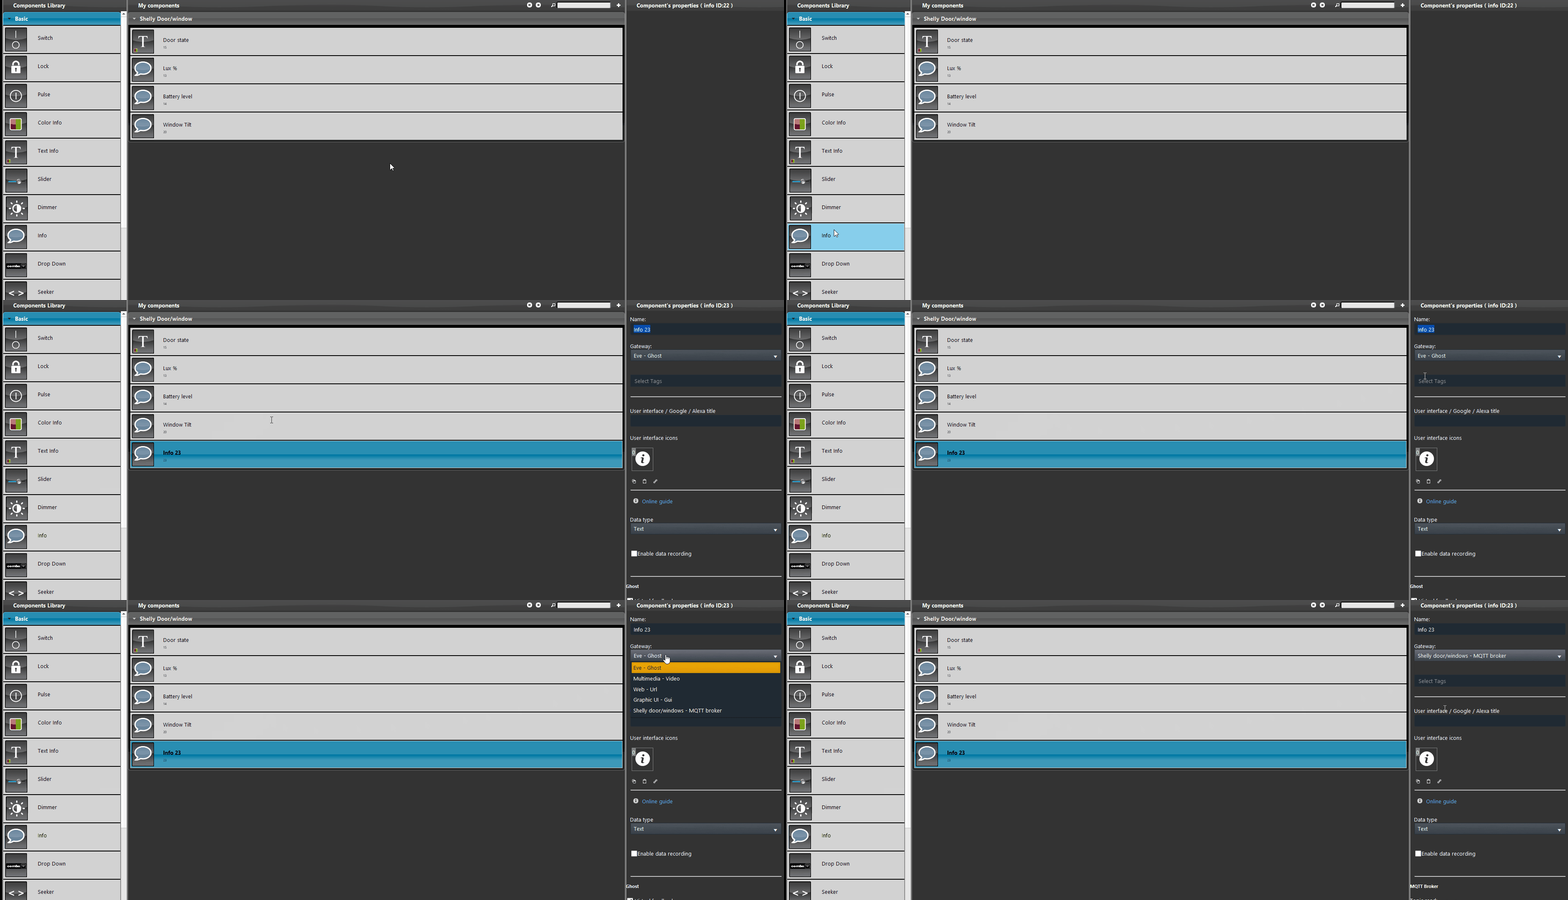
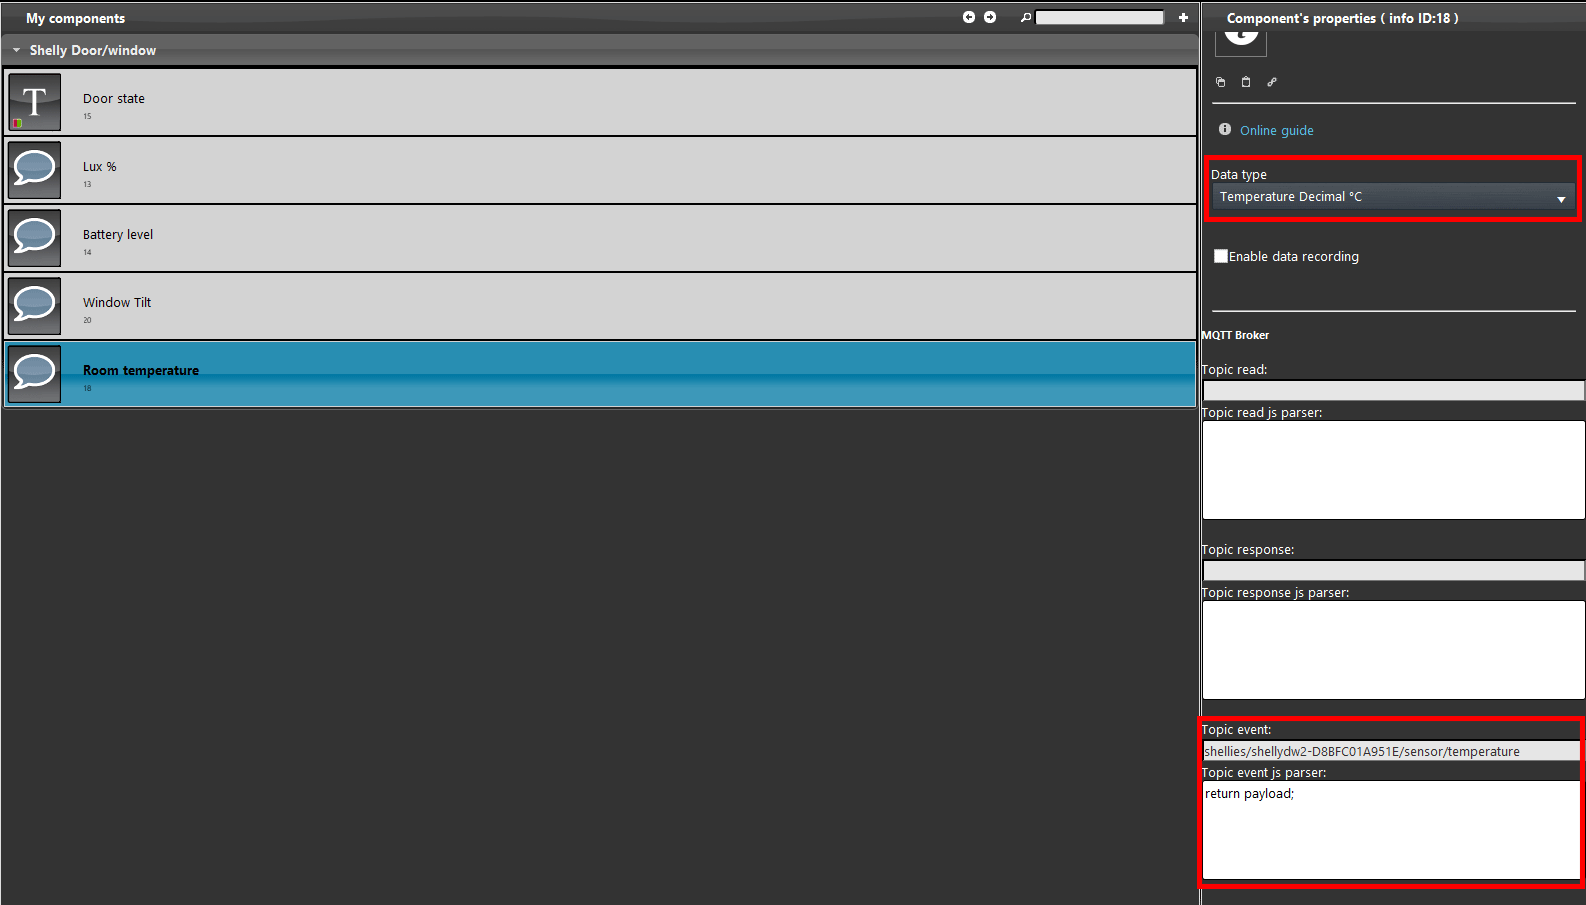
Now lets set up the component that will retreive the temperature value pubblished from the shelly device. Add a new Info component inside the project and set the MQTT protocol by selecting it from the gateway drop down menu inside the component’s properties.
Topic: shellies/shellydw2-<deviceiD>/sensor/temperature
Now lets set up the topic information, This topic will return the value pubblished as decimals from the shelly device.
By clicking this link you will be able to consult the topic configuration.
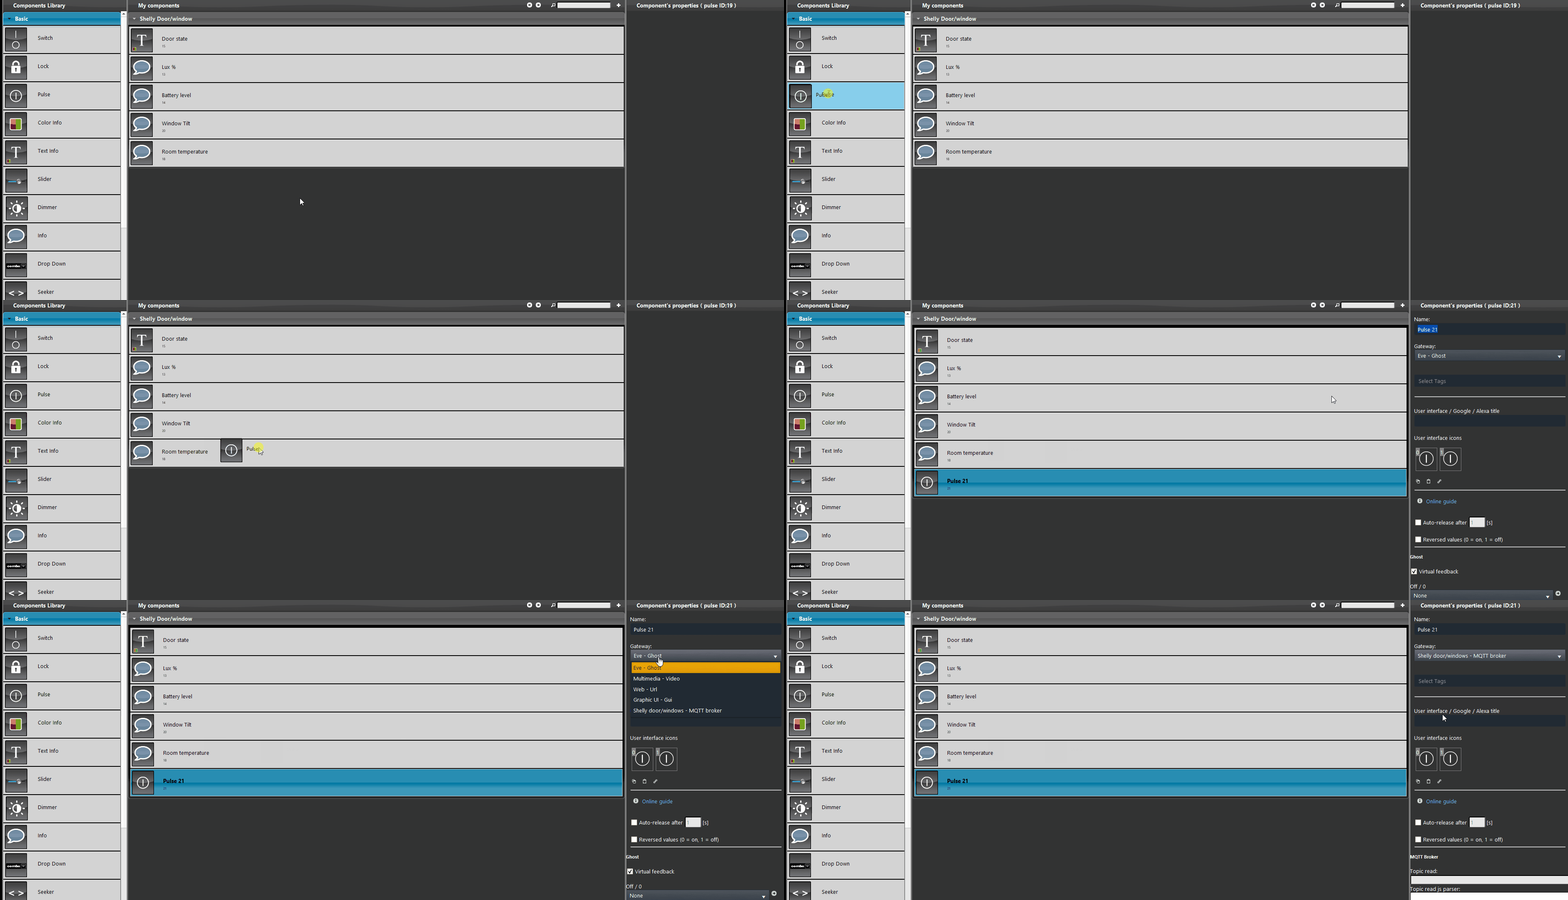
As last but not least lets set up the Vibration detection, add a new Pulse component inside the components section and set its protocol to the MQTT one we have create at the beggining of the guide by selecting it from the gateway drop down menu inside the Pulse component’s properties.
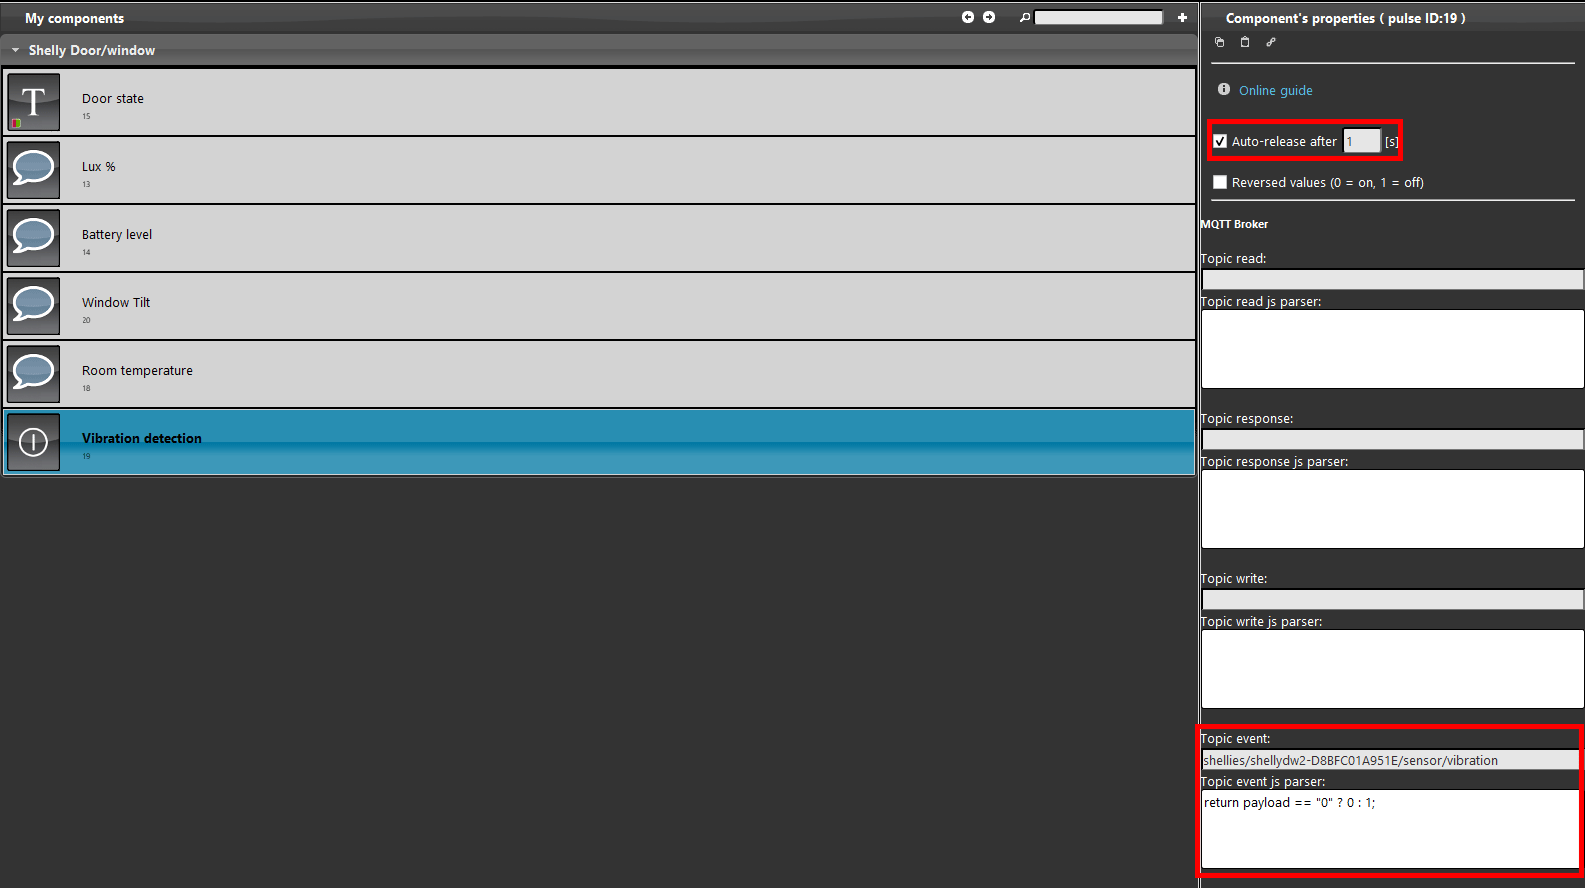
Topic: shellies/shellydw2-<deviceID>/sensor/vibration
Then lets set up the topic, this time the topic other then only retreive the if there are vibration or not, it will change the state to the pulse component. Then to be able to “reset” the status pf the pulse component each time the the shelly device triggers it, set a auto release time from the Auto release setting section inside the pulse component properties, it is suggested to set the Auto release time to 1 second.
By clicking this link you will be able to consult the topic configuration.
HOW TO SEND NOTIFICATION WHEN A VIBRATION IS DETECTED
INTRODUCTION
If the option is enabled the shelly device door window 2 can send values of 0 if no vibration is detected or 1 if a vibration has been detected.
Notification module set up
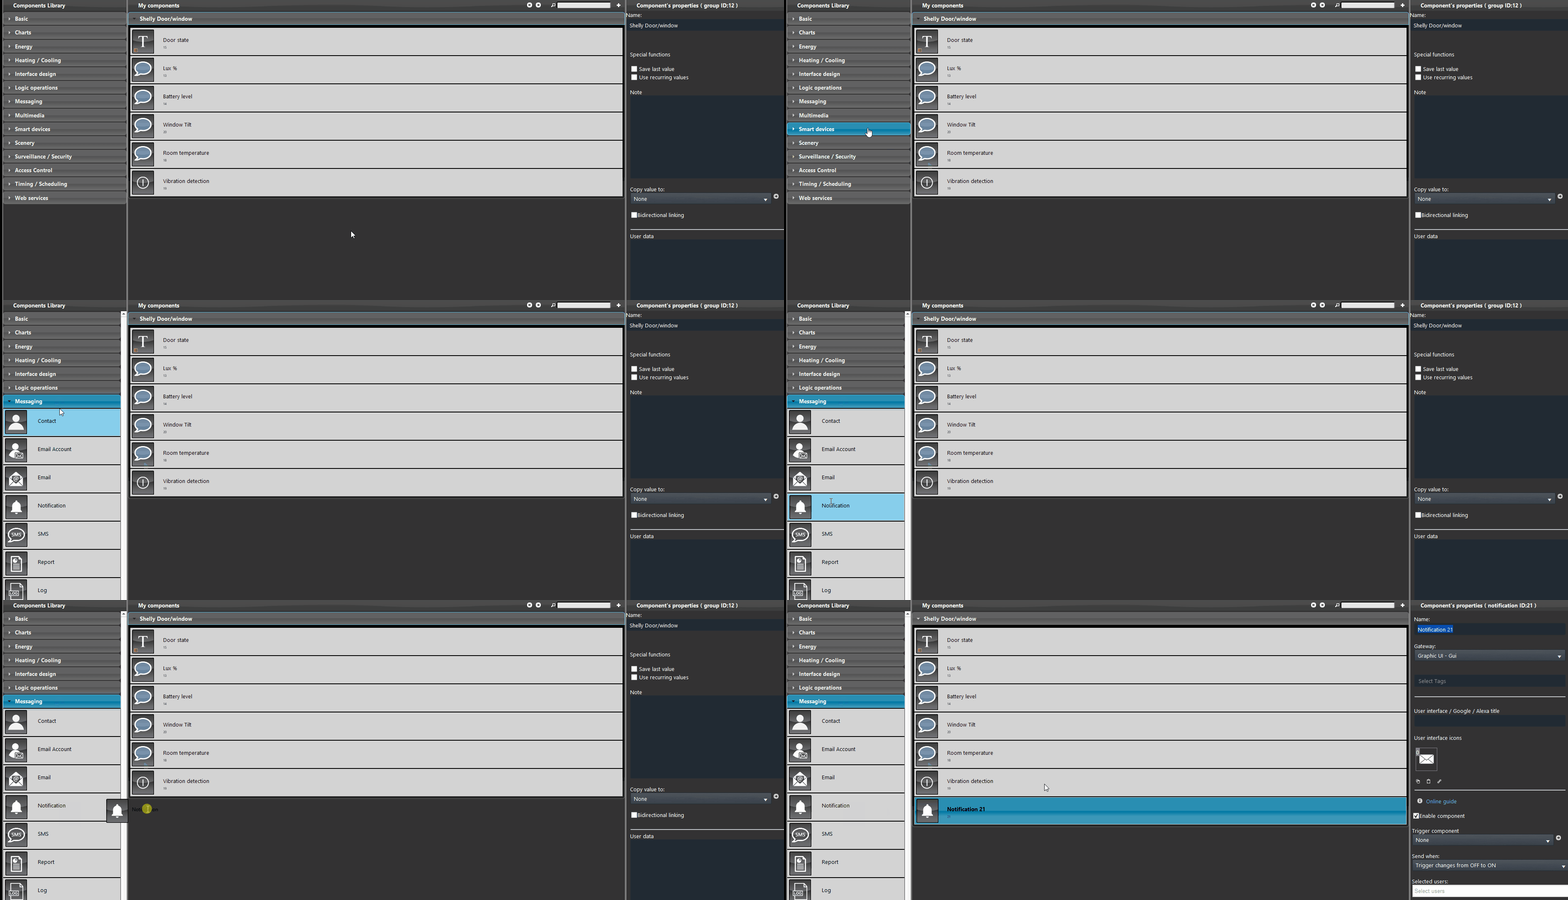
Drag and drop a Notification component from the messaging tab on the left menu of the components section.
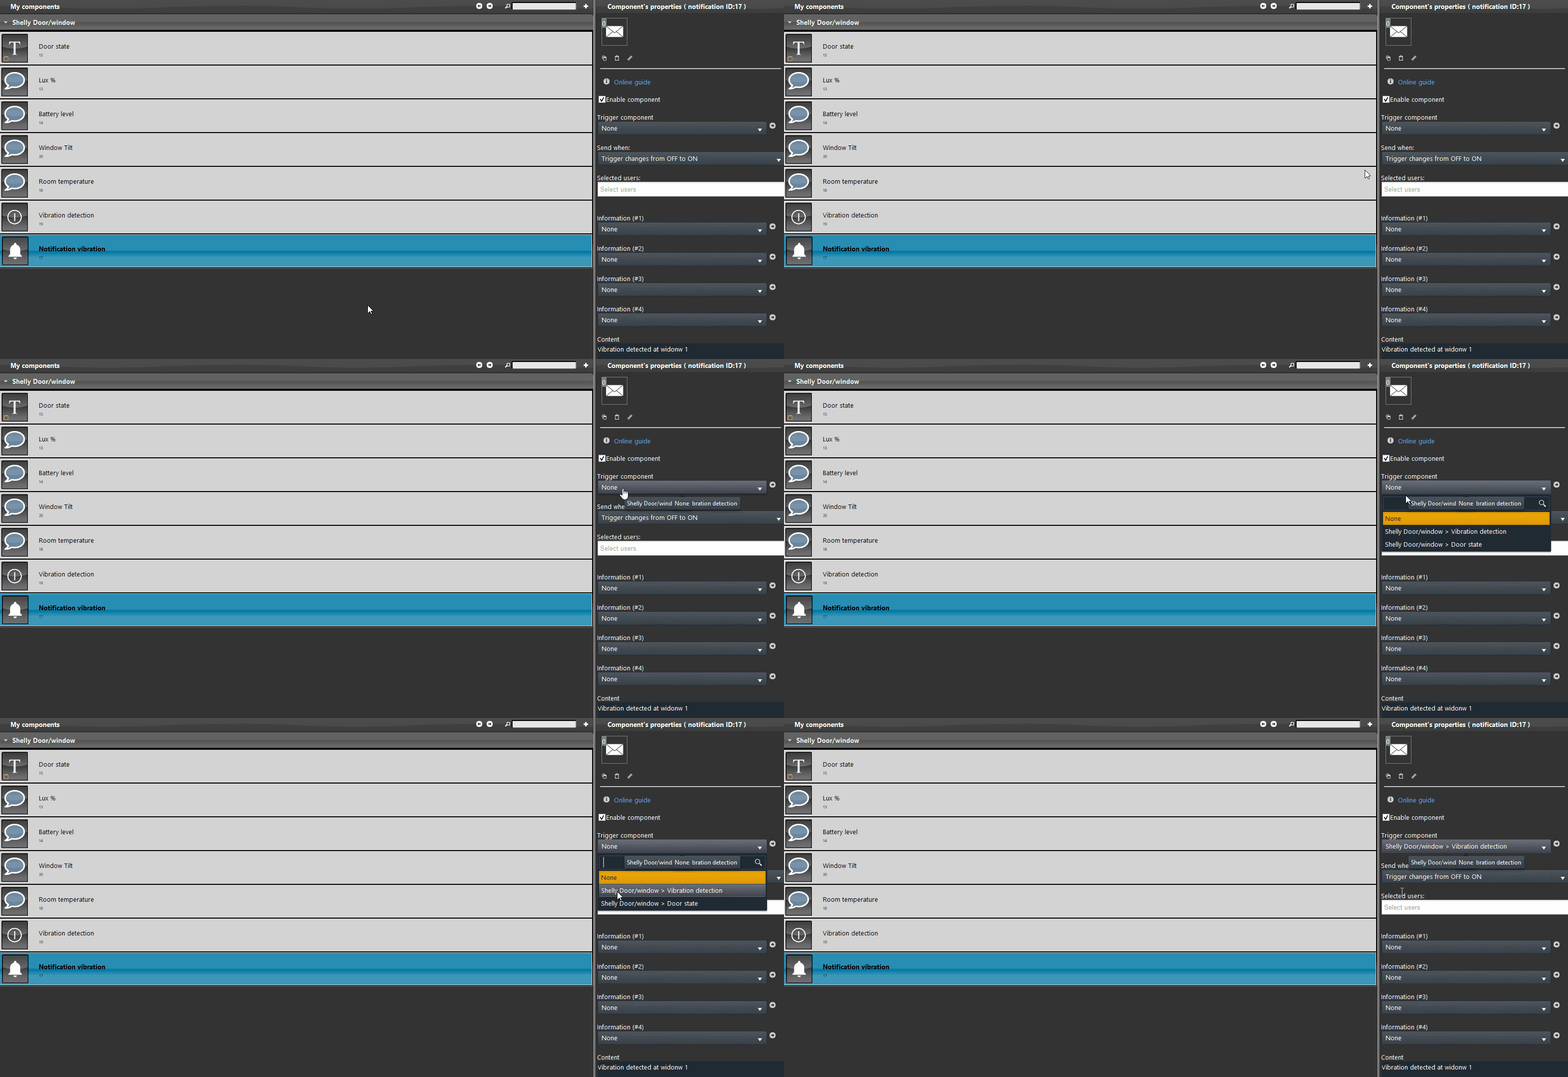
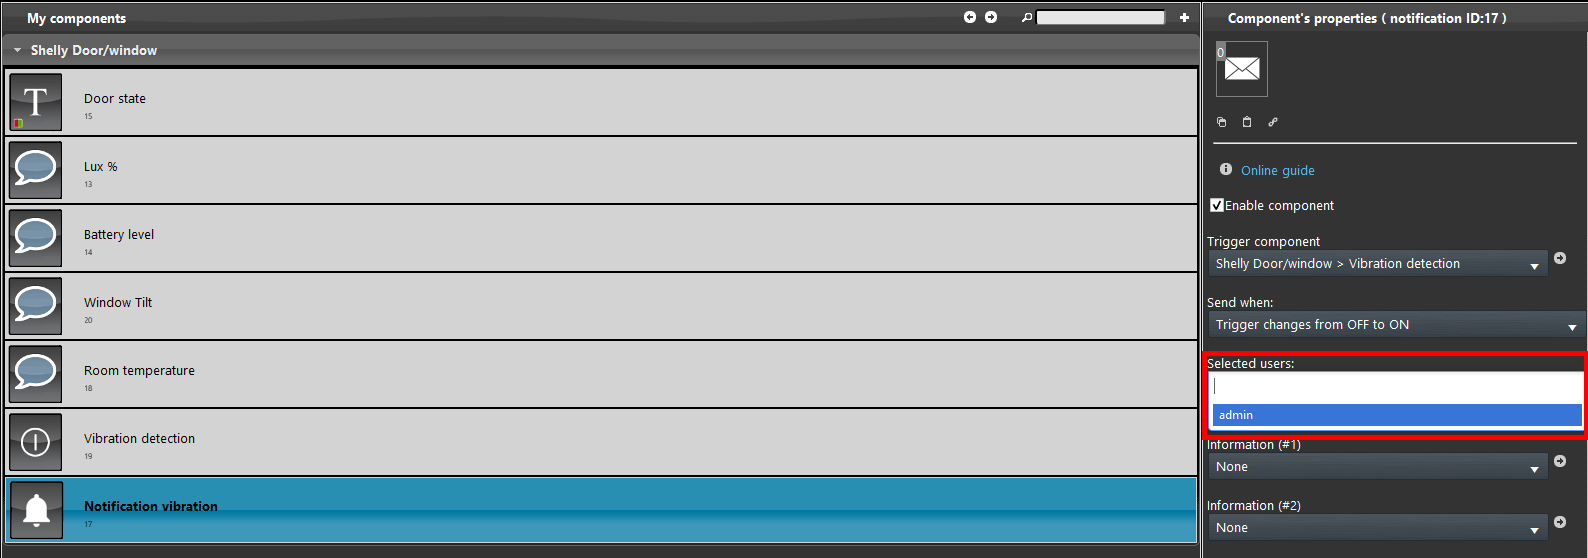
Now select the pulse component from the trigger component drop drop down inside the Notification component’s properties.
Now select the user that will receive the notification when a vibration will be detected from the shelly device. Click on the “Select users” drop down menu and select the user you want.
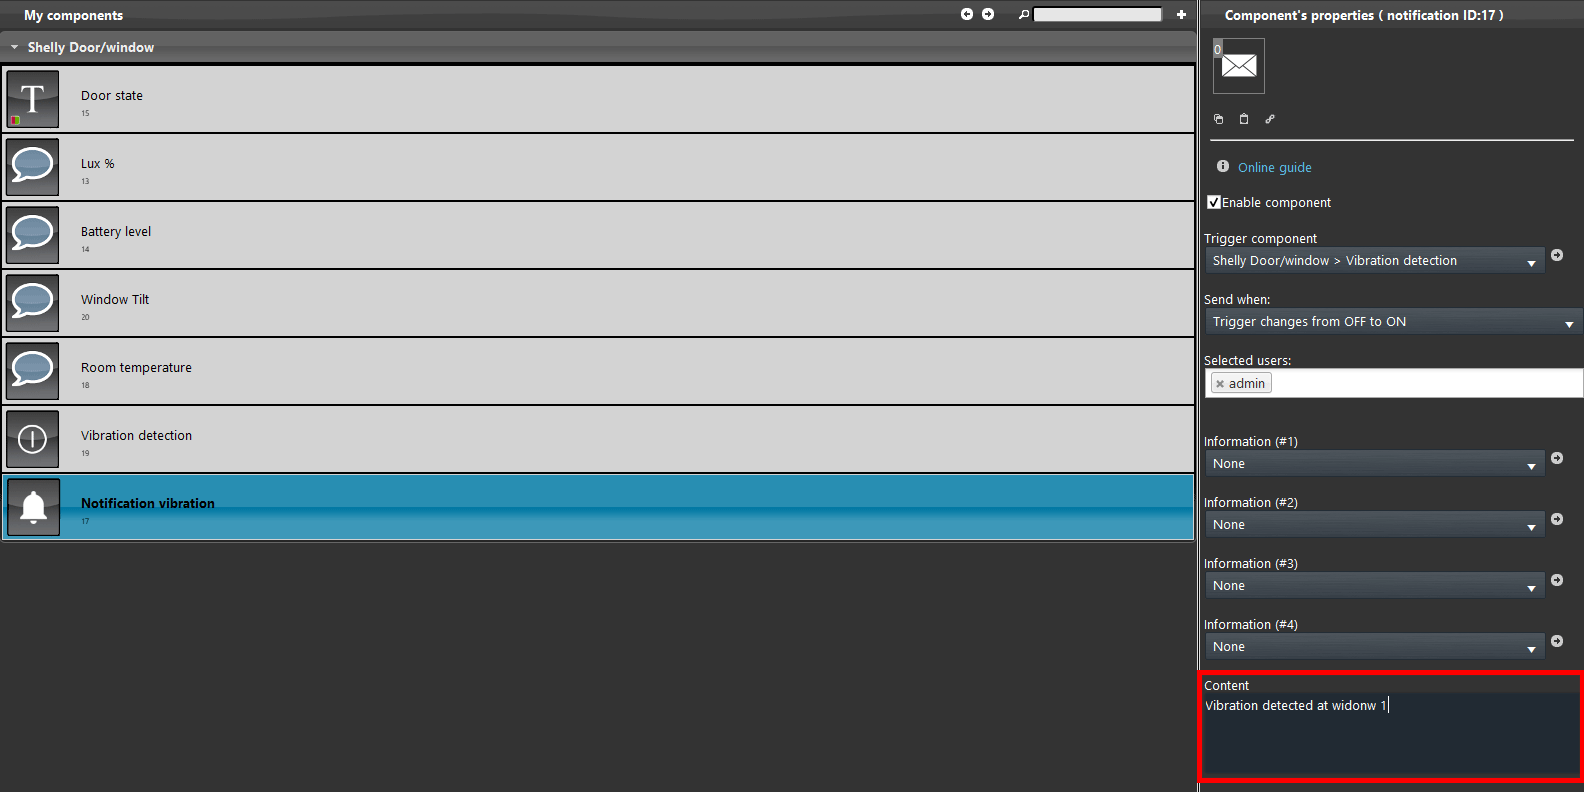
Once you select the user, it will be needed to set up the content that will appear when the notification is received from the users. You are free to write anything on the content field of text inside the Notification component properties.
This will concludes the configuration of the notification module.
USER INTERFACE RESULT
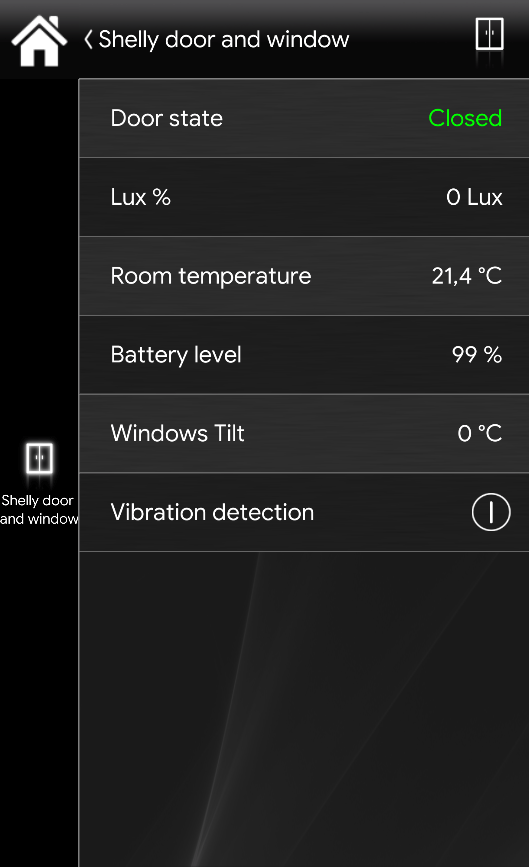
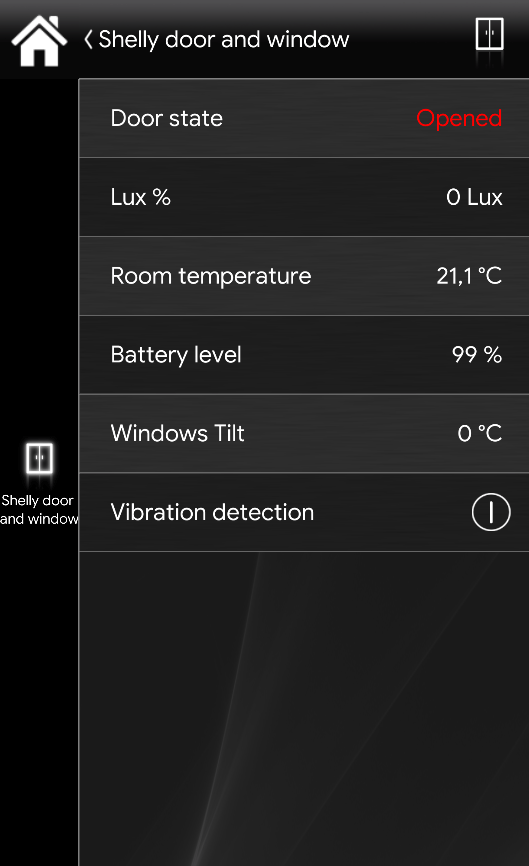
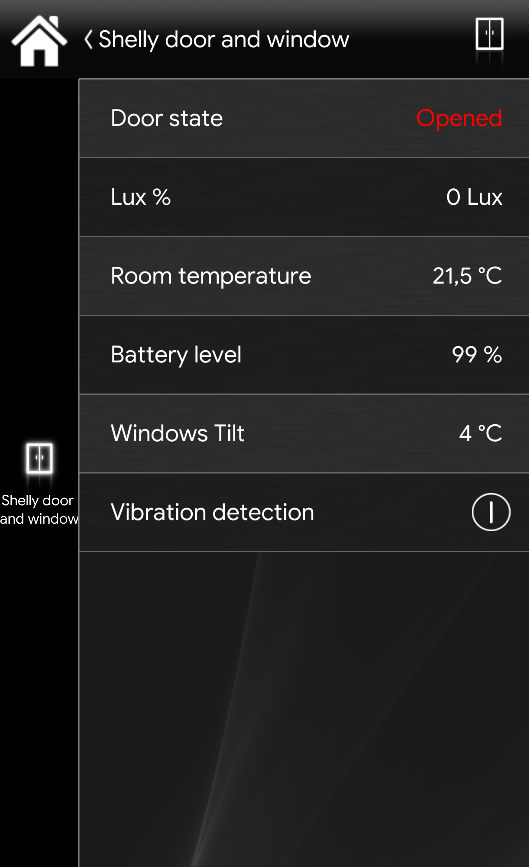
Now lets finally try all the components we have set inside the User Interface of the Home automatio App EVE Remote Plus.
Window closed
Window Opened
Tilted window
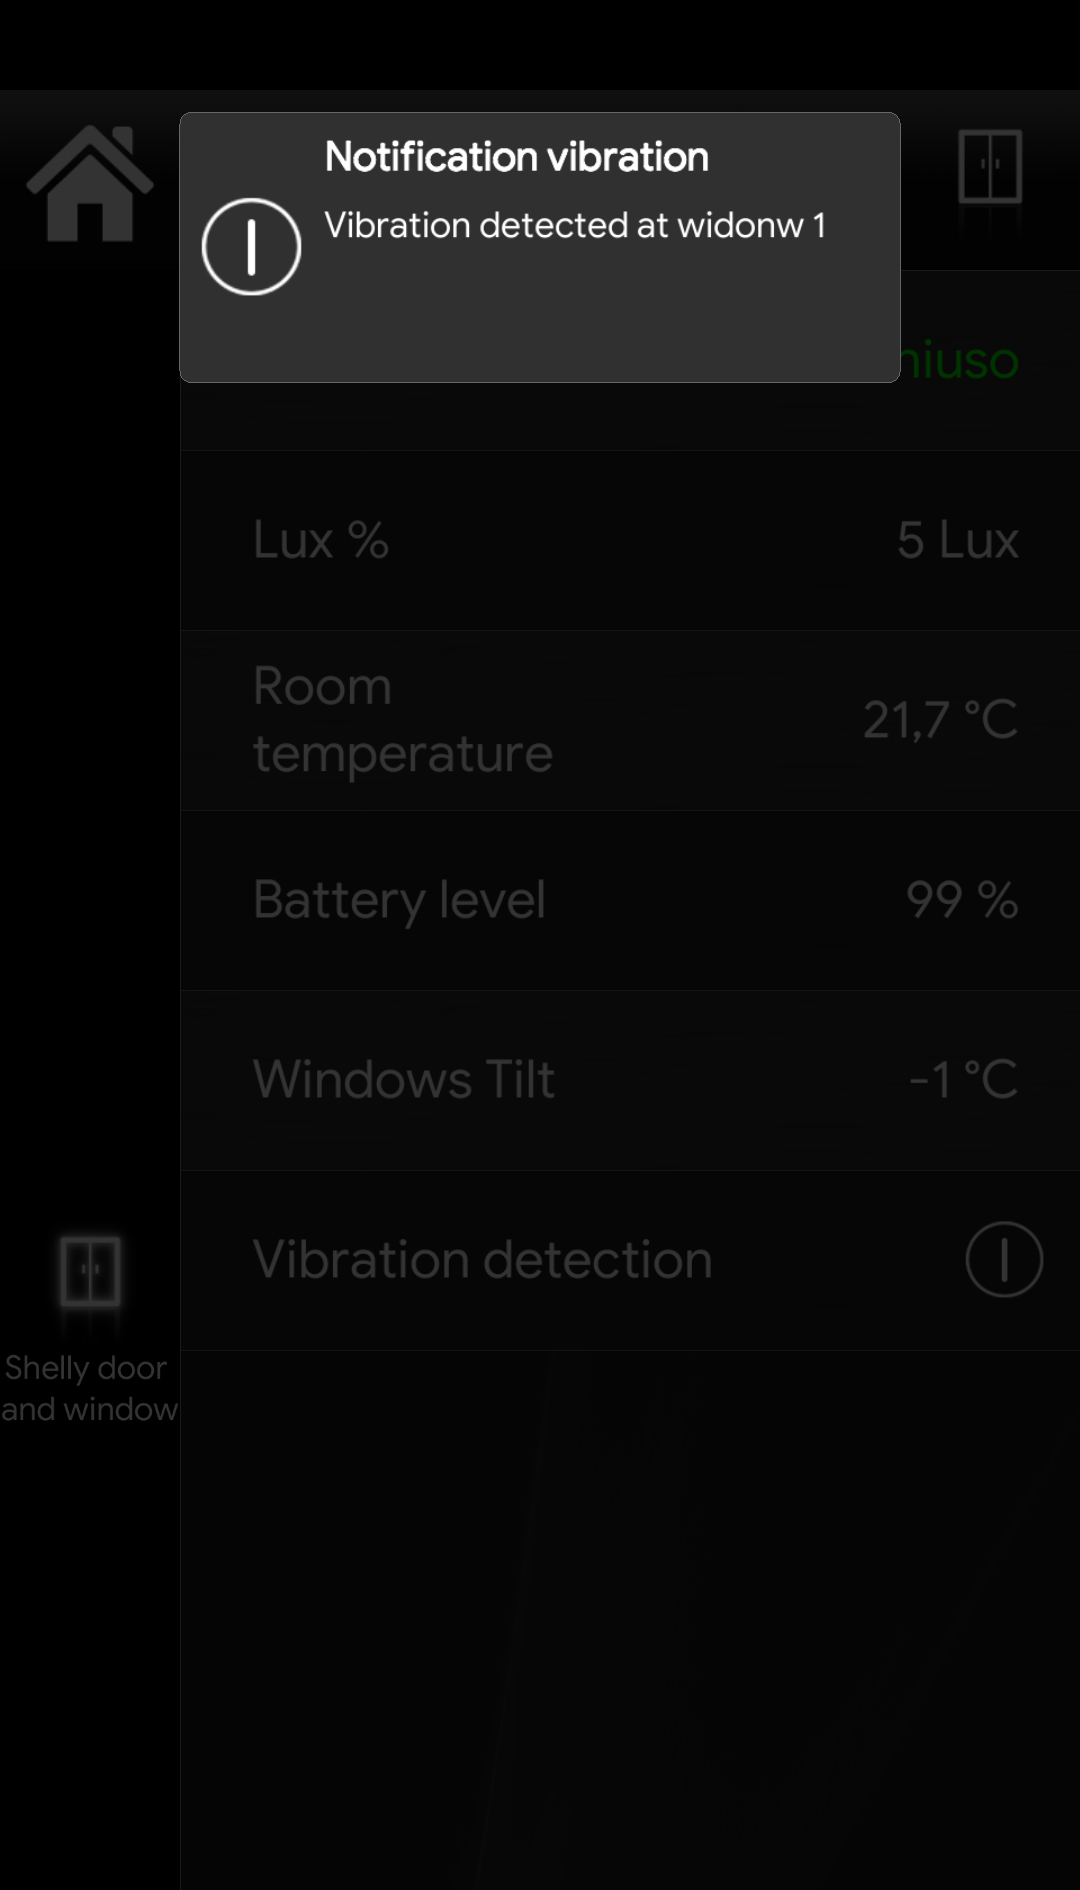
Notification Visualization
This is how the notification will be displayed inside the EVE Remote Plus APP once the shelly device detect a vibration.
TROUBLE SHOOTING
1- Make sure to have the last version available for EVE manager and Eve X1 server firmware.
2- Make sure the shelly plug is connected in your network.
3- If you can’t connect to the broker check if the X1 server has been wired correctly.


