SHELLY 2.5 INTEGRATION WITH MQTT PROTOCOL WITHIN THE ILEVIA SYSTEM
Shelly 2.5 relay function
INTRODUCTION
This Shelly 2.5 device is made to control 2 separate lights channel and to control a shutter motor. This guide will explain how to set both of the two functions that this device is capable of.
Web interface configurations
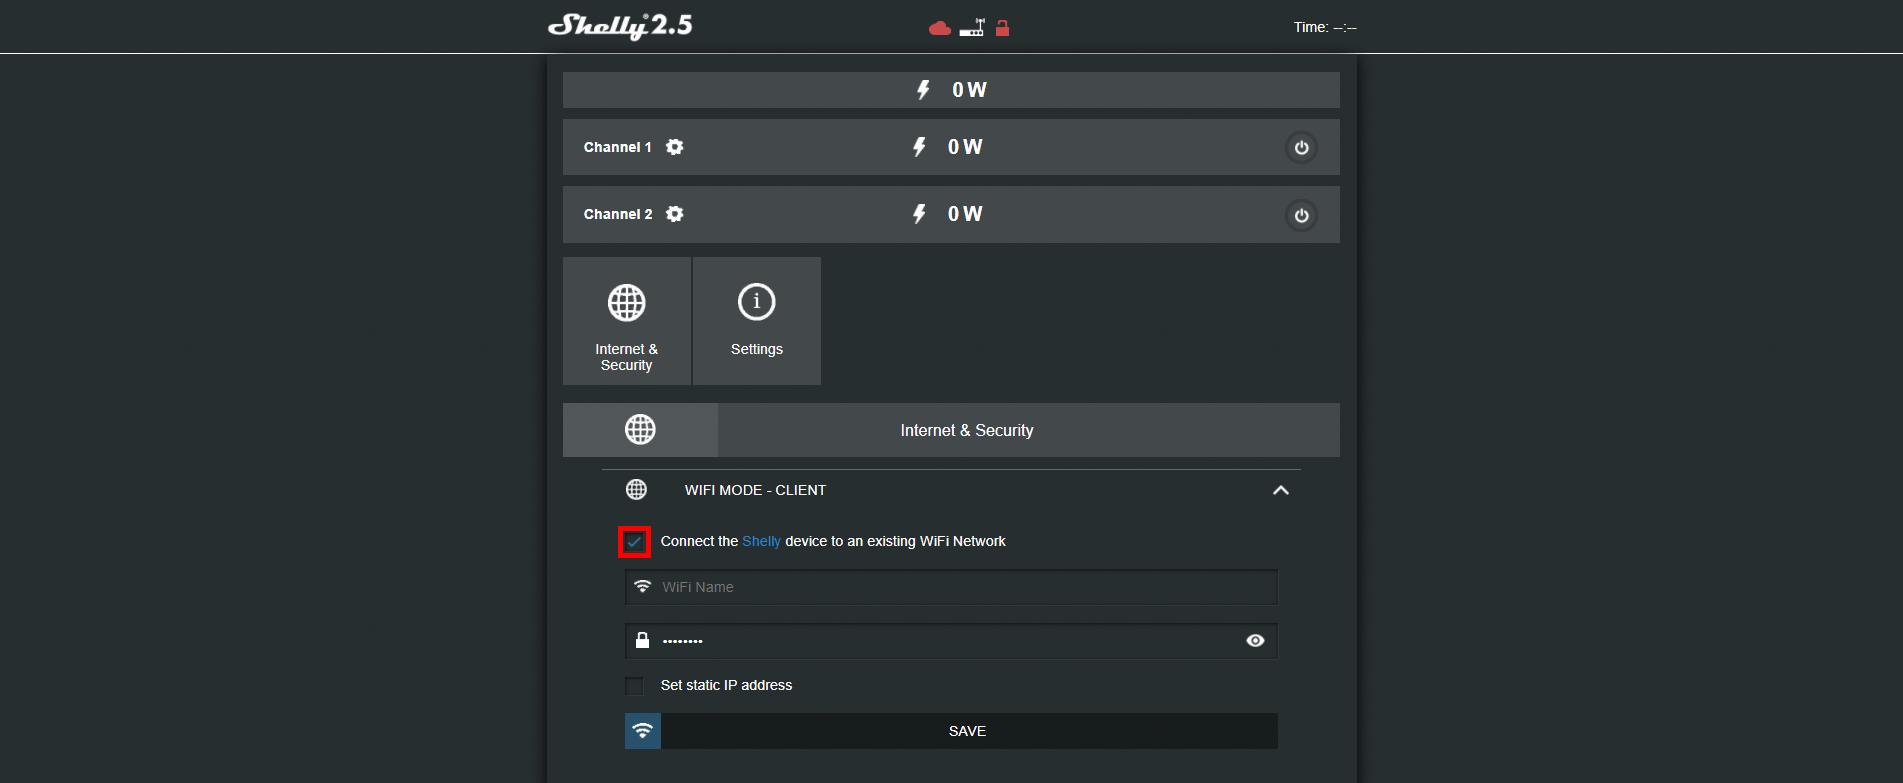
Connect to the shelly device hot spot and get inside its web interface by typing the default IP address 192.168.33.1.
Get inside the internet security setting then wifi mode client and check the box connect the shelly device to an existing WIFI network.
Put your wifi credential inside the text boxes.
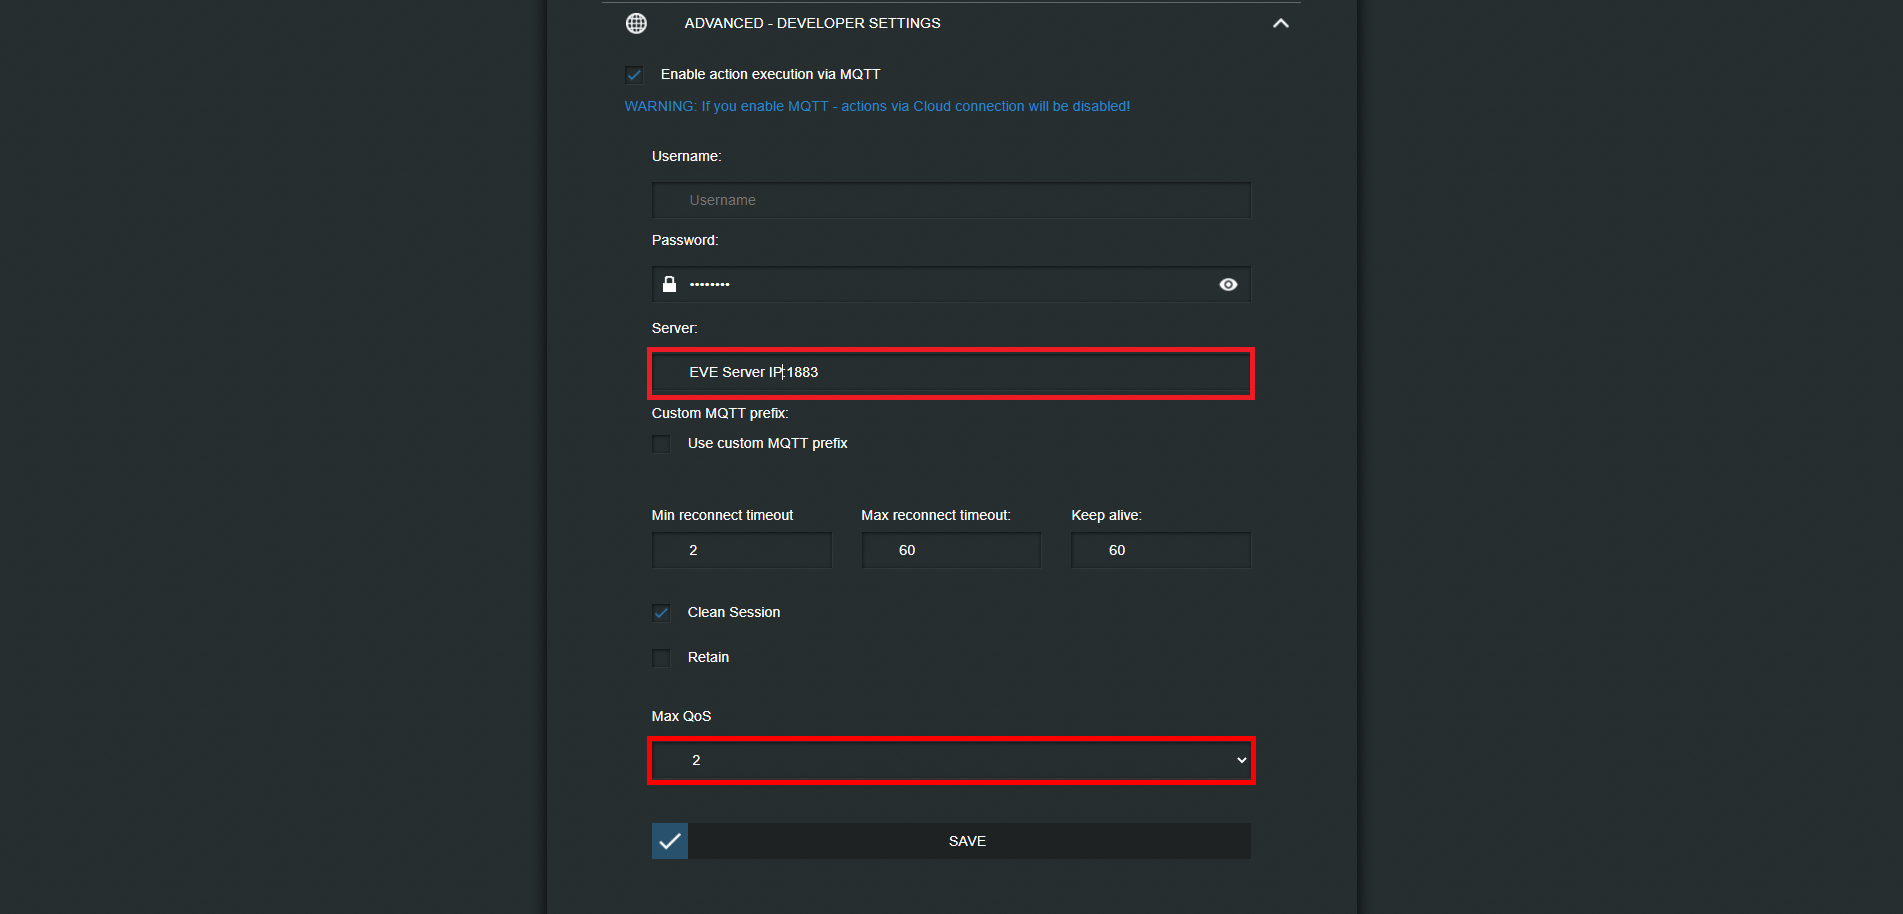
Now enable the MQTT protocol on the shelly device. Head to the internet and configuration settings and enable the “Enable action execution via MQTT” check box. It will be needed to insert the EVE Server IP address inisde the “Server” text box.
Topics confiugration:
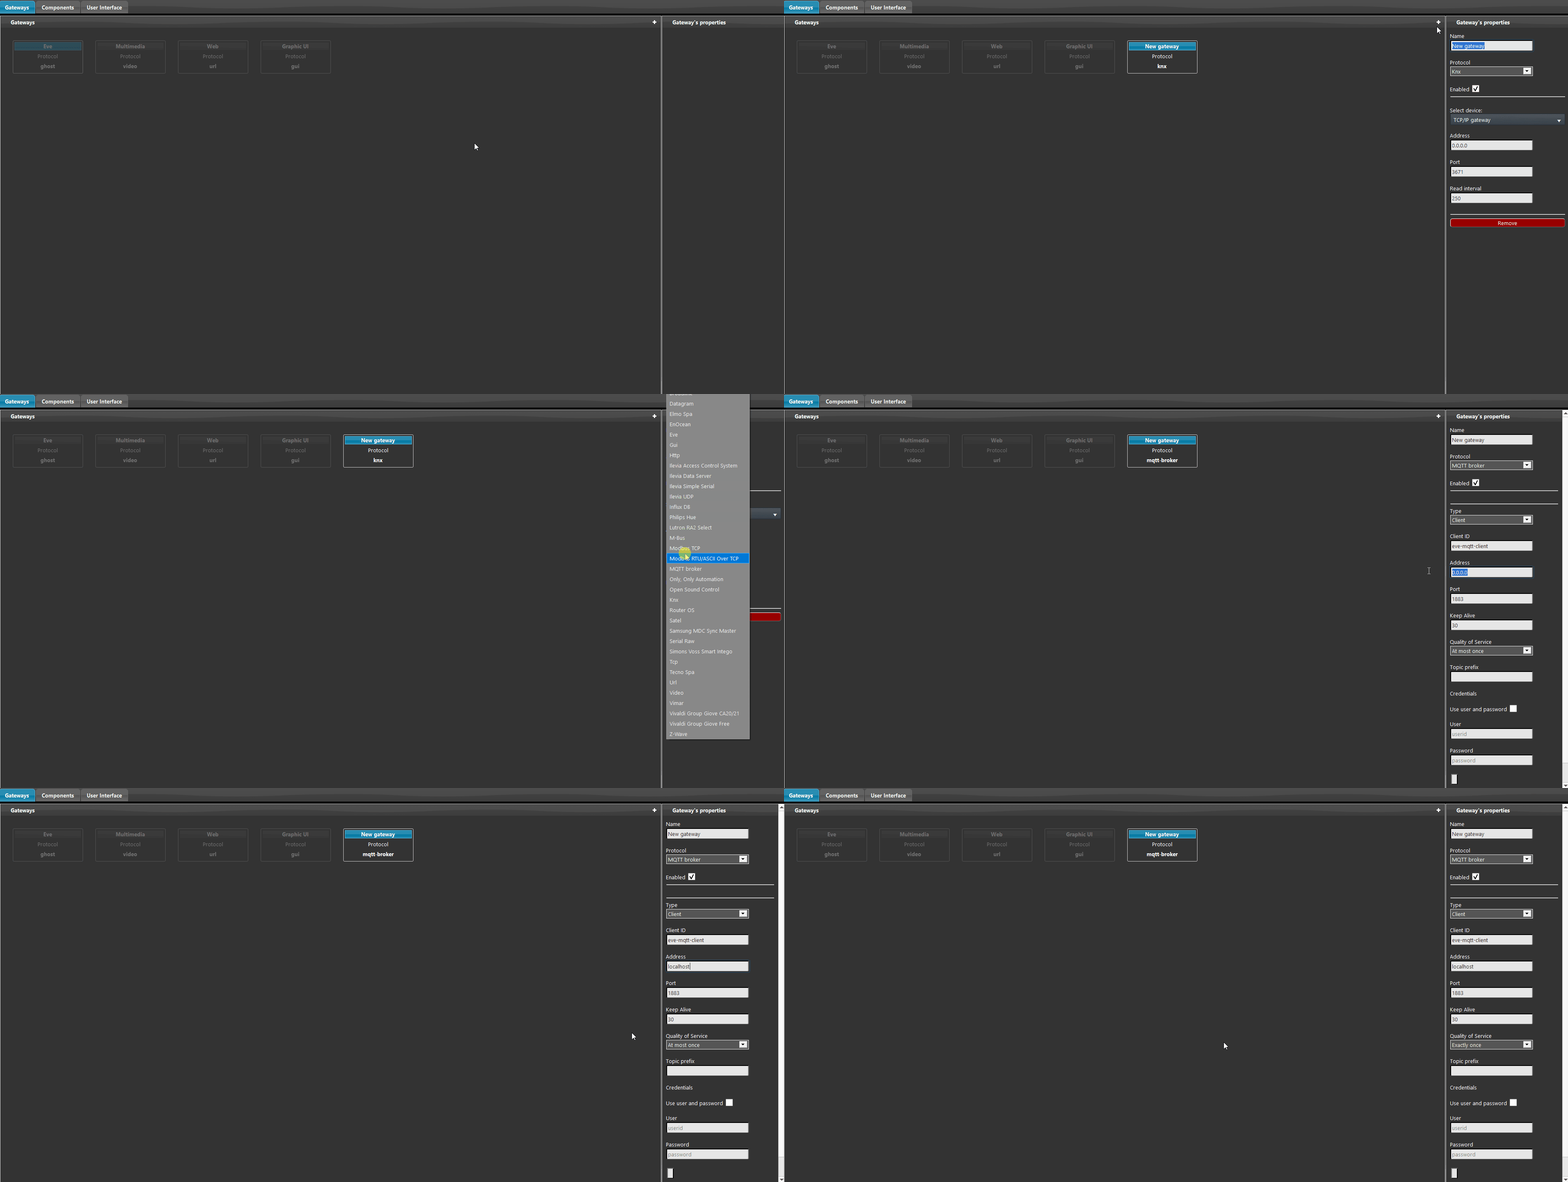
Open the Home automation software EVE Manger Pro, create a new MQTT gateway inside the gateway section. Insert the EVE Server IP address inside the “address” text field, them set the QoS towo exactly one.
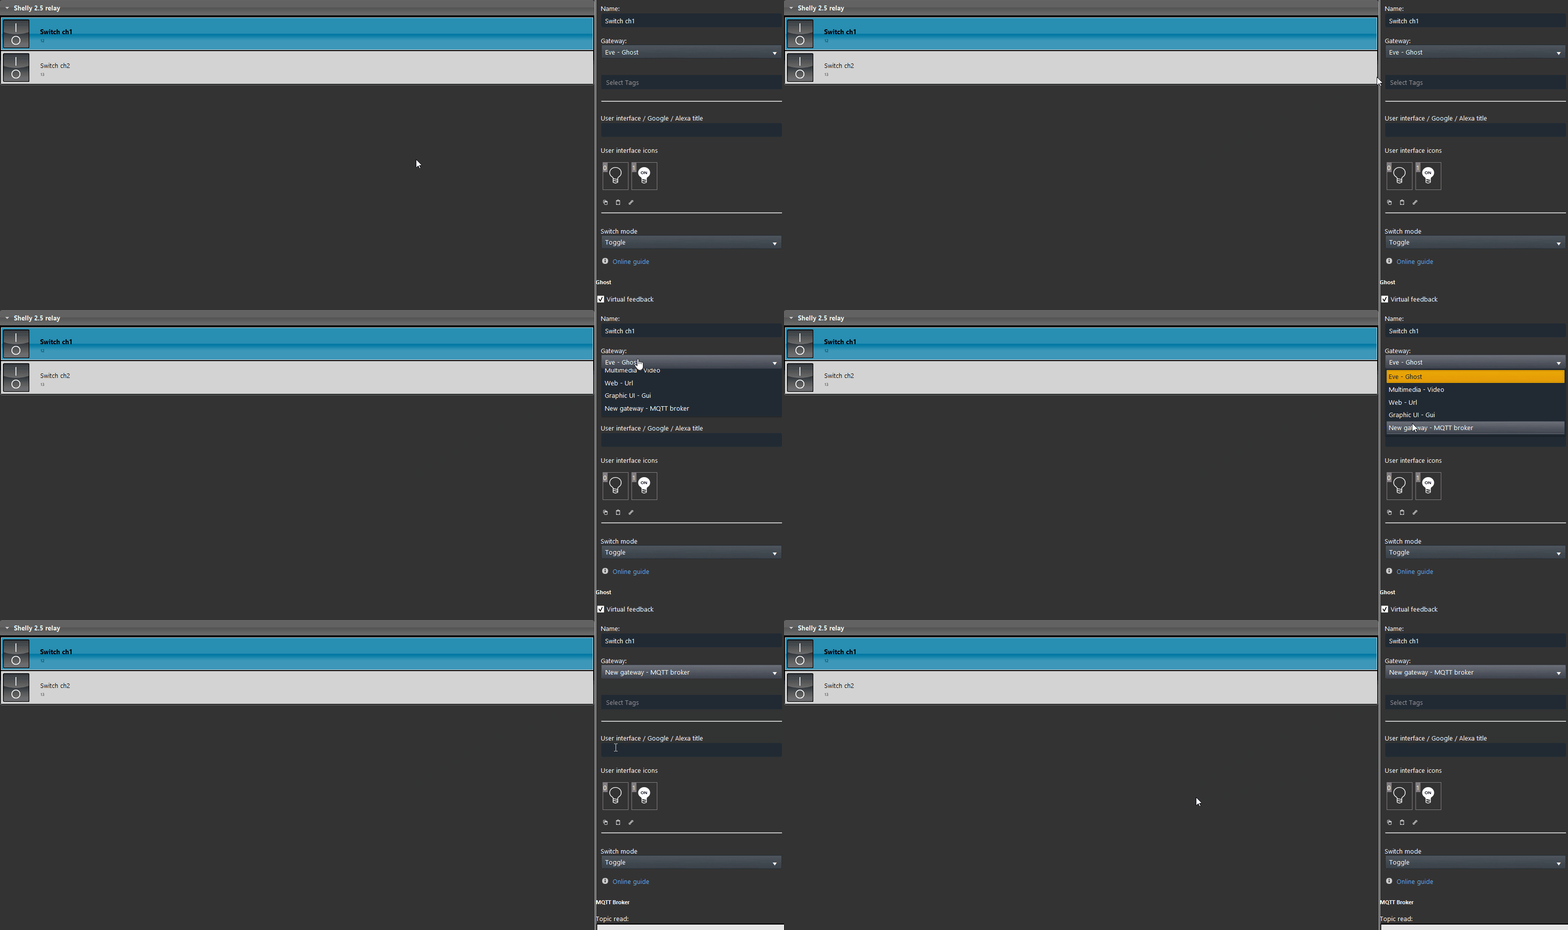
In order to set up the topic you must set the switch component’s gateway to the MQTT one we created earlier.
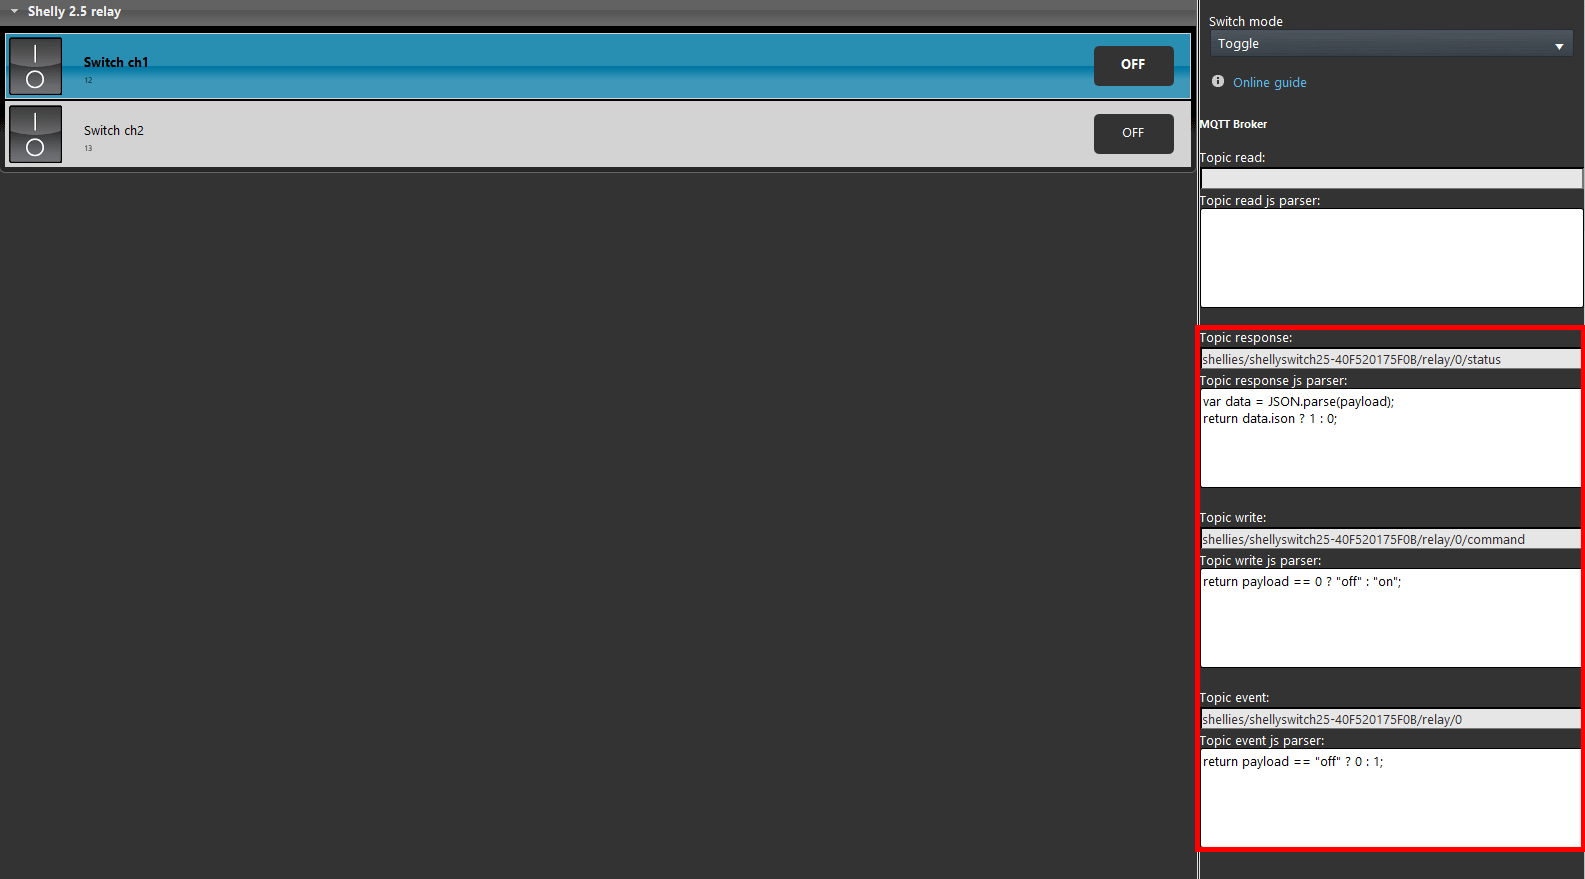
Now in order to set up the topics properly change the switch’s gateway settings to be able to insert its MQTT configurations.
Click this link to see the topic configuration.
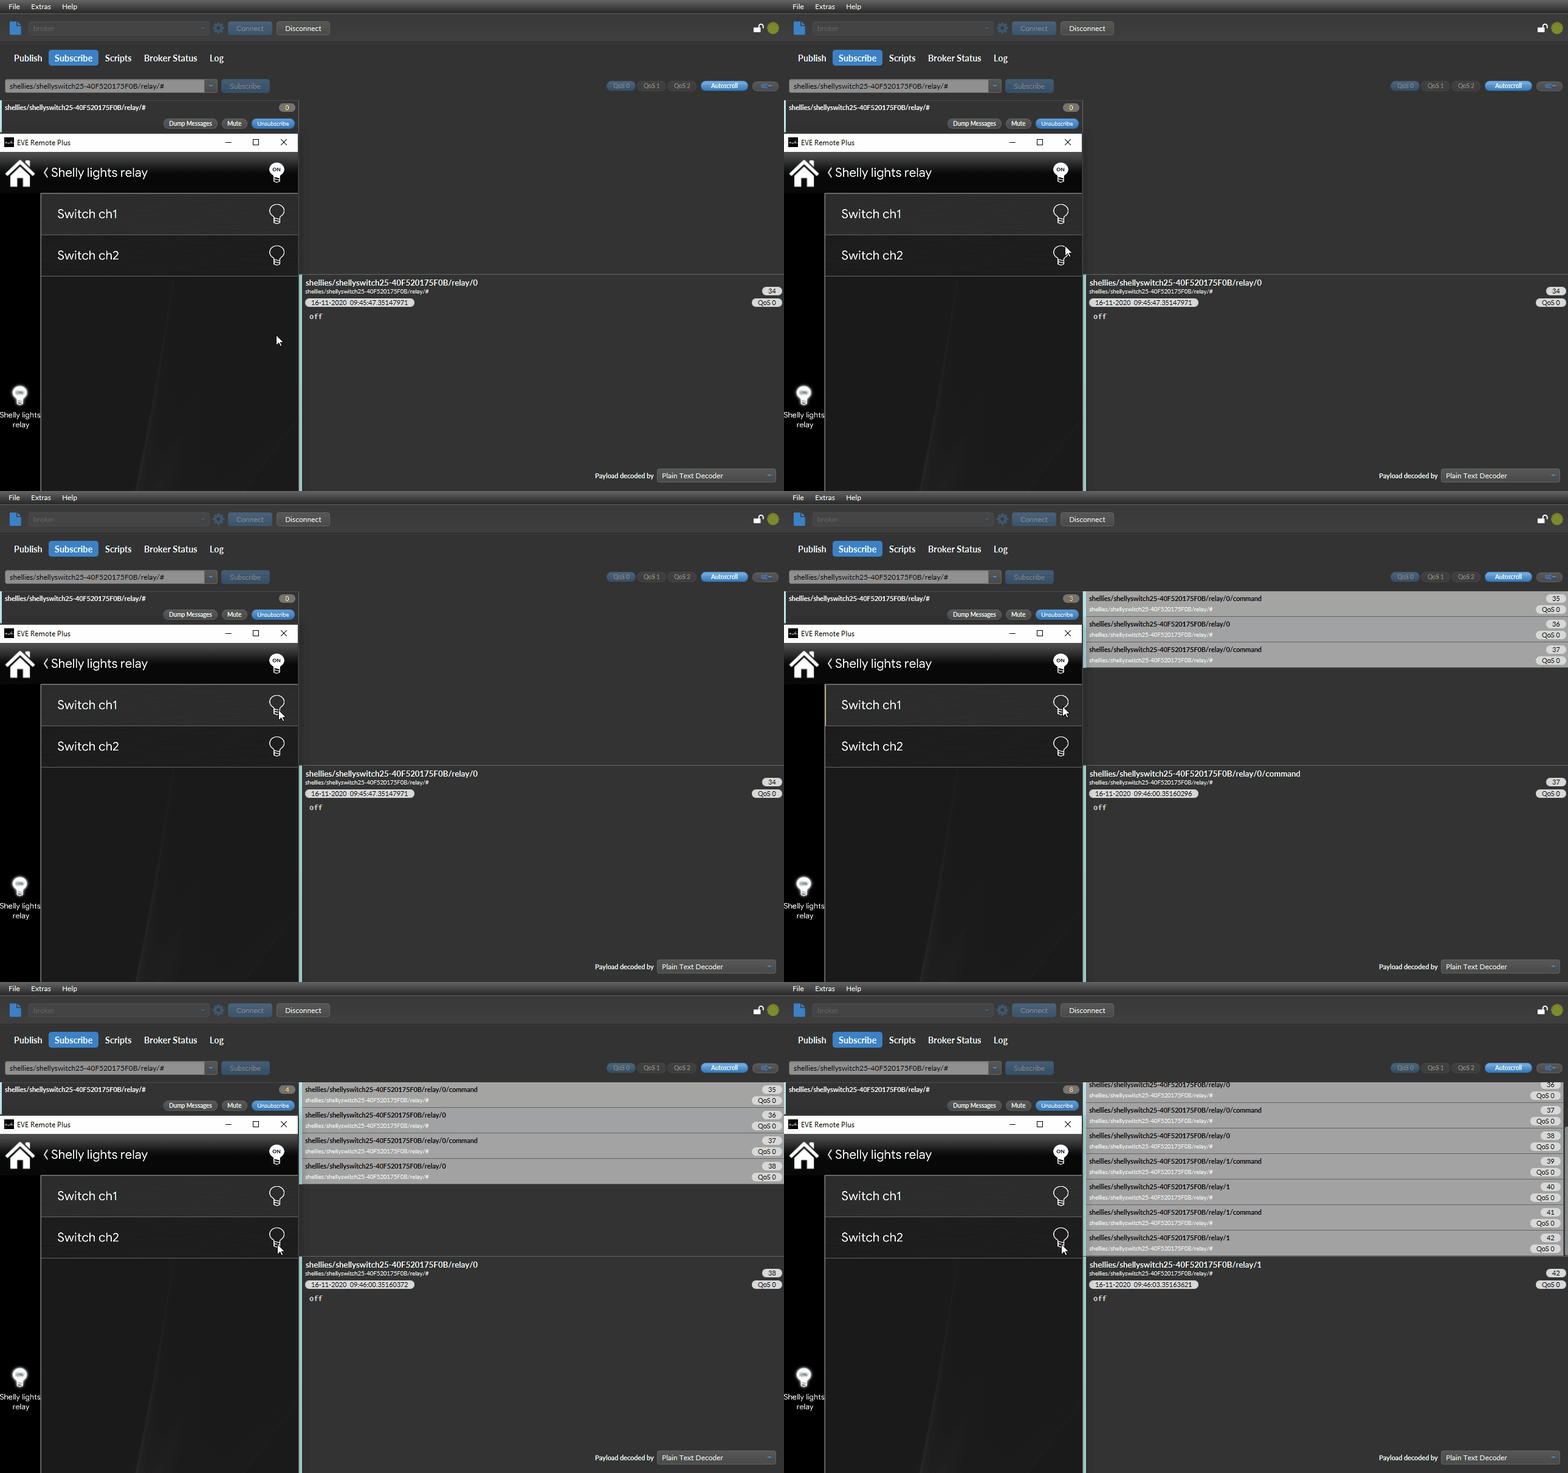
This is how the components works inside the classic user interface, and how the topics looks like when crossing the server broker.
Shelly 2.5 Roller shutter function
INTRODUCTION
Shelly 2.5 has a second function out of commanding two separate actuators, infact this device from shelly can control even a roller shutter.
Web interface configurations
Step 1.1:
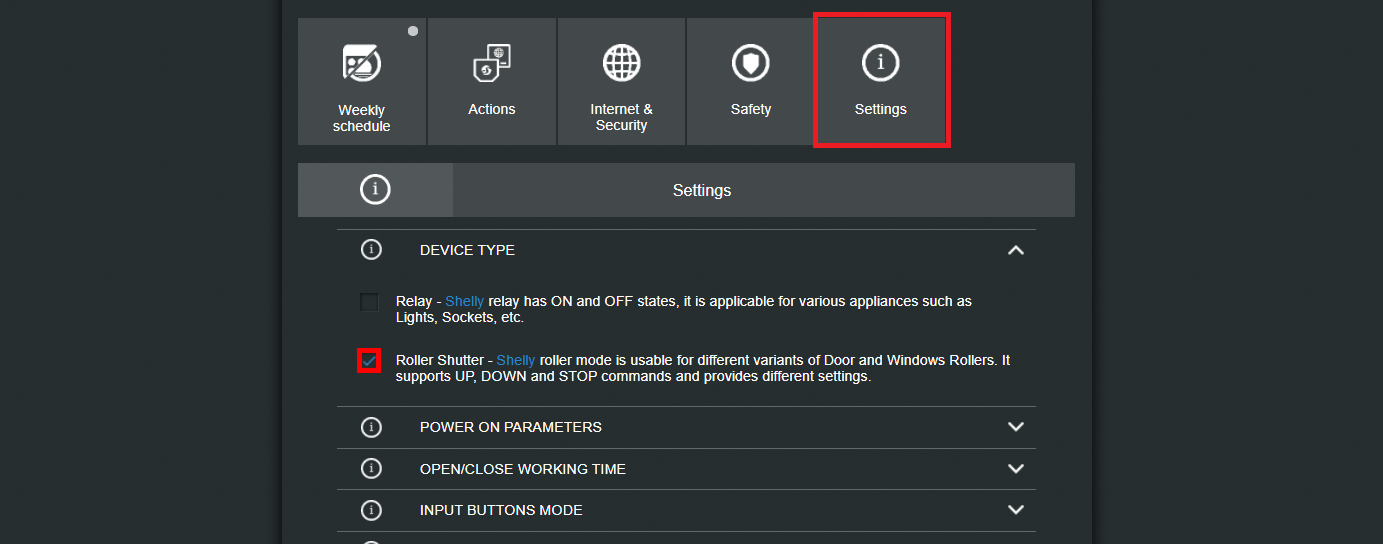
First this we are going to do is switch the relay function of the shelly device to the roller one to be able to control a shutter component. From inside the shelly 2.5 web interface, enter the settings menu and click the second check box inside the “device type” section.
Topics confiugration
Step 1.2:
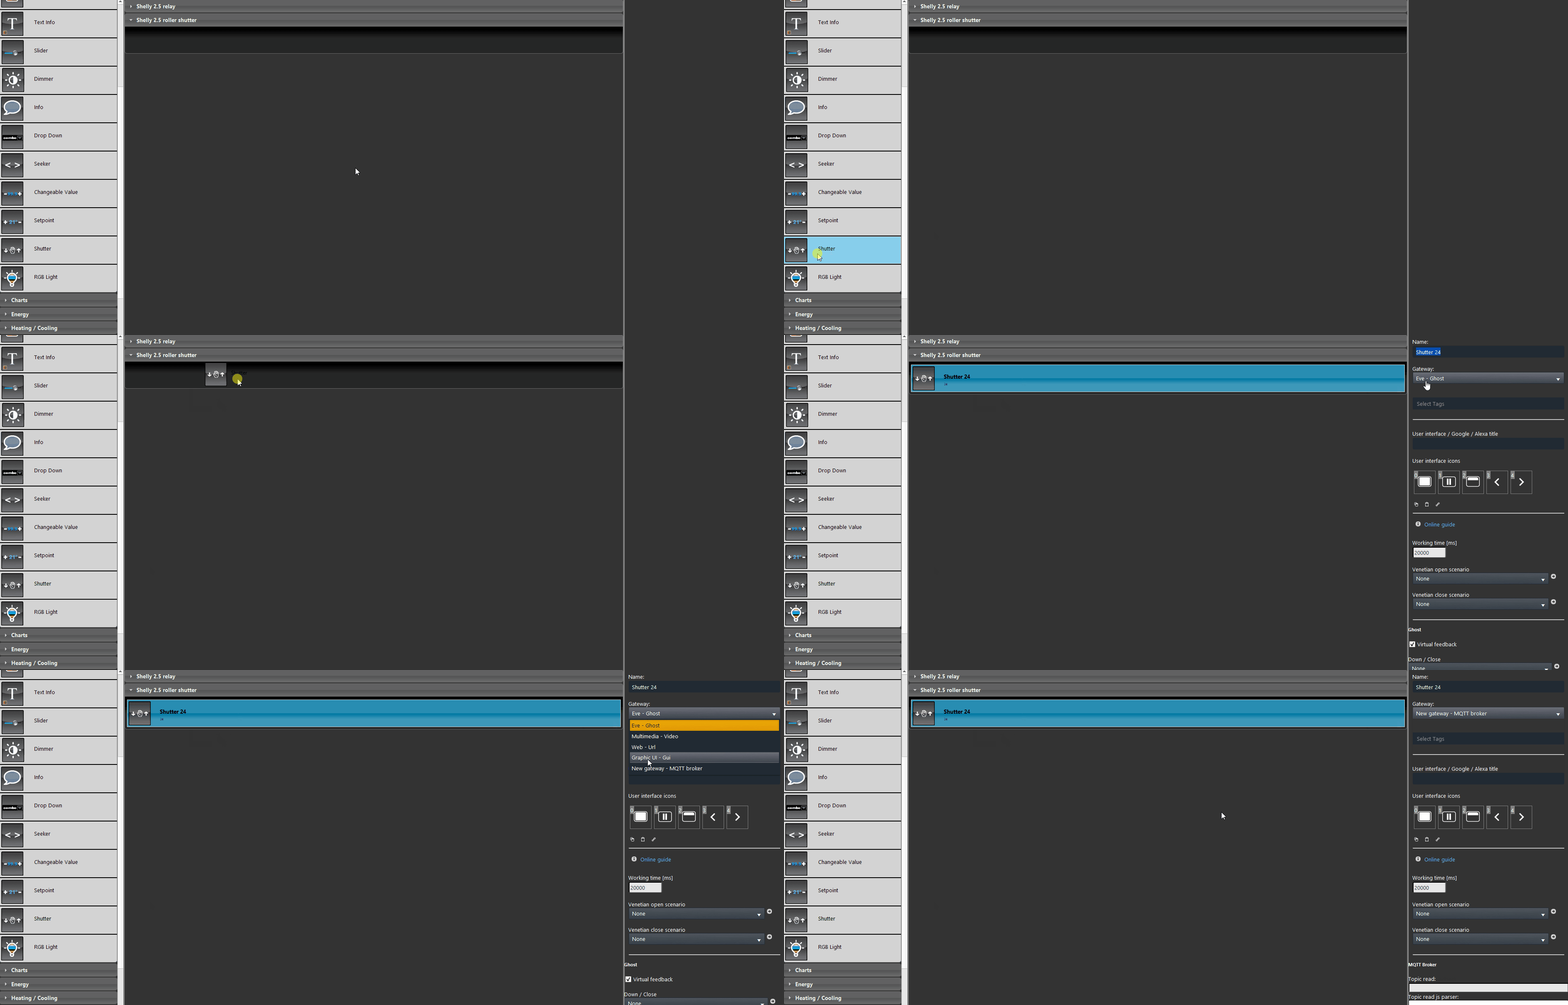
Drag and drop the shutter component from the basic components menu inside the component area, then change its gateway to the MQTT one.
Step 1.3:
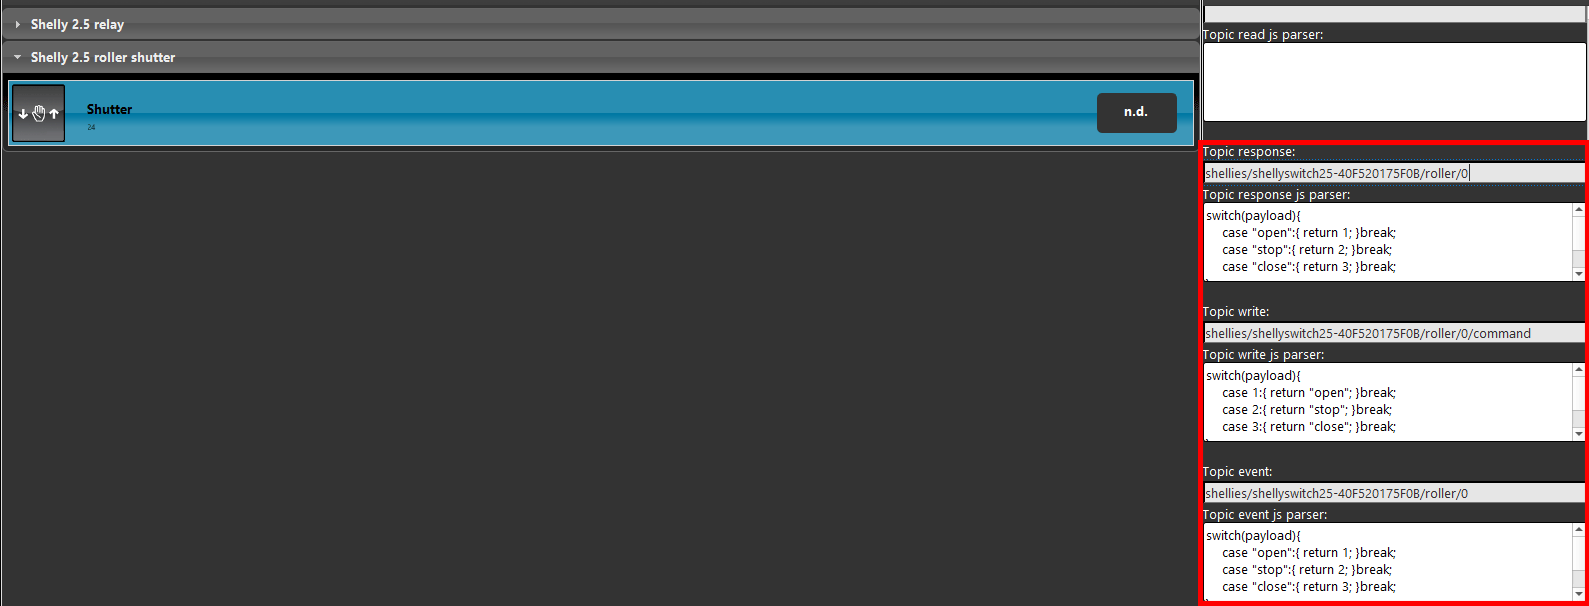
The topics in this case are designed to perform a specific function, as you can see from the image below the script will get the status from the device and “translate” the value in both ways.
Inside the EVE system the values that are used on the shutter component are 1, 2, 3 (open, stop, close).
Click this link to see the topic configuration.
Slider component configuration to set the opening percentage to the shutter
Step 1.4:
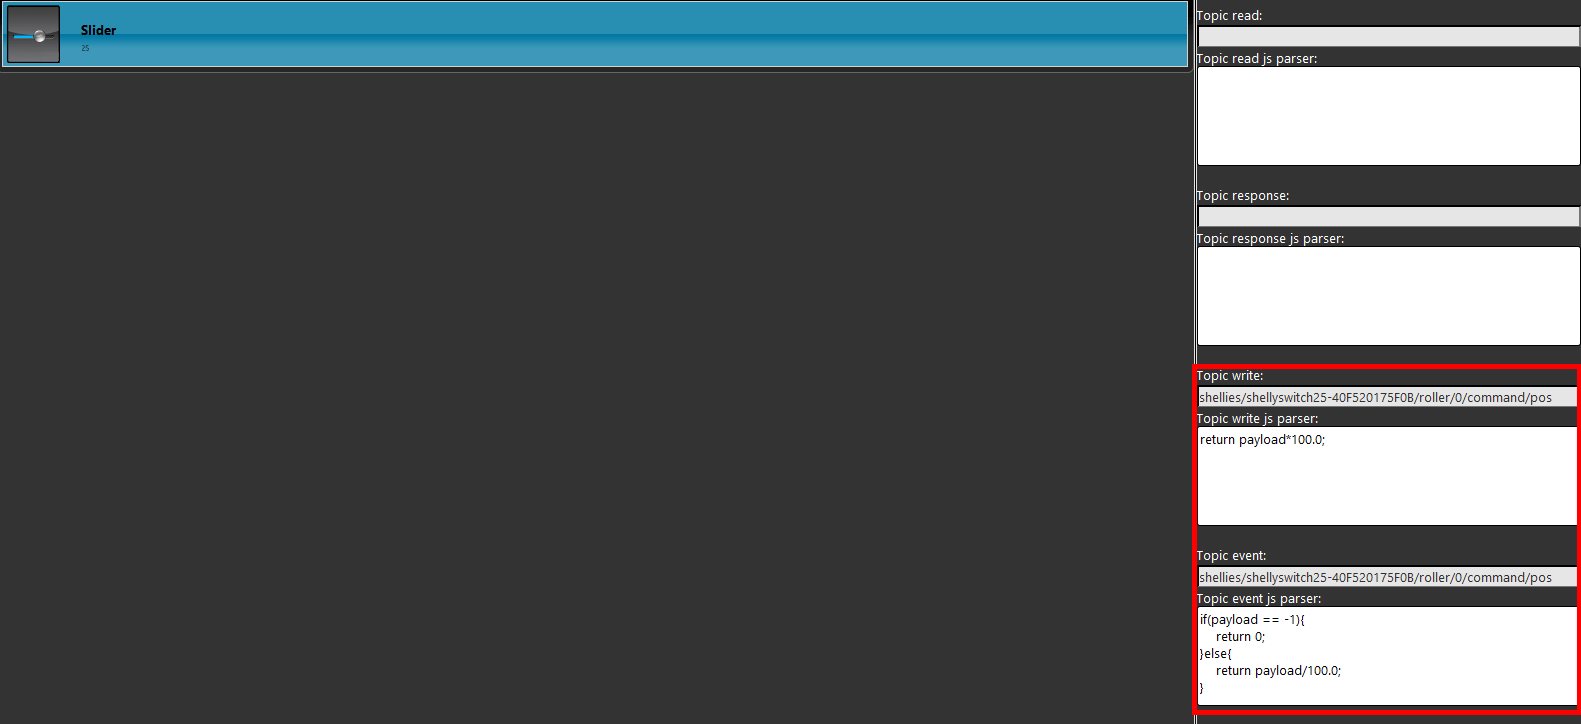
Now lets set up the slider that will allow you to choose a specific persentage which the shelly device will set the roller shutter to. Add a slider component inside the components area, set its gateway to MQTT.
And put the script inside the right topics.
Click this link to see the topic configuration.
Scenario configuration for the shutter calbiration
Step 1.5:
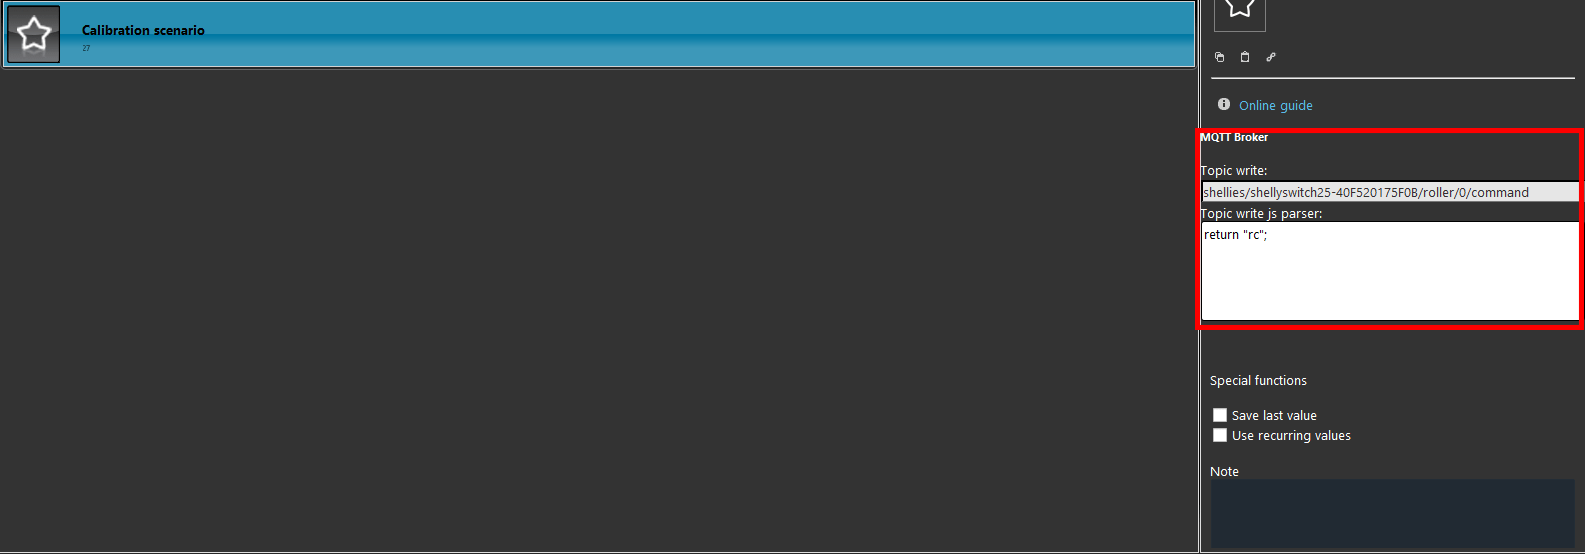
The shelly 2.5 accept a command via MQTT to calibrate the shutter directly from an MQTT command. In our case the command will be send by a Scenario set up with the MQTT protocol and the right topic configuration as shown below.
Click this link to see the topic configuration.
Step 1.6:
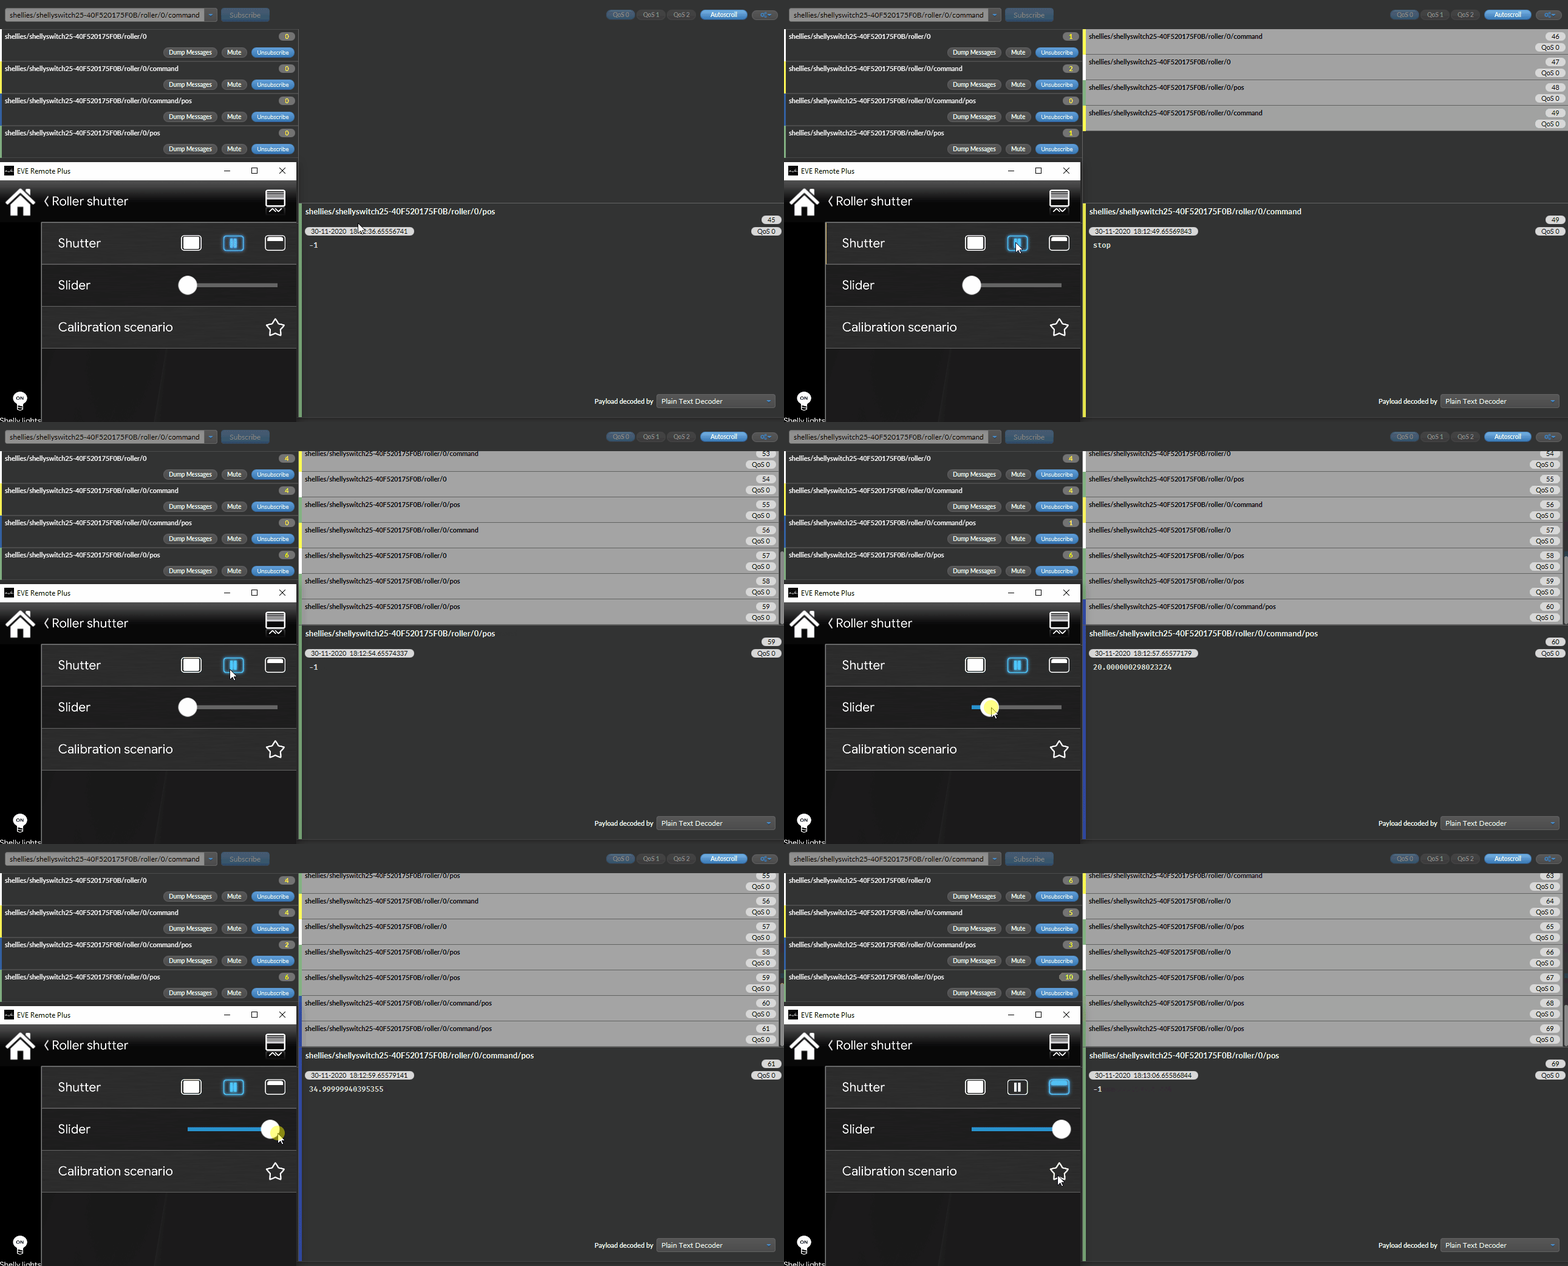
Now lets try it, add the shutter component inside the user interface and and try to open, close and stop the shutter.
1- Assicurati di avere l’ultima versione disponibile di EVE manager e del firmware dell’X1 server.
2- Assicurati di avere il dispositivo shelly correttamente connesso alla tua rete.
3- Se non riesci a connettere il broker controlla che il tuo X1 sia stato impostato correttamente.


