Email
Email
INTRODUCTION
This component makes it possible to EVE to send e-mail messages allowing clients to be updated on the status of their houses. Useful to send Email alerts to customizable contacts lists. To enable this feature you must use the other components listed below. Email component indicates the message which is sent using a Switch component as an activator.
USE CASES
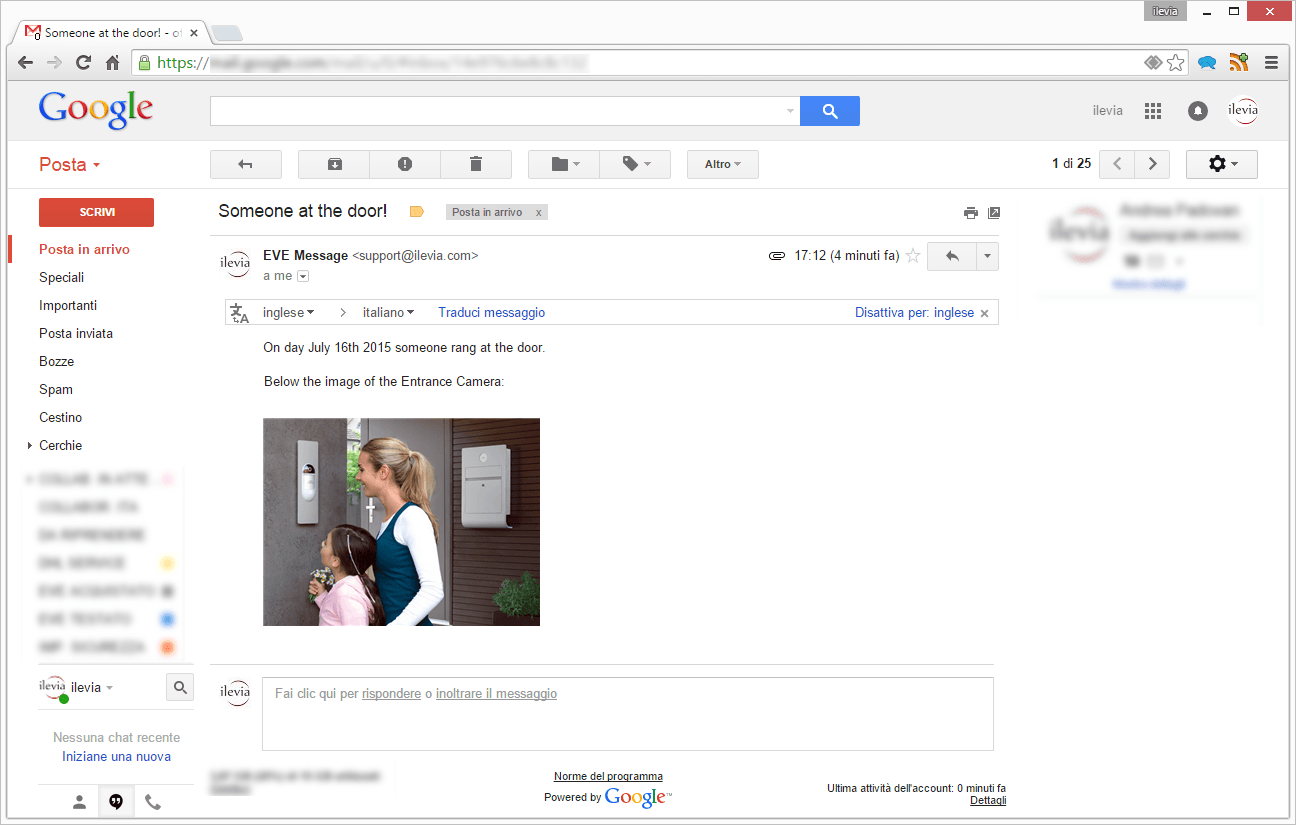
- the user wants to get an email message from EVE with the IP camera image attached anytime a specific event occurs (when the doorbell rings, …);
- the user wants to get an email message from EVE anytime a specific physical switch is turned On;
- the user wants to get an email message from EVE anytime a specific event occurs on the system;
- the user wants EVE to send an email message to specific groups of contacts and report customized info;
- the user wants to keep an email history of specific events that occur in the building.
Downlaod and test
We provide you a test project already configured in order to let you try on your own the plugin’s functionalities in just few quick steps.
- Download the linked file and unzip it;
- Run the RaspberryPi/Virtual Machine;
- Set Email Account and Contact data;
- Upload the .eve project to the server;
- Run EVE Remote (Ver. Map).
Account login
User: admin
Password: password
ATTENTION PLEASE!
Email plugin module is used to send an e-mail to customizable contacts lists. However, you do not have to forget to define the server for sending your e-mail messages. To do this, please refer to Email account page.
COMPONENT’S PROPERTIES

Customizable component’s title and icon. Please refer to “Common properties” guide.
GUI
This component’s sample is made by using Graphic UI gateway.
Please refer to “Gateways / Protocols” guide in order to get further info.
Enable component: checkbox which defines whether the function is enabled or disabled on the system.
Trigger component: Drop Down, Color info, Text info, Switch, Lock, Pulse component that triggers the e-mail sending;
Send when:
– Trigger changes from Off to On: SMS is sent only when the trigger goes to On;
– Trigger changes from On to Off: SMS is sent only when the trigger goes to Off;
– At any change of the trigger: SMS is sent anytime trigger goes to On and Off;
Send to: contact list to whom the e-mail will be sent;
Selection is carried out by dragging Contact components from “My components” area to the list box.
Subject: The object of the e-mail message which will be sent when trigger changes will occur;
Send Email message: Check this checkbox if you want that this module will be able to send Email messages to the selected contacts.
Send Telegram message: If this parameter is checked allows this module to manage and send Telegram messages.
Sender: Email address of the person to whom the email arrives;
Further information can be added to the e-mail body (up to 4 information):
Information (#1): Drop Down, Info, Color info, Text info, Slider, Switch, Lock or Changeable value component;
Information (#2): Drop Down, Info, Color info, Text info, Slider, Switch, Lockor Changeable value component;
Information (#3): Drop Down, Info, Color info, Text info, Slider, Switch, Lock or Changeable value component;
Information (#4): Drop Down, Info, Color info, Text info, Slider, Switch, Lock or Changeable value component;
It is also possible to attach to the e-mail body an image of a specific IP Camera:
Image: IP Camera image component that defines the URL address of an IP Camera;
Report: Please refer to this guide;
Content: The body of the e-mail that will be sent when trigger changes will occur.
To visualize the above info on the e-mail body, simply type #1, #2, #3, #4 on the “Content” text field.
Attachment filename: This is the name of the file you have created by suing the Log component, make sure the name written in this text field mach exactly the one used in the Log component.
Text Attachment: It apply a signature in the end of the Email message.
Enable: By linking a Info, Color info,text info, Switch, Lock, Dropdown component you will be able to Enable or Disable the entire Email module.
HELP
Email configuration can be easily carried out by using component’s drag&drop function. When setting components on Component’s parameters, you can use the drop-down menu, or you can drag and drop them from “My components” area to the component selection field.
Reminder before continuing:
- Download and Install EVE Logic plugin to enable plugins (link);
- After loading .eve project to the server, run EVE Remote app, log in and then wait a couple of minutes for logics activation.
Ilevia Message on your browser