SHELLY PLUS 1 INTEGRATION WITH THE ILEVIA SYSTEM
INTRODUCTION
In this guide will be explained how to integrate the Shelly Plus 1 device with the MQTT protocol within the Ilevia system.
Shelly’s device interface configuration
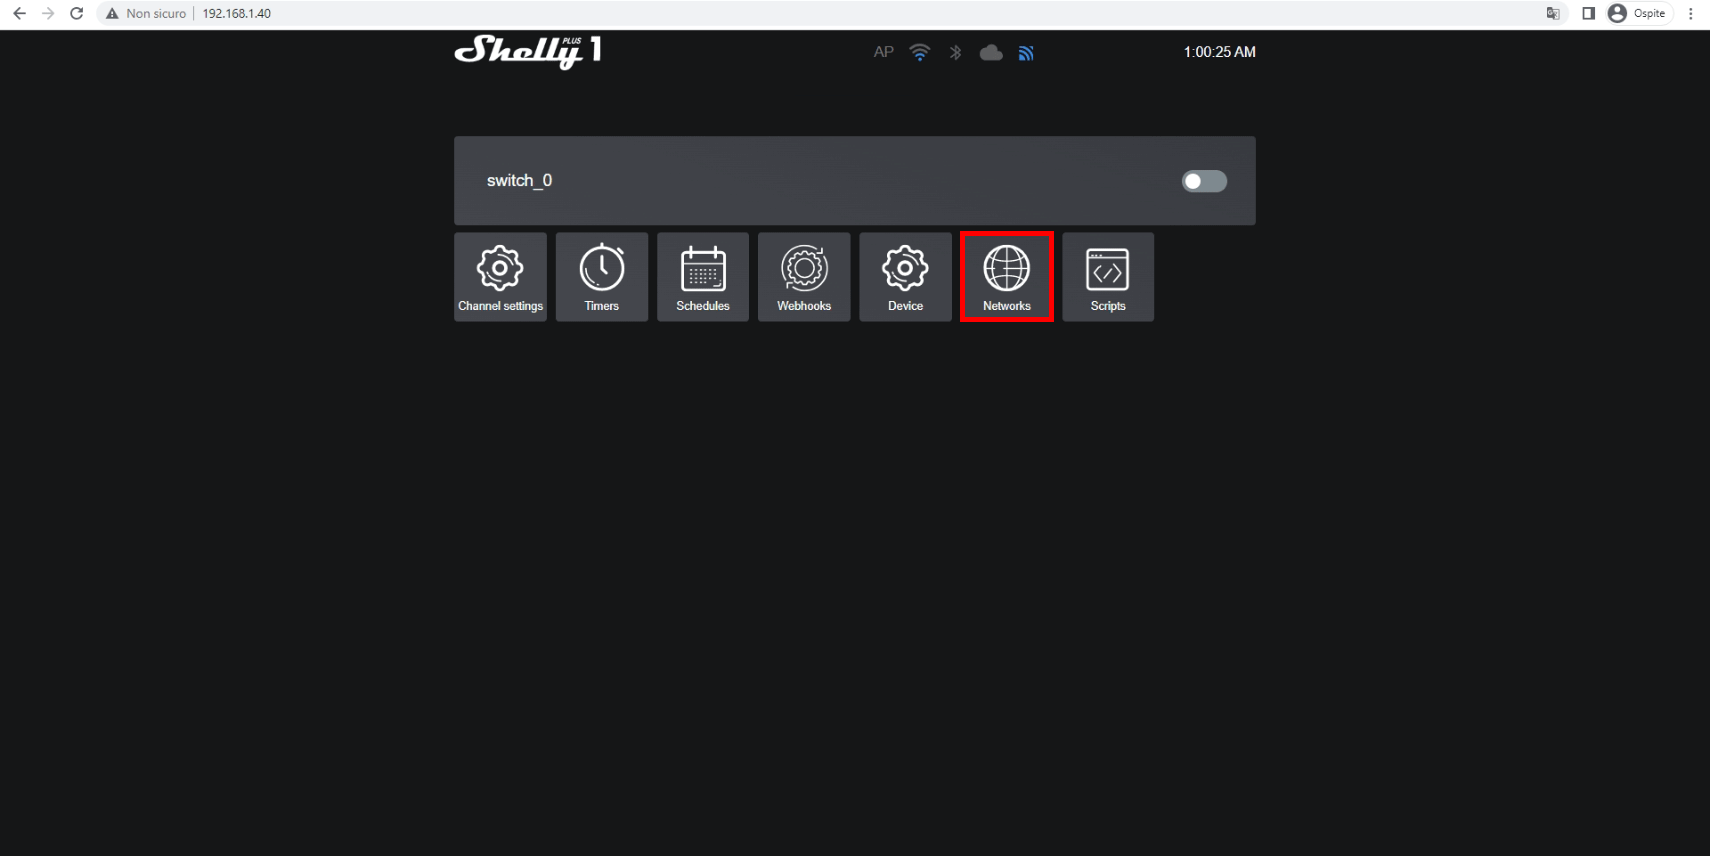
Enter the web interface of the Shelly device by entering its local IP address inside the URL bar in your web browser, then click on Networks.
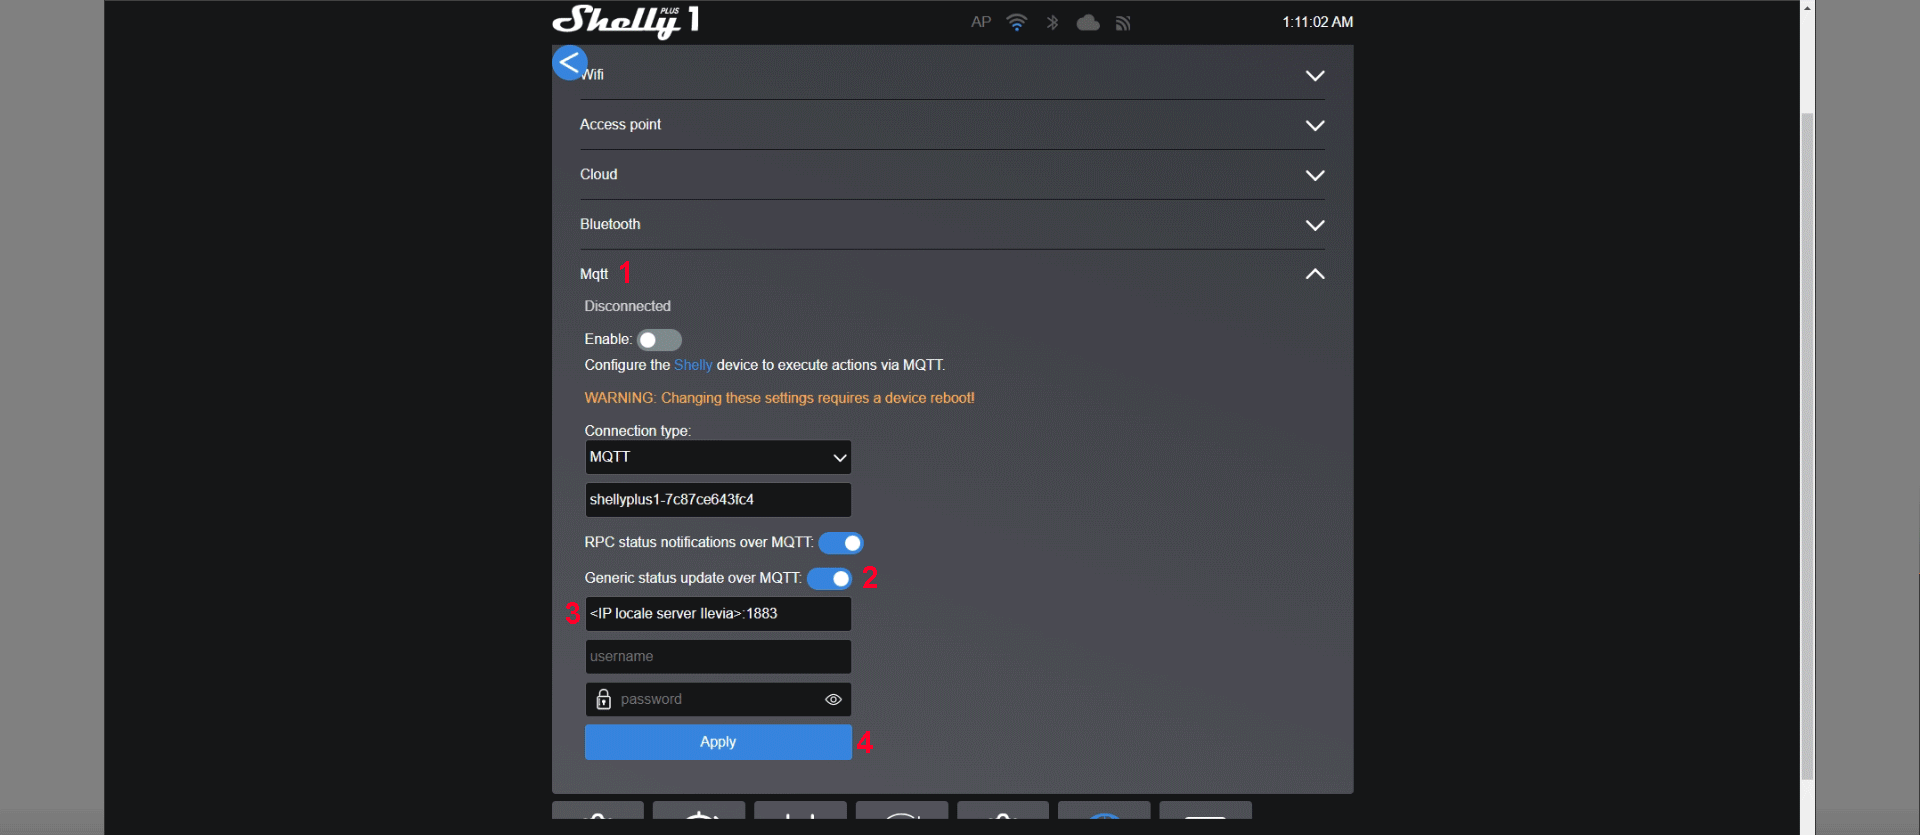
1. Open the MQTT drop down menu. 2. Enable the Generic status update over MQTT, 3. add you Ilevia server’s IP address, 4. finally click APPLY to confirm the customization. This will make the device to reboot.
EVE Manager project configuration
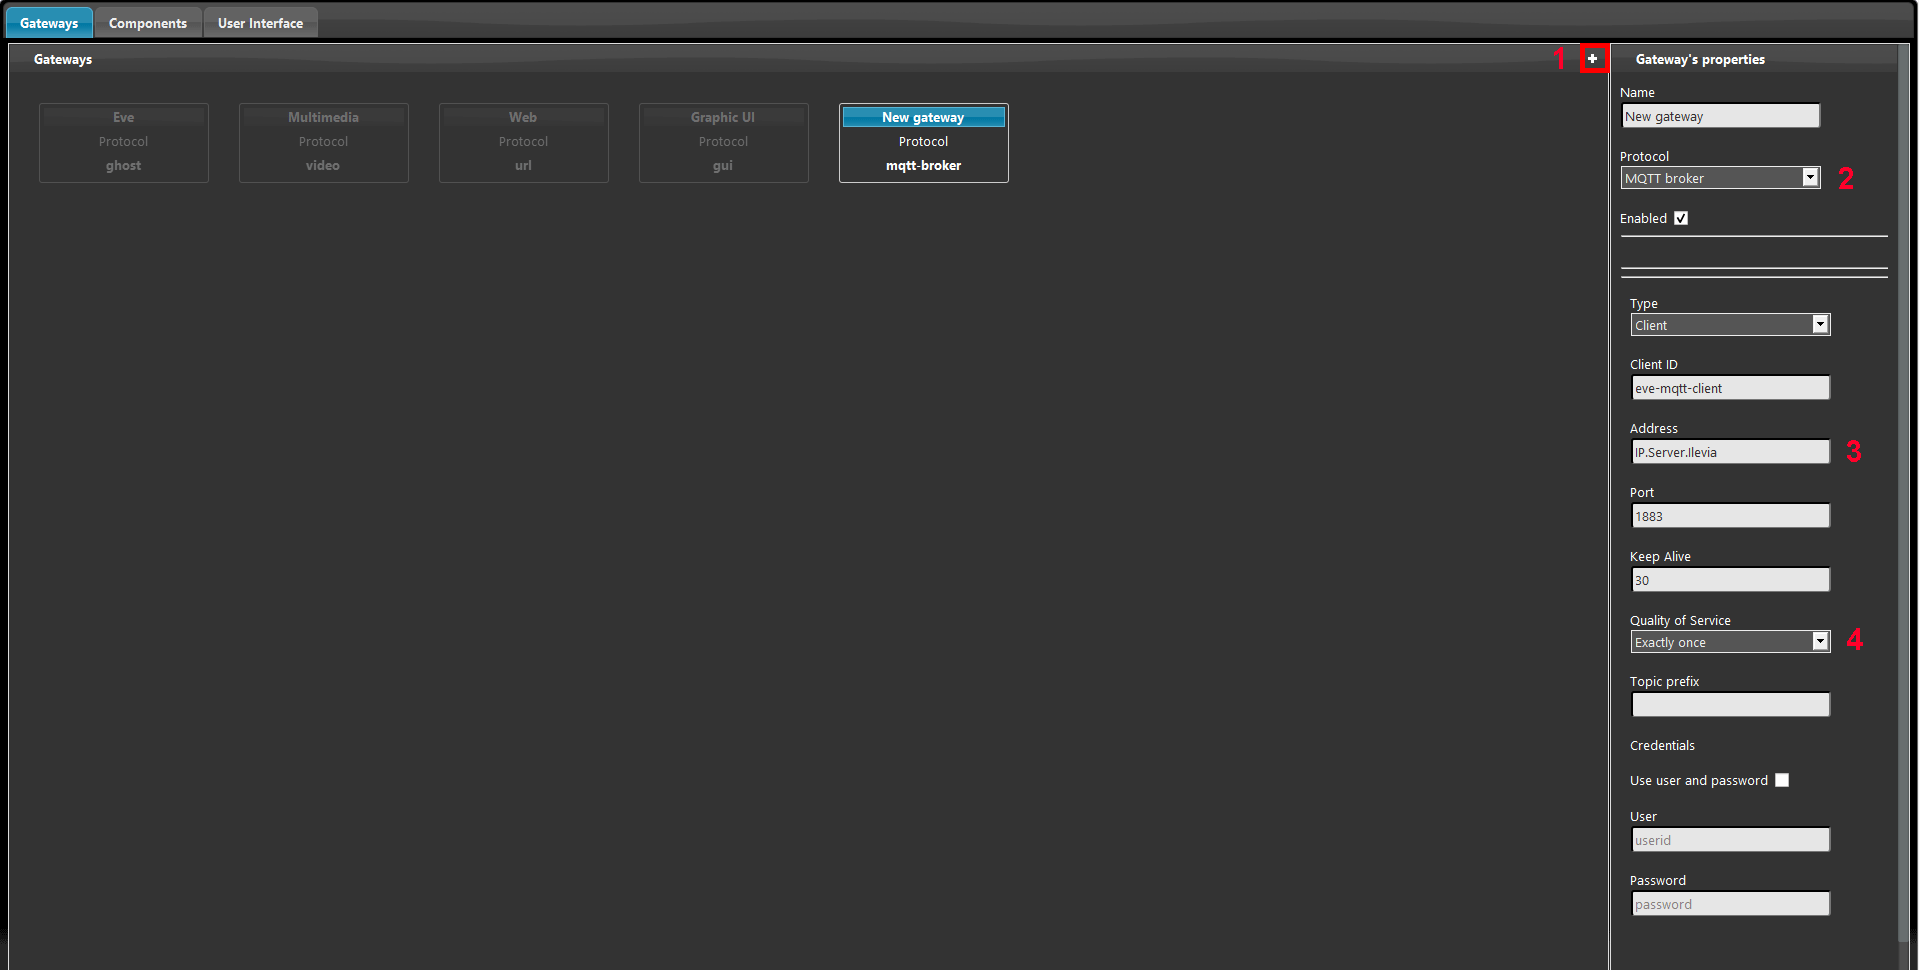
1 Open EVE manager and create a new gateway, 2. set the protocol to MQTT brocker, 3. set the address parameter inserting localhost as address, 4. finally Quolity of service a “Exactly once“.
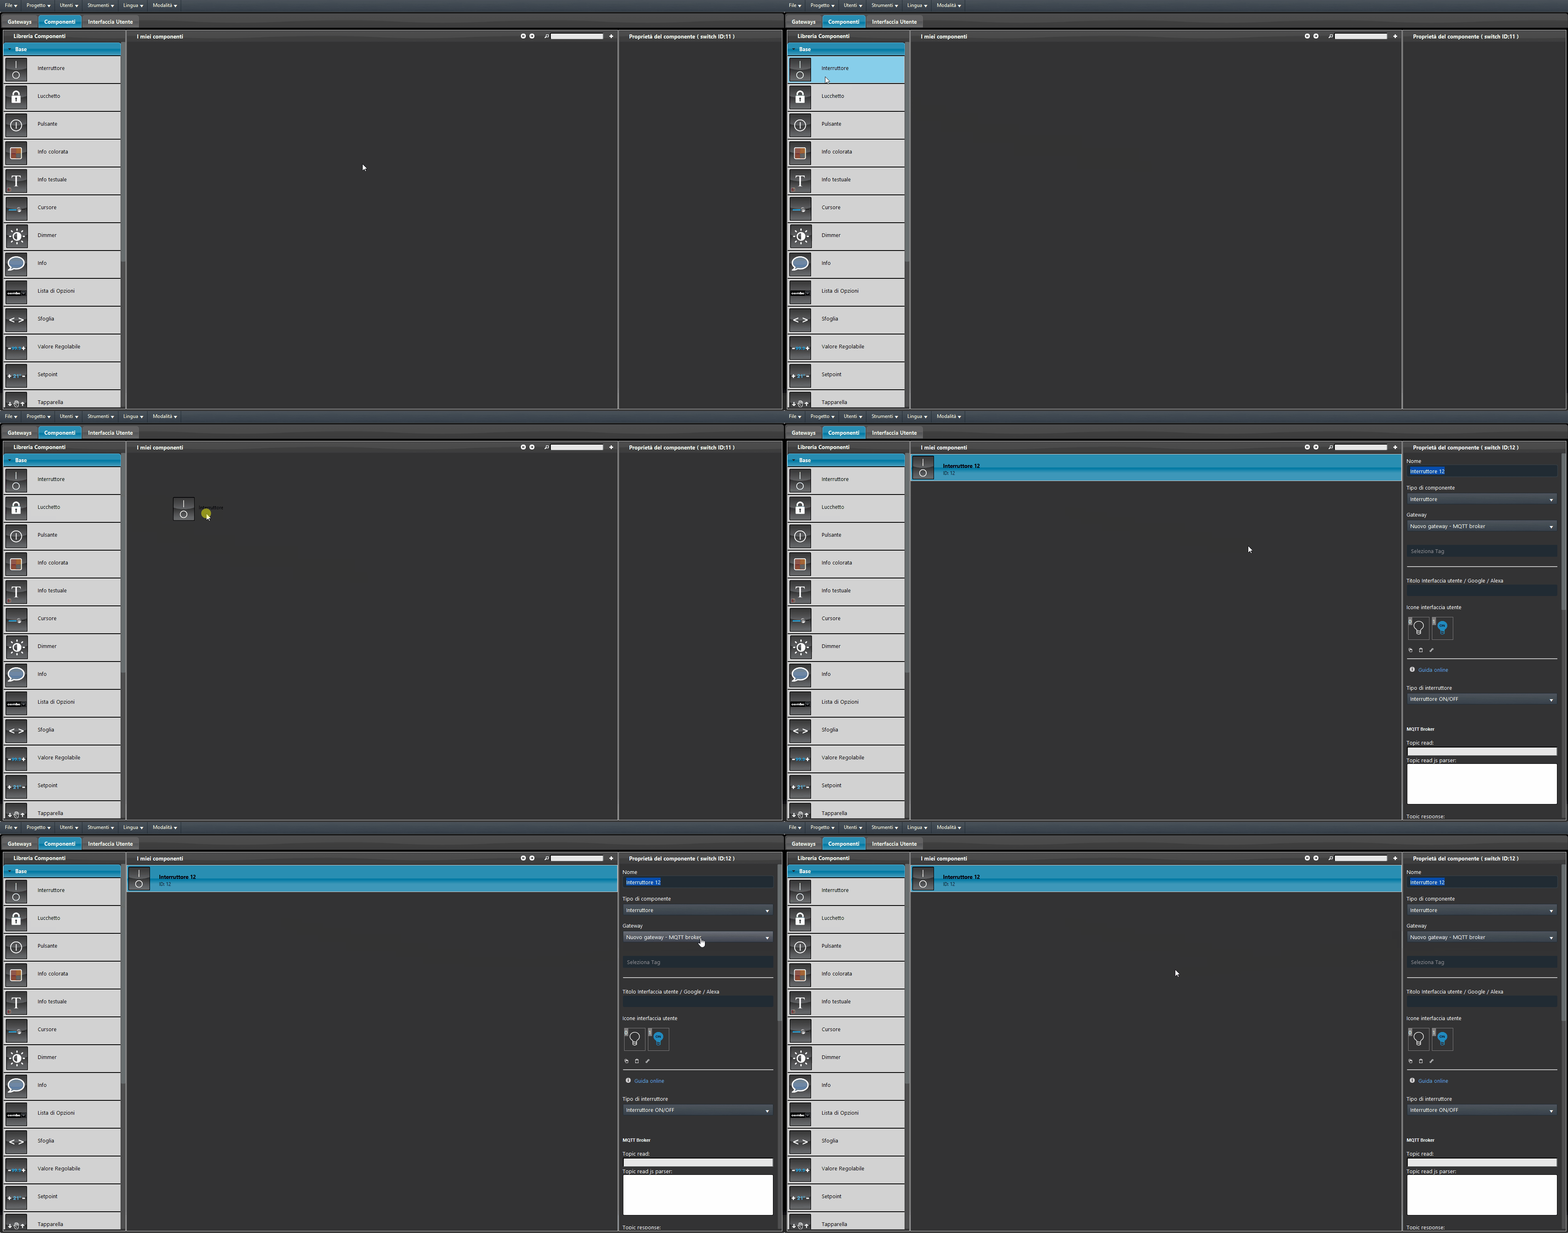
Add a new Switch within the project. Make sure the component has the gateway we just created (MQTT).
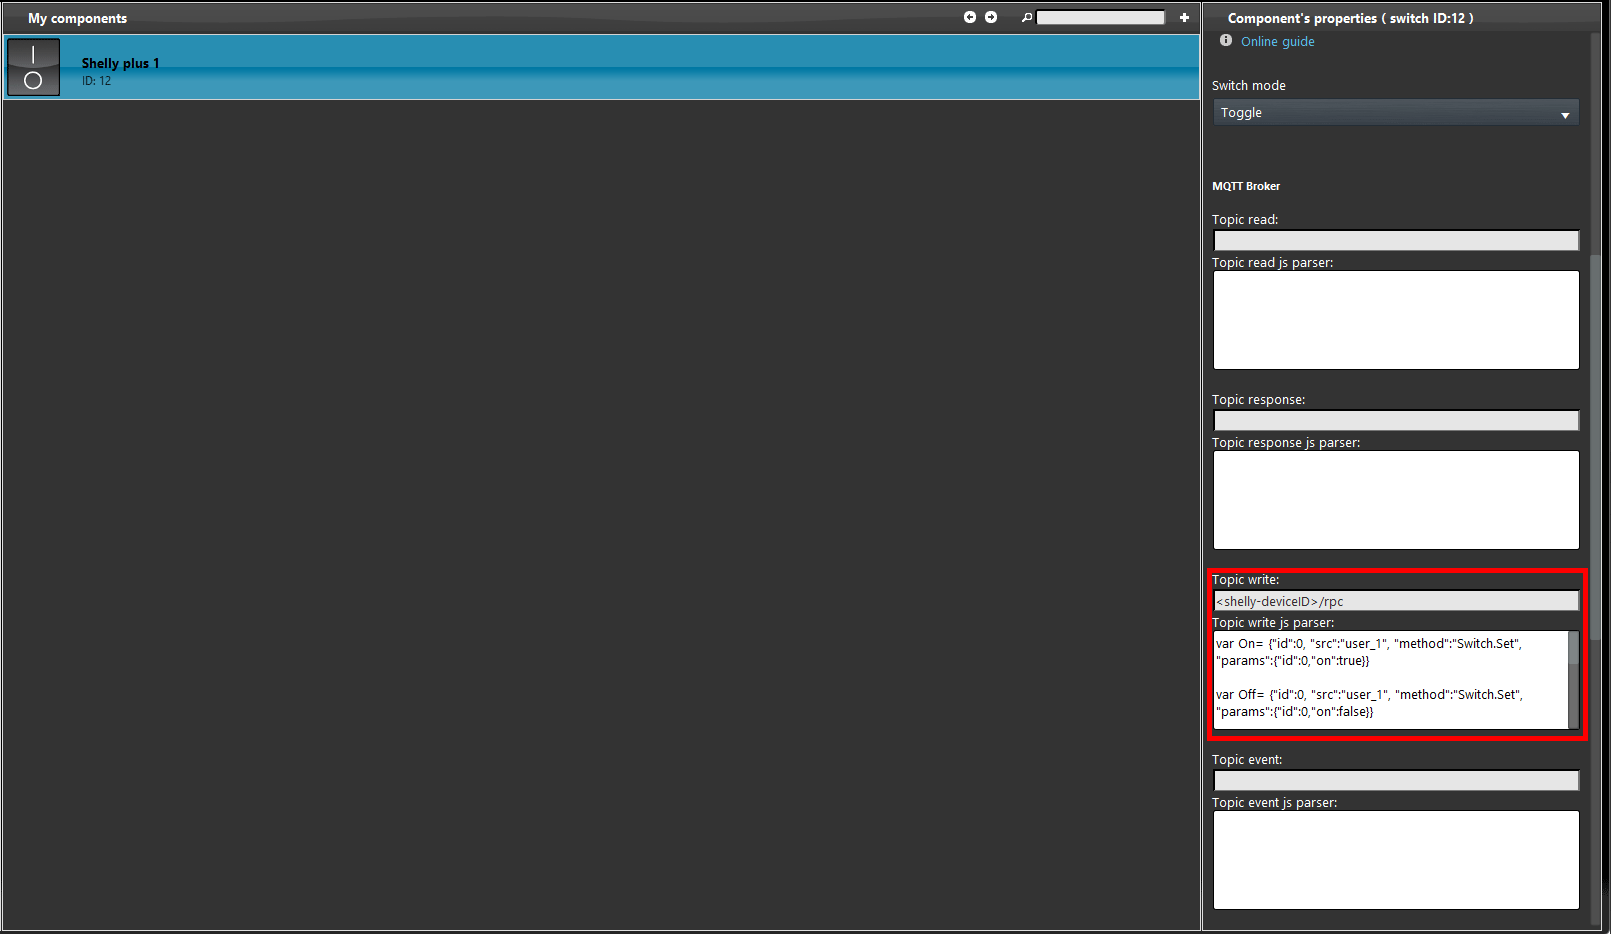
The first topic that will be configured is the Topic write, this topic is the one used to send the command to the device. The topic to configure is the following: “<shelly-deviceID>/rpc” where <shelly-deviceID> has to be replaced with your shelly device ID that you can find within your shelly device web page within the menu Device Info. You can find all the json information are indexed inside the Shelly web site.
NOTE!: The script is not fully rappresented in the picture. Click here to view the script.
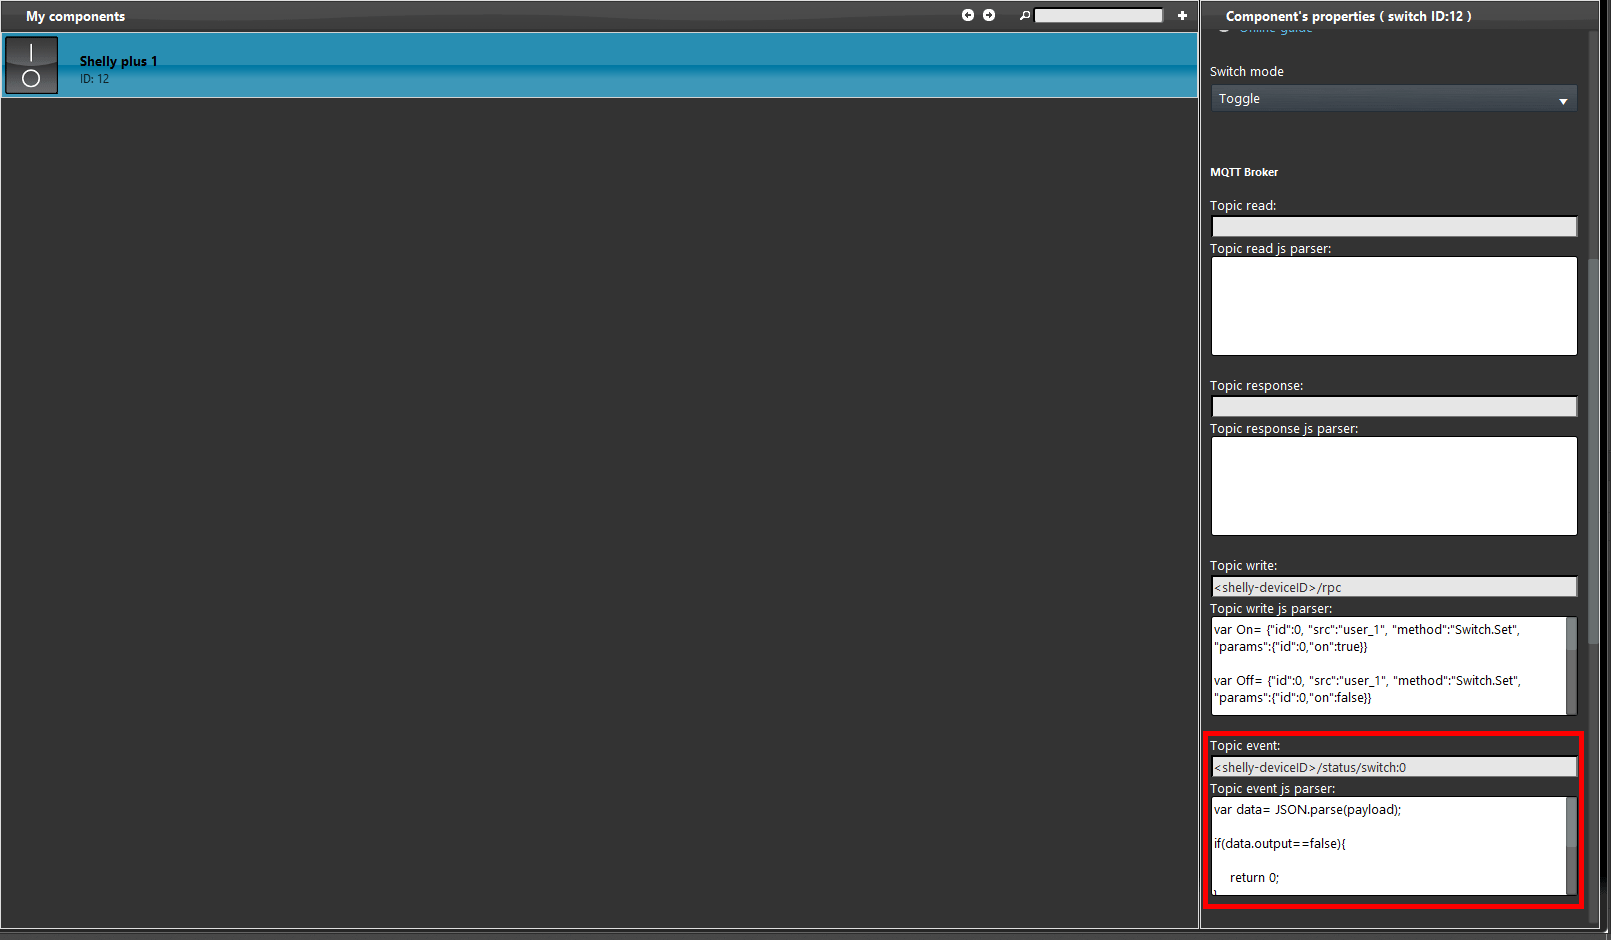
The second Topic that needs to be set up is the Topic Event, this is the topic that will get the status coming from the Shelly device. The topic that needs to be configured is the following; “<shelly-deviceID>/status/switch:0” where <shelly-deviceID> will be replaced with the ID of your device. All the information about the the json configuration are indexed in the Shelly web site.NOTE!: The script is not fully rappresented in the picture.Click here to view the script.
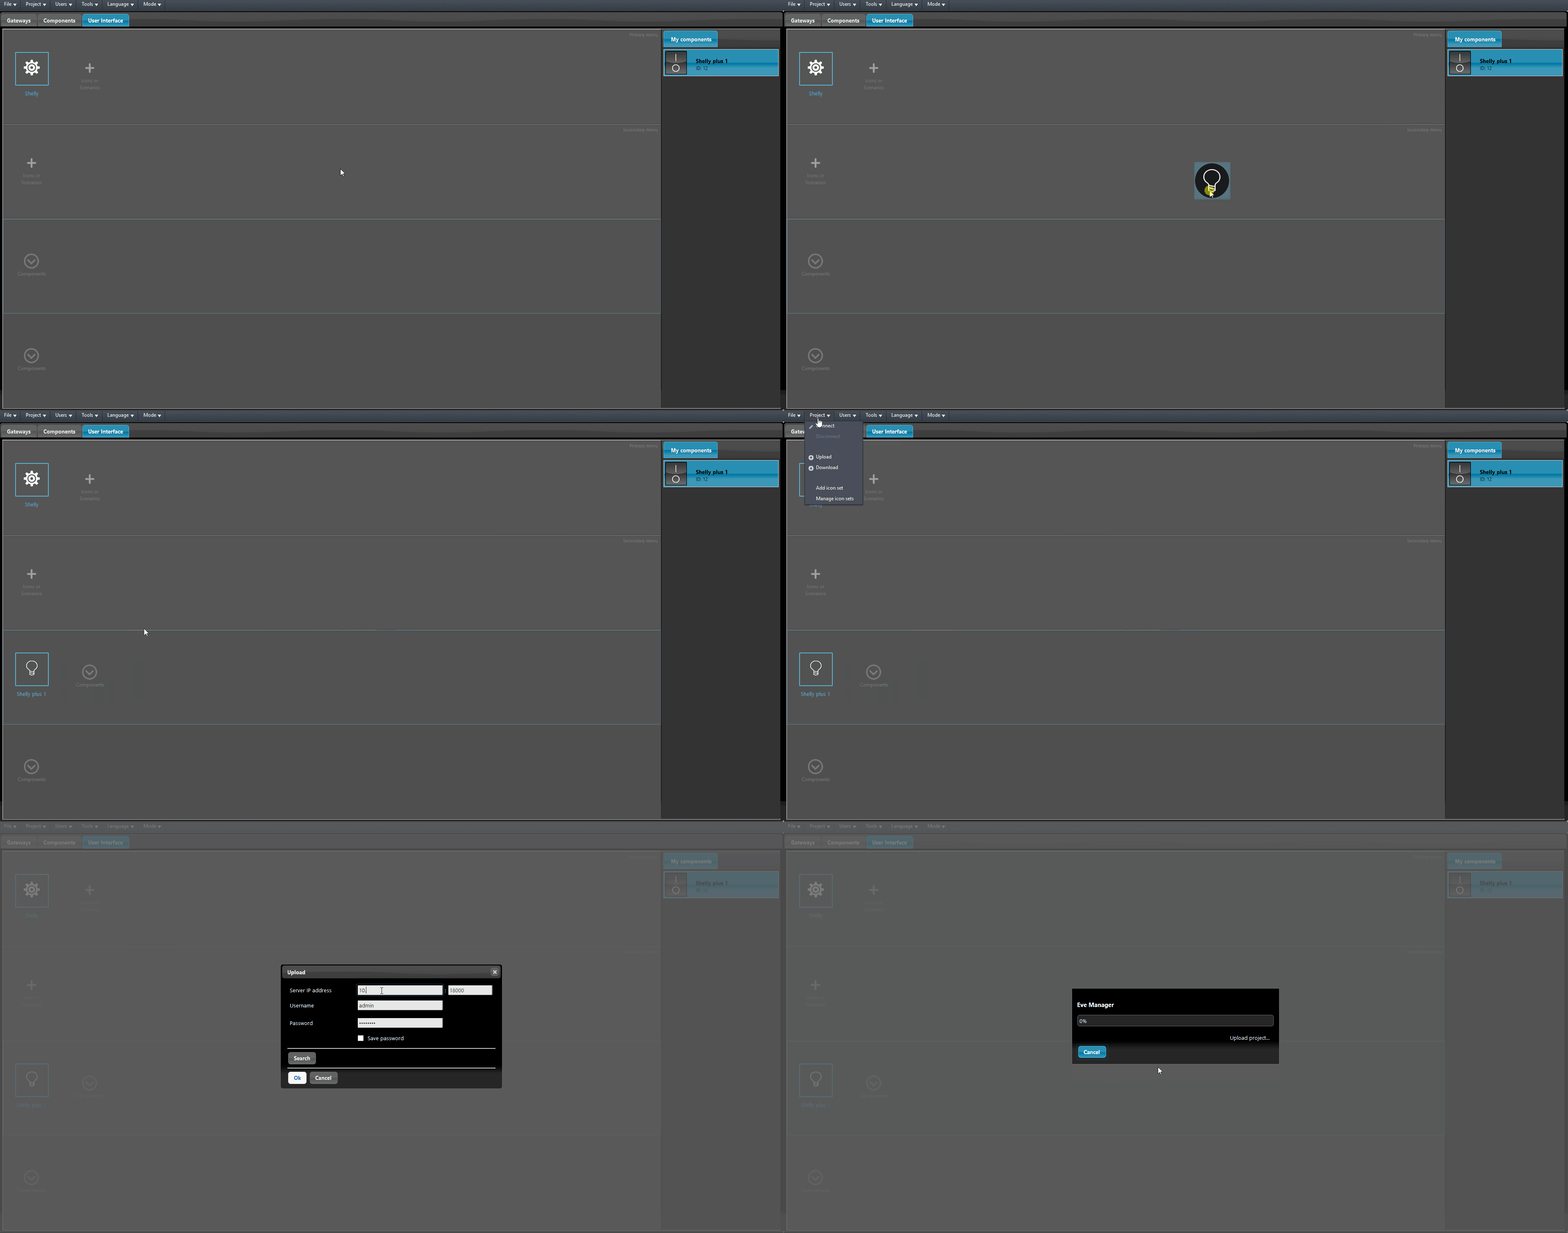
Add the component inisde the User interface and upload the project to the server by setting its right IP address.
Final tests
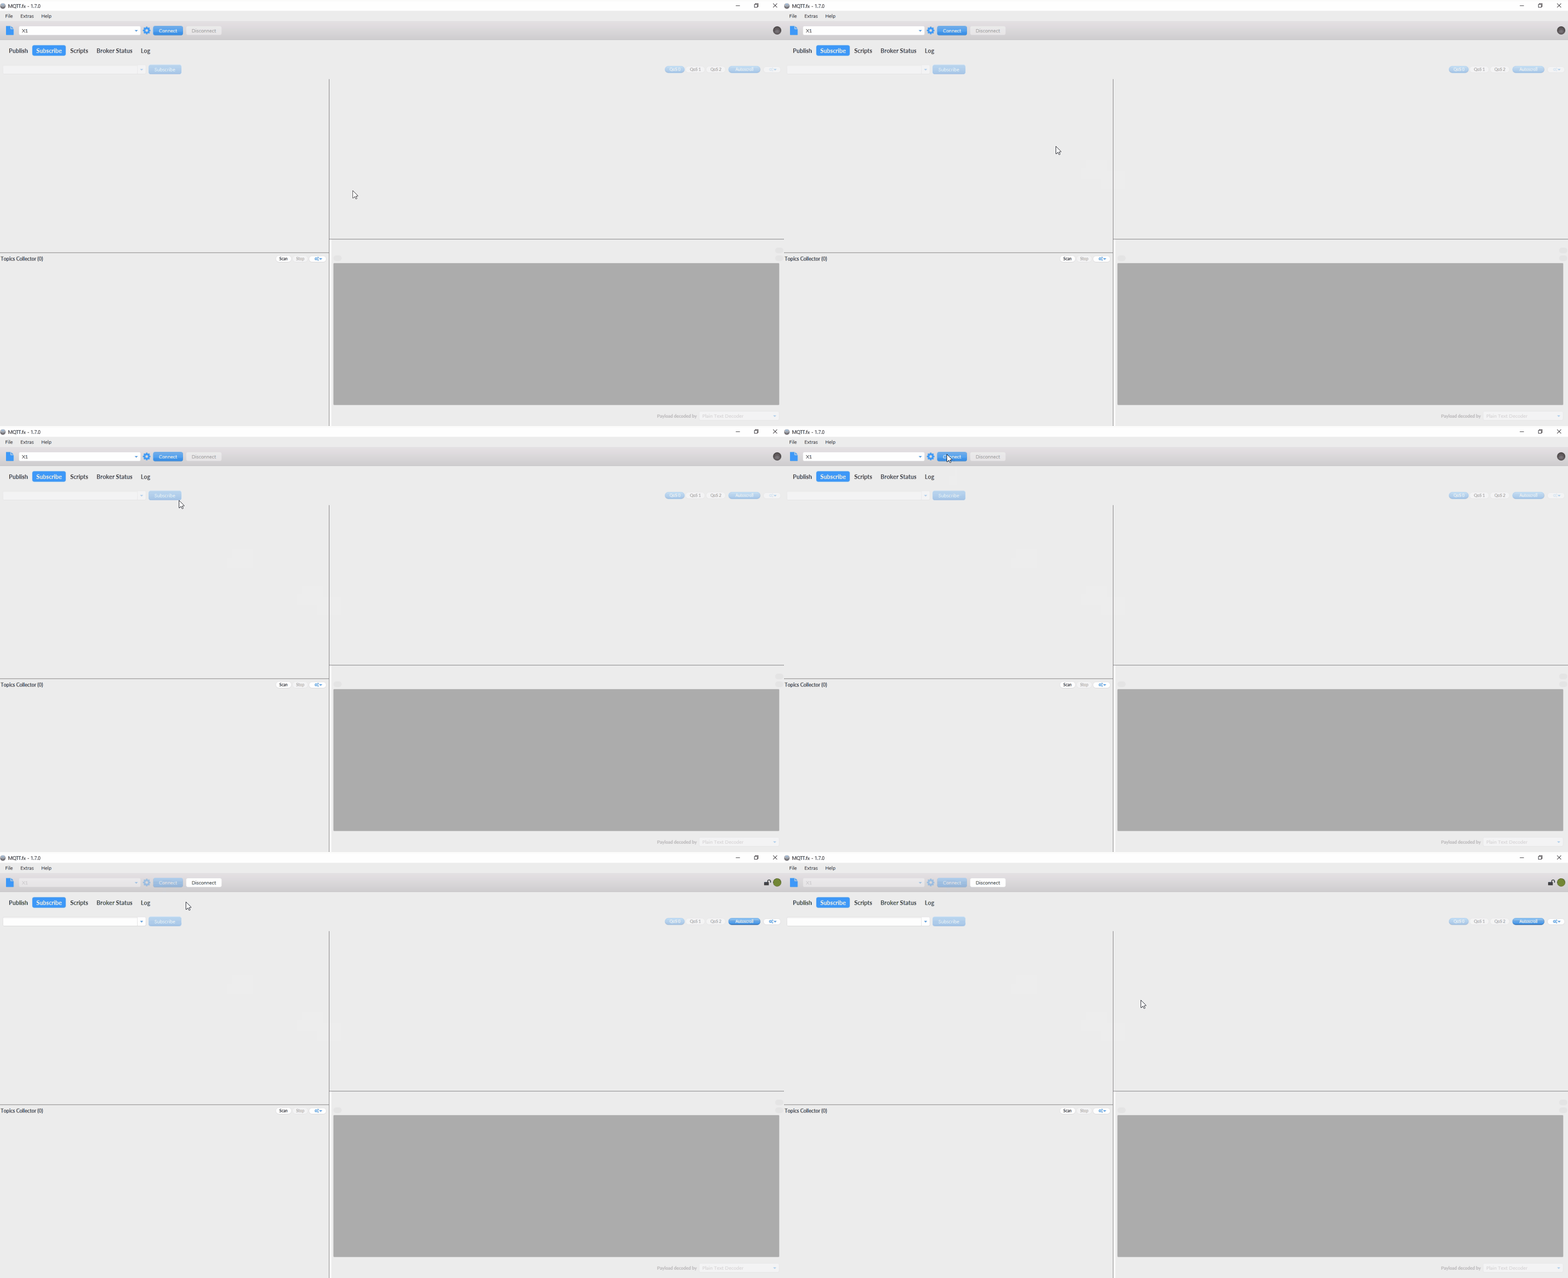
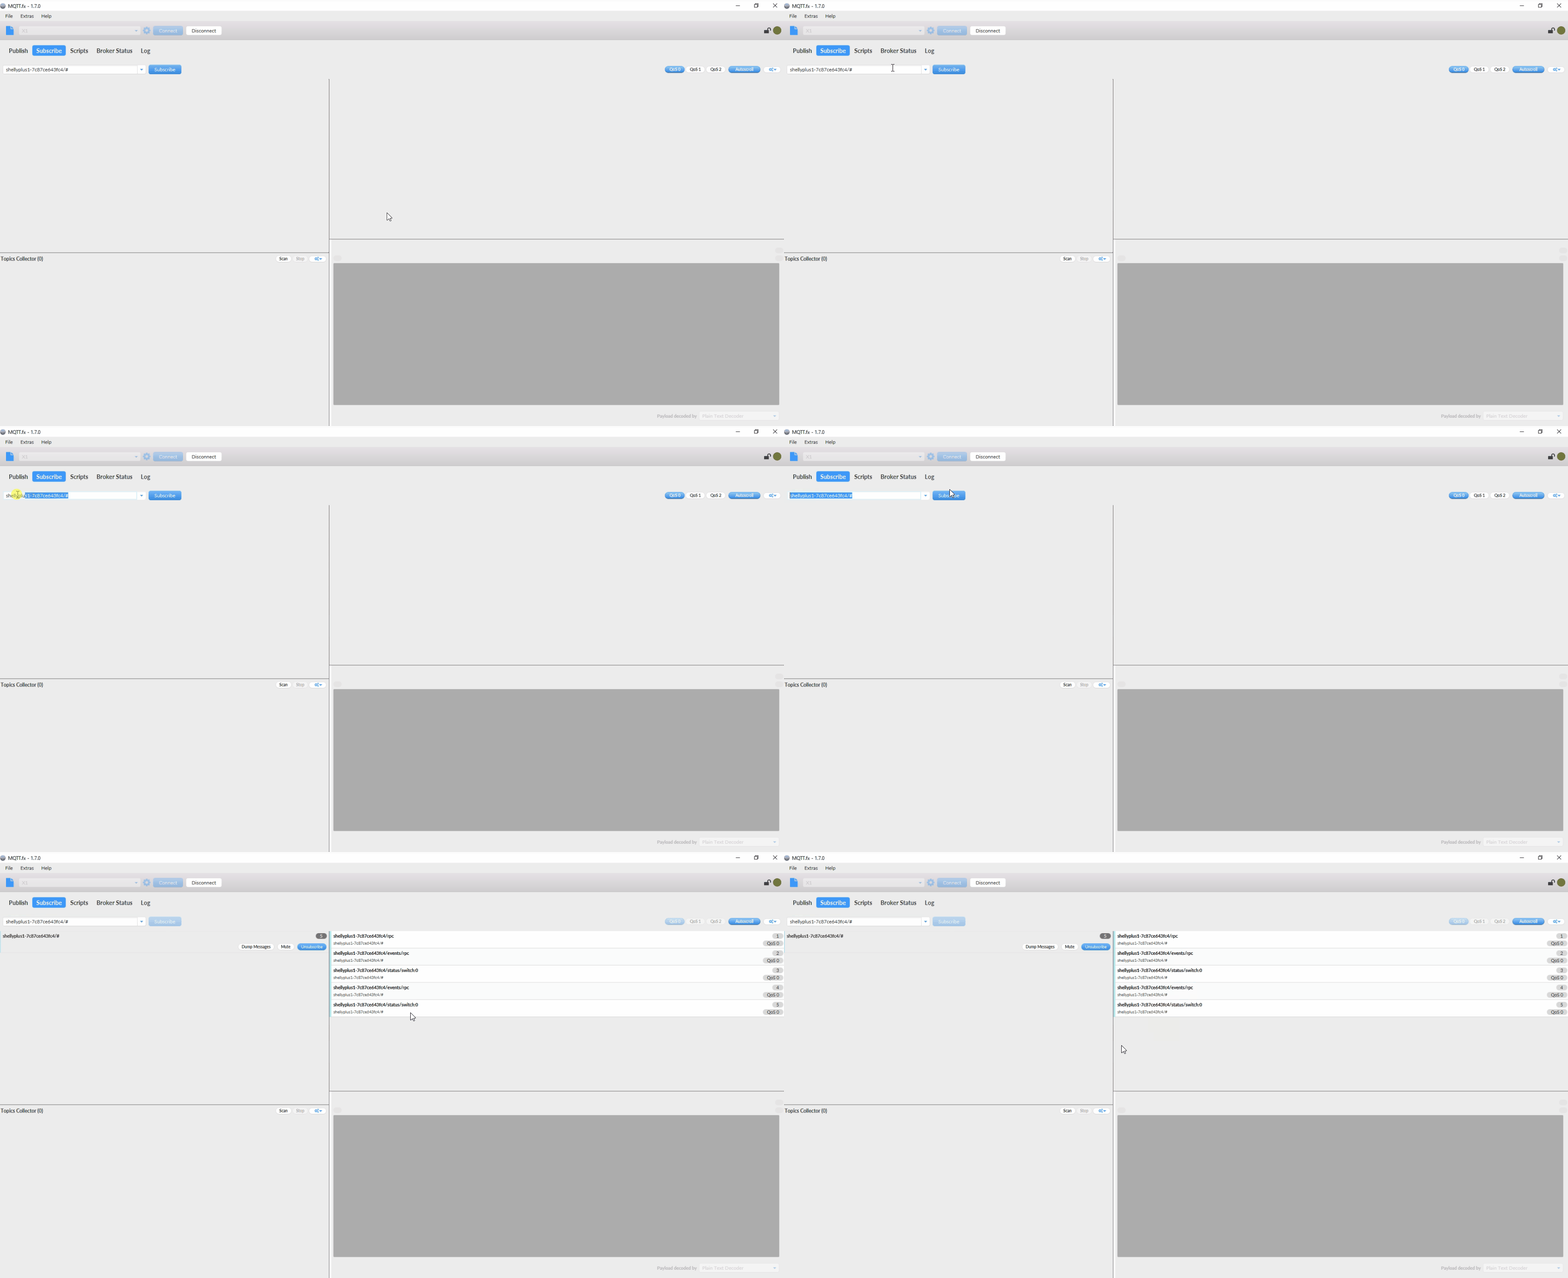
Now subscribe to the following topic with the MQTT fx software in order to view the commands crossing through the Ilevia’s server MQTT broker. Add the topic in the text entry then click “Subscribe“.
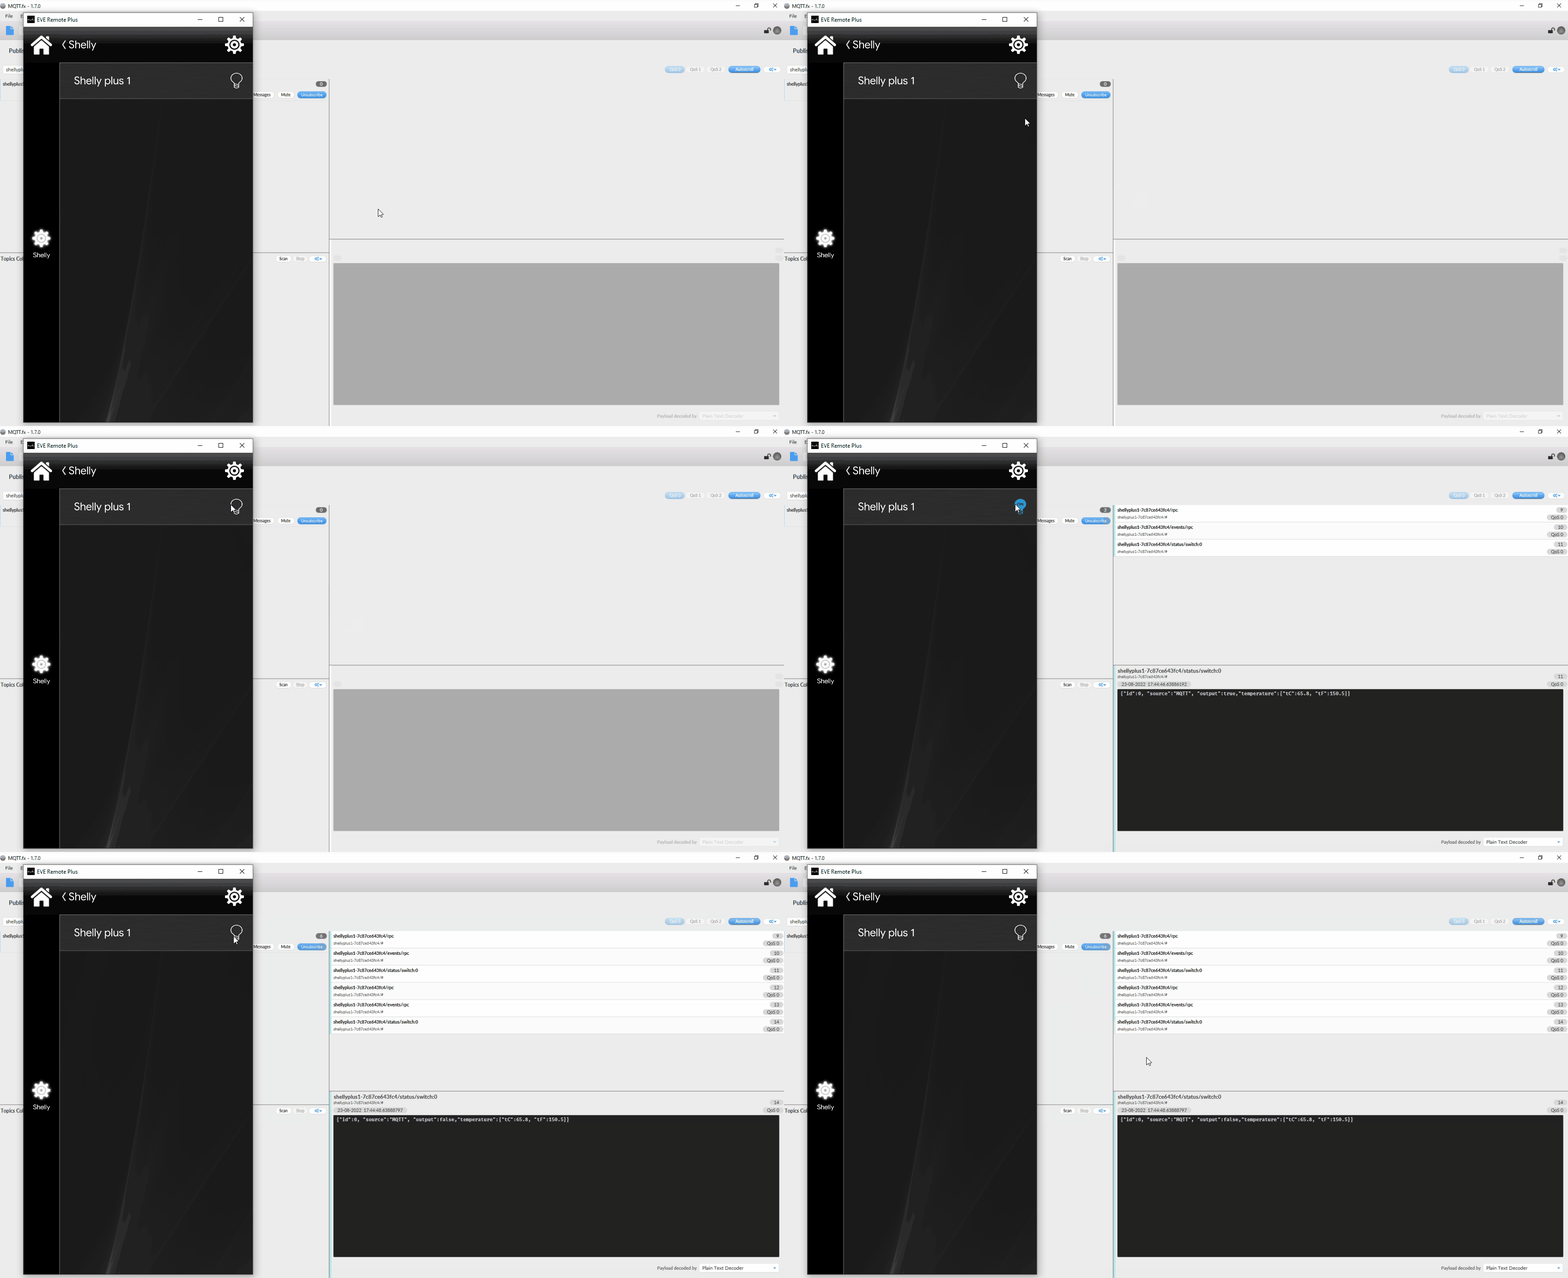
As you can see by the image below, by clicking the icon on the User interface it will turn on and off the shelly device.
Click the link below to download the Shelly 1 plus demo project and try it your self.

